We grew up thinking this was Sealed with a Kiss, right? Well, you could technically do that with what I have for you today, but today I have a different meaning for you!
Today we are STAMPING with a KISS! Have you heard about the Kiss Technique? Well, it is where you ink up one stamp, stamp it onto another stamp that has a design, and then stamp the remaining ink onto your project. Sounds pretty cool, right? Well, let’s see what I made to show you!
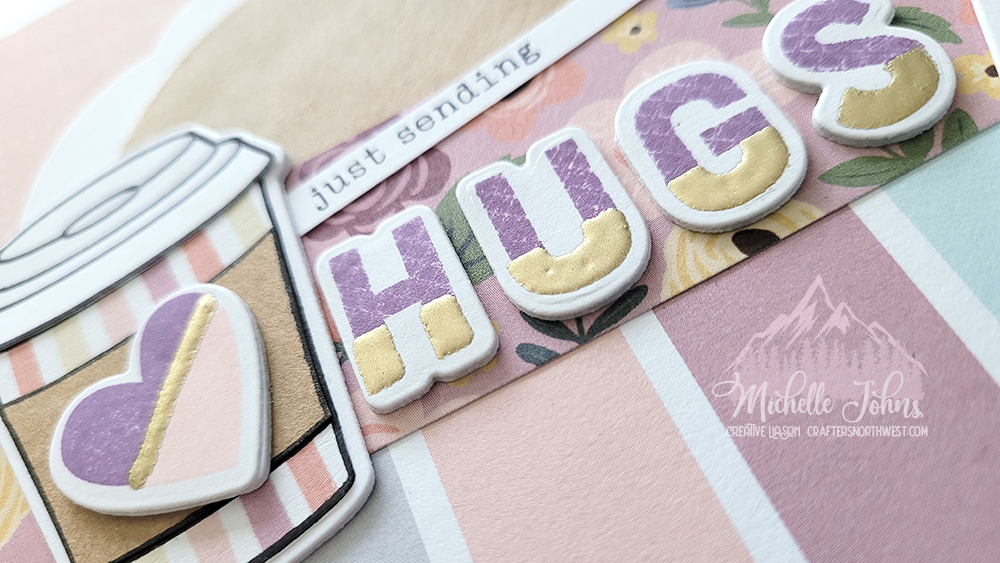
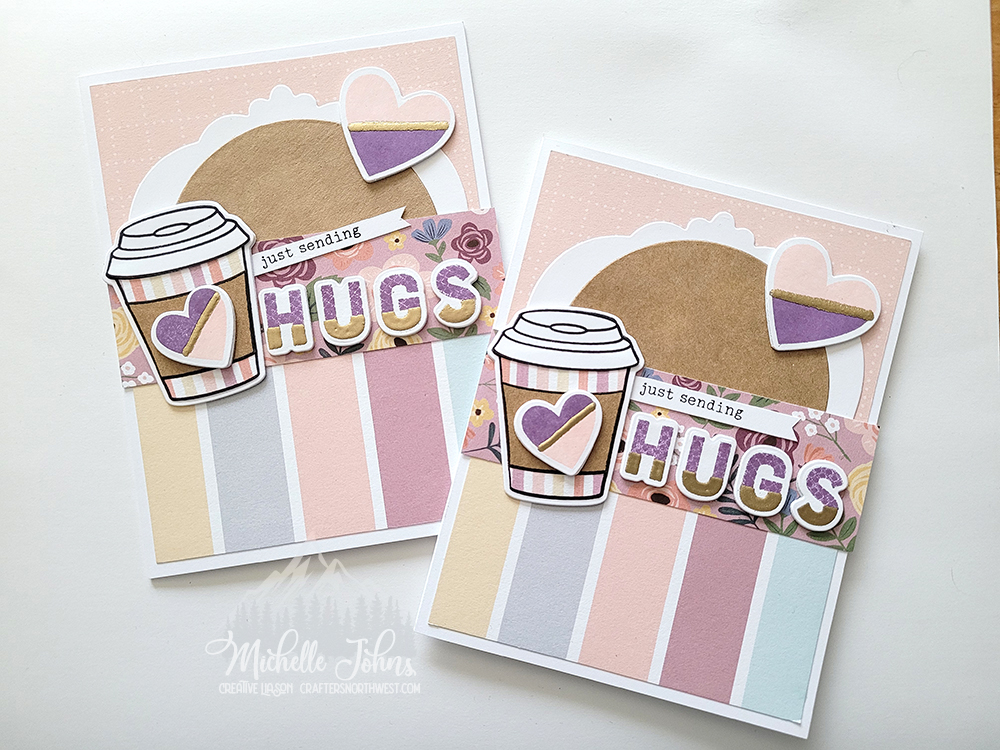
Isn’t this sentiment just so cute?? I bet you couldn’t guess which stamp I used to kiss the letters onto! Would you believe it was an ice cream cone stamp? Well, it was! I just thought the texture was so fun, and would work so well with the PML card that I used for the top of the card!
The ice cream cone is in the same set as the coffee card, and we already know that I love me some coffee cards! So, it just worked out so perfectly!
I know my friend Lynn loves that there can be more uses for dies than what they are specifically designed for, so hopefully this card will make her smile!
The white frame on this card is the Oval Frame Thin Cut! I paired it with the Circles Thin Cuts, and you wouldn’t know that it’s supposed to be an oval inside!
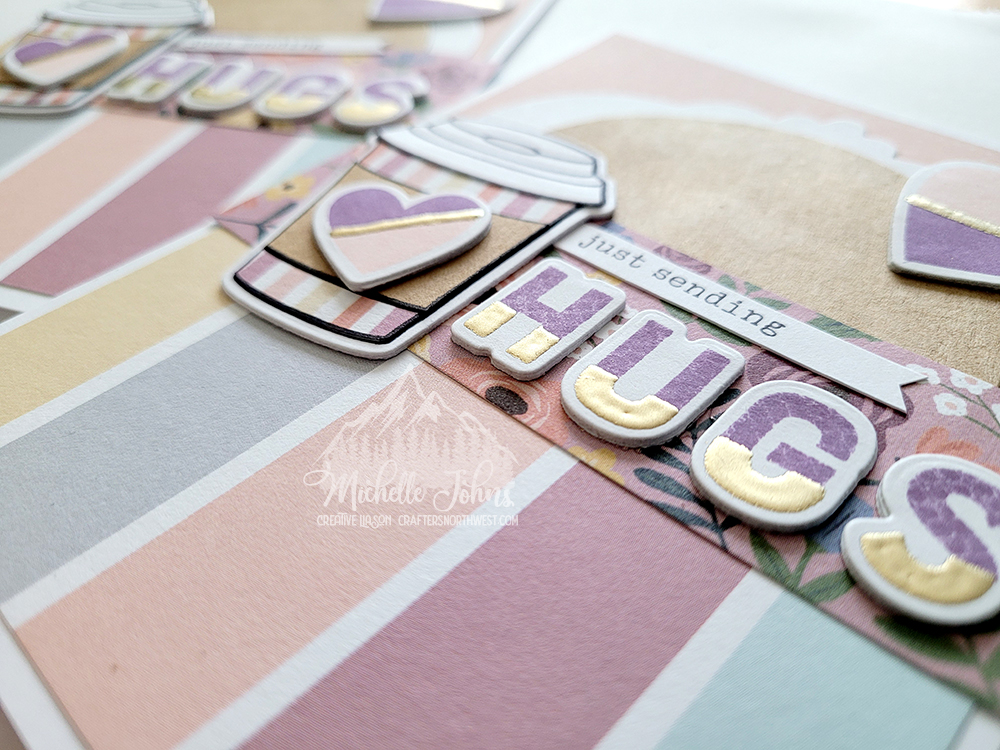
I just wanted to show off the gold embossing on the bottom of the letters! It just makes them pop! (well, that and a few layers of cardstock!)
I used no foam tape on this card, no coloring, I just wanted a nice ‘simple’ card! (ok, maybe not ‘simple’ . . . )
I hope that you like the card, and leave a message below letting me know your thoughts! If you try the Kiss technique, go and show off your project at the H2H blog! The would LOVE to see your craftiness, too!
CTMH Supplies Used:
- Desserts a la whirl Stamp & TC...............Z3957
- Candid Moments Cardmaking S & TC........Z4394
- As You Grow PML Cards.....................X8020D
- 2" × 3½" My Acrylix® Block.................Y1009
- 1" × 1" My Acrylix® Block......................Y1000
- Oval Frame Thin Cuts.............................Z4295
- Circles Thin Cuts..................................Z3943
- Liquid Glass..........................................Z679
- Kraft Paper..........................................Z1375
- Grape Exclusive Ink..............................Z6524
- Peach Exclusive Ink..............................Z6502
- Archival Black Exclusive Ink....................Z3271
- VersaMark™ Ink..................................Z891
- Embossing Ink Pens...............................Z3548
- Princess Gold Embossing Powder.............Z2066
- Non-stick Micro-tip Scissors..................Z1836
- White Daisy Cardstock............................1385