Tag Archives: Dies

What kind of card do you get with White Daisy Cardstock and Thin Cuts?

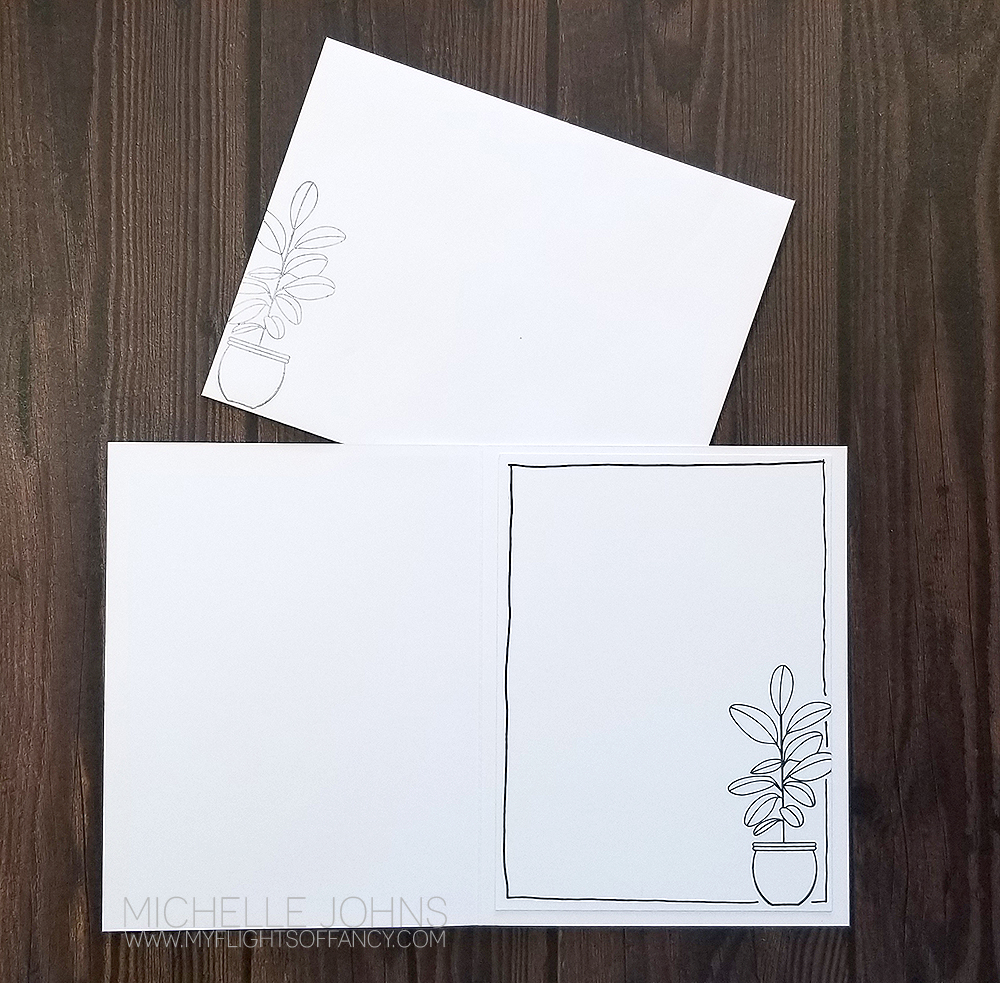
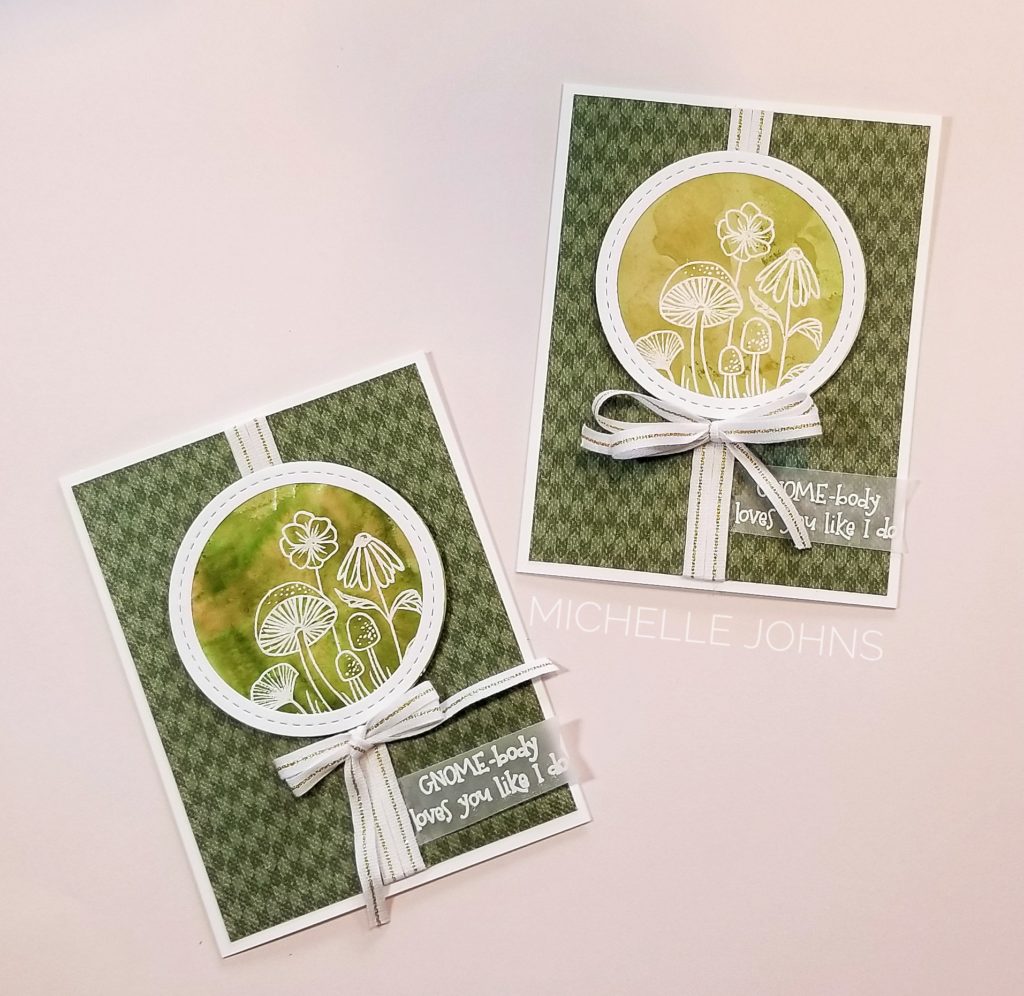
This week’s challenge over at H2H is all about the thin cuts!  Well, let me share with you a card that is ONLY white daisy cardstock.  (well, and three white dots for embellishment . . )  The card came together really rather easily!!

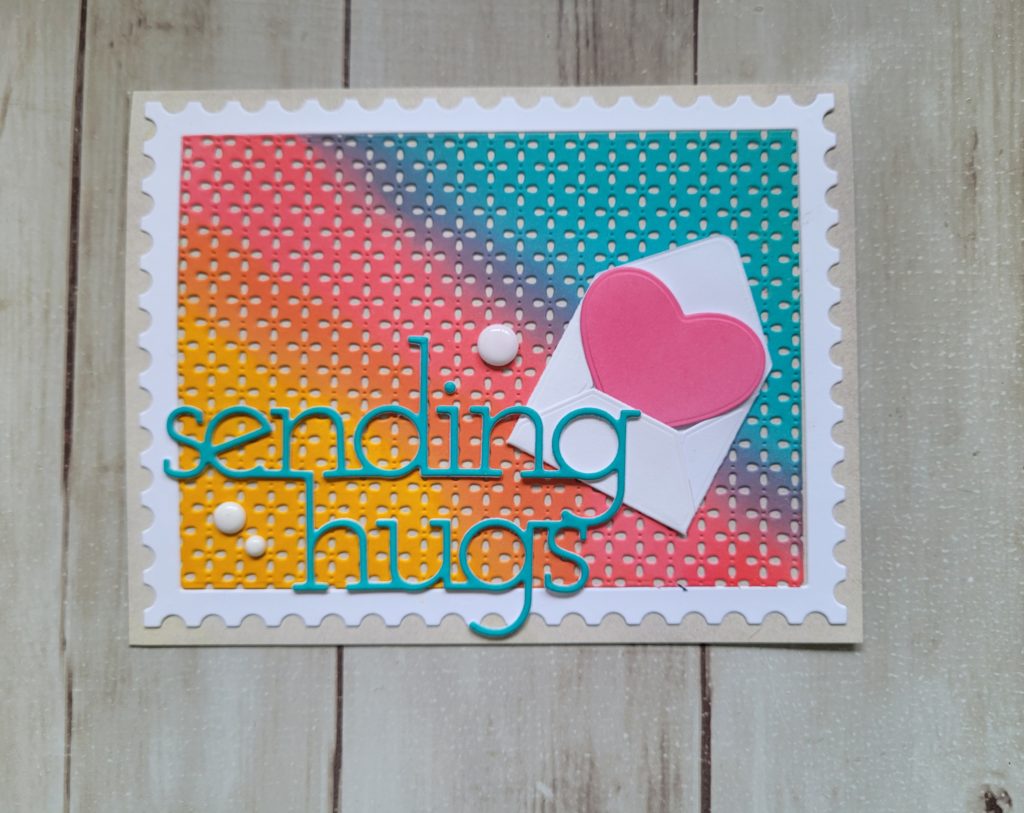
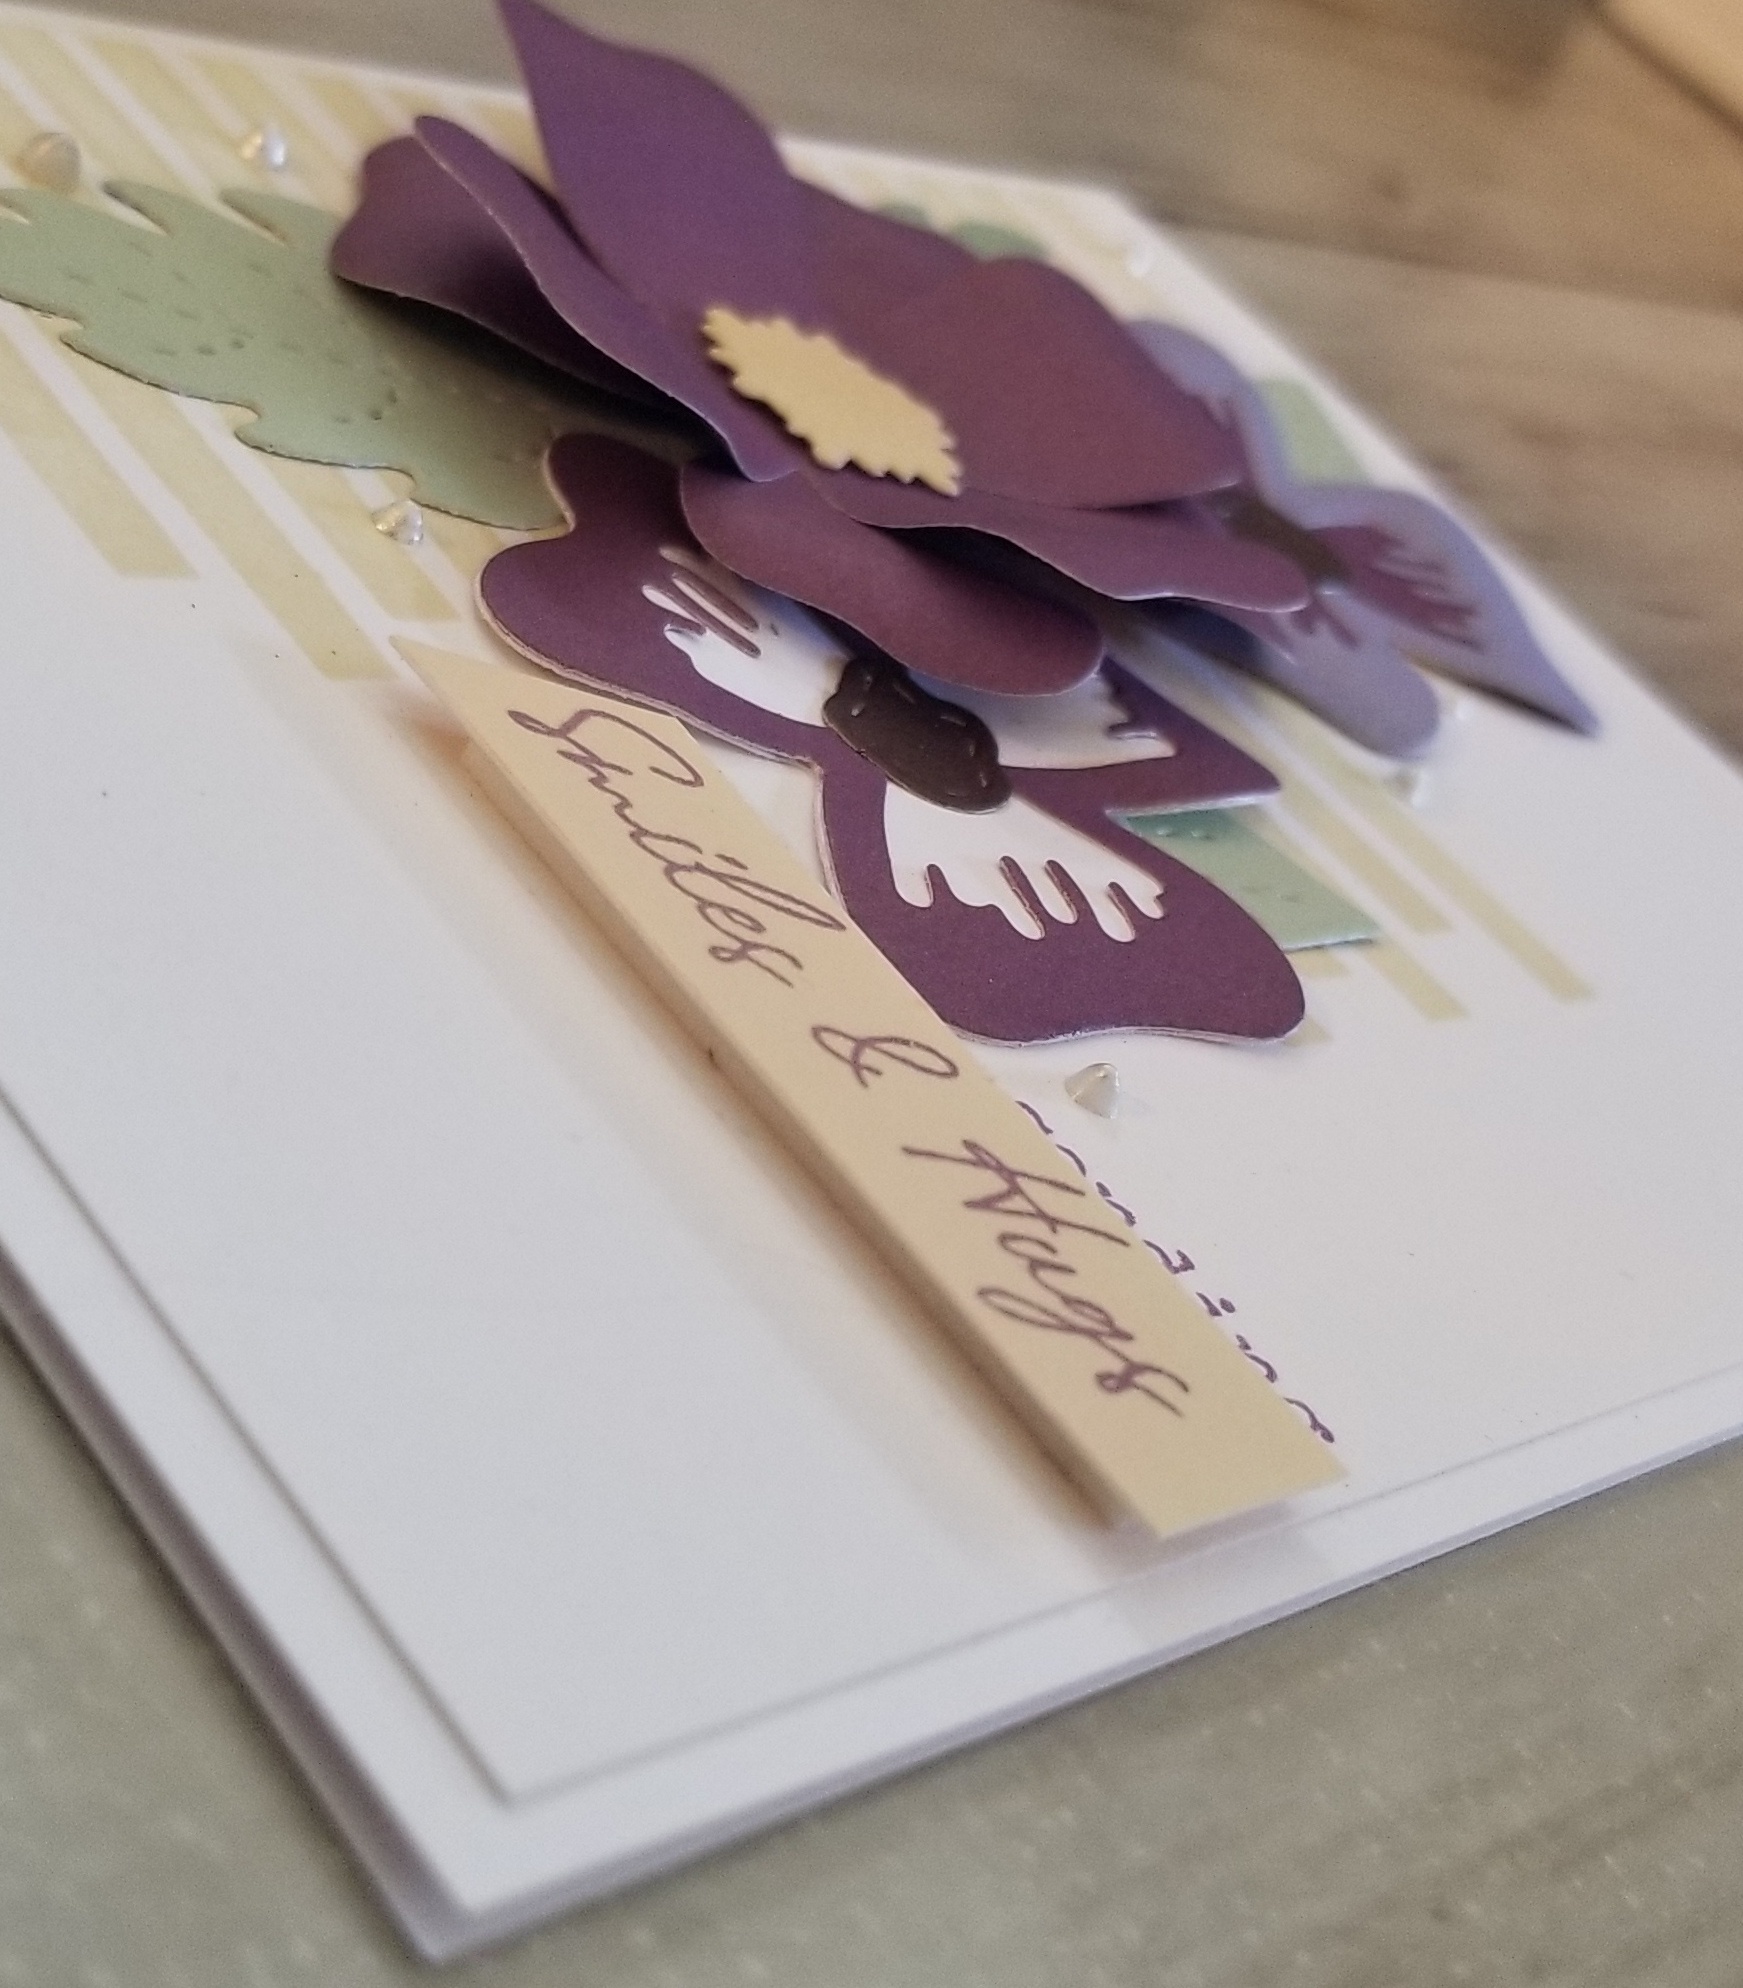
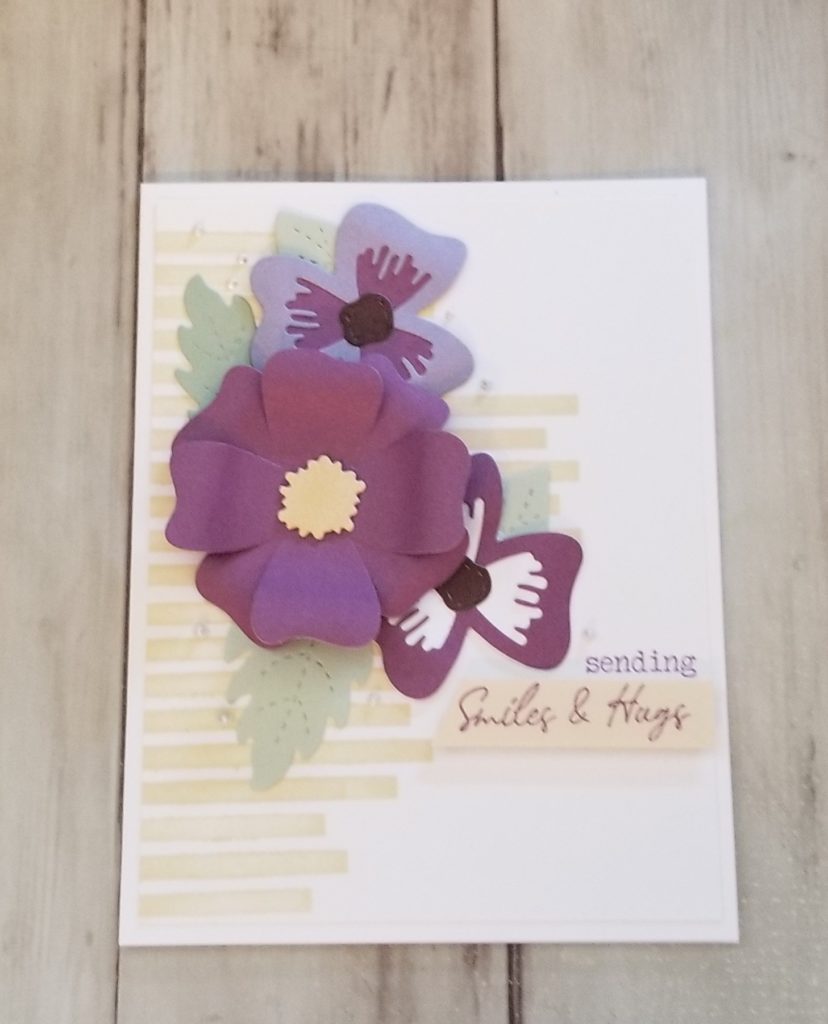
I used the postage frames thin cuts to get my frame.  Then I took the inside piece, and used the decorative texture background thin cut to get all those itty bitty dots and petals cut out of the center . . . AFTER I added some distress oxide to it.  I used Mustard Seed, PIcked Raspberry, and Peacock Feathers on that panel, making sure to overlap them to get some additional blended colors.  I put some Peacock Feathers onto some more white daisy cardstock, and then used the Sending Hugs thin cut.  I cut it two more times from white, to make it a bit thicker for my card.

I colored a corner of more white daisy with the picked raspberry and used the heart from Teddy Bear Hugs to cut that out.  I had a bit of space on the peacock feathers, so cut out another heart for the inside of the card.  And, last, but not least in the thin cuts is the mini envelope thin cut.

I did use some pumice stone on the card base, and a line on the inside of the card to bring that color inside as well.  I like how it turned out!  And no scissors, no paper trimmer!  Just thin cuts and white daisy paper!

I hope that you like my little project today!  I think it turned out super cute!  

You should dig into your stash, show us what you can do with your thin cuts!


Until next time!

~Michelle

Will it be Flora or Fauna?

As you have seen, H2H Challenge Blog does challenges twice a month.  If you haven’t played along yet, you really should!  The prompts are great, and the artwork is pretty splendid as well!  The second challenge for April is Flora or Fauna.  That leaves so many different options!  You can do almost anything with this!


So, I decided to go with Flora.  My card is more of a masculine card, even though it has flowers and butterflies on it.  (Guys do actually like flowers, too!)

This is called a Bookbinding Card.  It is sealed at the far right, with a ‘lip’.  (as opposed to the normal fold)  It gives you a smaller space to write on the inside, but that’s ok too, sometimes!


I stamped on the charcoal piece with white craft ink.  Once dried, it comes to this nice almost faded look that I think fits and pairs well with the B&T from In Full Bloom.


The sentiment is heat embossed in white powder, so that it would stand out from the card.

I really like how this card turned out!  Simple and elegant, and can be used for so many reasons, just by changing the sentiment.


Thanks for stopping in to see my card!  I hope you will leave a comment below, for me!


Then, hop over to the H2H Challenge Blog and play along!


Keep being Crafty!

~Michelle

Layered Flowers

Welcome to the Technique blog hop!  This month our focus is on layered flowers!  There are so many different ways that you could do that!  The Layered Flowers Thin Cuts might be the easiest way to do that!  I will link some other projects below, that I had fun making in different ways.  If you are following the hop, you should have arrived here from Michelle’s blog.  If you started here, that’s ok!!  You will continue around in a circle until you get back to here!  I know you will find a bunch of great ideas that you will want to copy!

So, for my card, I used a few different things!  I used the stencil from the In Full Bloom Scrapbooking workshop, the stamped sentiment from the cardmaking workshop, and the layered flowers thin cuts.

I used the stencil a few different times with shortbread ink.  The sentiment is stamped in grape ink to coordinate with the grape cardstock of the flowers.  The leaves are cut from both light and dark sides of sage cardstock.  Tof finish it off, I used some liquid pearls!  (I don’t know about you, but I tend to forget how much I like them!)

I hope that you like the card that I shared today!  I have a short video that you can watch of me putting it together, here.

I said I would link some other cards that I have made thatw ould fit for this blog hop.  I have this card here that shows how to use different colors of cricut cuts for a flower.  This one uses a different style of cricut cuts, that are similar to what I have done today with the large flower.  Last but not least, this is a whole different style, with multiple layers of the B&T paper being cut and layered.

Thanks so much for stopping by!  Next you should be going to Lauren’s blog.  Before you hop away, however, I would love it if you left me a comment about my project!

Have a crafty day!

~ Michelle

CTMH Items used:

{All items are clickable!}
H2H Watercolor Close Up

The look of watercolor, the ease of stamping!

Don’t you just love the look of watercoloring?  I do love it, but sometimes am intimidated by it.  So, when Heart 2 Heart announced the watercolor challenge, I thought it was a perfect chance to give you all an idea on how to do it, without having to feel intimidated by actually watercoloring!

H2H Watercolor Slimline Card

I grabbed the Perfectly Imperfect Patterns stamp set, that has 6 different watercolor type stamps and 2 stamps that are splattered dots, and got started!  I used the Wild Berry and Lemonade inks for my card, and just went for it!

The stamps are stamped a couple of times each, and I did overlap them, and got a light orange color in the middle.  I used the splatter dots all over the card, in first, second, third, fourth, fifth, and even sixth generation stamping!  I even added a few in Archival Black, to help tie in the banner and butterfly body.

I used the small butterfly outline and cut out of the vellum, and used the detailed small butterfly in Wild Berry to ‘pop’ off the card.

The banner and sentiment are both from the Thoughtful Critters Stamp and Thin Cut.  I stamped the sentiment on some black cardstock, used white embossing powder, and then cut with the banner thin cut.  (then trimmed off the hands with my scissors)

I used just a tiny scrap of Black cardstock to make the body.  I cut with the thin cut, then trimmed the body out with my non stick scissors.

I hope you have liked my little project!  I would love to see you participate with the H2H Challenge!  You have until the end of the month to upload your creation!  (you don’t have to be a consultant, the challenges are for anyone that likes to craft with CTMH goodies!)

I would really love it if you left a comment below!  I love to hear what you all think about my creations!

Supplies Used:

Thanks for stopping by!

~Michelle

Did you know you can use embellishments in a different way?

The new challenge is up over at Heart 2 Heart Challenges is up!  This one is all about the embellishments!  This could be taken so very many different ways!  At first, I was going to do a shaker card, and then, as the card was coming together, it ended up being totally different!  I love how it turned out, don’t you?

For this card, I started with the window thin cuts.  Everything except the shutters have four layers of White Daisy Cardstock, the top and bottom have a layer of Charcoal Cardstock, and the shutters have a layer of Pewter Cardstock.  I have a piece of acetate between two layers of the window, so that I could have some “glass” in my window frame!

I ended up stamping on a piece of the Wood Texture Paper (from the Wood Grain Paper Packet, and I love how much depth it gives it!  I used two of the little sprigs from the Serenity Cardmaking Stamp & Thin Cuts. and put them on two 1″ x 1″ blocks.  I used Sage, Clover, and Evergreen inks for the foliage.

I added red sequins from the Holiday Loose Sequins (that are still available online!) with the , then some of the tiny gold glitter gems on the garland.  I decided it still needed a bit more, so I added a few lines with my black .05 journaling pen, then I added the larger gold gems to the end of those lines.

Of course, the outside of the house needed to have something on it, we couldn’t have it be just plain white!  So, I grabbed a sheet of the brick texture paper from the textures paper pack.  These bricks work perfectly!

I used Liquid Glass to adhere everything except the sequins, and for those I used Tombow Multi Bond Glue.

The card is a 5×7 card that I made from White Daisy Cardstock.  Though not shown, the inside reads “For You With Love”, from the For All Occasions stamp set.  I used a 2″ x 2″ block for that, and combined the two sentiments onto one block.

I would love to know what you think about this card!  For every share of this blog post, and comment on this post, and comment on the Facebook post with this card, you will be entered into a drawing for me to send this card to you, for you to be able to use to send to someone! (or keep for yourself!)  I will draw a winner on December 11th!  And, if you have made it this far, if you put a penguin emoji in your comment (here or on facebook) you will receive 2 entries!

Thanks for stopping by!  I hope that between myself and the other ladies, you have been inspired to join us over at Heart 2 Heart Challenges!  You have until the end of the month to participate!  I hope to see you over there!

~Michelle

Old & New, the next H2H Challenge!

Hey guys!  It’s time for another challenge!  This one was super fun to do!  It was one of those cards that changed about 15 million times from concept to finish!  Have you had that happen before?  I’ve had cards that evolve as I am making them, but not many that change as many times as this one did!

So, Old and New.  Well, I have a bunch of new(er) products on this card.  I’ll name them at the bottom, but can you find them all before you see the list?


I decided that I wanted to go with a slimline card.  I grabbed one of the old CTMH books to get a sketch to use.  Then I just went to town!  I did a bunch of stamp surgery and even more masking, and I don’t know about you, but I just LOVE LOVE LOVE how this card turned out!


I even added a sentiment on the inside of the card!  (which, I don’t normally do, but I just didn’t have enough room on the outside!  LOL!!)


This card just makes me so happy!  It’s kind of ridiculous how much so!!  LOL!  Oh! I might need to grab a pen and add a comma after coffee and glitter…. hmmmm . . . what do you think?


Oh, and the “old”  It is both the older CTMH book (retired) and the packing material that I had, to use for the coffee cup sleeves!


Thanks so much for stopping by!  I hope my card has inspired you!  If so, come on over to the H2H challenge blog and play along!  Plus, you can see all of the other designers’ creations!

~ Michelle


CTMH Items Used:

[linkdeli uuid="ef642b30-eaba-4be1-a639-540d590c7ecd"]


It’s time for another Color Challenge over at H2H!

Welcome to another week’s challenge from H2H! The challenges are so fun! And, sometimes, will take you outside of your normal realm! This week, the challenge is to use Saffron, Peacock, Sage, and Glacier! They do go together, quite well, it’s just not a combination that I would normally use!

That being said, I think I came up with something that is fabulous!! Don’t you just love it when things turn out better than you expected? I know I sure do!

So, today’s card uses two different stamp sets, Can’t Get Enough and Born to Bloom. Not things that you would just look at and say ‘oh, these two will work well together” . . . but, Can’t get enough has been one of my SUPER favorite sets! There is a little bit of everything in this E sized set! You should definitely add it to your collection before it sells out! (It’s technically retired, but available while supplies last for online orders!)

This card was surprisingly simple to put together! Come join me on my FB page on Monday at 5pm Pacific, and we will make it together!

So, I already told you what stamps I used. I also used the Peacock, Glacier, Saffron, and Sage inks to color this card. I used a small snippet of B&T from the Summer Vibes paper packet (it fits perfectly with the glacier color!).

Of course, if you know me, I LOVE to add another layer (or two) on the inside of my cards! And it doesn’t have to be hard! I just stuck with the black and white stamping of this fun image!

I love that the set has a thin cuts die set with it! Then I can have those pretty leaves and pots popped up off the page! It just adds a little bit more!

Like I said before, this card turned out so much better than I thought it might! Join me Monday night at 5pm Pacific to make this card! You only need a few supplies! (and that background paper could TOTALLY be something different!)

Thanks for stopping by! Make sure to check out the other design team ladies’ projects over at H2H! Then make your own, and link it up over there!

I can’t wait to make this card with you! See you Monday Night!

Supplies used for this card:
White Daisy Card base & Envelope
Summer Vibes Paper Packet
Peacock Cardstock
White Daisy Cardstock
Inks:
Peacock
Saffron
Glacier
Sage
Intense Black
Can’t Get Enough
Born to Bloom
Foam Tape
Waterbrush
Shammy
1 x 1 Block
3 1/2 x 2 Block
1 x 3 1/2 block

Just add water, you say?

At least I’m not Gizmo! That would be bad! (though, it would fit right in with how 2020 is going, right?)

So, I decided I was going to add some water to my ink! So I grabbed a piece of acetate and picked a paper, and then chose an ink. Believe it or not, both of these cards were done with the same ink color, and that was fern!

So, let’s walk through the steps, shall we?

So, first I grabbed a couple of pieces of white daisy cardstock, and used some versamark ink and stamped the little mushroom scene from the Gnome Matter stamp set. (LOVE that set!) and embossed with some white powder. Then I put some fern ink directly onto some acetate and grabbed a water brush, added some water, and then swirled it around. I then smooshed the ink and water mix onto the paper with the embossing. I dabbed it a few times, then did some heat setting. Then, a bit more ink and a smidge more water, mixed, and smooshed again some more! Then a bit more drying and the first one was done.

I decided to see what would happen if I put some ink on the back side of the paper, directly, and then added some water from behind. It gave a completely different result! But, still so fun!

I ended up getting more browns from my inks than I expected! A bit of red, too!

So, to finish the card, I cut the circle out with the solid circle from the shaker window and confetti die set. I cut the frame from that set from white daisy cardstock. I used the B&T from the Mix In paper pack. I stamped a sentiment from the set on vellum with the versamark and white embossing powder. I lined the B&T with two rows of the white and gold ribbon (retired and sold out!), then popped up the circle with some foam tape. Then I tied a double bow, and attached it with a mini glue dot.

The cards were so simple and easy to do! Super fun, and no two cards will be the same!!

Now, make sure to hop over to the H2H blog and see the other inspiration and link up your project too!

See you again soon!!