Category Archives: Tutorial

Fun paper crafting tutorials

From Me to You

Welcome to another challenge from H2H Challenge blog! This is the last challenge of the month, and next week/month, you will be seeing new products available with CTMH, and I can’t wait to show you! This week is all about “From me to you” . . . which screams gift giving, right?

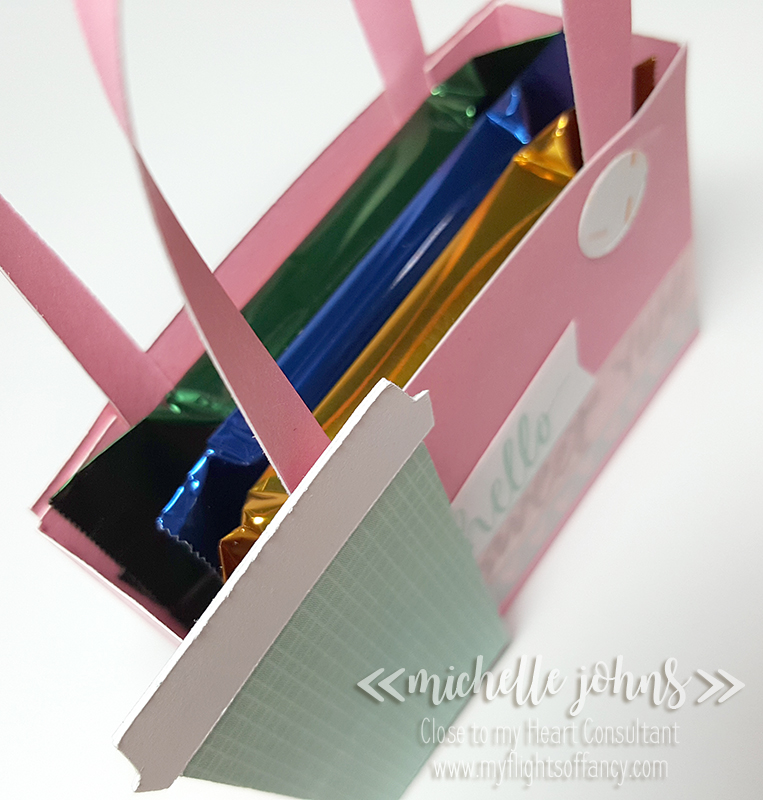
So, for this, I thought it would be perfect to create a card box to gift a set of cards to someone. I decided to go with the True Love Paper Packet, as I do love the colors in it! One of the ladies that I watch on Youtube quite frequently, is Sam Pootles, and she has a knack for making boxes. So, she was the first place I went! She has MANY boxes (many!) along with the tutorials for them. I found a couple of boxes for some smaller cards, but I wanted to make something to fit standard A2 sized cards (that means 4 1/4 x 5 1/2). So, I used her plan, figured out what sizes I needed, cut a test one, made some adjustments, and then came up with this fantastic little box!

This box holds 5 cards and envelopes perfectly. It is just one inch deep, so it wouldn’t hold a ton of cards, but you could easily make it deeper to hold more, should you want.

I did use a magnet to hold the box closed (since we no longer have our hook and loop dots!), and I couldn’t be more happy with it! I tied some white ribbon around the front flap, and it was just what it needed! I could add a sentiment onto the front of this box as well, however, I think it is just perfect like it is!

I do have the front, back, top, and insides covered with B&T paper, however chose to leave the side edges and inside top without the extra paper. Doing it that way allowed for the cardstock of the box to show through a bit more, which I really liked.

I hope you like the box, and the cards that I have inside! Let me know what you think!

Would you like to make one for yourself? I did a FB live Sunday video on how to do it! You could go and take a look, and make your own box!

Thanks for stopping by! Why don’t you come join us over at H2H with one of the weekly challenges? They are great fun, and give great inspiration!

All items used are CTMH unless otherwise noted.

True Love Paper Packet
Ballerina Cardstock
White Ribbon
Liquid Glass
Paper Trimmer
Corner Rounder
Micro tip Scissors
Bone Folder
Magnets

Pages & Projects: 1 Year Thanks Bags

Hey everyone! My friend Danielle and I are doing a number of things this month, to help challenge each other to be better, and one of the things that we are doing is a series of videos on Thursdays that will be Pages & Projects. We will alternate each week what we do, so you should make sure to come and check out the videos each week! You can find her project here.

That being said, this week I am starting off with a thank you project for some of the doctors and nurses we had when Audrey was in the hospital last year. This weekend is her One Year anniversary of getting to come home! So, we will be delivering some of these fun little bags on Sunday!


{Can’t see the video in email? Click here to watch!}

I hope you enjoy the video, even my oops, and my fix for it! I left that all in for you, so you can see that EVERYONE does the oops, and generally it is fixable with a bit of thinking!

I would love to know what papers you would use, and who you would give a little bag like this to!

Project sizes:
White Daisy:
4 x 12 scored at 5 1/2 & 11
4 x 10 scored at 5 1/2 & 7
5 1/4 x 4 1/4 scored at 1 3/4 on all sides

B&T Pieces
3 3/4 x 5 1/4 (qty 3)
3 3/4 x 2 3/4

Charcoal Cardstock
2 x 5 1/4

Shaker Thin Cuts:
Largest circle in White Daisy
Stictched Frame in Charcoal

Products used:
Into the Wild paper packet
White Daisy Cardstock
Charcoal Cardstock
Charcoal Ink
Simply Said Stamp Set
Shaker Window Thin Cuts
White Ribbon
Micro Tip Scissors
3-D Foam Tape
Liquid Glass

Thursday Tutorial : CTMH How-To Books

If you’ve been around my blog or attended any of my classes or crops, you have probably heard me talk about the CTMH books. Now, I’m not talking about the Idea Books (those are FANTASTIC, but still) . . . I’m talking about the How To books. In the current “big book”, they are on page 110, or you can find them online, here.

Now, why are these books so great? Well, because they give you everything you need, at the tip of your fingers! You have artwork made with the sketch provided (sometimes exactly the same, and sometimes with something a bit different!), you have cutting guides, telling you how many and what styles of paper you need, and how to best cut them to save time and money.

Last week, I shared a layout with you that used a pattern from Cherish. I wanted to share another example with you. Now, this is from a PDF (that I will also share with you), so it doesn’t include the artwork that is in the book, but it is very helpful!

This image shows you the sketch, the sizes of each of the pieces, and how to cut them, like I mentioned above. You can download the PDF here.

There are books for just Layouts, books for just Cards, and books that include both! One of the things that I will do if I have a creative block, is flip through the books looking at the artwork. Maybe I have an idea of the paper I want to use, or even the purpose for the card. I can flip through the book and find something that I like, and be able to make it! (the card books have 2 totally different designs of each card, spread throughout the book. While you may not like the design in one paper, you may find that you really like it in a different paper!)

Next time you are at one of the crops or classes, feel free to flip through them! They are always there to use during the crops!

Until tomorrow, stay crafty my friend!

~ Michelle

Sweet! Yum! Treat Bag!

Welcome back to Bags & Tags Tuesday! Today I have this sweet little bag of chocolate for you! It would be paired perfectly with a coffee, mocha, hot cocoa, or even tea!

As you can see, this sweet little bag will hold 3 Ghirardelli chocolates perfectly!

I used Pixie Cardstock for the bag and the straps. The little dot is the middle of the donut hole from yesterday’s card! (there are 2 more on the back side, since I mis-cut one of the donuts yesterday!) The dots and cup are from the Sugar Rush paper packet, as well as the “hello” sentiment (it’s from the same zip strip as yesterday’s card).

I used two of the three washi tapes that come in the Sugar Rush Washi Pack. They add just a bit to the whole bag, making it not too bland!

I hope you enjoyed this little bag! I’ll include the dimensions and such below!

Until tomorrow!!

~ Michelle

Bag dimensions and info:

3 x 4 15/16
scored at 2″ from each 3″ side. (so the long part across the top)

(2) 2 1/2 x 1 7/8
scored at 1/2″ on 3 sides (2 long and one short)
slightly miter the squares on the 2 corners

(2) 1/4 x 10 (handles)

Use your bone folder to crease the score lines.
Attach handles 1/2″ in from the sides, lining them up just along the score line.
Decorate the front of your bag before you put it together, as it will be easier to do at this point.
Attach center piece of the bag sides first (do both sides).
Then attach the sides to the front of the bag, and repeat on the back.

Thursday Tutorial: Shimmer Brush

If you haven’t played with CTMH’s shimmer brushes yet, you are missing out! These things work like a DREAM!!

That being said, sometimes it’s a bit hard to figure out how to work them. So, I created a quick video on how to put it together so that you can start using them on your projects.


{If you are reading this in email, click through to the web page to view the video}

In the video I show you the Clear Shimmer Brush, and you can also now get the Gold Shimmer Brush.

Hopefully this was a bit helpful to you!

Until tomorrow, have a crafty day!

~ Michelle

Quick Card Set Tutorial

Hey Crafters!!

Today I have a tutorial for you! AND, it’s even in video form! It’s my first tutorial video, so don’t be too harsh on me! I even figured out how to stitch together 2 videos, since it cut off right in the middle.

With this tutorial, you will see how to make 16 cards, quickly and easily!

Ooops! Looks like one card played hookey when it was time for the class photo!

This card set uses 4 sheets of B&T papers, just over 1 sheet of cardstock (for the mats), and 16 card bases. Plus ink and the stamps, of course!

Here are some closer shots of the class photo.

As you can see, I kept these cards simple so they can easily be mailed. If you would like, you could easily add a little bit of bling to the cards.

As I said, this is a video tutorial, so enjoy the video! Click subscribe while you are watching, I will have videos for you each week with a new tip or trick or tutorial!


{If you are getting the blog post through email, you may have to click through to watch the video.}

Supplies used for this card set are all CTMH:

Balloon Ride Paper Pack
Cardstock: Saddle, Colonial White
Ink: Saddle
Stamp Sets: Happy Autumn, Casual Expressions, Give a Lift, For a Friend
Tools: Paper Trimmer, Bone Folder, Versamat, Clear Blocks

{Tutorial inspired by Patty Bennett’s photo tutorial}