


The new challenge is up over at Heart 2 Heart Challenges is up! This one is all about the embellishments! This could be taken so very many different ways! At first, I was going to do a shaker card, and then, as the card was coming together, it ended up being totally different! I love how it turned out, don’t you?
For this card, I started with the window thin cuts. Everything except the shutters have four layers of White Daisy Cardstock, the top and bottom have a layer of Charcoal Cardstock, and the shutters have a layer of Pewter Cardstock. I have a piece of acetate between two layers of the window, so that I could have some “glass” in my window frame!
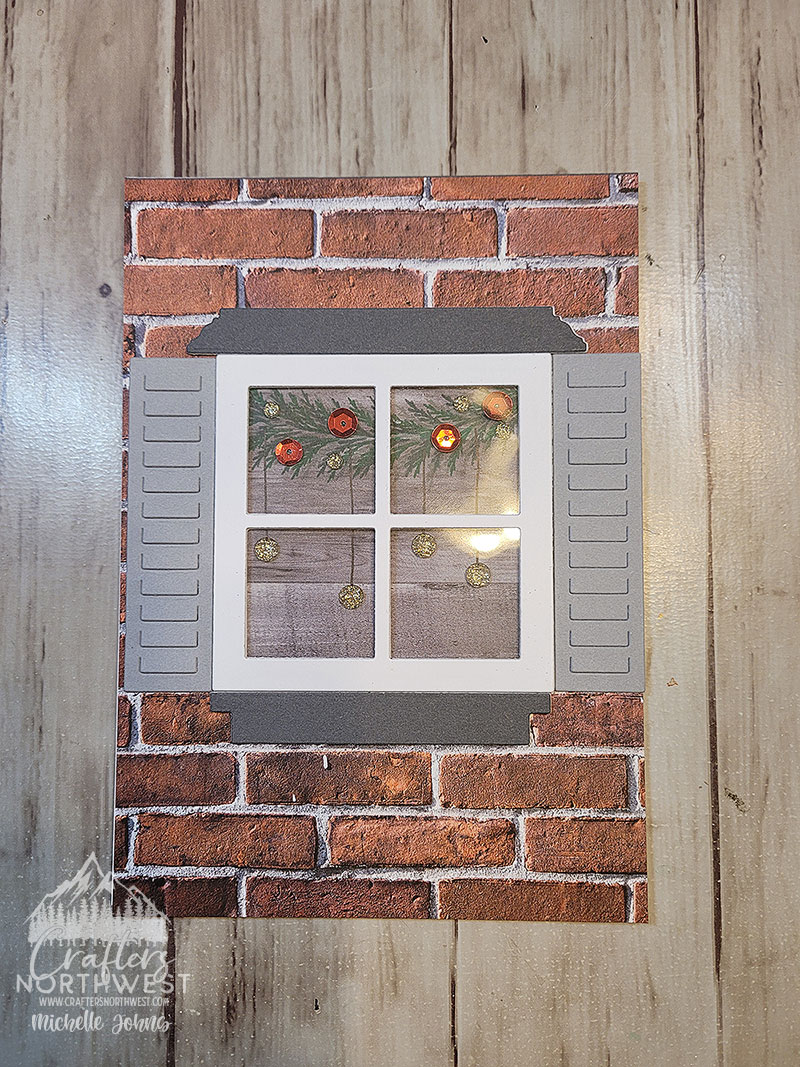
I ended up stamping on a piece of the Wood Texture Paper (from the Wood Grain Paper Packet, and I love how much depth it gives it! I used two of the little sprigs from the Serenity Cardmaking Stamp & Thin Cuts. and put them on two 1″ x 1″ blocks. I used Sage, Clover, and Evergreen inks for the foliage.
I added red sequins from the Holiday Loose Sequins (that are still available online!) with the , then some of the tiny gold glitter gems on the garland. I decided it still needed a bit more, so I added a few lines with my black .05 journaling pen, then I added the larger gold gems to the end of those lines.
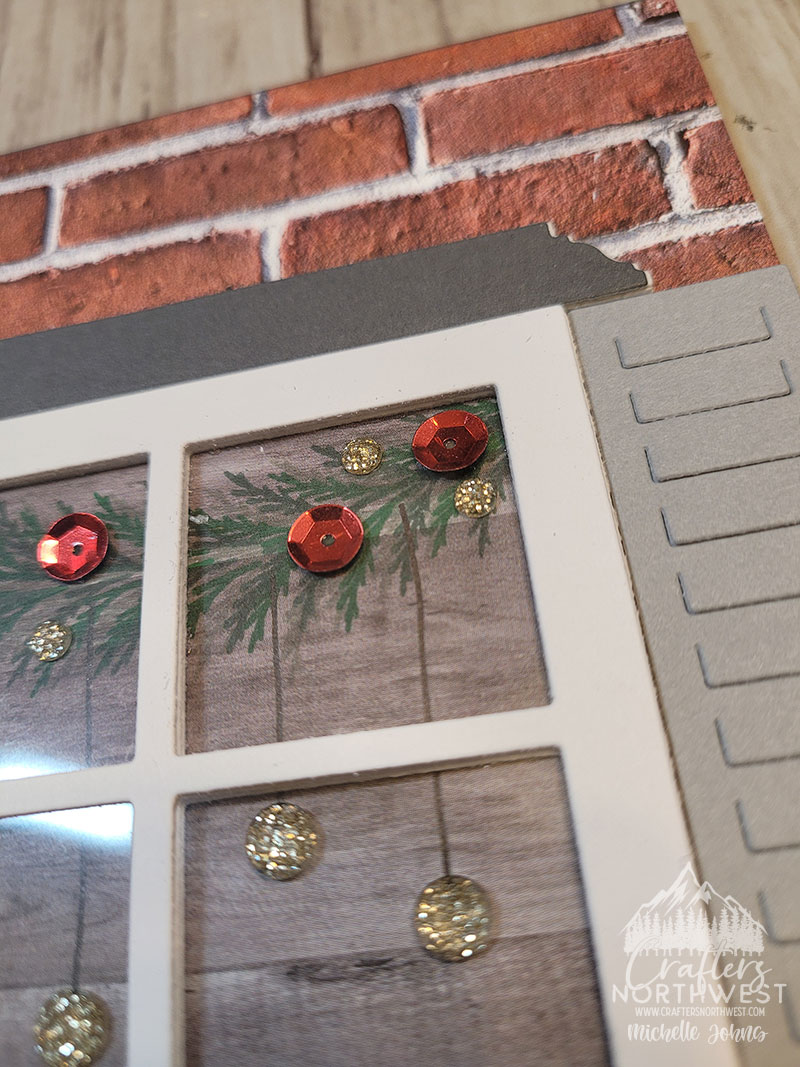
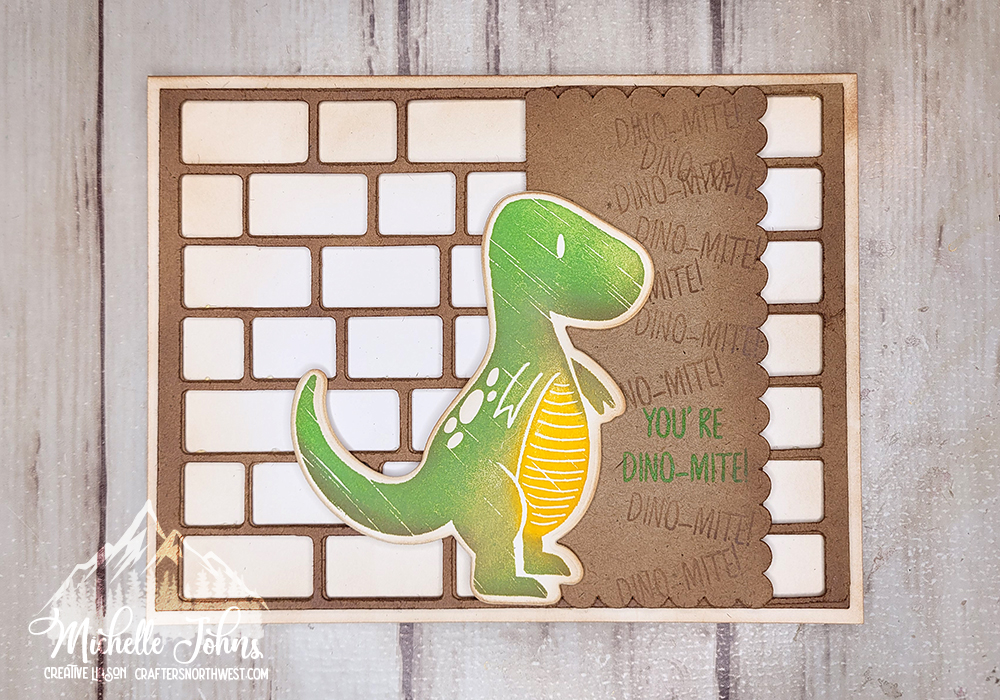
Of course, the outside of the house needed to have something on it, we couldn’t have it be just plain white! So, I grabbed a sheet of the brick texture paper from the textures paper pack. These bricks work perfectly!
I used Liquid Glass to adhere everything except the sequins, and for those I used Tombow Multi Bond Glue.
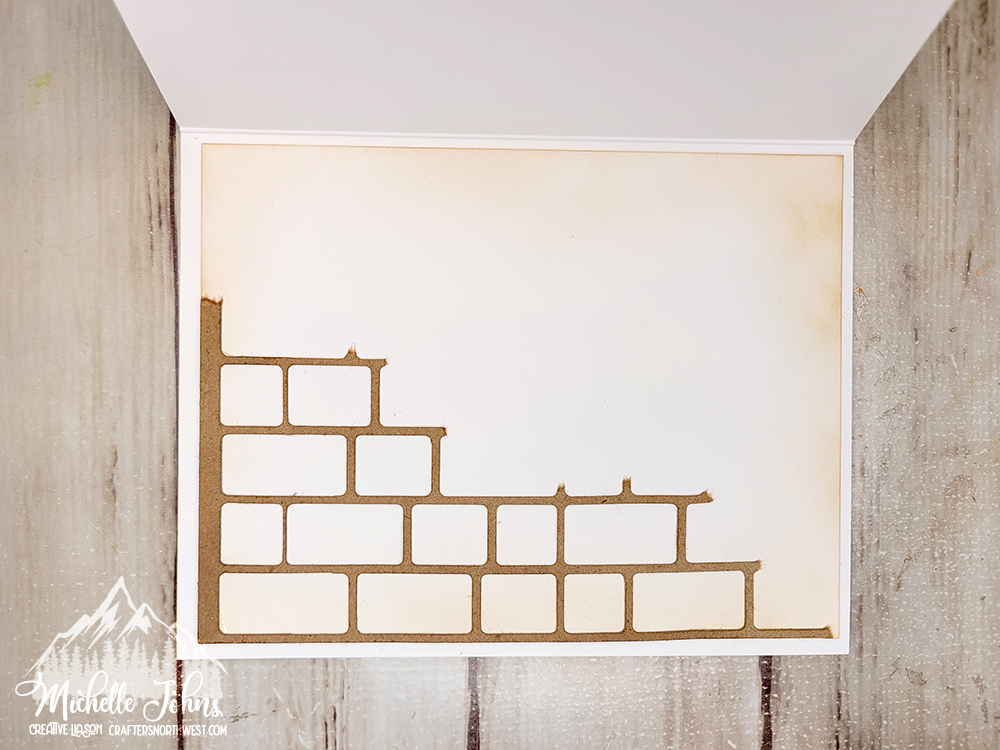
The card is a 5×7 card that I made from White Daisy Cardstock. Though not shown, the inside reads “For You With Love”, from the For All Occasions stamp set. I used a 2″ x 2″ block for that, and combined the two sentiments onto one block.
I would love to know what you think about this card! For every share of this blog post, and comment on this post, and comment on the Facebook post with this card, you will be entered into a drawing for me to send this card to you, for you to be able to use to send to someone! (or keep for yourself!) I will draw a winner on December 11th! And, if you have made it this far, if you put a penguin emoji in your comment (here or on facebook) you will receive 2 entries!
Thanks for stopping by! I hope that between myself and the other ladies, you have been inspired to join us over at Heart 2 Heart Challenges! You have until the end of the month to participate! I hope to see you over there!
~Michelle
Hello friends!
Welcome back to another week of the Card Challenge! Each week I will make a card, share a video with you on how to create it, share what challenges inspired me with the card, and ask for you to play along with me! Wow, that was kind of a really long sentence! LOL!! Anyway, it was a super fun and easy card to make, I hope you love it and are inspired to do the same!

I think these cards turned out absolutely adorable!!

Head over to my FB page to watch the video and get the measurements (really, there’s only one . . . ) and the blog that I found the challenge on! And make sure to share a photo of the card(s) that YOU are inspired to make!

CTMH Products Used:
If you are following my blog, you probably know that I LOVE my CTMH stamp sets! I think I have shared the story before, but just in case I haven’t, let me share now.
10 years ago, I was a party of a monthly group that would get together to make a set of projects (usually cards) and place an order of product. I was getting my crafty time in with other ladies, and I was having a blast! I ordered a stamp set that I LOVED the concept of!
It was a “people” set. There were guys and gals and kids and baby heads, and bodies and each arm individually, and legs, and feet, and other items too. There were a LOT of stamps in that set!
I had hundreds of ideas on things to make with it! However, each of those pieces was on a square wood block. So, just in case you didn’t already know, most people can’t see through wood! (amazing, right?!?!) So, while I loved the set, I just could NOT get anything to line up, for the life of me! (And it looks really strange to have the head and neck floating above the neckline of the body below it!)
That being said, I was still excited, and was getting ready to sign up to be a representative of that company. I mentioned it to a friend that lived (and still does) across the US from me), and she asked “Have you heard of CTMH?” I responded with “I don’t even know what CTMH stands for, so, no? Probably not!”
Well, as you can probably guess, it stands for Close To My Heart, and I LOVE it!! She told me that the stamps were clear and the blocks were clear, and you could see through them. I was in love without ever having used them! My problem had been solved! They, of course, didn’t have that stamp set that I loved so much, but they had so many other things that I loved!
I signed up and was Tickled Pink! (that was the campaign that was happening then!)
So, let me show you some about these stamps!
1. They are clear. Every stamp set is clear. You can see through them to get your stamping aligned just how you want it!
![]()
2. You don’t have to store wood! This isn’t a big thing to everyone, however I have 4 kids and pets, so storage space is at a premium! If I don’t have extra stuff to store, then that means I can keep it in a smaller space (or, you know, get more things to fill the space that the wood would have taken up, right?) CTMH stamps use acrylic blocks to stamp with. Once you have a few, you are good to go!

3. They don’t take up much space! Each stamp set comes as a 6×6 sheet with a foam piece and care instructions, inside a plastic storage envelope. They are about 1/4 thick, and if the set has matching dies, they fit right inside the same envelope.
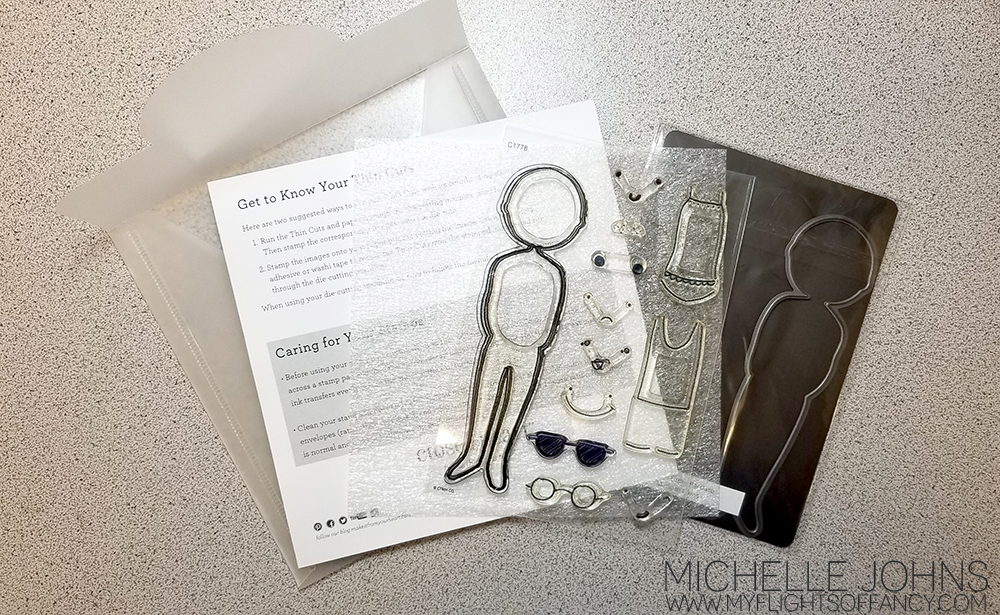
4. Stamping Surface Every stamp set includes a foam sheet to help you get a nice, crisp image. The old red rubber stamps have foam between the rubber and the wood to help give cushion to the stamping for a nice image. Removing the foam means that the stamp can continue to be clear and see through, so you know exactly where you are stamping.
![]()
![]()
5. Flexability One of the best things about these stamps is the ability to change them! You can take a straight line and use it straight, and then put a little (or a big) curve into it, and continue using it! So very many options!

This is just a small list of things that are awesome about the Close to my Heart stamps, I would love to know what else YOU love about them!
I figured I would share the card that came of the images above, because I thought it was pretty cute!

And, because I know you can’t see the shirt very well, I decided I needed to add a bit more to it, so, using masking, I created this MOM Hugs shirt! {I actually clapped when it worked PERFECTLY!}

I would love to send this fun MOM Hugs card out to someone! Share this post on social media, and leave a comment here stating that you did so. On Friday 8/16 I will draw a name from those comments and send this card out to you!
Thanks so much for stopping by! I hope I brighten your day just a bit!
See you tomorrow!