


Happy Friday! I hope your week has been lovely! (tehehehe) It has been a fun filled week with the Lovely paper packet, don’t you think?
This card was partly made from leftover pieces from my desk! The Thanks die cuts were from a card that I was going to do a video on, and life got in the way! The Kraft paper and white daisy were smaller pieces on my desk as well. It’s awesome to be able to use other layers to strategically hide things!
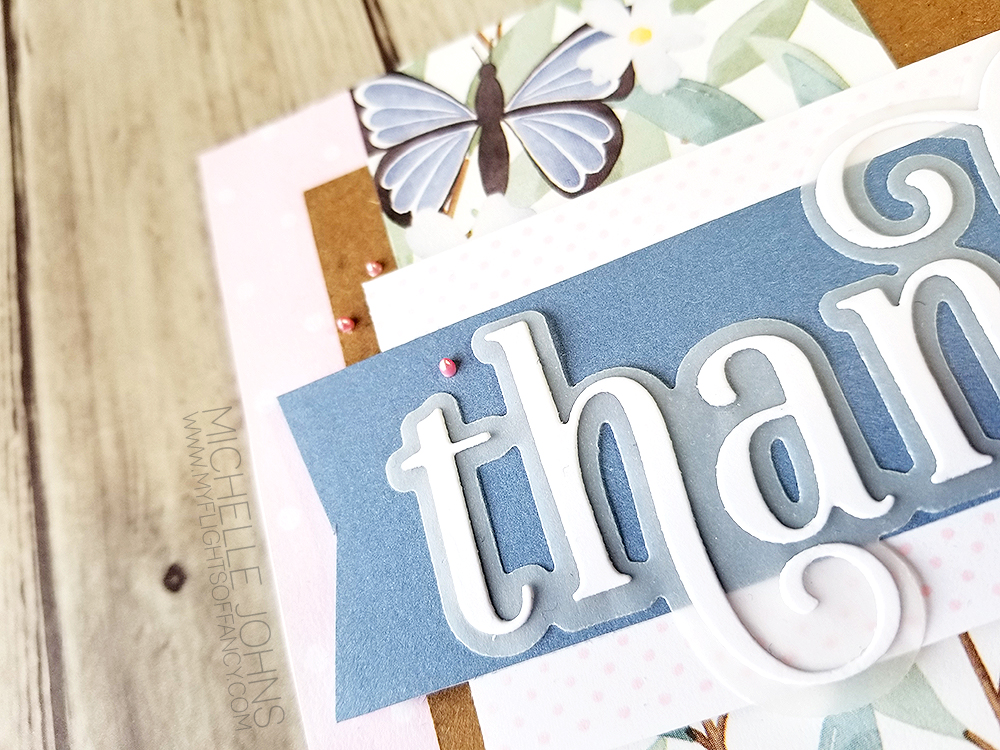
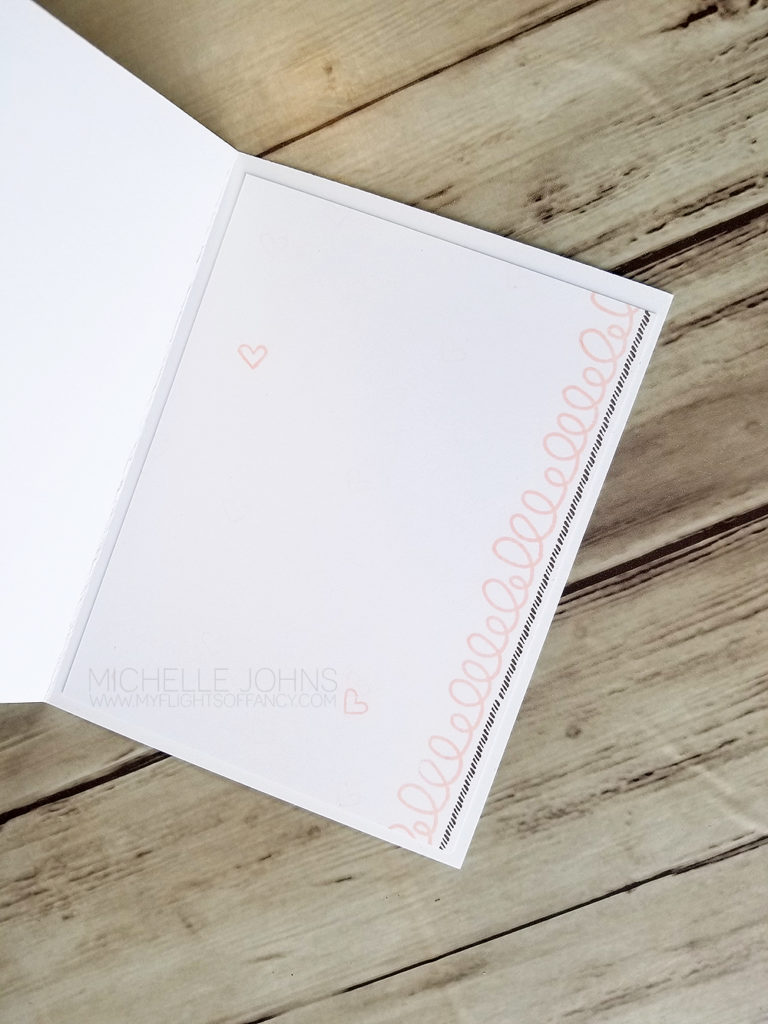
I know it’s somewhat hard to see, but there are ballerina stamped dots above and below the blue belle banner. Add some ballerina liquid pearls, and it just tops off the card! I did a row of those same dots on the inside of the card.
I hope you have enjoyed all of the projects made with the Lovely Paper Packet this week! I would love to hear what you have thought of everything!
Thanks for stopping by!

Happy Monday, friends! This week we are focusing on the Hello Lovely paper packet, as I’m sure you have seen! This paper packet is in the core book, available for an entire year! You have a few months left to be able to get it! The paper packs in the core book have more sheets of paper in them!
This is the card that we will put together in the FB live event, today! I know you will love it, too!
![]()
I used some fantastic Blue Belle glitter paper on here, and it shines so much! Add a few liquid pearls, and voila! The card is finished!
If you are seeing this before the FB live, hop over to my FB page and have a quick watch!
I can’t wait to see how this inspires you!
Welcome back to another post for me today! It happens sometimes! This post is all about the Stamp of the Month blog hop! You will see a large handful of ladies share their work with this fun set! Today, you could have arrived from Megan’s blog, or you could have started here. Either way, it’s a big circle, so you should be able to hop along until you get back to your starting point! If you happen to get lost along the way, you can find the whole list on Melissa’s blog.
Today’s card is super fun, and super easy to do! In fact, when this post goes live, I should have started my FB live of putting it together!
I love how simple it is on the color combo! Ballerina, Espresso, and White Daisy!

The February Stamp of the Month is perfect to add to the inside of the cards, and to add the extra little something on the front! This set is not meant to be the front runner or show stopper, but to be the main supporting actor! LOL!
So, if you haven’t already see the FB live, go and check it out, and I will show you how I put it together!
Remember to continue hopping along the blog hop, and see even more great stuff! After you leave a comment below, make sure to go and see what fun stuff Wendy has to show you!
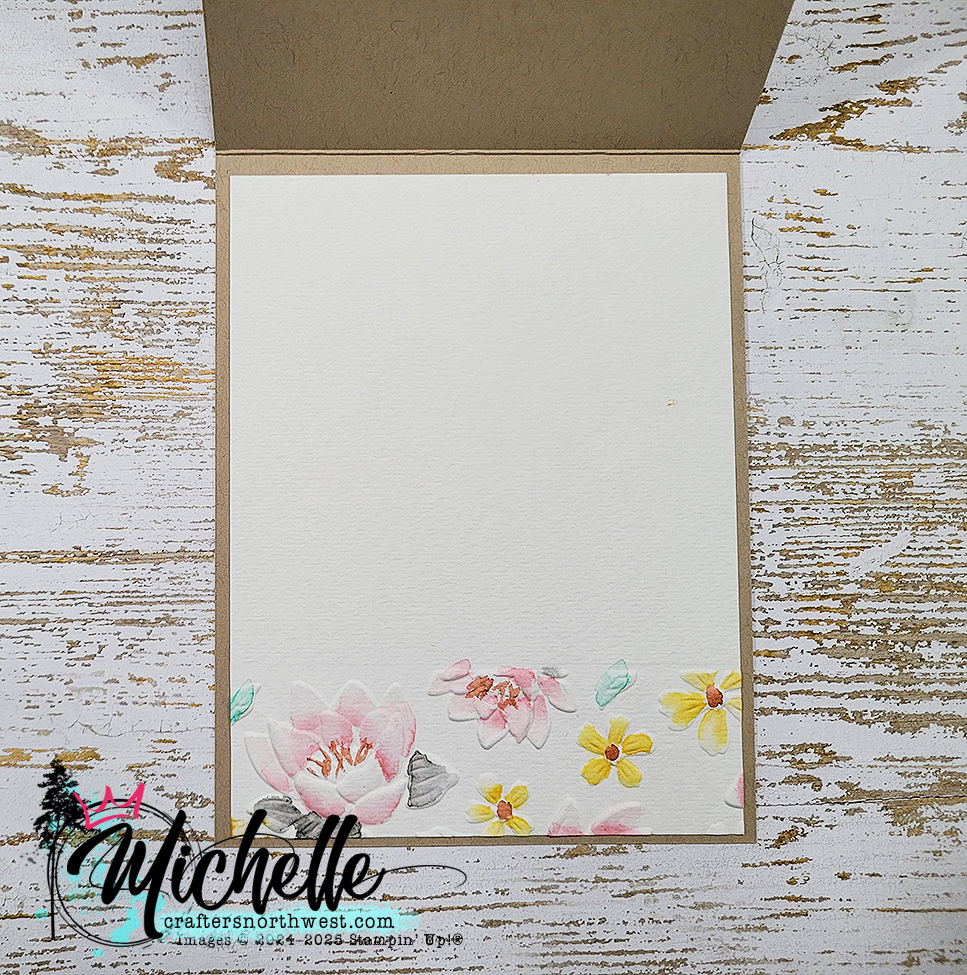
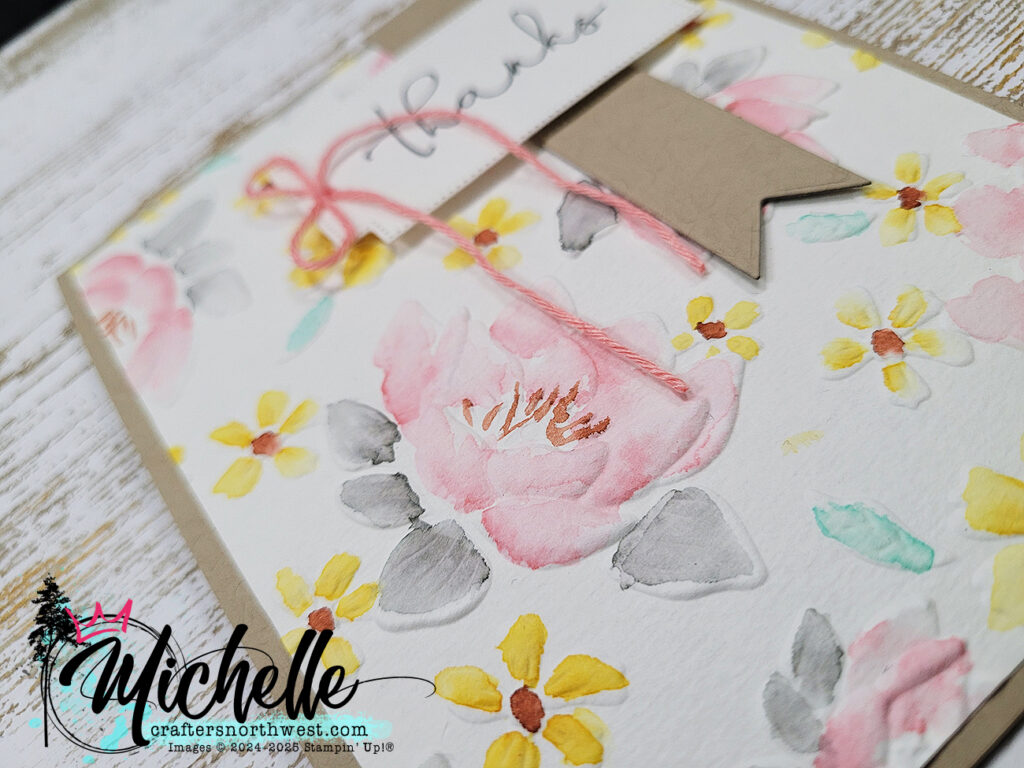
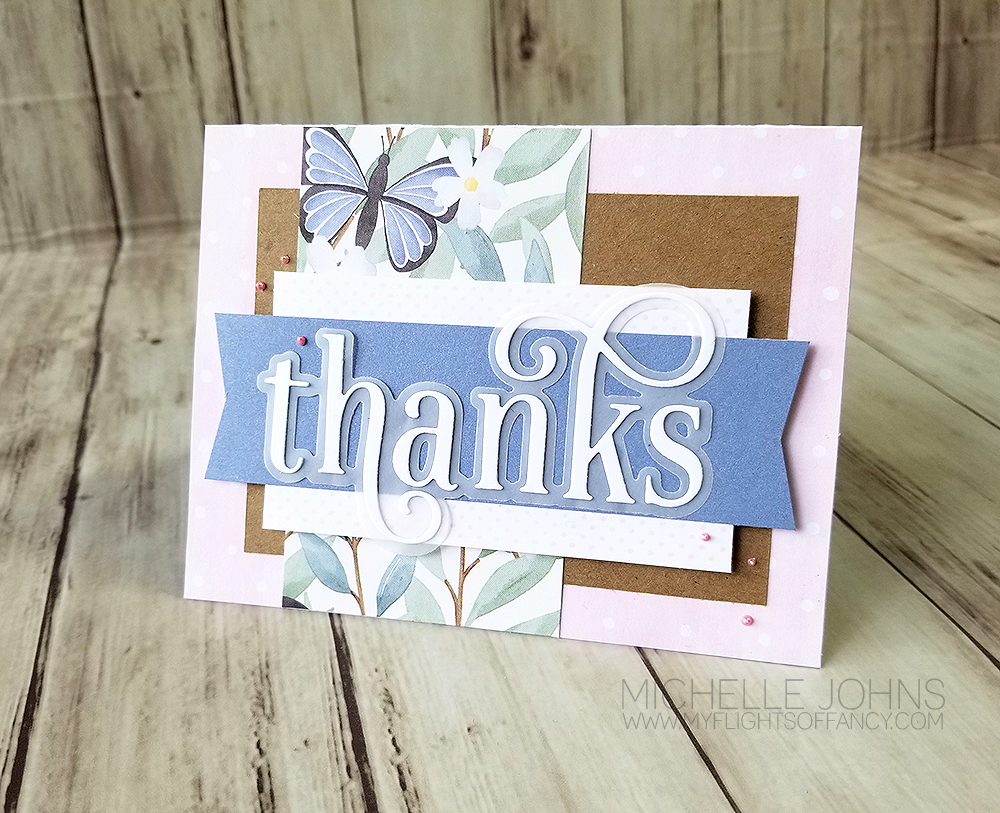
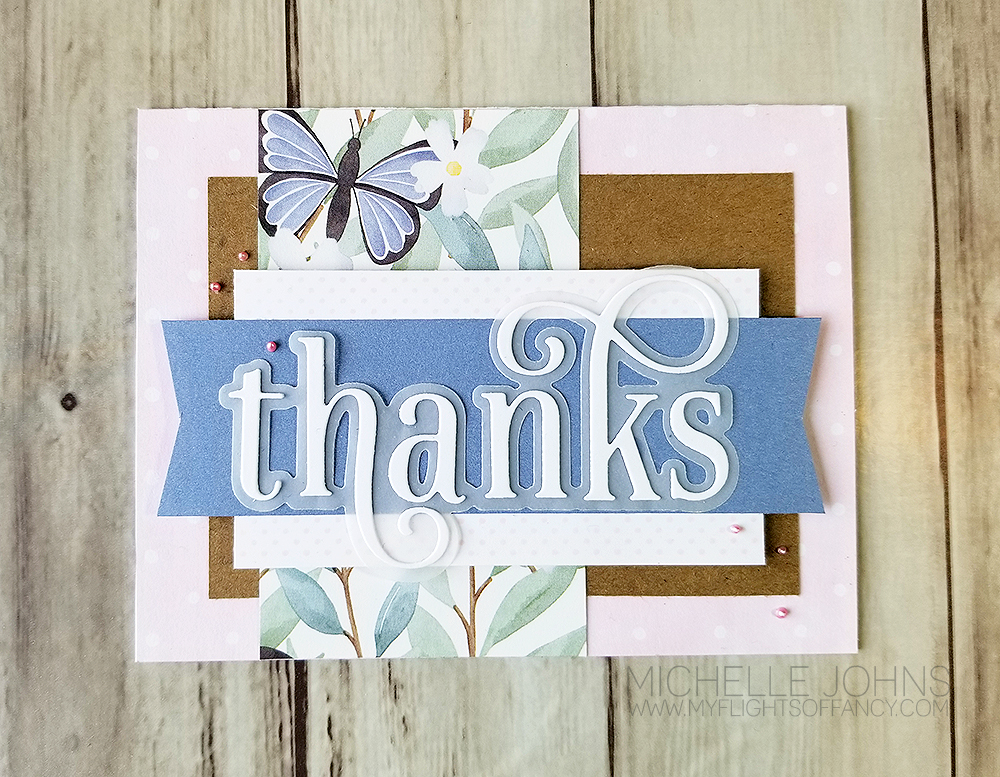
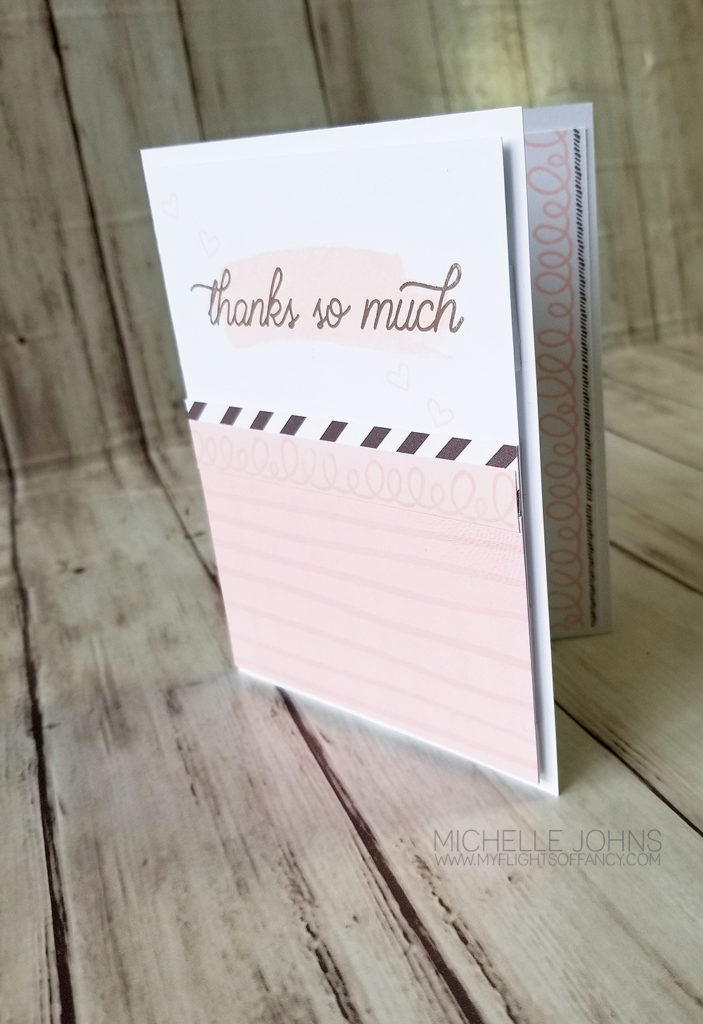
It’s time for another challenge over at H2H! This week’s challenge is “Thankful”. You can take that to mean whatever you would like. I decided to go with a Thank you card.

I had a ton of fun using the card guide for the new Serenity cardmaking workshop with the Lovely Paper Packet! I LOOOOOVE that the guides are perfect not only for the paper that they are shown with, but also with other papers as well! This uses the pattern for card 3. Isn’t it so pretty with the Lovely paper??
I used the Thanks thin cuts for the sentiment. Vellum was the perfect shadow background! Then I used two layers of white daisy and topped it all off with the White Opal Liquid Pearls! I’m not quite as good at using them for that as some other big named people out there, but the card turned out SOOOOO fun!!

This card went together really fairly quickly! The patterned papers are the front and back of one sheet! I could easily get 4 cards out of it! If you haven’t yet, pull out an older card-making workshop’s instructions, and use them for a different paper pack! I bet you will LOVE how they turn out!
Items used today:
Thanks so much for stopping by! I hope you go and play along with the H2H challenge this week! You have a whole month to play along!
Until next time, keep crafty my friends!
Welcome to the September Technique Blog Hop! This month is all about a window of some sort! I know there will be LOTS of great ideas on this hop, so make sure to visit everyone! (and make sure to leave some love along the way! EVERYONE loves to hear how much their creation resonates with others!) Today, you may have come from Lauren’s blog, or you may have started here. Either way, it will be a big circle, so you will eventually end up back here!
Today I did a fun peek a boo card, with a new technique that I hadn’t tried yet, and it was fun! Let’s take a look at the front, first, shall we?
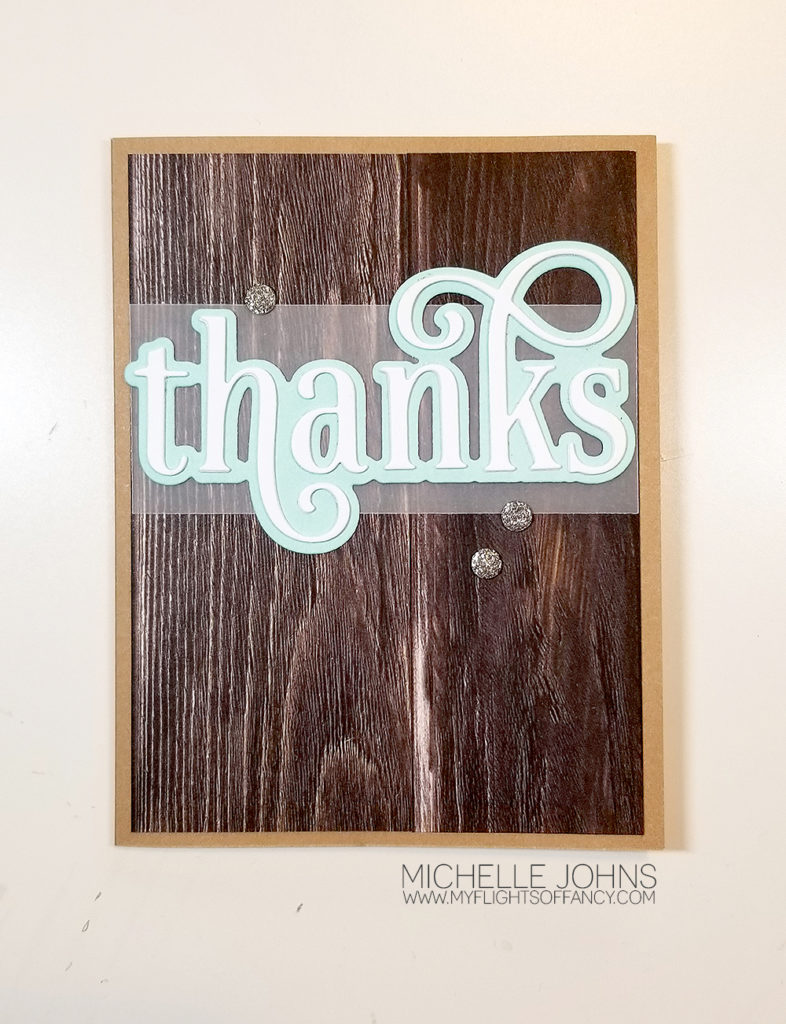
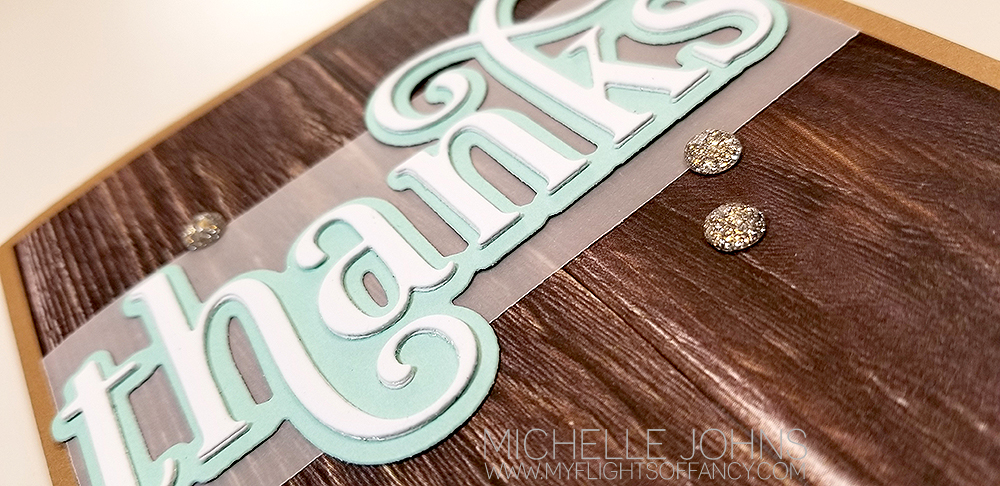
I am IN LOVE with the wood paper packet! This is just one of the papers from the packet! It is actually a plank looking piece, so, I did some fussy cutting to be able to have it look like a solid piece (though, maybe not quite so much in person!)
That Thanks die cut is fabulous, isn’t it? That is new too! I cut three layers from White Daisy Cardstock, and the shadow layer from Mint Cardstock. Then layered them with the liquid glass, that I LOVE so much! I attached them on top of a piece of vellum with some micro glue dots. I finished fancy-ing up the card with some gold glitter gems.
Now, let’s take a look at the inside, shall we?
Oh my goodness! Isn’t that fantastic?!?! SOOOOOOOO much fun!
![]()
I used the From the Funny Farm stamp set for the adorable little birdie! I stamped it in the intense black ink and then colored with the Ice Blue Blend Tri tip marker. I used the circle thin cut from the card spinner die set for the little cut out for the bird.
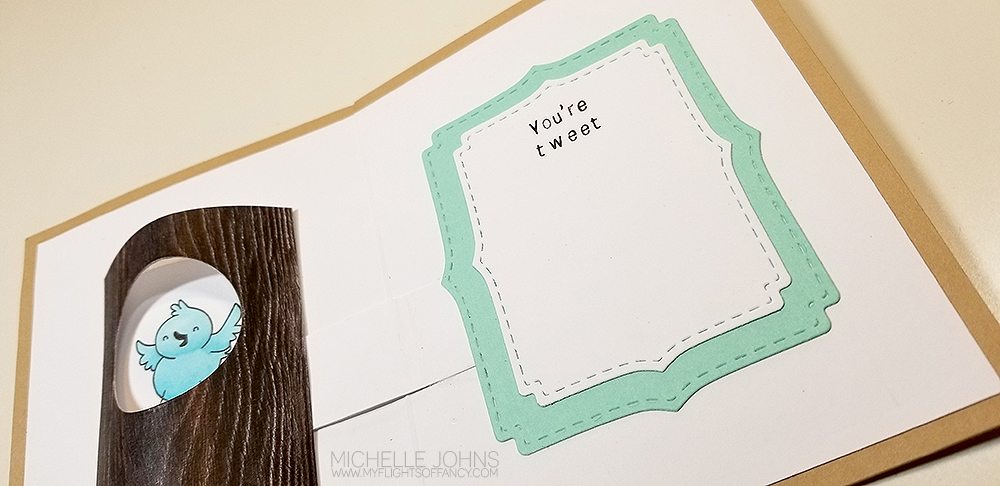
The sentiment side uses the Stitched Fancy Brackets dies, in both White Daisy and Mint Cardstocks. I stamped the sentiment with the Teeny Tiny Type alpha set.
I hope you leave a bit of love for me! Then, off to another Michelle’s blog! 😉
Thanks so much for stopping by!!
In case you get lost along the way, here are all of the blogs this hop!
Melissa
Cat
Maz
Lauren
Michelle J. You Are Here!
Michelle L.
Brandi
Katy
Alyson
Miss. Carrie’s Creations
Hey there, Crafty Friends!
Danielle and I are back with another fun project! Today’s project is a card, but not just any card! Today we are using this card as our inspiration. We wanted to be inspired by the design, the water coloring, and the vellum!
Originally I was going to do a BUNCH of different cards to show off different water color techniques, but I left most of the products for those other techniques at home! ACK! So, I went with the “easy” option! Also called faux watercoloring! To do this, you use your ink pad, a slick surface (I used the All Purpose mat), a brush (I used the medium flat waterbrush, and some water.

Now, the papers on the left side of my cards are both retired. I used a zip strip from Craft On, on the pink card, and the cardboard piece of B&T from Hawthorne on the brown card. My ink colors today were raspberry and toffee.
Ideally you would do this on watercolor paper, however, I also didn’t have any of that with me! (Yes, I forgot a whole bag of items when I left for my crop!) So, I just used some white daisy cardstock. While it did warp some, it didn’t warp too much!) I used the Shaker window and confetti thin cuts to die cut my circle from vellum paper. Then I used two different (retired) embossing folders to emboss the circles. I created two (actually four, but I only used two) versions of “thanks” and cut them with my cricut machine. I used a bit of gold embellishing thread and gold glitter paper on the pink card, to help it pop some more. I added a few black dots from the Black & White dots. and decided I needed a bit more black. So, I grabbed the black watercolor pencil, scribbled a bit on a scrap of paper, added a bit of water with the small round water brush, and smacked it on my scissors to get some splashes of color on the rest of the card front.
I think they look pretty fantastic, even if they don’t look like the one that inspired us! I would love to see the cards you make! So, make some, snap a photo, and share with Danielle and I!
Thanks so much for stopping by! Make sure to hop over to Danielle’s blog to see her card too!
Welcome to another SOTM blog hop! It’s been a bit since I have done one! Today you should have arrived from Danielle’s blog. If not, that’s ok, it’s a big circle, and you will get there!
Today I mixed up a couple of stamp sets, just because they are so fun!! I used the Perk Up stamp and thin cuts for everything except the sentiment, and the September Stamp of the Month for the sentiment.
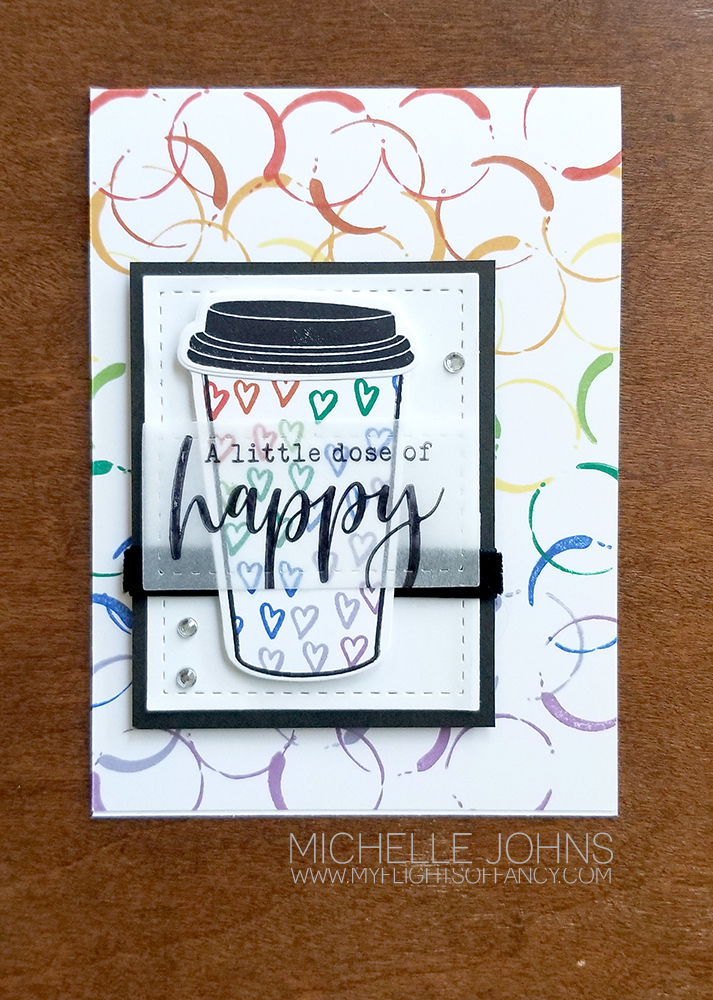
I made a rainbow background using the circle from the Perk Up Stamp set, and stamped in a whole rainbow of colors, including some new ones! Candy Apple, paprika, goldrush, canary, green apple, bluebird, wisteria, and pansy.
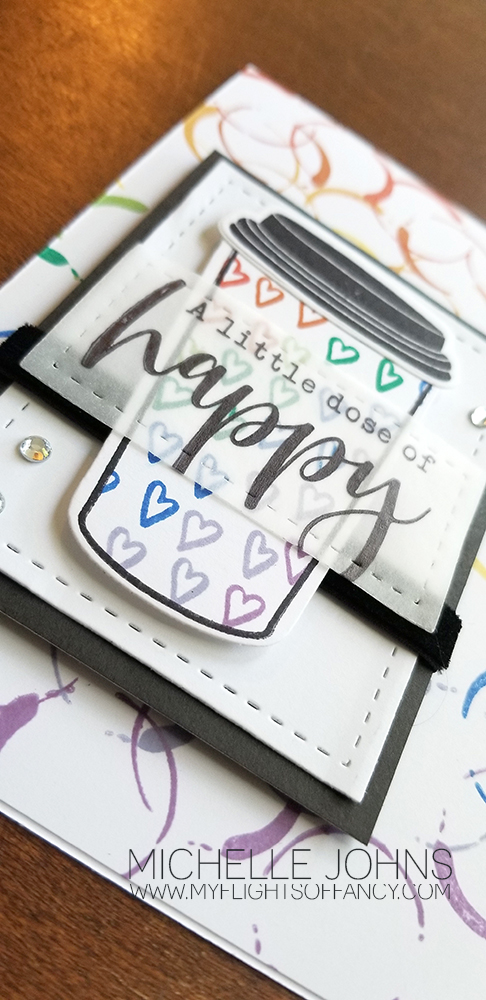
I used some vellum for the sentiment, so it wouldn’t completely hide the fun cup that I stamped!
See that black ribbon? Its new too! Its a fun velvet ribbon, that you will love!
I hope that you love the card! I can’t wait to use both of these sets more! And these colors are fantastic!
Thanks for stopping by! Now, hop on over to Michelle’s blog
See you guys again soon!!
Hey everyone! My friend Danielle and I are doing a number of things this month, to help challenge each other to be better, and one of the things that we are doing is a series of videos on Thursdays that will be Pages & Projects. We will alternate each week what we do, so you should make sure to come and check out the videos each week! You can find her project here.
That being said, this week I am starting off with a thank you project for some of the doctors and nurses we had when Audrey was in the hospital last year. This weekend is her One Year anniversary of getting to come home! So, we will be delivering some of these fun little bags on Sunday!
{Can’t see the video in email? Click here to watch!}
I hope you enjoy the video, even my oops, and my fix for it! I left that all in for you, so you can see that EVERYONE does the oops, and generally it is fixable with a bit of thinking!
![]()
I would love to know what papers you would use, and who you would give a little bag like this to!
Project sizes:
White Daisy:
4 x 12 scored at 5 1/2 & 11
4 x 10 scored at 5 1/2 & 7
5 1/4 x 4 1/4 scored at 1 3/4 on all sides
B&T Pieces
3 3/4 x 5 1/4 (qty 3)
3 3/4 x 2 3/4
Charcoal Cardstock
2 x 5 1/4
Shaker Thin Cuts:
Largest circle in White Daisy
Stictched Frame in Charcoal
Products used:
Into the Wild paper packet
White Daisy Cardstock
Charcoal Cardstock
Charcoal Ink
Simply Said Stamp Set
Shaker Window Thin Cuts
White Ribbon
Micro Tip Scissors
3-D Foam Tape
Liquid Glass