Welcome to the September Stamp of the Month Blog hop! This month we have more than 20 consultants sharing their fun projects with you! Today you should have arrived from Katy’s blog. If not, that’s ok, it’s a large circle, and you will get back there! This month’s stamp set is called “Just Treats“. It has 22 images on it, and is just fantastic! Just take a look!

You will be able to do so much with this set! It covers treats for each of the seasons and holidays for the remainder of the year! I will be showing so many options with this set! I can’t wait for you to see them and tell me what you think!
Let’s get to showing you what I came up with for this fun hop, now shall we?
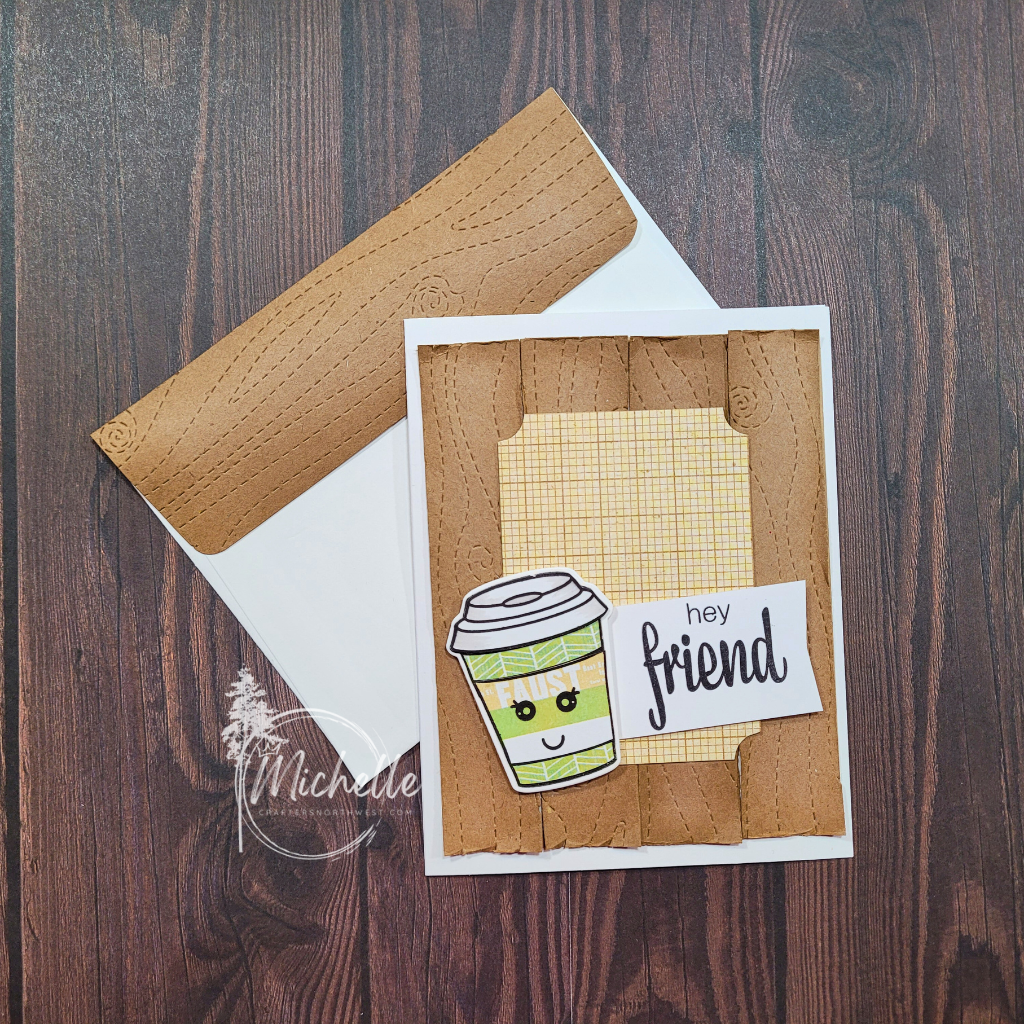
This card is a little ‘extra’, because I had the thought of what I wanted on the inside, before I designed the rest of the outside. While I know it isn’t fall just yet, (I know, Erin, I know!) but there is pumpkin spice everything around me already, so I just had to go with a fall theme for my first card! (at least it doesn’t actually mention pumpkin in it . . . )

I used the newly available Grateful For You paper pack on the front of this card. I thought these colors went together so well! The design for the front is from the MIFYH Volume 2, pattern 23. (These books are so very handy!) Popped up the sentiment with foam tape and the cup with some thin foam dots. Add a bit of burlap ribbon, and you have a beautiful card!

Some things that I used that you may not notice or not see include the Golden Yellow, Warm Grey, Mahogany, and colorless blender ShinHan Markers, Shimmer brush, Archival black ink, Non Stick Microtip Scissors, Piercing tool, Journal pen, tweezers, and liquid glass. Scroll down further to hear how I put this fun card together! But, before you do that, check out the inside of this card!
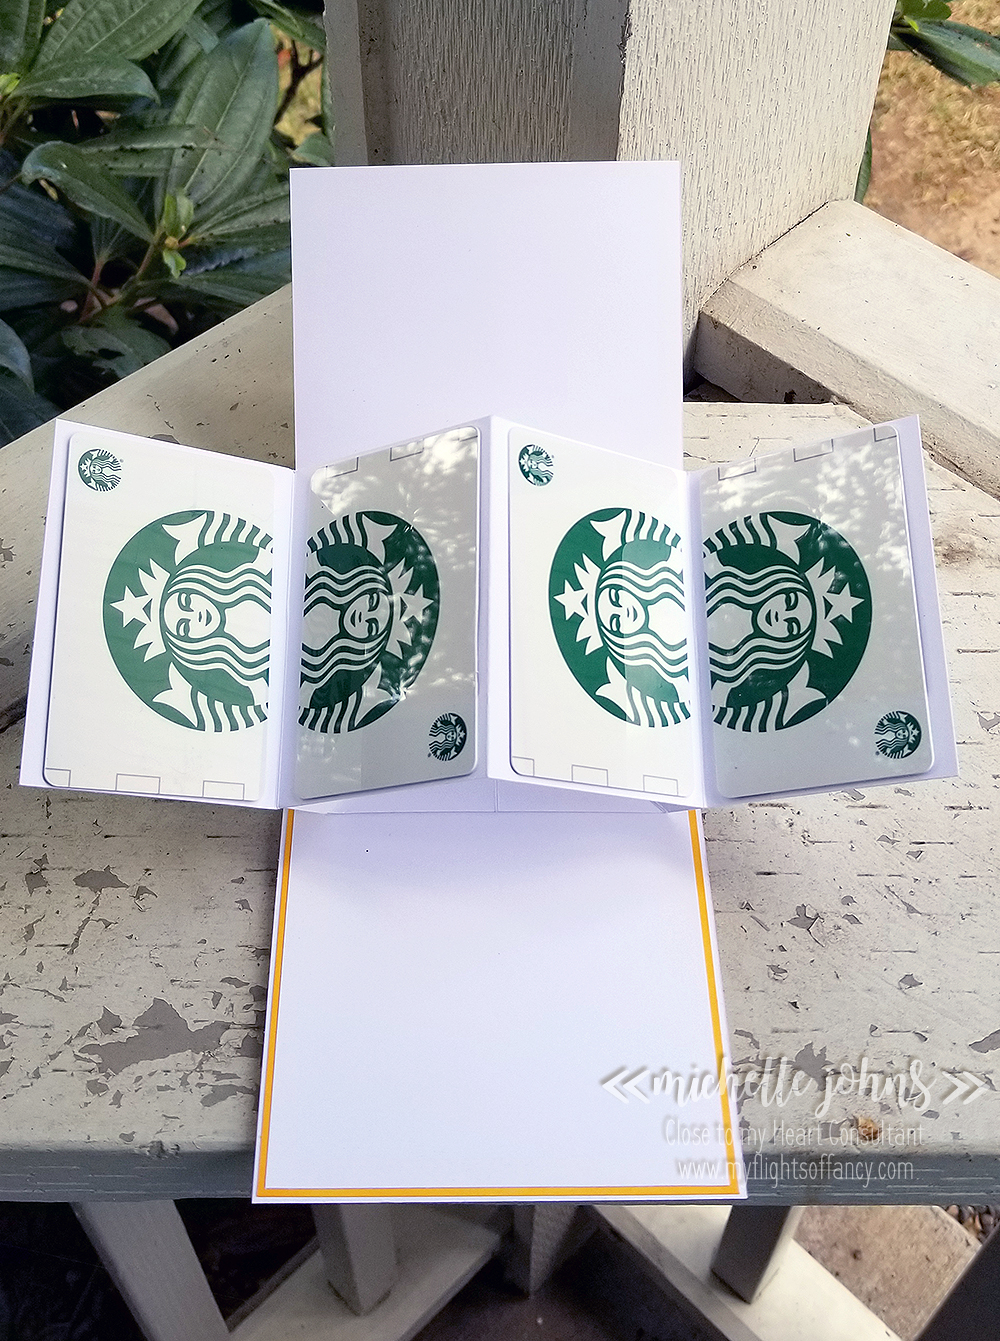
My daughter was gifted a 4 pack of these coffee cards (not naming, since that might be a no-no). And I thought that it would be really fun to make something to be able to gift something like this in the future! (these ones are used, but I will replace them with new ones (or reload these ones) when I gift the card. This card works (and will sit like this) because of the number of layers that this card has, and the strength of the liquid glass.
The inside has two layers on top of the card base. The front also has two full layers (plus a few extra pieces) on top of the card base. This makes sure that the front and back both stay flat when you are opening the card, and don’t bend, making it harder to get the card open.
Thanks so much for stopping by! Next up is Melissa! Check out her blog! If you would like more details on how I made my card, just keep reading below!
~ : ~ : ~ : ~ : ~ : ~ : ~ : ~ : ~ : ~ : ~ : ~ : ~ : ~ : ~ : ~ : ~ : ~ : ~ : ~ : ~ : ~ : ~ : ~
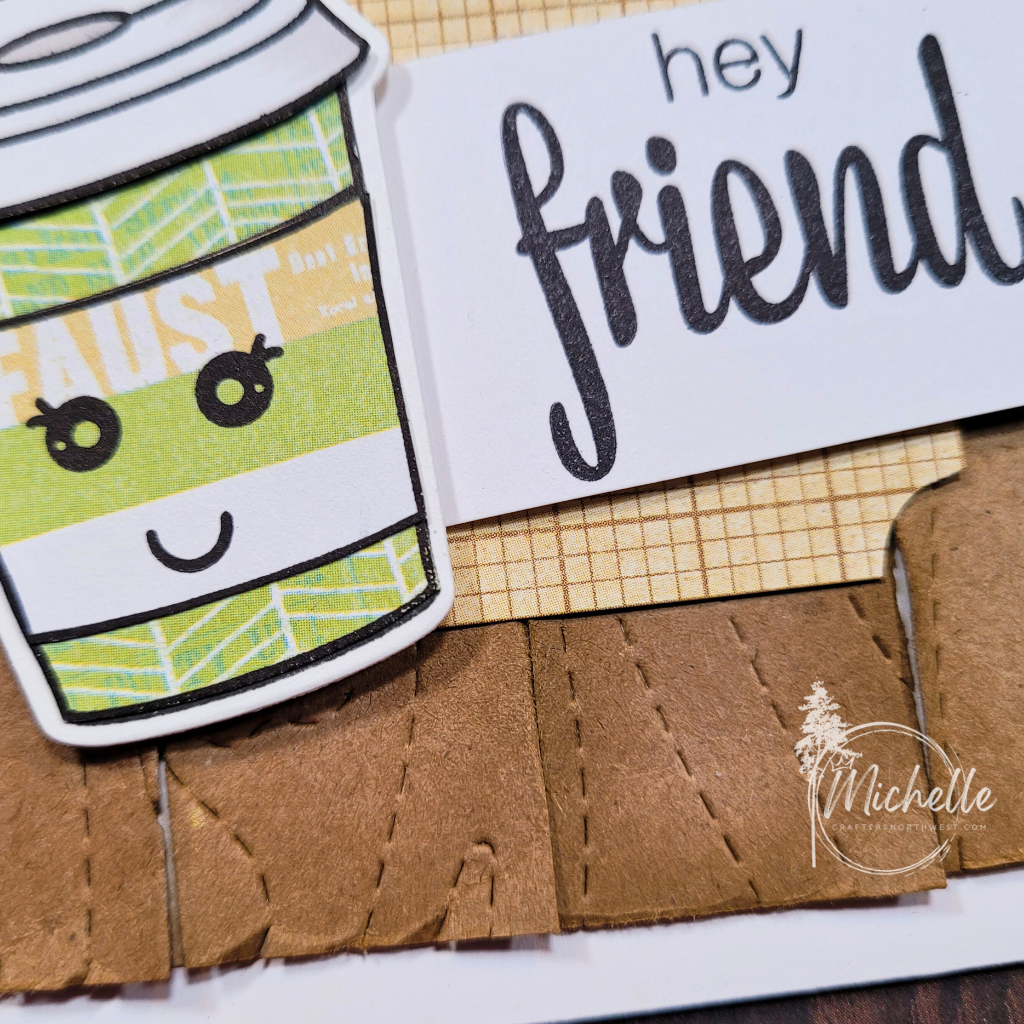
So, I am needing to replace some of my cardstock . . . specifically saffron and sapphire! LOL Those are the two colors that match the papers that I chose for this card. So, what to do? I knew I needed that layer on there, so I could have the stiffness that this card needed for that fun fold on the inside of the card. So, I went to my shinhan markers, to see what would work. I don’t have any dark blue markers (I could mix colors to get the right blue, but didn’t want to) so I was looking at the yellows. The Golden Yellow matches decently enough! So, I cut the layer from white daisy cardstock and used the Golden Yellow marker along the edges. No need to color the center of the cardstock, as it won’t be seen. If I had done fewer layers of color, it would have matched a bit more closely. I did this for both the outside and inside of the card.
I also used that same yellow to color in the letters on the stamp. I used the Mahogany to color in the little drops on the sentiment to look like coffee or cocoa. The Warm grey I used to create a bit of a shadow under the cup, however, because it was so dark, I used the colorless blender to soften it and move some of the color a bit further down. I used the shimmer brush on the whipped cream, just to give it a little pizzazz! Now, to get your cup to look like this, you will need to create a mask of the whipped cream, and stamp it first, cover with the mask, and then stamp the cup. That way the back of the cup isn’t seen in the whipped cream.

If you notice, my cup is ‘backwards’. I did this on purpose too! One of the benefits of cutting out your element, is that you can make some changes to it. So, after I stamped the whipped cream and the cup, I cut it out, chopping off the handle in the process (it makes a cute bowl, btw!). Then I stamped it again on a scrap of white daisy cardstock, and cut that out. Before I glued it all together, I went over the edges with the journaling pen, it gives the stamped image just that much more omph. Then I used the liquid glass to attach the handle to the other side of the mug.
This card is a “Pop and Twist” card. I modified mine from a few different videos (and would probably do a few more modifications for the next one). It will be one of the fun cards I offer in my card workshop that will happen a bit later this month! So you will want to watch for that info, coming soon!

Thanks again for stopping by! I hope you liked my card! Let me know what you think!
~Michelle