Sponged Dino

Can you sponge your Dino?

The new challenge of the month over at H2H is all about sponge techniques!  This one was fun!  Because, I don’t know about you, but I like to channel my inner Tim Holtz every now and again!  I saw him do this technique years ago, on a video, that was probably years old!  LOL!!  Basically he used a Misti tool to make a rainbow of colors on a stamp, by sponging colors onto the stamp and overlapping them.


So, before you leave, I would love for you to leave me a note and let me know which is YOUR favorite card, and let me know if you have tried this technique!

Sponged Dino Card

Mine didn’t ALL overlap, but some of them did!  I just think the whole thing turned out great!


I also channeled my inner Jennifer McGuire, and made TWO dinos when I was stamping, to make two cards.  However, I couldn’t decide which background I wanted, so I just went ahead and did two!


Before I swap over to the other card, I wanted to show something.  I managed to blow a fuze when I was making this card.  (literally, had to go and flip the breaker!)  So, one of my pieces didn’t cut all the way.  So, I decided to do something fun with the inside, and use that piece that hadn’t cut all the way.  


I tore it into a ‘sloped’ shape, and then distressed it, and glued it to the inside of the card.  I think it turned out great!

inside of card

Ok, let’s see the other card, shall we?

Sponged Dino

This is the other dino!  Isn’t he cute, too?  I created a background with one of the images on the Artbooking cartridge.  Then I cut it four times, to give it some depth

Sponged Dino Card

It was fun to do two different cards!  It would have been much faster if I had done two of the same, but that’s ok too!

Last week, you saw that I was inspired by a friend’s son, and this week is the same!  Just, a different friend!  (actually, both friends’ sons like dinos!)


Like I said earlier, I hope that you will let me know which card is YOUR favorite!  Also, if you might want to try this whole sponging thing, join us over at H2H for some fun challenges, and put YOUR artwork into the hat!

Thanks so much for joining me!

Blog Signature

Have you been afraid to use Stencils?

Have you been scared to try stencils, because they might be hard?  Well, you shouldn’t be!  And with this Technique hop, we will give you more than a few reasons why you need to try them!

You should have arrived here from Danielle’s blog, (if you didn’t start here!) and she always has great ideas!  If you started here, no worries!  You will get back around to her blog, as it’s a giant circle!

So, let’s get started on what I have to show you, shall we?

Isn’t this just an adorable card!?!?  (I hope you leave a comment below to let me know what you think!!)  I loved coloring this little guy!  I used my friend’s son as my model for coloring!  (I’m not the best at it, but I think he’s cute!)


Now, the stenciling part.  I started with his hoodie!  I masked his hoodie first, so that I could get an ombre effect on it (which I looooove how that turned out!) and then masked off his arms and pocket, so I could add stripes from the stencil.  I used the card front 3 bundle for the stripes.  (these are all done in bluebird ink.)


Then I decided I needed to make it a bit more!  So, I grabbed the thanks stencil from the card stencil pack 1, picked the upper case A, masked off around it, and used texture paste and silver embossing powder to make an A on the front.  (my model’s first name starts with an A).  I let the paste dry, then heat embossed the A, it gives it some extra dimension!

I took some white daisy cardstock, and stamped the headphones, pizza, cup, donut, TV, and laptop in linen ink to make the background less boring!  I stamped and cut the headphones and cup with their thin cuts, and the pizza I fussy cut (no thin cut for that one!)  I popped up my model, and he is super cute!


I decided I needed a bit more blue, and a bit more silver, as well, so I grabbed a strip to heat emboss the word Awesome in the silver embossing powder, and then the ‘you are’ in sapphire ink just above it!


I used most of the guys stamps, because they are so easy to mix and match!  I even used one of the girls!

To finish off the card, I used the same stencil and same ink (bluebird) to create the stencils on the card base.  I think it ties everything in perfectly!  Now, after you leave a quick comment, head on over to Lauren’s blog!  She has some great stuff! 

Remember to leave a little love on everyone’s post!  We all love crafting, and we love to know that what we show you is appreciated!  

Thanks!  And see you next time!

~Michelle

SWAK isn’t what you think it means!

We grew up thinking this was Sealed with a Kiss, right?  Well, you could technically do that with what I have for you today, but today I have a different meaning for you!


Today we are STAMPING with a KISS!  Have you heard about the Kiss Technique?  Well, it is where you ink up one stamp, stamp it onto another stamp that has a design, and then stamp the remaining ink onto your project.  Sounds pretty cool, right?  Well, let’s see what I made to show you!

close view of sentiment

Isn’t this sentiment just so cute??  I bet you couldn’t guess which stamp I used to kiss the letters onto!  Would you believe it was an ice cream cone stamp?  Well, it was!  I just thought the texture was so fun, and would work so well with the PML card that I used for the top of the card!

The ice cream cone is in the same set as the coffee card, and we already know that I love me some coffee cards!  So, it just worked out so perfectly!

Full Front of Cards

I know my friend Lynn loves that there can be more uses for dies than what they are specifically designed for, so hopefully this card will make her smile!


The white frame on this card is the Oval Frame Thin Cut!  I paired it with the Circles Thin Cuts, and you wouldn’t know that it’s supposed to be an oval inside!

Semi Close view of sentiment

I just wanted to show off the gold embossing on the bottom of the letters!  It just makes them pop!  (well, that and a few layers of cardstock!)


I used no foam tape on this card, no coloring, I just wanted a nice ‘simple’ card!  (ok, maybe not ‘simple’ . . . )

I hope that you like the card, and leave a message below letting me know your thoughts!  If you try the Kiss technique, go and show off your project at the H2H blog!  The would LOVE to see your craftiness, too!

Blog Signature

CTMH Supplies Used:

SWAK challenge image
H2H Watercolor Close Up

The look of watercolor, the ease of stamping!

Don’t you just love the look of watercoloring?  I do love it, but sometimes am intimidated by it.  So, when Heart 2 Heart announced the watercolor challenge, I thought it was a perfect chance to give you all an idea on how to do it, without having to feel intimidated by actually watercoloring!

H2H Watercolor Slimline Card

I grabbed the Perfectly Imperfect Patterns stamp set, that has 6 different watercolor type stamps and 2 stamps that are splattered dots, and got started!  I used the Wild Berry and Lemonade inks for my card, and just went for it!

The stamps are stamped a couple of times each, and I did overlap them, and got a light orange color in the middle.  I used the splatter dots all over the card, in first, second, third, fourth, fifth, and even sixth generation stamping!  I even added a few in Archival Black, to help tie in the banner and butterfly body.

I used the small butterfly outline and cut out of the vellum, and used the detailed small butterfly in Wild Berry to ‘pop’ off the card.

The banner and sentiment are both from the Thoughtful Critters Stamp and Thin Cut.  I stamped the sentiment on some black cardstock, used white embossing powder, and then cut with the banner thin cut.  (then trimmed off the hands with my scissors)

I used just a tiny scrap of Black cardstock to make the body.  I cut with the thin cut, then trimmed the body out with my non stick scissors.

I hope you have liked my little project!  I would love to see you participate with the H2H Challenge!  You have until the end of the month to upload your creation!  (you don’t have to be a consultant, the challenges are for anyone that likes to craft with CTMH goodies!)

I would really love it if you left a comment below!  I love to hear what you all think about my creations!

Supplies Used:

Thanks for stopping by!

~Michelle

Geometric Layout

Let’s get Geometrical!

You know, sometimes you just have to get outside of your box, right?  That was me for this hop.  I couldn’t figure out what I could do for it.  Then, I went to pinterest.  And, I don’t know about you, but I get waaaaaaaay too many ideas from there!  (wouldn’t it be fun to have the time to make all of those ideas, though??)  I am so glad I did!  So, if you are following along on the hop, you came from Maz’s blog.  If you started here, that’s great too!  Just keep hopping along, and you will end up getting to Maz’s blog, and all the other ladies as well!

So, this is a layout that I have had pinned for many years!  Today was the first time that I went for it!  I don’t have a title for it, just yet, becasue I need to pick the photo that is ‘just right’!

Geometric Layout

I had laid it all out, and thought it was just a smidge too stark, so I decided to add a hint of color.  I grabbed my watercolor pencils, and added some colors to the flowers and leaves with the pencils, very very lightly!  There is just the tiniest hint of color to it, and I think that makes it just perfect!

Here you can see the color just a bit.  Like I said, it’s VERY light!  This page was super fun to do!  I just love it!

Thanks for stopping by the hop!  I hope you enjoyed my layout!  I would love to hear what you think of it, so if you could drop a comment below, that would just warm my heart!  Then, you can hop over to Danielle’s blog to see what she made for you to see!


Supplies used:
Thanks for Stopping by!  See you again soon!

~Michelle

Sometimes you just need some Winter Wonderland!

Hello crafty friends! It is another crafty challenge week at H2H! This time it is all about the Winter Wonderland! I just recently got this paper pack, and it is so fun! I wanted to make something extra useful for the holidays that are happening soon (are YOU ready?) So, I went with a gift card holder!

It’s super simple, can be used with scraps, and is great for any and all occasions! This gift card holder is beyond easy to make! Let me know if you guys make some!

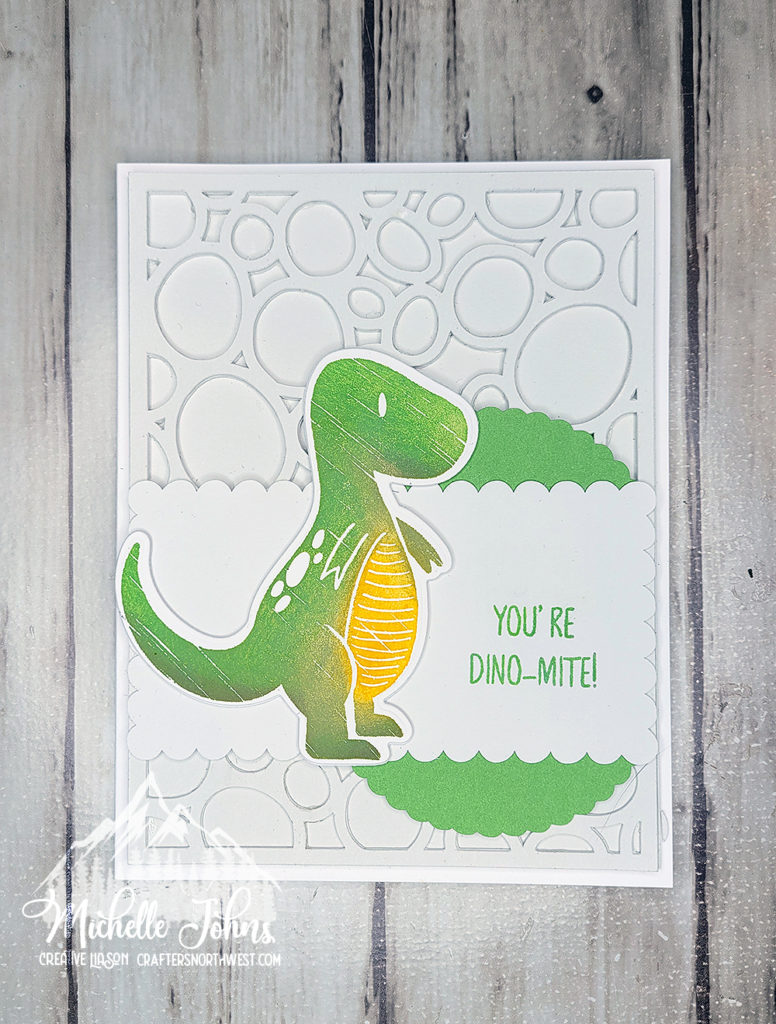
Let me know what you think of this adorable little guy! Then, hop over to H2H’s blog, and play along with the challenges!

Did you know you can use embellishments in a different way?

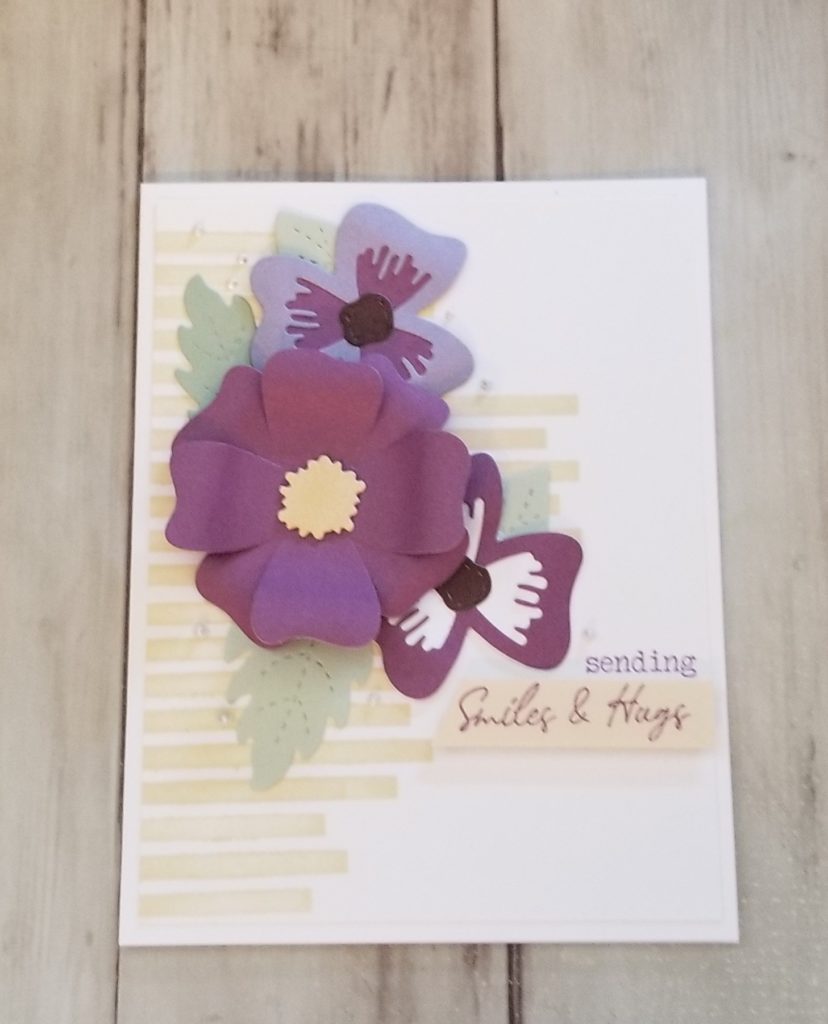
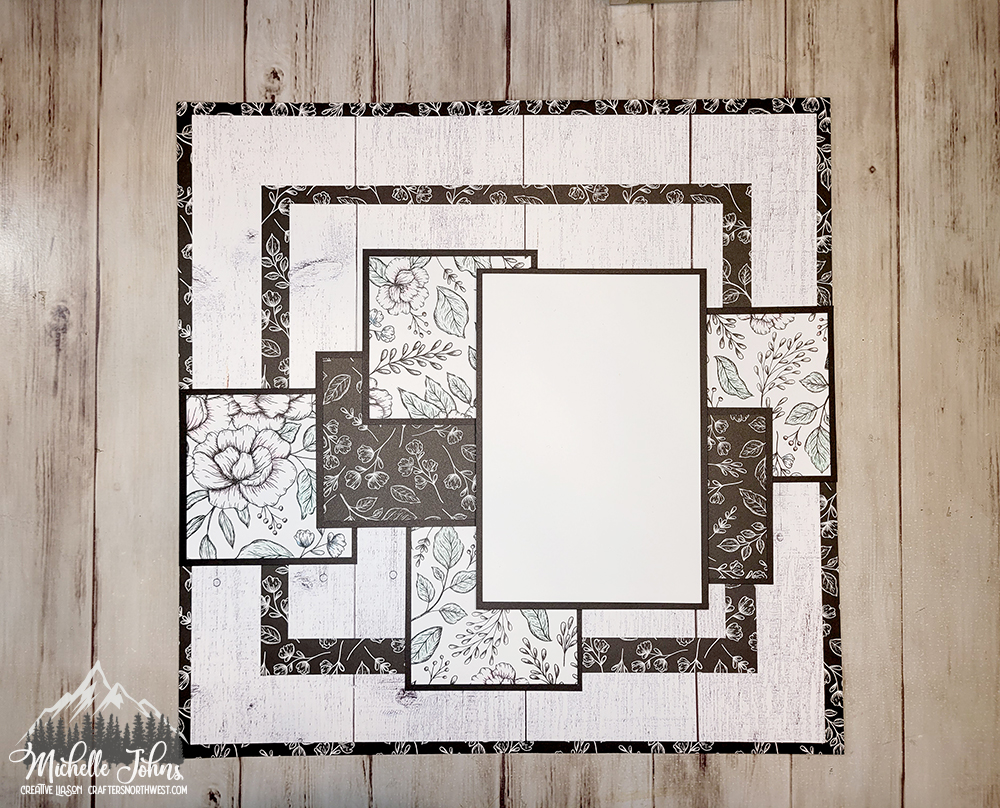
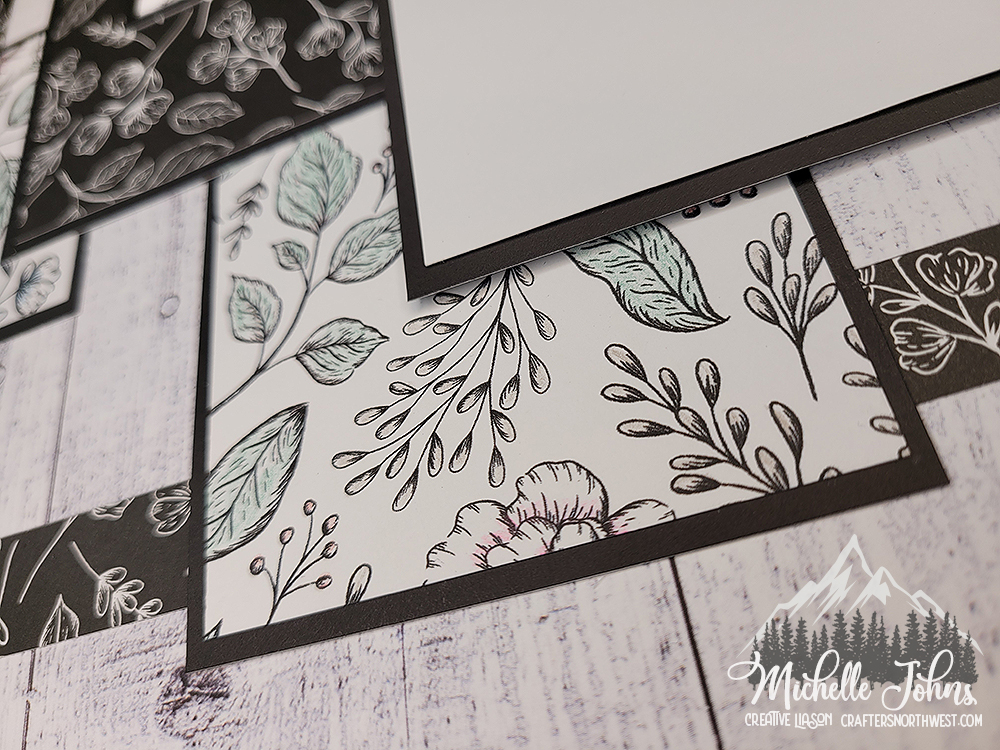
The new challenge is up over at Heart 2 Heart Challenges is up!  This one is all about the embellishments!  This could be taken so very many different ways!  At first, I was going to do a shaker card, and then, as the card was coming together, it ended up being totally different!  I love how it turned out, don’t you?

For this card, I started with the window thin cuts.  Everything except the shutters have four layers of White Daisy Cardstock, the top and bottom have a layer of Charcoal Cardstock, and the shutters have a layer of Pewter Cardstock.  I have a piece of acetate between two layers of the window, so that I could have some “glass” in my window frame!

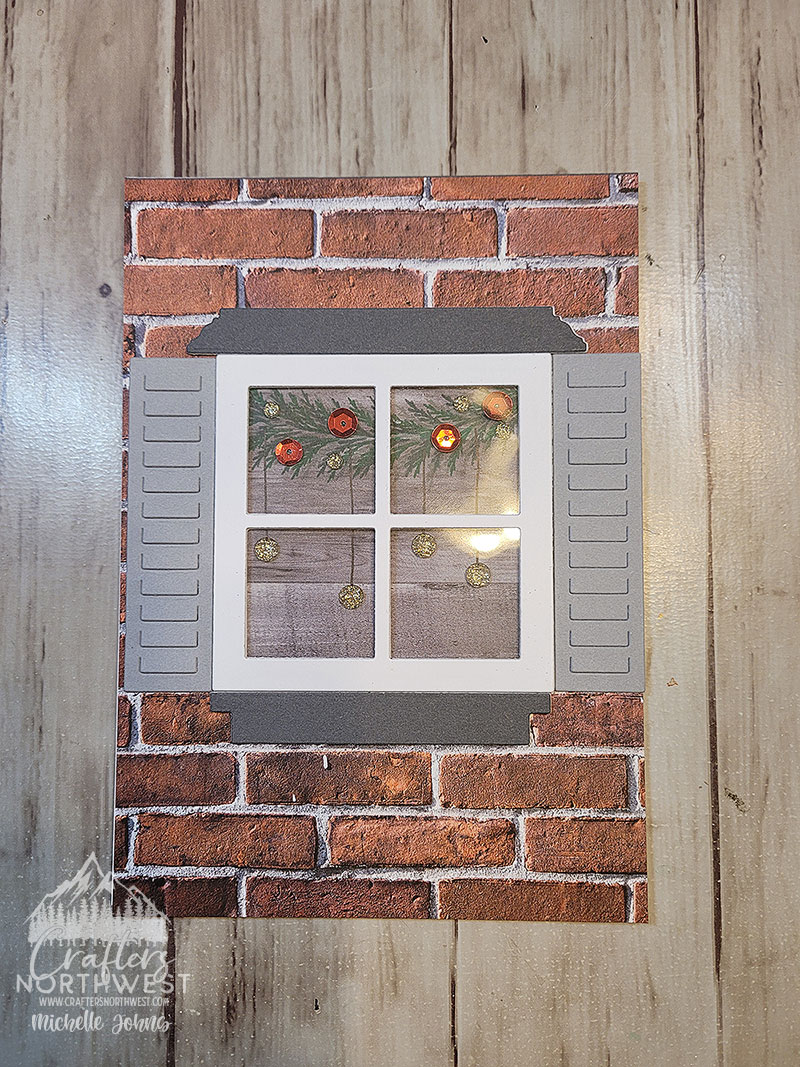
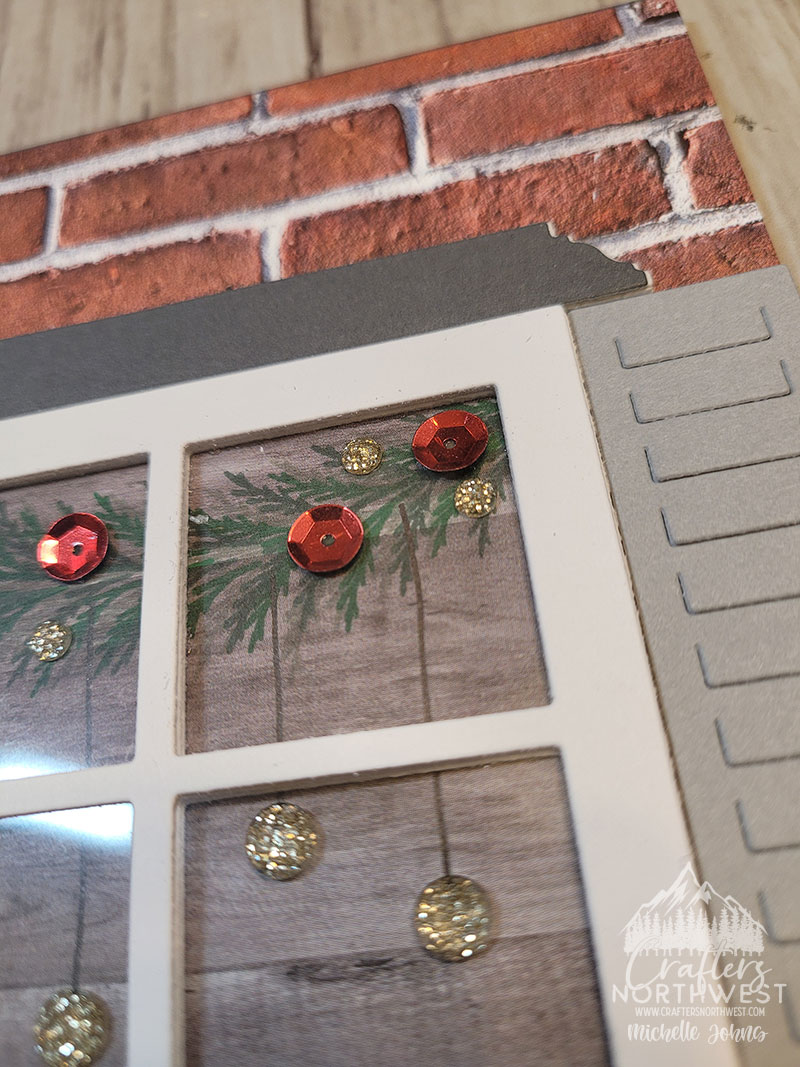
I ended up stamping on a piece of the Wood Texture Paper (from the Wood Grain Paper Packet, and I love how much depth it gives it!  I used two of the little sprigs from the Serenity Cardmaking Stamp & Thin Cuts. and put them on two 1″ x 1″ blocks.  I used Sage, Clover, and Evergreen inks for the foliage.

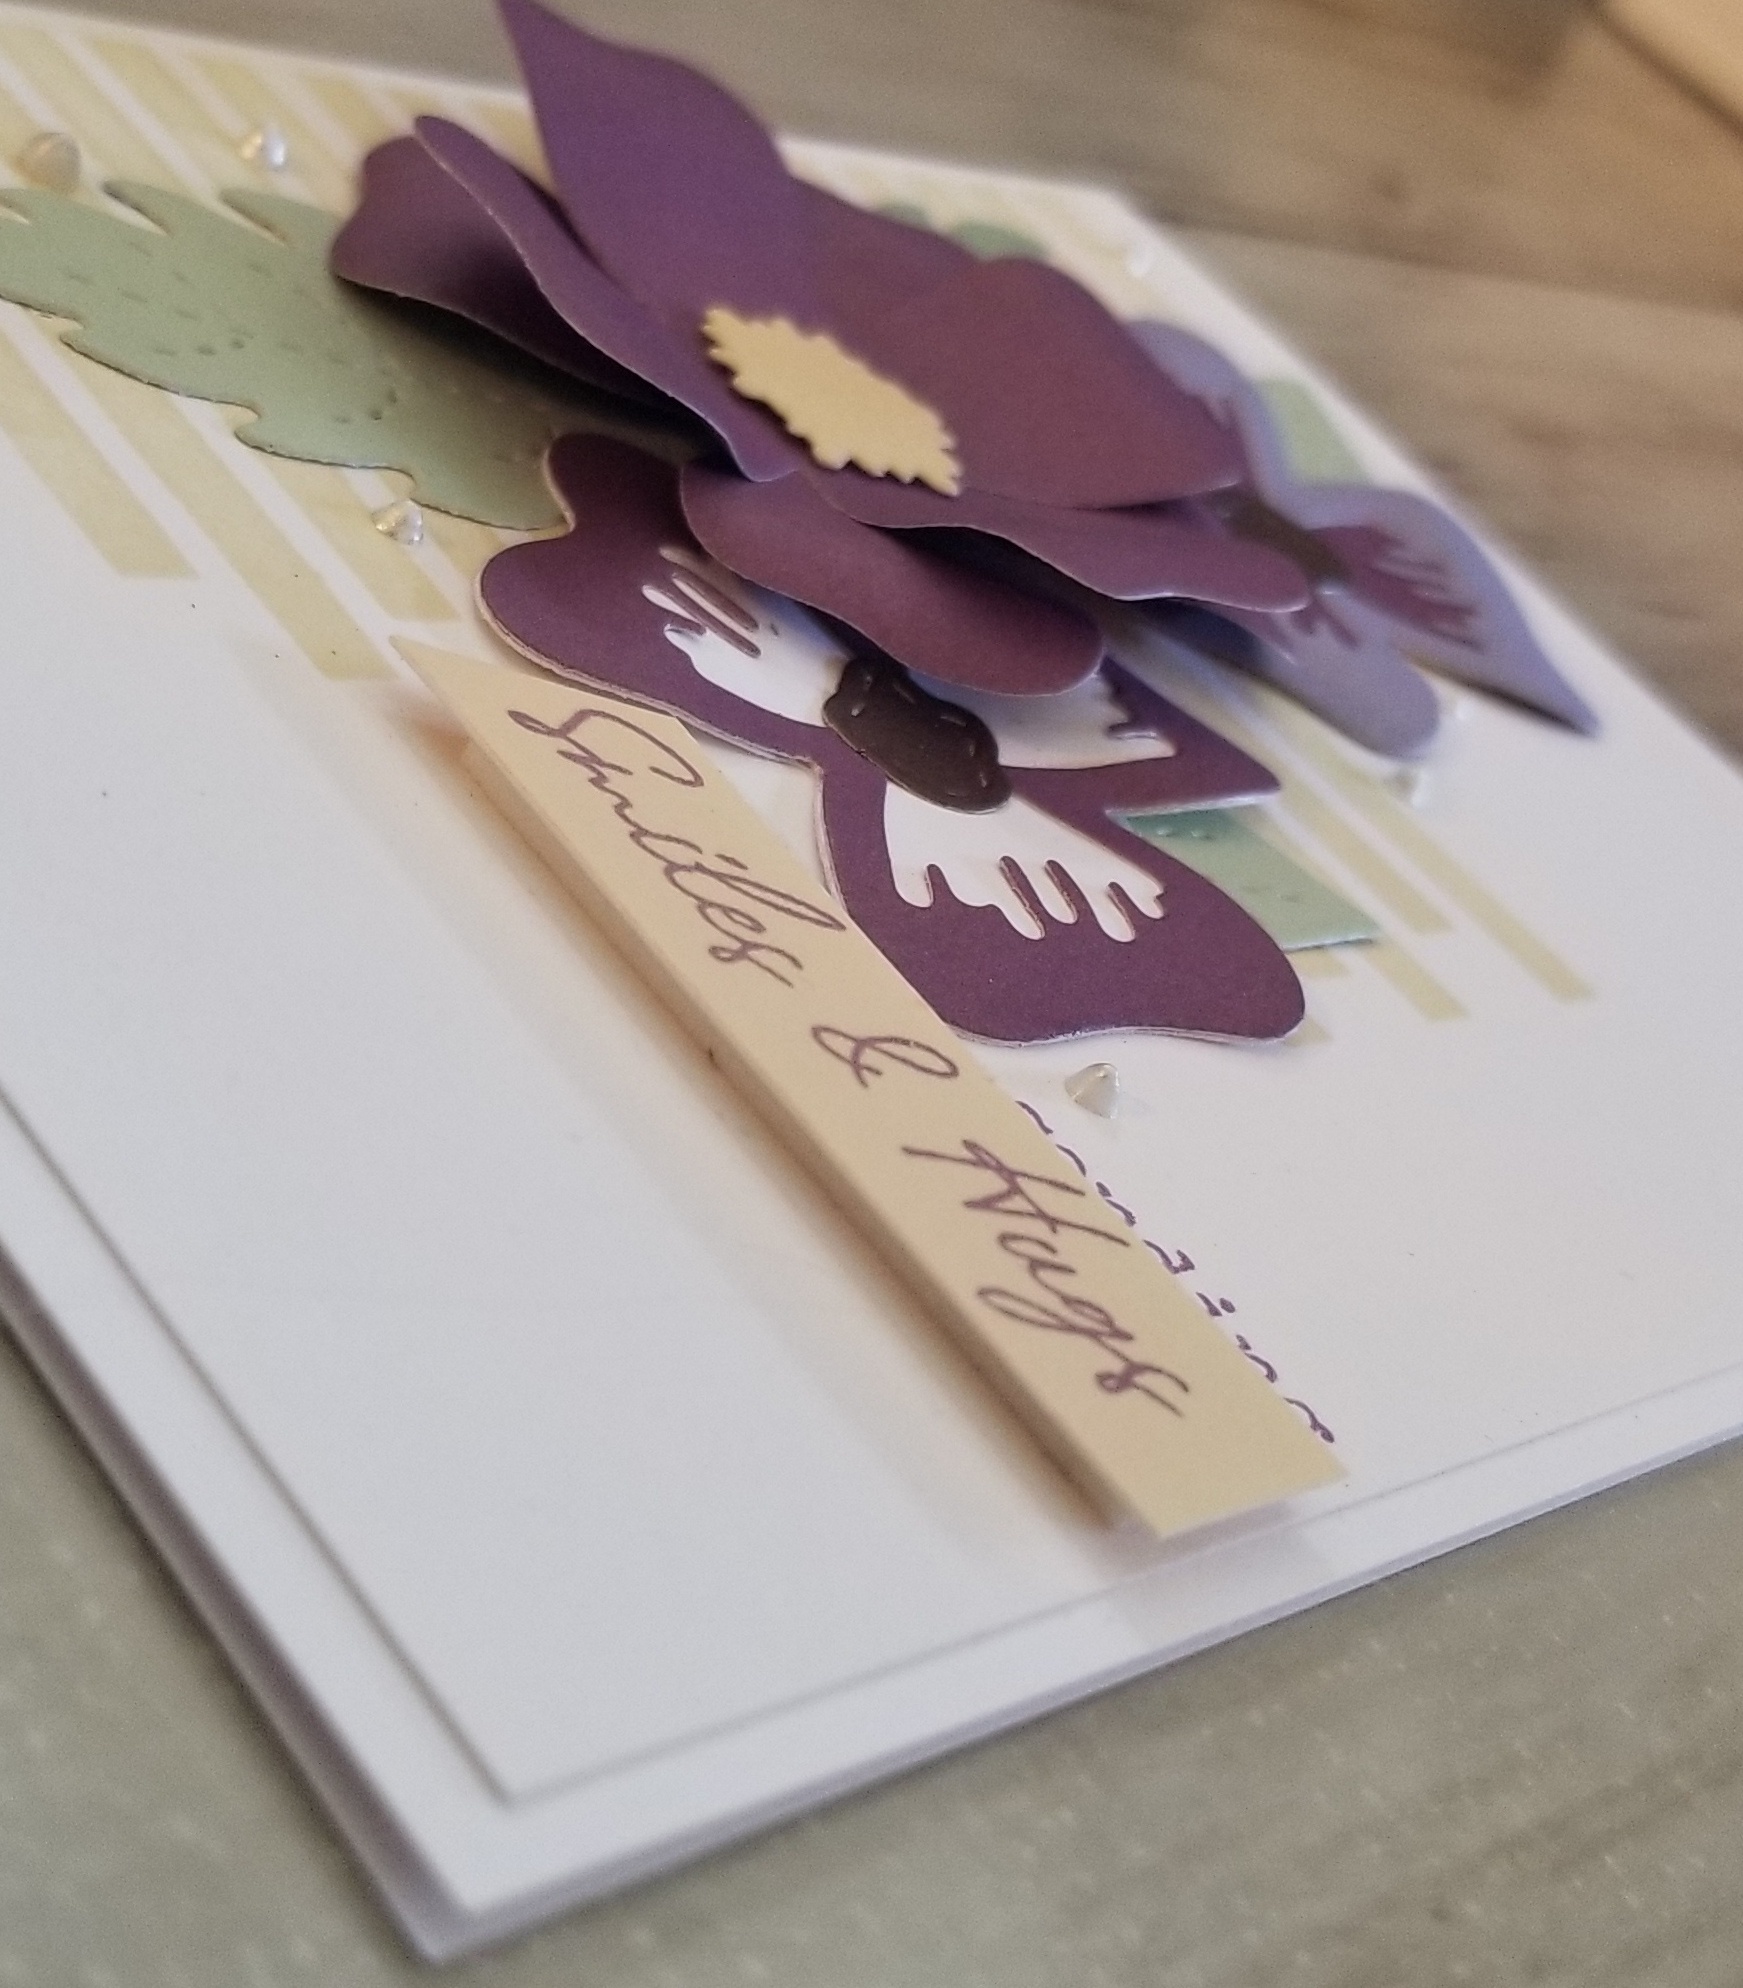
I added red sequins from the Holiday Loose Sequins (that are still available online!) with the , then some of the tiny gold glitter gems on the garland.  I decided it still needed a bit more, so I added a few lines with my black .05 journaling pen, then I added the larger gold gems to the end of those lines.

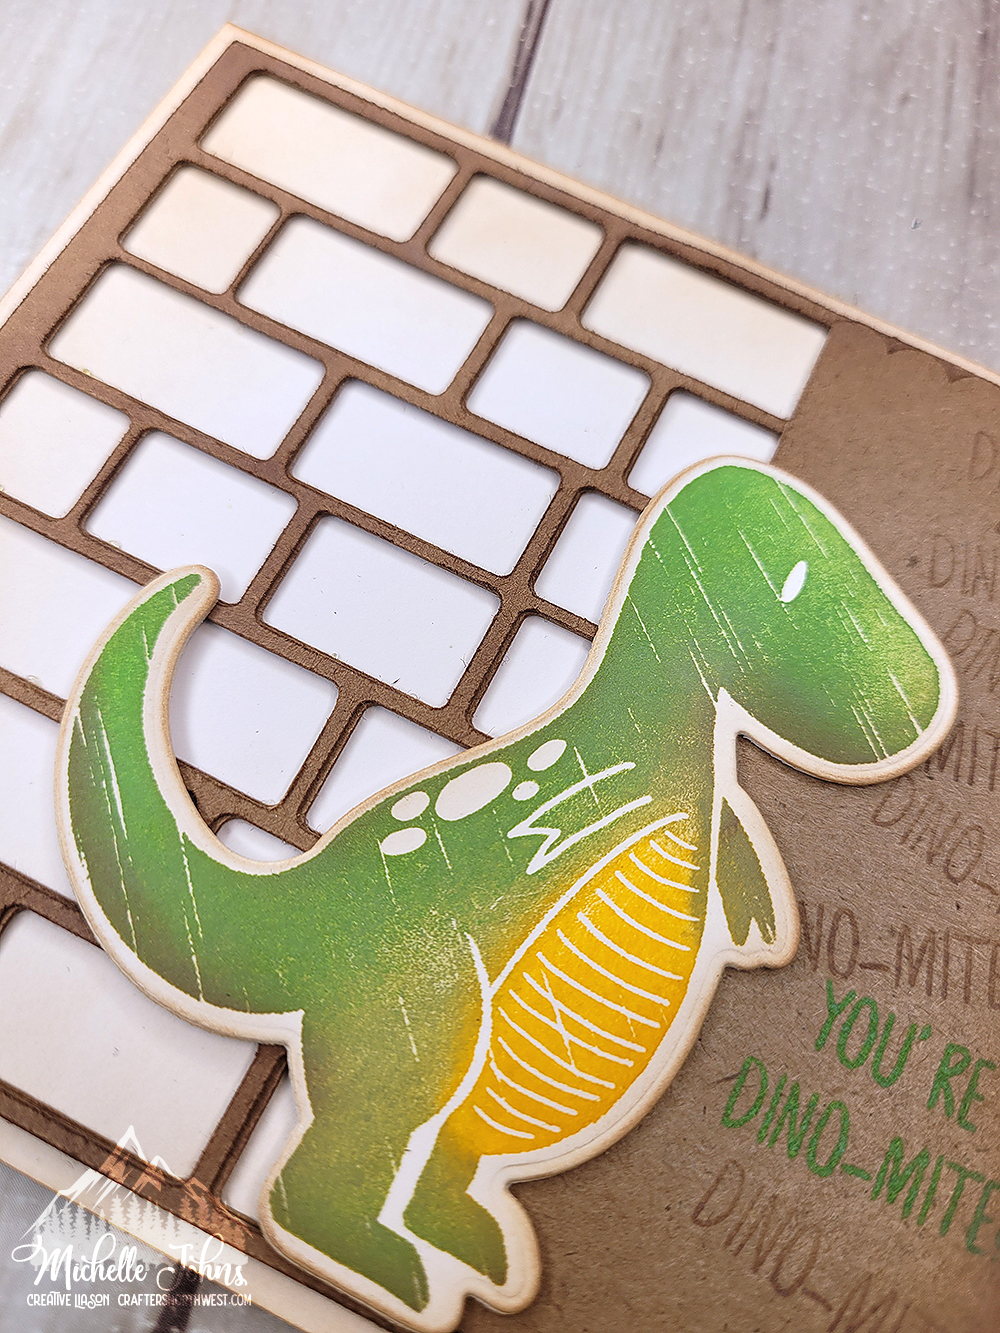
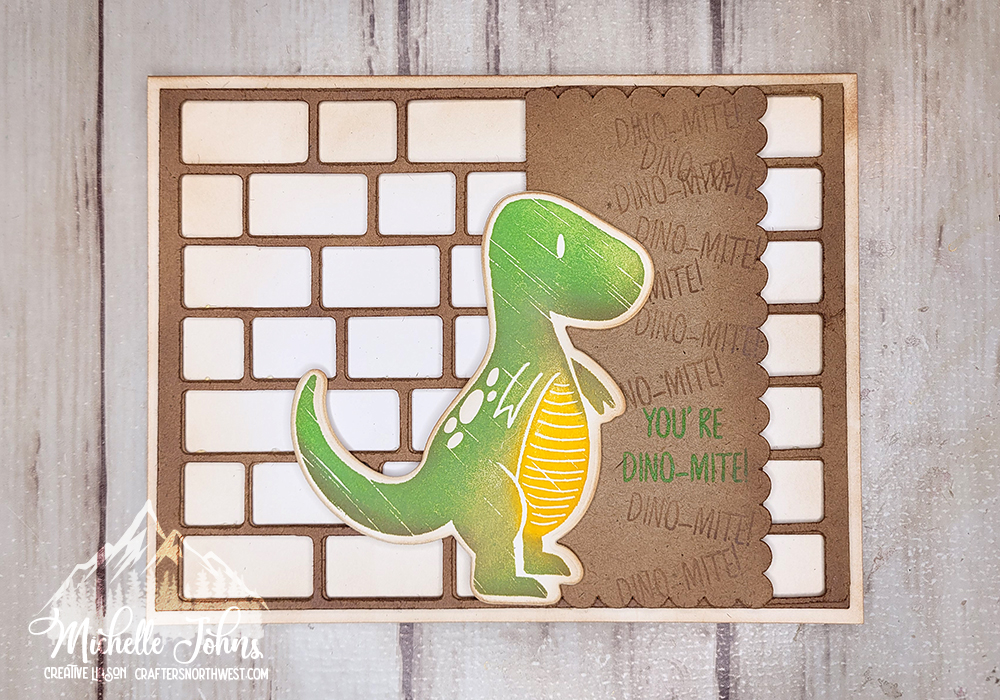
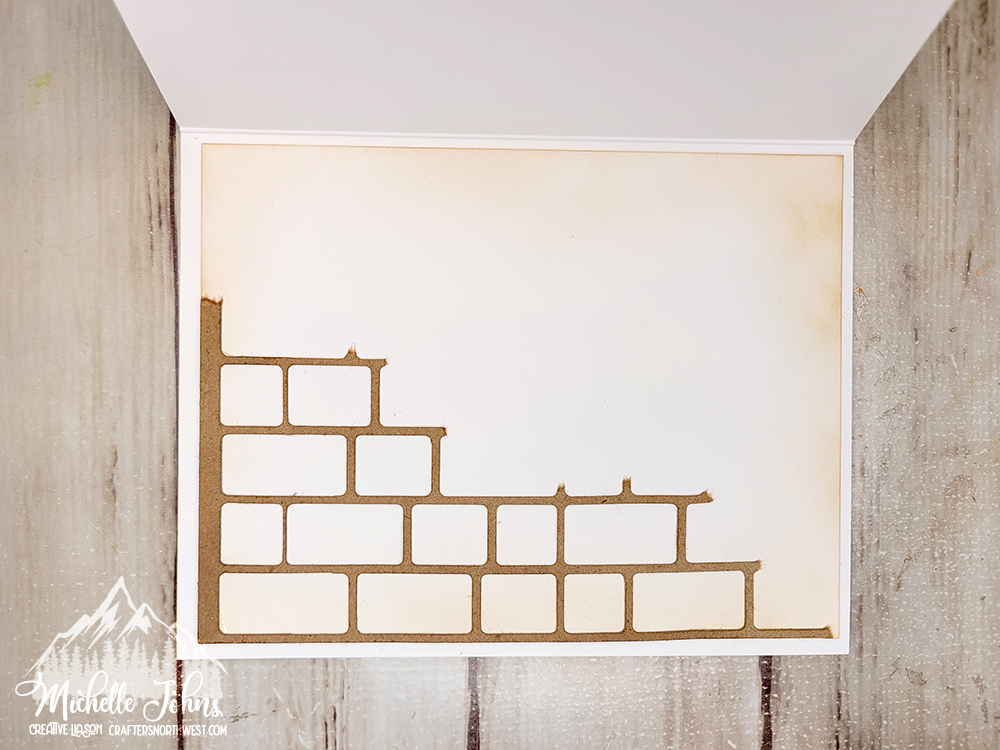
Of course, the outside of the house needed to have something on it, we couldn’t have it be just plain white!  So, I grabbed a sheet of the brick texture paper from the textures paper pack.  These bricks work perfectly!

I used Liquid Glass to adhere everything except the sequins, and for those I used Tombow Multi Bond Glue.

The card is a 5×7 card that I made from White Daisy Cardstock.  Though not shown, the inside reads “For You With Love”, from the For All Occasions stamp set.  I used a 2″ x 2″ block for that, and combined the two sentiments onto one block.

I would love to know what you think about this card!  For every share of this blog post, and comment on this post, and comment on the Facebook post with this card, you will be entered into a drawing for me to send this card to you, for you to be able to use to send to someone! (or keep for yourself!)  I will draw a winner on December 11th!  And, if you have made it this far, if you put a penguin emoji in your comment (here or on facebook) you will receive 2 entries!

Thanks for stopping by!  I hope that between myself and the other ladies, you have been inspired to join us over at Heart 2 Heart Challenges!  You have until the end of the month to participate!  I hope to see you over there!

~Michelle

Inspired by Silver and Gold

Today I am participating in a blog hop with CTMH Techniques.  The theme of this hop is Silver and Gold!  I am sure you will get many fantastic ideas!  Just follow along in the hop, and you will get back to where you started.  You may have started here, or you may have started at Brandi’s blog.  Either way, let’s continue on with the hopping, shall we?

I was inspired by a card that I found on Pinterest, and just had a blast with lots of bits and bobs of left over bling!


I did some stamp surgery with one of the sentiments, to make it even more fun!  I embossed each line with silver and gold embossing powder!

I think I quite fit the challenge, what do you think?  Do you have one or two (or more) pieces of bling left over in a pack?  This would be the perfect way to use them up!  (they don’t have to be only silver or gold!)  I would love to see what you do with this idea!

Now, if you would be so kind as to leave a comment before you hop away, I would greatly appreciate it!  Then, you can hop over to Judy’s blog, and see what she has for you!

Until next time, have some crafty fun!

~Michelle

Rose gold simplicity!

Have you seen the rose gold papers that CTMH carries?  There are 6 different designs, with rose gold foil on them!  They are so shiny and pretty!  They are perfect for cards, and like with a little black dress, you can dress it up or dress it down!

These two cards use the exact same measurements, but with the different papers, they look so different!  One looks a bit more ‘formal’ than the other.  I love how just changing a paper can make a world of difference!

Just look at all that shine!

These cards were first inspired by this week’s challenge over at H2H Challenges!  You should check them out!  Then, I started looking at the Make it from your Heart book, volumne 1, and pattern 20 was my starting off point!

I hope that these cards inspire you to try the Rose Gold Papers!  They are beautiful and fun!  (and so easy to use!)

Do you have problems with making masculine cards?

I know that sometimes I do!  I thought that the Oh Deer challenge over at H2H Designs was perfect to get in a fun guy card!  And the great news, it’s fairly easy, too!

I grabbed a deer image off of one of the CTMH cartridges, and did some editing.  I cut it out a couple of times, so that I wouldn’t have to worry about foam tape on those teeny antlers!!

I used three different distress oxides to color the back panel, then sprinkled some water droplets on it, then sprinkled some gilt gloss spray over the oxides.

I used just a scrap of the french vanilla cardstock to help the sentiment pop off the card.  The sentiment itself was embossed with gold embossing powder.

The card went together super quickly!  And I could imagine it working with any number of color combinations!

I would love to see what you come up with, with the inspiration you get from the other ladies participating in the H2H Challenges!

Until next time, I hope you are able to stay crafty, my friends!


~ Michelle