Monthly Archives: August 2019

Shop your stash Saturday ~ Skimpy supplies

Welcome back to another Shop your Stash Saturday!

I know that if you are seeing this, you likely have a stash of paper that you either didn’t use because you completed the first project, and didn’t get back to it, you love it and don’t want to use it, or any number of reasons.

Today I have just a bit of the “A Slice of Happy” cardmaking workshop your way. As you can see, I don’t have much of this kit left! I cannibalized it for other projects! Until this project, I had never inked up the stamp set that came with it! I love the set, and I don’t know why I didn’t use it . . . too many projects, not enough time, I think!

So, I started with the directions, and had to adjust, since I didn’t have as much paper as it called for! Just one sheet of 12×12 B&T, 1 sheet of whisper cardstock, and a partial piece of sapphire cardstock.

I wanted some of both cards, and wanted more that just 2 of each, so . . . math time it was! I figured out that I could get 4 cards of each design with what paper I had! Woohoo!!

So, here’s what I did:

From my 12×12, I cut 3 pieces that were 3 3/4 x 12.

Then, I cut 2 of those pieces into 5 1/4 x 3 3/4 pieces, which gives you four pieces.

From the remaining 3 3/4 x 12 piece, I cut 4 pieces that were 1 1/4 x 3 3/4, and four pieces that were 1 1/2 x 3 3/4.

You should have a couple of scraps that are 1 x 3 3/4. Cut each of these to 1/2 x 3 3/4.

You are all done cutting the B&T piece! Yaay!

Now, for the Whisper, I cut a 4 x 12 strip and cut that down to 3 x 4, which gives you four pieces.
Then I cut another 4 x 12 piece, and cut that down to four pieces that were 1 1/2 x 4.

Now the sapphire. For that one, all I did was cut four pieces that were 3/8 x 4.

Oh, the white daisy might be important too, yes? Four pieces that are 2 3/4 x 3 3/4 and four pieces that are 4 x 1 3/4. Plus a scrap that is about 4 x 4, to stamp the stars on.

Then, it’s just as easy as just layering all of the pieces together to make the cards!

These cards came together very quickly! The longest part was the coloring of the pizza!

So, shop your stash! Complete a project that you have just set aside for ‘another time’, crunch some numbers and do something like I did, or mix it up and do both!

I bet you can find something that needs to be done! Show me when you complete it! I would love to see!

Thanks for stopping by!

Oh, and yes, I have a few more tiny scraps, but that makes me happier than a 12 x 12 sheet that is doing nothing!

Thinking of You Gifts

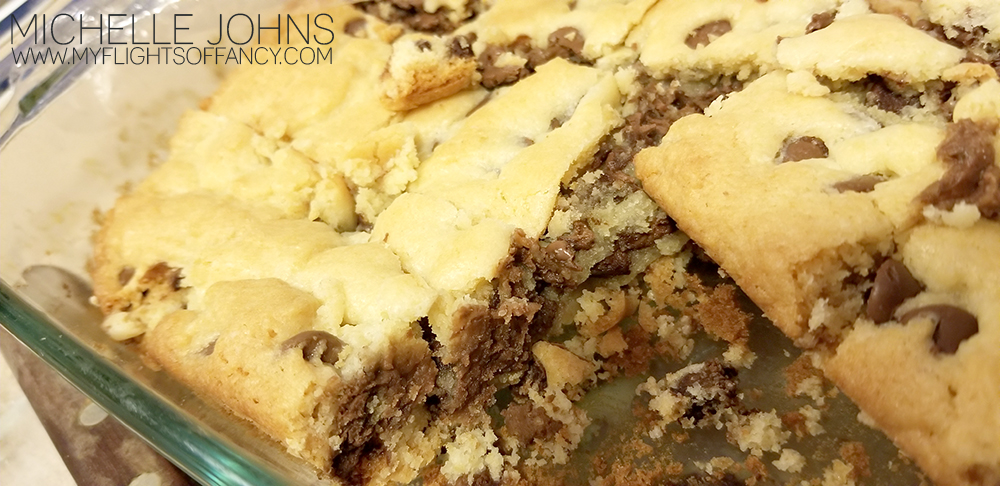
Sunday’s live video was all about giving some yummy treats to someone, just because. We decorated a mug and added some yummy cookie bars and come coffee packs, just because.

These little gifts were super fast to make. You will spend more time waiting for the cookie bars to bake than anything else! (and even that isn’t too long!)

So, click on over to the FB group and watch the live video (on replay) and make yourself some fun mugs!

Now that you have watched the fun video, let’s make some of these fantastically easy cookies, shall we?

I did NOT come up with this idea by myself, it was a fantastic pinterest find! (actually, we found a bunch of sites that copied the first one, but left some of the info out, so I went searching for the original, and luckily, I found it!)

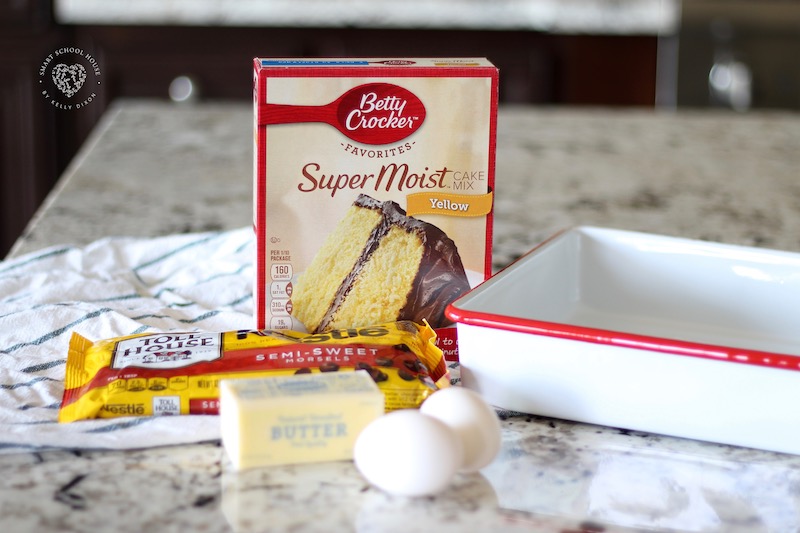
Look at this beautiful photo . . . . this is all that you will need to make these cookies!


(Image from smartschoolhouse.com)

And if you click here, you will find the recipe and instructions, and even a short video of her making them!

I am telling you, these are so easy to make, and they are sooooooooooo good! They puff up much more than you think they will! I don’t think there is a size of pan listed. I would stick close to an 8×8 sized pan!

You will add these to your go to treat list, I promise!

Thanks for stopping by! I hope you have a great day!

Let me know if you decide to make the treats (food or mugs) and share a photo! I would love to see!

See you next time!

MCM: Thank You

Today is an easy project, and could be used with any color combination that you might have or want to use! I used Sapphire cardstock and ink today, however, use what works best for whomever you are giving your card to!


{If you cannot see/watch this video, click here to watch it.}

You could even make up a whole set of these with different sentiments on there!

I hope that you liked today’s card!

The items needed for today’s card are listed below.

White Daisy Cardstock: 3 x 4 (qty 2)
Sapphire Cardstock: 3 1/4 x 4 1/4 (qty 2)
White Value Card Base & Envelope
Sapphire Ink
Clear Embossing Powder
Into the Wild Scrapbooking Stamp set
Thank You Badge Stamp set

Adventure Awaits with H2H

Are you ready for another Adventure? I know I sure am! At the beginning of the summer, Audrey went on a trip with one of her good friends, and they camped for a couple of nights at Crater Lake. It’s a beautiful spot in Oregon, with a gorgeous lake, and a hike around the bowl, and so many beautiful sights to see!

When they got back into cell range, she sent me a few photos, and I knew I needed to scrap them! So, I went back to the mini album idea, I’m thinking she will like it, at least, I hope she will! The Cricut You Are Here bundle have some GREAT stamps for travel! (not to mention some great cuts, too!)

I started with a New England Ivy cardstock base, and realized that it was too heavy. So, I added a bit of the wood grain paper from the Into the Wild paper packet at the top of the page. I left the green at the bottom because A. it was a bit heavier, and B. it would work well with the trees that are in the photo.

I stamped 4 of the images on white daisy in archival black ink, and then decided that the road sign needed to be green instead. So, I restamped it in Fern ink. I wanted to put a little something over the photo (once I get it printed), so I used a bit of vellum and stamped on it with the archival black ink. I used two different stamps to get the sentiment that I wanted.

I wanted the wifi stamp on there since there was zero cell service up there for her. So I stamped it in second generation charcoal ink, right onto the wood piece. I haven’t printed the photo yet, but this is the photo that will be going onto this page!

This will be an awesome page, won’t it? She sent me a few photos, so I might add a few flip flaps to put other photos and a journaling spot for her. I did stamp the little ‘you are here’ markers from the Escape to Paradise stamp set and thin cuts in sapphire, lagoon, and candy apple red to put a marker on the photo, but since I don’t have it printed yet, I don’t know which would look best. So, I have them attached to the back of the page with a bit of washi tape!

Thanks so much for stopping by! If you had this page, what photo would YOU put on it? Leave a comment and let me know!

All products used are CTMH unless otherwise noted:

You Are Here Cricut Bundle
Into the Wild Paper Packet
White Daisy Cardstock
New England Ivy Cardstock
Archival Black Ink
Charcoal Ink
Fern Ink
Vellum
3-D Foam Tape
Liquid Glass
2 x 3 1/2 Clear Acrylix Block
1 x 3 1/2 Clear Acrylix Block
Fiskars Paper Trimmer

Shop your Stash Saturday

Happy Weekend! I hope yours has started well!

We are starting another new weekly feature here on the blog, called Shop your Stash Saturdays! It’s going to be all about using what you have! While I love shopping for more crafty stuff as much as the next person, sometimes I really like (and should) use the stuff I have. I mean, I DID get it for a reason, right??

So, different weeks will focus on different parts!

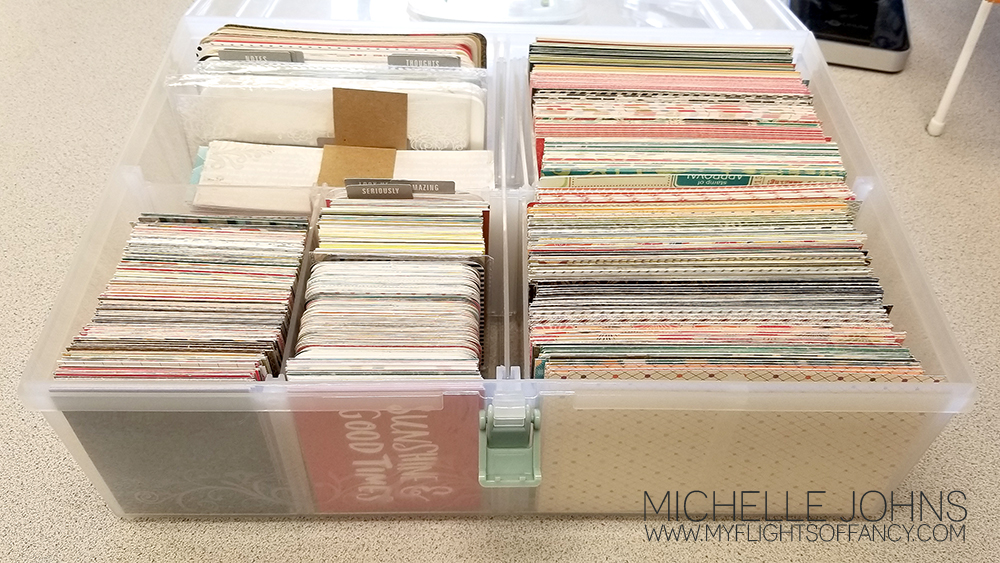
So, first up, how do you store your scraps?

Do you have them in a drawer?

Do you have only a few left, and in a bag?

Do you have a LOT left, including 12×12 pieces, so you keep them all together?

Have you cut them into small, usable pieces?

As you can see, I seem to have almost all of the above!!

So, I need to figure out what I like best, and start sorting! I do like the container. Those are 4×6, and 3×4 pieces (mostly) with a small pile that is 2×6. This is one of the old medium containers that we used to sell. However you could do this in the new ones as well!

I had some sheets that were just one or two left in a paper packet, so I cut them down to 4×6. That means that they are large enough to use on a card, I can use them in spots on a layout, if I wanted, and I could use them for cricut cuts very easily!

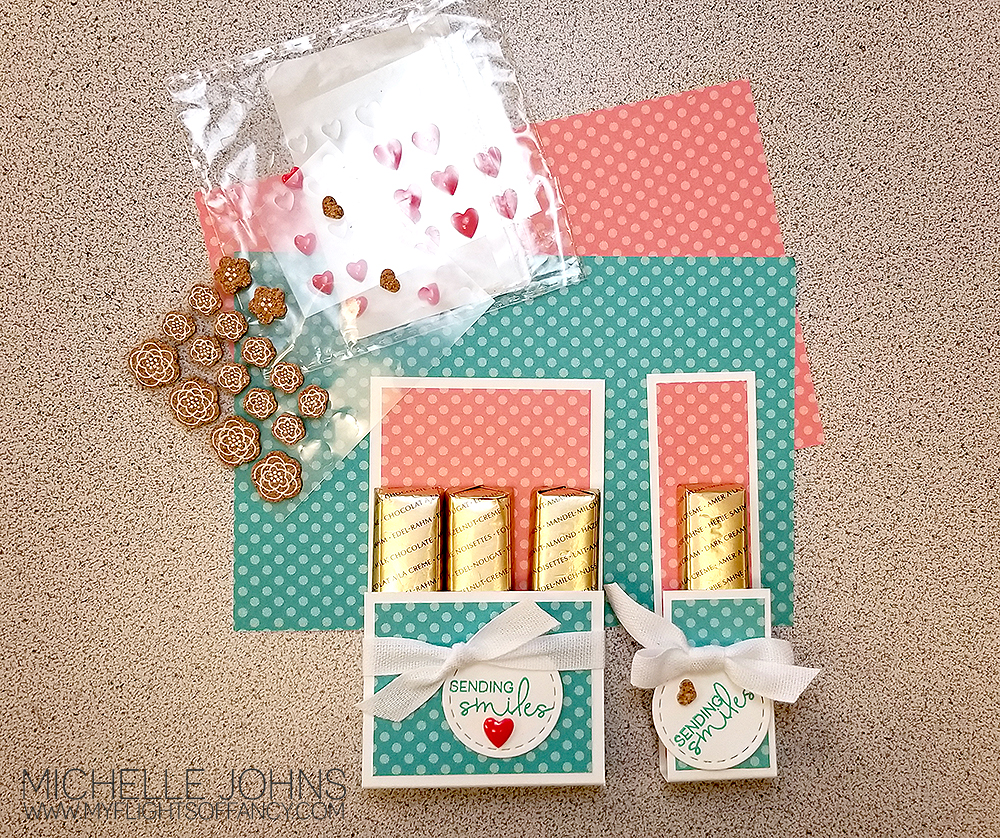
So, that being said, I wanted to show you what I ended up making, with just a few scraps!

I used some white daisy cardstock to make the base, and even had some extra, hence the smaller one! I will have the dimensions below, but know that I was able to get the decorations for these and many more from just a few pieces of these 4×6 scraps!

I made sure to check my scrap embellishments too! We don’t want to neglect those either!

I really like what I ended up with here, and I hope that you do as well! They are super easy to make, and I’m positive that you have some scraps that you could use up, too!

Who would you make up some of these fun little treats for?

See you soon!

White Daisy Size:
2 1/2 x 6 3/4 scored at 4 1/4 & 4 3/4
small scrap for stitched circle

B&T:
4 x 2 1/4
2 1/4 x 1 3/4

Feature Friday: Stamp sets

If you are following my blog, you probably know that I LOVE my CTMH stamp sets! I think I have shared the story before, but just in case I haven’t, let me share now.

10 years ago, I was a party of a monthly group that would get together to make a set of projects (usually cards) and place an order of product. I was getting my crafty time in with other ladies, and I was having a blast! I ordered a stamp set that I LOVED the concept of!

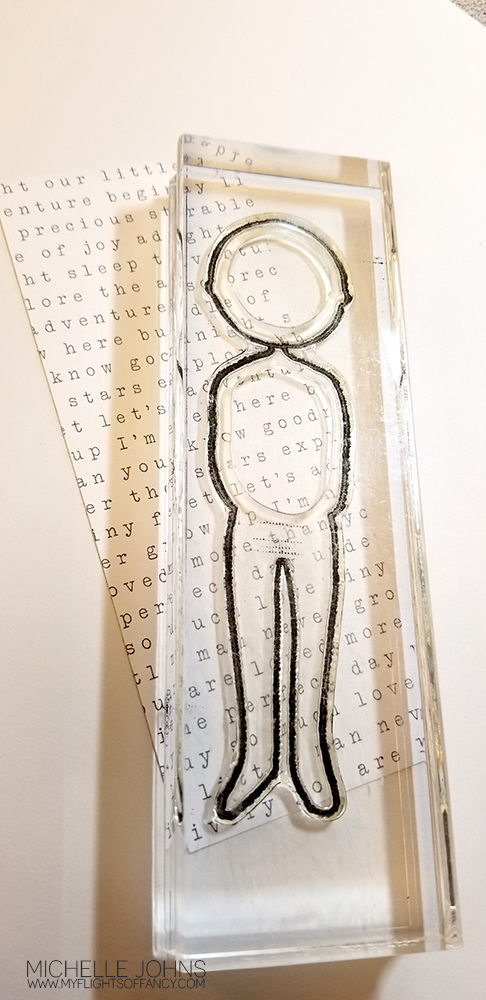
It was a “people” set. There were guys and gals and kids and baby heads, and bodies and each arm individually, and legs, and feet, and other items too. There were a LOT of stamps in that set!

I had hundreds of ideas on things to make with it! However, each of those pieces was on a square wood block. So, just in case you didn’t already know, most people can’t see through wood! (amazing, right?!?!) So, while I loved the set, I just could NOT get anything to line up, for the life of me! (And it looks really strange to have the head and neck floating above the neckline of the body below it!)

That being said, I was still excited, and was getting ready to sign up to be a representative of that company. I mentioned it to a friend that lived (and still does) across the US from me), and she asked “Have you heard of CTMH?” I responded with “I don’t even know what CTMH stands for, so, no? Probably not!”

Well, as you can probably guess, it stands for Close To My Heart, and I LOVE it!! She told me that the stamps were clear and the blocks were clear, and you could see through them. I was in love without ever having used them! My problem had been solved! They, of course, didn’t have that stamp set that I loved so much, but they had so many other things that I loved!

I signed up and was Tickled Pink! (that was the campaign that was happening then!)

So, let me show you some about these stamps!

1. They are clear. Every stamp set is clear. You can see through them to get your stamping aligned just how you want it!

2. You don’t have to store wood! This isn’t a big thing to everyone, however I have 4 kids and pets, so storage space is at a premium! If I don’t have extra stuff to store, then that means I can keep it in a smaller space (or, you know, get more things to fill the space that the wood would have taken up, right?) CTMH stamps use acrylic blocks to stamp with. Once you have a few, you are good to go!

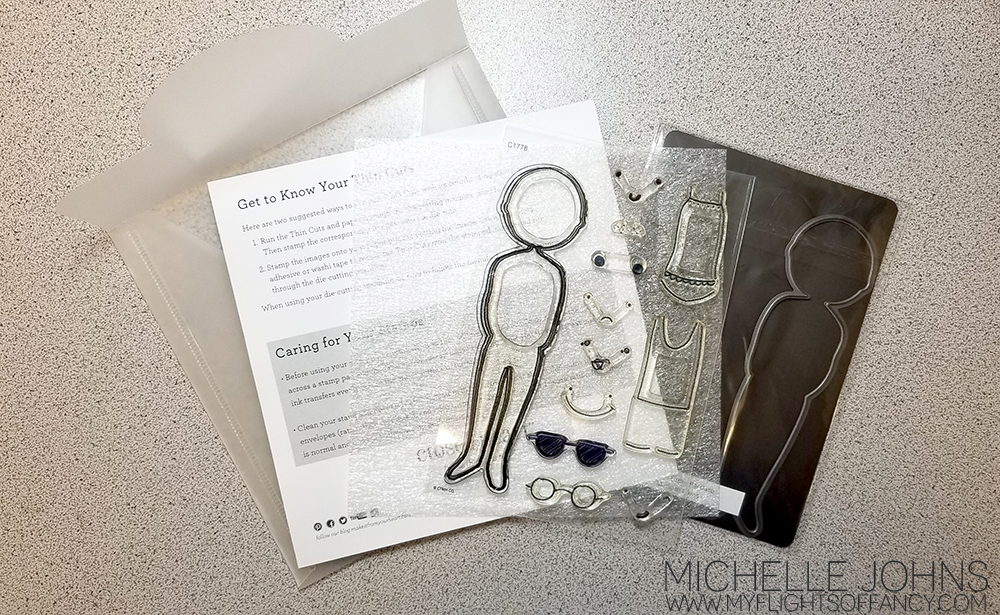
3. They don’t take up much space! Each stamp set comes as a 6×6 sheet with a foam piece and care instructions, inside a plastic storage envelope. They are about 1/4 thick, and if the set has matching dies, they fit right inside the same envelope.

4. Stamping Surface Every stamp set includes a foam sheet to help you get a nice, crisp image. The old red rubber stamps have foam between the rubber and the wood to help give cushion to the stamping for a nice image. Removing the foam means that the stamp can continue to be clear and see through, so you know exactly where you are stamping.

5. Flexability One of the best things about these stamps is the ability to change them! You can take a straight line and use it straight, and then put a little (or a big) curve into it, and continue using it! So very many options!

This is just a small list of things that are awesome about the Close to my Heart stamps, I would love to know what else YOU love about them!

I figured I would share the card that came of the images above, because I thought it was pretty cute!

And, because I know you can’t see the shirt very well, I decided I needed to add a bit more to it, so, using masking, I created this MOM Hugs shirt! {I actually clapped when it worked PERFECTLY!}

I would love to send this fun MOM Hugs card out to someone! Share this post on social media, and leave a comment here stating that you did so. On Friday 8/16 I will draw a name from those comments and send this card out to you!

Thanks so much for stopping by! I hope I brighten your day just a bit!

See you tomorrow!

Pages & Projects: 1 Year Thanks Bags

Hey everyone! My friend Danielle and I are doing a number of things this month, to help challenge each other to be better, and one of the things that we are doing is a series of videos on Thursdays that will be Pages & Projects. We will alternate each week what we do, so you should make sure to come and check out the videos each week! You can find her project here.

That being said, this week I am starting off with a thank you project for some of the doctors and nurses we had when Audrey was in the hospital last year. This weekend is her One Year anniversary of getting to come home! So, we will be delivering some of these fun little bags on Sunday!


{Can’t see the video in email? Click here to watch!}

I hope you enjoy the video, even my oops, and my fix for it! I left that all in for you, so you can see that EVERYONE does the oops, and generally it is fixable with a bit of thinking!

I would love to know what papers you would use, and who you would give a little bag like this to!

Project sizes:
White Daisy:
4 x 12 scored at 5 1/2 & 11
4 x 10 scored at 5 1/2 & 7
5 1/4 x 4 1/4 scored at 1 3/4 on all sides

B&T Pieces
3 3/4 x 5 1/4 (qty 3)
3 3/4 x 2 3/4

Charcoal Cardstock
2 x 5 1/4

Shaker Thin Cuts:
Largest circle in White Daisy
Stictched Frame in Charcoal

Products used:
Into the Wild paper packet
White Daisy Cardstock
Charcoal Cardstock
Charcoal Ink
Simply Said Stamp Set
Shaker Window Thin Cuts
White Ribbon
Micro Tip Scissors
3-D Foam Tape
Liquid Glass

What is a Basic Tool Kit?

Have you ever seen a class or event listing that says “bring your basic tool kit”? And think to yourself, but what does that mean?? I know I have! So, I thought I would share with you what MY definition of a ‘basic tool kit’ is.

So, it kind of looks like a lot of stuff, but that’s just because it’s all laid out pretty, just for you guys! I know I like to see things, and not just a list sometimes. So, let’s go over what we see in the photo, shall we?

First, a paper trimmer and refill blades. Now, there are ALL sorts of paper trimmers out there. This is the one that I am currently using. I really do like it! Fiskars is a really great brand, that stand behind their product! Can you paper craft without a paper trimmer? Of course you can, this just makes the job so very much easier!

Right next to the paper trimmer, you see a number of different adhesives. Glue dots (two sizes, regular and micro are what I use the most often!), Liquid Glass (with the fine tip applicator, a tape runner, and foam tape. These are all great for different reasons, and I use them all often! At the end of that column, you will see an anti static pouch. Yes, that is kind of the opposite of ‘sticky’, and let me tell you why it’s here! When you are using the compliment stickers, you may want to pop one up. If you don’t make it not sticky, when you put it into your page protector, and then into your book (assuming a scrapbook layout in this example), when there is pressure, the parts that don’t have foam tape on them specifically, may stick to your project, giving it an odd dimension. If you use the anti static pouch on the back side of the sticker first, then it will pop up quite nicely, and you won’t have to worry about it sticking where you don’t want it to!

Next up we have blocks. I have a small variety of sizes shown. The top/left three of those shown are in the block starter kit. This kit is a fantastic place to start! You have most of your bases covered with those three blocks. I have added an additional two blocks, as they are perfect for sentiments and tiny stamps. All of the block sizes shown here are: 3×3, 2×2, 2×3 1/2, 1×3 1/2, 1×1.

Continuing on, we have scissors, of course! I show two pairs here, however, you don’t need to have two. Both of these are micro-tip scissors, which make them great for fussy cutting out images from the B&T paper or stamped images. The grey pair (in this photo) are non stick as well. Which means that I can cut the foam tape with these, and not have to worry about them getting sticky! My blue pair (they are sold in grey now) are 10 years old, and I have never had to have them sharpened or replaced! While I don’t craft every day, I can say that I average at least one day per week during that whole time, and probably even more frequently than that! These are nice, quality scissors!

Directly below the scissors we have some washi tape and post it notes. I tell my ladies to have their “Ugly Washi” in their kits, as we use it on the back sides of projects for various reasons! It doesn’t have to be ugly, but if you buy a pack, and have one roll that you KNOW you will never use on a project, this is the perfect use for it! We will use it to tape ribbons on the back sides of layouts and cards, tape small pieces together to make them easier to glue on as a whole, and a few other reasons too! It just comes in handy! The post it notes are used for masking our projects and making notes as well. Maybe you want to use a specific photo on a layout, or you can’t remember what size photos you want to put onto the layout. Post it notes are perfect for this!

Moving to the last ‘group’ of items. Most of these will be pretty self explanatory, but I do still want to list them for you. We have an embossing tool, a piercing tool, a pencil, journaling pen, ruler, and a bone folder. I think most of those are pretty clear, right? The embossing tool for scoring card bases, and even making fun designs on things, the piercing tool is great for piercing (go figure!) and also picking up the already sticky embellishments to put them onto your projects. The pencil, pen, and ruler speak for themselves, I do believe! And the bone folder is great for burnishing the card bases, and smoothing out the liquid glass, to give a great finish to your project!

The last two items in this photo are a Rub & Remove eraser and a needle threader (ok, well, two of those . . . that’s how they come!) The eraser is great for getting stray adhesive off of your projects or your tools. And the needle threader? Well, that comes in super handy for the twine that you are trying to get through holes of paper or buttons! This super inexpensive little tool has come in SO handy, you will for SURE want to add it to your basic tool kit!

The other thing that I will usually bring, but didn’t get into the photo, is my VersaMat. This is a self healing, gridded cutting mat on one side, and a soft stamping surface on the other side.

Now, hopefully I didn’t get TOO wordy for you today! At least I had a picture as well, right?? Do you have something in your basic tool kit that I don’t have in mine? Do I have something that you hadn’t thought to have in yours? I would love to hear about those items! Do share!! (I know my friend Eileen has dental floss in hers, to get her paper up after she has glued it down, if she placed it wrong, or forgot a layer that should have gone down first)

Want more inspo? Check out my friend, Danielle’s blog post! She has a few different things than I do!

Thanks so much for stopping by! Let me know what you think of my list!

See you tomorrow!!

Seeing Stars!

Do you know that I do a Facebook live every Sunday evening? It is at 5pm pacific time, and I do all sorts of crafty things! I have always had great intentions of putting the photos and dimensions up on my blog after the video, and, well, life seems to always get in the way! So, now I am going to turn over a new leaf, and get them up on the blog on the Tuesday following! So, welcome to the first Tuesday repost of the Sunday live! LOL!!

Click here for the FB Live video!

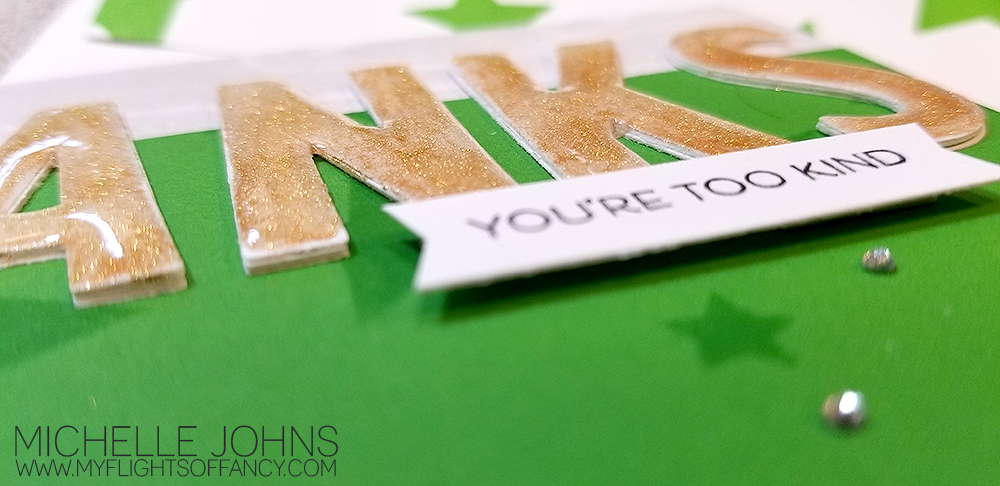
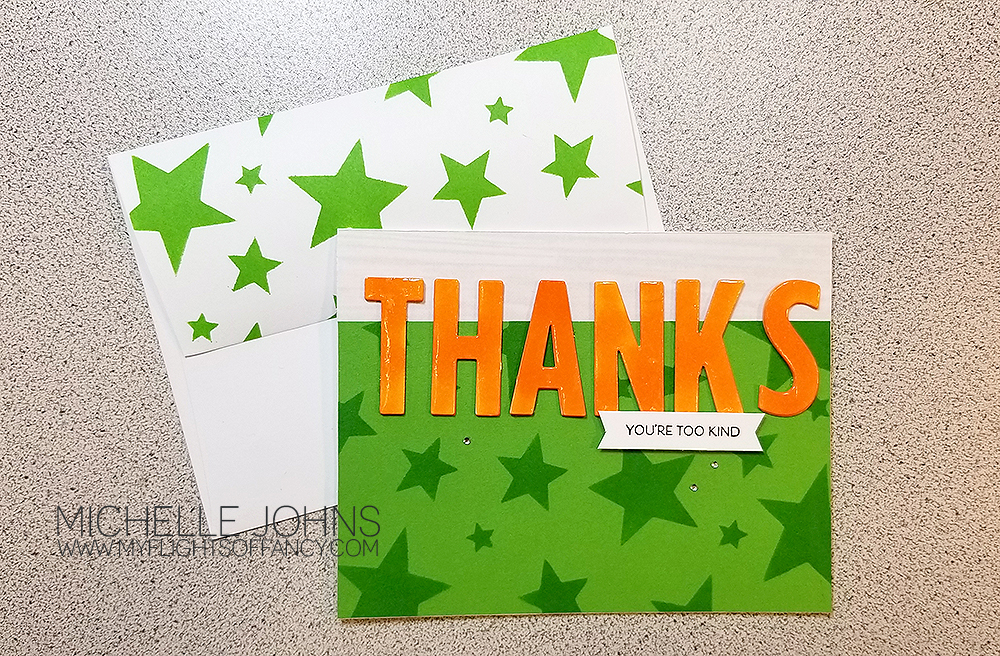
Sunday we were playing with stencils and different things that you can do with them! I have a few examples to show you, and we made a card with one as well! If you want to play along, here is the star stencil that I used. It is on the Artbooking cartridge, so you will need to have that cartridge to cut this stencil. It is slightly different than that image, as I wanted to add a few more stars. So, at the end of the post are the steps that I did to get this stencil, in case you want to try it with one of yours!

We used a variety of mediums in the video, including dye ink, pigment ink, texture paste, & embossing powder. Different things will give you different looks, so you should try them all out!

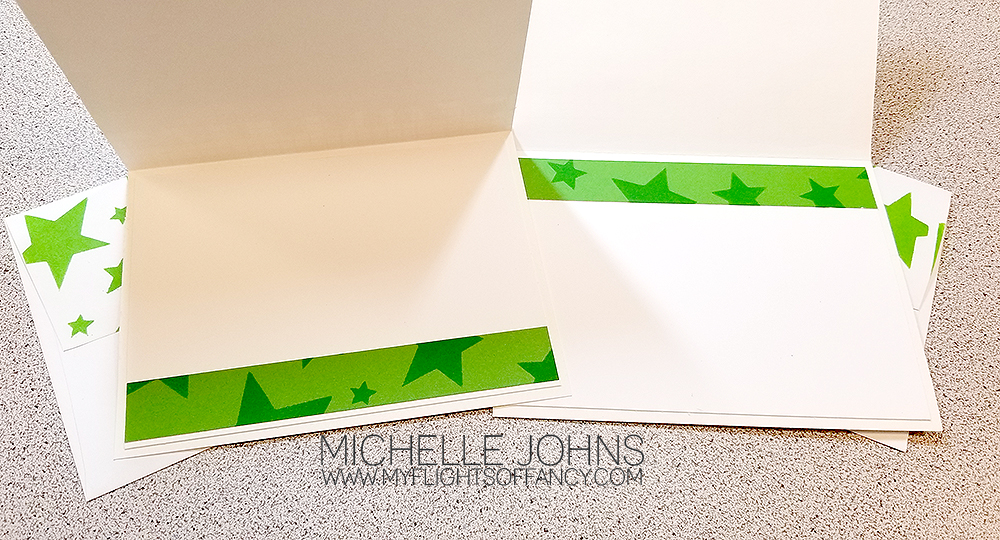
This card was so fun to put together! And super easy, as well! Maybe a smidge time consuming, but not too bad, overall! I hope that you make one too! Please show me what you make, I love knowing that my tutorials are helpful to you!

Click here for the FB Live video! While you are there, make sure to click ‘like’ on my fb page!

Paper size info:
Willow: 6 x 4 {Trimmed after stenciling to 5 1/2 x 3 1/4 & 5 1/4 x 3/4}
Into the Wild, Wood Grain B&T: 5 1/2 x 1 1/4
White Daisy: 2 x 3/8 & 5 1/2 x 4 & scraps for “thanks” letters

Step by step how to make your own stencil:

1. Open Image: #M3D15D Stars overlay from Artbooking cartridge and make it be 6×6
2. Add Shape>Square to your mat
3. Click and drag square to be slightly larger than your star overlay
4. Select both images and slice
5. Select the grey image that looks like your stencil, and delete.
6. Move the grey stars & outline to the side of your overlay
7. Add Shape>Circle & duplicate it
8. Shrink one circle to fit over just one star in the grey overlay
9. Select that circle and the grey overlay and slice
10. Step 9 will give you 2 grey stars separate from everything.
11. Delete the circle with a start cut from it.
12. Repeat steps 8 & 9 & 11 with the 2nd circle.
13. Select all 4 grey stars, and like with the grey square, click and drag, but make smaller instead of larger
14. Place the individual stars on the original overlay (mine is a lagoon color) in the solid portions of the overlay
15. Select ONE grey star and the overlay, and slice. (you can ONLY slice 2 layers at one time)
16. Delete (or move) both the grey and the lagoon stars. (move if you might want to cut more stars from the overlay)
17. Repeat steps 15 & 16 for the other 3 stars.
18. You are now ready to cut your stencil!

If you don’t want to do all of those steps (looks harder in writing than it really actually is!!), here is the link to my stencil that I am using in the video!

Star Stencil Design Space Link

Products used in the video:
Willow cardstock
Sapphire Cardstock
White Daisy Cardstock
Into the Wild Paper Packet
White Daisy Pigment Ink
Willow Dye Ink
Texture Paste Trio (Transparent Gloss)
Gold Tinsel Embossing Powder
Gold Shimmer Brush
Marigold Shinhan Touch Twin Marker
Liquid Glass
Archival Black Ink
Bitty Sparkles
Block Alphabet Thin Cut Die

I really do love seeing the creations that you guys and gals come up with! Leave me a comment and let me know what you think, and show me what YOU come up with!

MCM: Sending Many Wishes Your Way

Welcome to another Man Card Monday! I’ve decided to ramp up this series again, as I had many people tell me that they love it! We lady crafters seem to have a hard time making cards that aren’t too froofy to give to the guys in our lives!

So, today I have a card for you that I hope you will like! I was inspired by this card on Pinterest. So I decided to recreate it with the stamps and papers that I have!

Make sure to watch the video to put it together. The sizes for each of the pieces are at the bottom of this post.


{Can’t see the video in your email, click here to watch it!}

I am using Into the Wild papers, Charcoal and Linen cardstocks along with one of the card base and envelope from the value pack. I am using three different stamps for this card, the Colorful Texture in the Story by Stacy line, the Into the Wild Scrapbooking stamp set, and the Sending Smiles set from the Flower Market Cricut Bundle.

The inks used are Pebble, Mink, Heather, Charcoal, and Glacier. And the other ‘fun’ things are the white and gold ribbon, the mink twine and the mini stapler.

Thanks so much for stopping by! I would love to hear what you think of this card! And remember, show me your version of this card!

Wood Grain:

5 1/2 x 3/4 (qty 2)
5 1/4 x 1/2 (qty 2)

Charcoal:

5 1/2 x 3 3/8
1/2 x 4
5 1/4 x 1/2 (qty 2) {side note: you could do one piece that is 5 1/4 x 3}

Linen:

5 1/2 x 3
5 1/4 x 2 3/4