Monthly Archives: August 2019

FBL: Into the Wild Mini Album ~ Completed!

On Sunday’s FB Live, we finished putting together the Into the Wild Mini Album! I need to order an actual album for it now! (There are a few more options coming up in the new book!) It was so fun putting it together!

The only thing that I did “off camera” was to cut the cut apart sheet pieces and die cut some of the shapes from White Daisy Cardstock. Everything else was the same as it was left at last week!

The items for this album will be retiring on Saturday, so make sure to get them before they are gone! As I said last week, there are a few options on how to get your hands on this fun-ness! Let me know if you would be interested!

I did make a quick walk through video, so that you can see the whole thing finished! Click here to see that!

To follow along with the making of the album, you can click here for part one, and click here for part two!

I hope that you enjoyed this little mini album! It was fun to make!

Thanks for joining me!

Man Card Monday: Explore

I think this super fun card is great for so many things! The guys in your life will think it’s really cool! So, let’s get the info out there, shall we?

First, I’d like to say thanks to Sandy Allnock, who created this version originally, way back in 2012! It was great then, and is great now!! She has a PDF download with sizes for both this reformatted version and the original tri-fold shutter card. So, check her out, as well!


{If you are not seeing the video, click here to go to the blog post}

Cardstock sizes:

Black: 5 1/2 x 12
White Daisy: 3 3/4 x 5 1/4 & scrap for the circle (approx 3 1/2 x 3 1/2)
New England Ivy: scrap for the circle frame (approx 3 1/2 x 3 1/2)

Into the Wild Paper Packet:
Green Plaid: 1 3/4 x 5 1/4 (qty. 2)
Stars: 1 3/4 x 2 1/4 (qty. 2)
Trees: 1 3/4 x 1 1/4 (qty. 4)

Scoring:

With the 12″ along the top of your scoring board, score the full length at 4″ and 8″

Then, only scoring down to about 1 1/2″, score on the 2″ and 6″ lines. To help make sure you are scoring on the correct lines, turn your paper 180*, and scoring down to about 1 1/2″, score on the 6″ and 10″ lines.

The other items you will need to complete the card as shown:
You are Here Cricut Bundle (Explore Stamp)
Shaker Window and confetti Thin cuts
Into the Wild Scrapbooking Stamp Set
Mink Ink
New England Ivy Ink
Black Shinhan Touch Twin Marker
Tombow Glue
Liquid Glass
3-D Foam Tape

Thanks so much for stopping by! I hope you enjoyed this card! Who would YOU give it to?

~ Michelle

From Me to You

Welcome to another challenge from H2H Challenge blog! This is the last challenge of the month, and next week/month, you will be seeing new products available with CTMH, and I can’t wait to show you! This week is all about “From me to you” . . . which screams gift giving, right?

So, for this, I thought it would be perfect to create a card box to gift a set of cards to someone. I decided to go with the True Love Paper Packet, as I do love the colors in it! One of the ladies that I watch on Youtube quite frequently, is Sam Pootles, and she has a knack for making boxes. So, she was the first place I went! She has MANY boxes (many!) along with the tutorials for them. I found a couple of boxes for some smaller cards, but I wanted to make something to fit standard A2 sized cards (that means 4 1/4 x 5 1/2). So, I used her plan, figured out what sizes I needed, cut a test one, made some adjustments, and then came up with this fantastic little box!

This box holds 5 cards and envelopes perfectly. It is just one inch deep, so it wouldn’t hold a ton of cards, but you could easily make it deeper to hold more, should you want.

I did use a magnet to hold the box closed (since we no longer have our hook and loop dots!), and I couldn’t be more happy with it! I tied some white ribbon around the front flap, and it was just what it needed! I could add a sentiment onto the front of this box as well, however, I think it is just perfect like it is!

I do have the front, back, top, and insides covered with B&T paper, however chose to leave the side edges and inside top without the extra paper. Doing it that way allowed for the cardstock of the box to show through a bit more, which I really liked.

I hope you like the box, and the cards that I have inside! Let me know what you think!

Would you like to make one for yourself? I did a FB live Sunday video on how to do it! You could go and take a look, and make your own box!

Thanks for stopping by! Why don’t you come join us over at H2H with one of the weekly challenges? They are great fun, and give great inspiration!

All items used are CTMH unless otherwise noted.

True Love Paper Packet
Ballerina Cardstock
White Ribbon
Liquid Glass
Paper Trimmer
Corner Rounder
Micro tip Scissors
Bone Folder
Magnets

Have you shopped your stash today?

I was teaching a class the other day, and didn’t have the paper pack that the class was designed for, so I had to improvise!

So, what did I do? I shopped my stash, of course! The class used a bright happy paper packet, so I wanted to keep with that theory, and have bright happy colors!

I think I ended up with papers from 5 different paper packs! The class turned out great, and the ladies loved it!

Today I am going to share just the cards from the class, so, remember to put your Make it from Your Heart books to use, and use up those scraps!

I would love to see how you are using YOUR scraps! I do hope you will share with me!

Feature Friday: All about the Inks

Close to my heart has a few different inks, and they are great for a few different applications. Let’s talk about them for a minute, shall we?

First there is the Exclusive Inks which are Dye based inks. This is the group of inks that had the most colors. These inks will sink into the paper that you are stamping on.

Next are the pigment inks. These inks are thicker in consistency and are more opaque. When stamped on top of another image, they will blend less. These inks stay on top of the paper, and also take longer to dry.

Then there are specialty inks. Those are Archival Black, Intense Black, StazOn, and Versamark. They are do different things, and may look similar on your finished project, however, it’s all about using the right tool for the job.

Archival black is the blackest black ink that Close to my Heart has. I personally love this ink! It really is a true black color. This ink is archival safe and acid free. Once dry it is waterproof, lightfast, and fade-proof.

Intense black is also archival safe and acid free. Like Archival Black, it is waterproof once dry. This ink is fast drying and non-smearing.

StazOn is not an acid free ink, so you may not want to use it in your scrapbooks, however it is great for a good number of things, especially non-porous surfaces.

Versamark ink is an archival safe watermarking ink. This means it is a thicker, clear ink. It, like the pigment ink, will stay wet (or sticky) for a bit.

So, you are thinking “Ok, Michelle, so what ones do I use on what projects?”, right? Well, let me give you a few examples!

These first two cards I used the dye ink and pigment inks in both pixie and sapphire. You can see slight differences in the inks on the paper.

In this close up, on the right, you can see that the pixie and sapphire dye inks blend together where they overlap. On the left side of this little cluster, you can see the pixie pigment ink on top of the sapphire ink. It isn’t super obvious because pixie is such a light color, and sapphire such a dark color, however you can see the difference.

On this next example, I am using three types of ink. I used the Versamark ink to hold the white embossing powder for the lace doily. I used ballerina dye ink to sponge some color over top of it, and then I used the sapphire pigment ink for the sentiment, and used clear embossing powder over top of it. (this helped it dry so I could continue with my project, and tied the look into the doily that is under it) Since the versamark and the pigment inks stay wet/sticky for a bit, they hold embossing powder fantastically!

I used the dye ink to sponge, as the pigment ink would have stuck to the embossing powder, and I would have ended up with a look that I wasn’t really going for!

Now, for this post, I did not use Archival Black, Intense Black, or StazOn inks. The majority of my cards use Archival Black ink. This is one of my most recent uses. I will use Intense Black Ink if I am going to be using my alcohol markers, as the solvent in the markers will not pick up the Intense black ink. You can see the Intense Black ink and coloring on this project. I know I have used StazOn ink, however apparently it didn’t make my blog! Ack!

I hope this helps you to know which ink to use for which project! Still have questions? Let me know! I will gladly answer them for you!

Items used for today’s projects:

Value Card bases & Envelopes
White Daisy Cardstock
True Love Paper Packet
Sweet Girl Paper Packet
Into the Wild Paper Packet
Vellum
Ballerina Ink
Pixie Ink
Pixie Pigment Ink
Sapphire Ink
Sapphire Pigment Ink
Versamark
White Embossing Powder
Clear Embossing Powder
Colorful Texture Stamp Set
Love Right Now (Artistry Cricut Bundle)
Sweet & Lovely (Artbooking Cricut Bundle)
Basic Circle Thin Cuts
Stitched Circle Thin Cuts

Pages & Projects: Aspen meets Into the Wild

I have a super fun page for you today! It went together quickly, even with me making the changes that I did!

Close to my Heart has a fantastic blog, that has some great tips and freebies on it, so if you don’t already follow it, you really should! You can find it here.

So, for today’s pages, I decided to take a peek at the blog, and found a great post that had a free sketch with it too! So, this is the post I am referring to, and if you scroll down, it has a link for the PDF pattern that you can download, for free!

So, grab your favorite drink, print out the pattern, grab your favorite paper pack, and click play on the video! Come make a scrapbook page with me!

https://youtu.be/CF4NTAsRciQ

{Click here if you cannot see the video in your email}

Thanks for stopping by! I hope you share your creation with me! I would love to see it!

~ Michelle

5 things to know about going to a crop

So, you are going to a crop . . . what do you bring? How much to pack? Do you need everything from your craft room? It can be overwhelming if you haven’t been to one before, or if you are going to one that is new to you. So, let me give you a few tips!

1. Have Fun! The point of crops is to be working on your own projects alongside other creative people. This means that you will be able to get input from others, bounce ideas off of, or even ‘how do I do this?’ type conversations. You will learn a lot, and gain new friends! This also means that you might not get a TON of stuff done. Or, maybe you are one of those people that are able to get a LOOOOOOOOT of stuff done! (I personally don’t generally fall into that last option! hahaha!!)

2. Bring at least two projects to work on. Just like at home, you may have the best of intentions to work on this one specific project, only to get there and ‘not feel like it’. So, bring another project to work on as well. They don’t have to be big projects, but having something different generally helps! So, if your main focus is a scrapbook, maybe bring a set of cards to work on as well. This helps your brain to switch gears and not be overwhelmed.

3. Pack smartly! Your table size will vary upon location and event. If you only have half a table to work on, you want to make sure that you will still have space to craft on, after you unpack your supplies! You likely won’t need your die cutting machine, every one of your ink pads, every one of your stamp sets, or ‘all the things’. Pack what you will need for your projects that you are bringing. I know I said two up above, but it’s ok to bring more than that! Just try to limit to 5 or fewer, otherwise you will be bringing all the things!

4. Perfect for introverts! You might be thinking that I’m crazy! That crops, a gathering of people, is perfect for introverts? Hear me out. The people that are attending a crop are all creative people, right? Most of them will be paper crafters. So, if we go with that assumption (all paper crafters), that means that you will have something in common with every one of the people there. You won’t have to use extra mental energy to try to come up with conversation with others. This is one of my favorite things about crops!

5. What should you bring? This will vary for every person and every event. But, you should have your basic tool kit. If you don’t know what that is, I did a post about that here. Then your projects. So, for example, if you are working on a Workshop your way kit, you will want everything in the kit (all in one bag) plus the inks, stamp, blocks, and photos for those pages. And remember, if you forget something, the likelyhood that someone else there has that item, or something that would work in place of it, is really pretty high!

So, that all being said, check out Danielle’s post about what to bring to a crop! Her post is more item focused as opposed to mine being more ‘what to expect when cropping’!

Thanks for stopping by! Share in a comment below, what you love to take to crops!

FBL: Into the Wild Mini Album

Sunday we started working on another mini album! I had the pieces pre-cut for this, I thought I might be able to make it through in one go, however I forgot my laptop charger, so I ran out of battery! Oops!

So, we will have part two to finish the base pages and do the embellishing next week, so you will want to make sure to come back!

I will have a few options for you! You can purchase the pre-cut kits from me for $45, or you can place a $50 order on my website, and I will send you the cutting guide, and you can cut the pieces yourself. (add on the SOTM for $5 and I will also send you the August SOTM kit free as well!)

Check out the video here.

I, of course, had to make a few changes, but they aren’t many, and they flow well with the album!

The things that you will need for this mini album are:

Into the Wild WYW Kit
Into the Wild Scrapbooking Stamp Set
6×8 Page Protectors
4×6 Page Protectors
3×4 Page Protectors

Plus, of course, glue, foam tape, & scissors.

Man Card Monday: Still so Much to Enjoy!

Welcome back to another Man Card Monday! Today we are going with a mono chromatic card, that works perfect with any wood grain paper you might have stashed away! (I know I have a small stash of it!)

This card is super fun and easy to make!

Here are a couple of close up photos for you, because I know you want them!

The first card, without inking:

The one made in the video, with inking:

Which do you like better? Let me know in the comments below!

The little details:

Value Card Base & Envelope with card trimmed to 4 x 5 1/2
Charcoal Cardstock: 3 3/4 x 5 1/4 (qty. 2)
White Daisy Cardstock: 3 1/2 x 5
B&T Paper: 2 1/8 x 6 & 4 1/2 x 1/2 (qty. 12-ish)
Printer paper: 3 1/2 x 5
Whisper Thick Twine
Black & White Dots

Color Challenge with H2H!

This week’s challenge is to use Pink, Grey, Black, and White. You have until the end of the month to play along, so I hope that you do!

I knew that I wanted to use the Hippo that is one of the hostess rewards available until the end of the month. It is such an adorable set! I know you will want one too! Just ask me how to get it!

I decided that I was going to CASE the card that is in the Seasonal Expressions book for this stamp, I figure why not make my life a little easier, right? That card is a 5×7 card. I estimated the white piece to be a 4×6 piece of white daisy, and I just built my card on that basis.

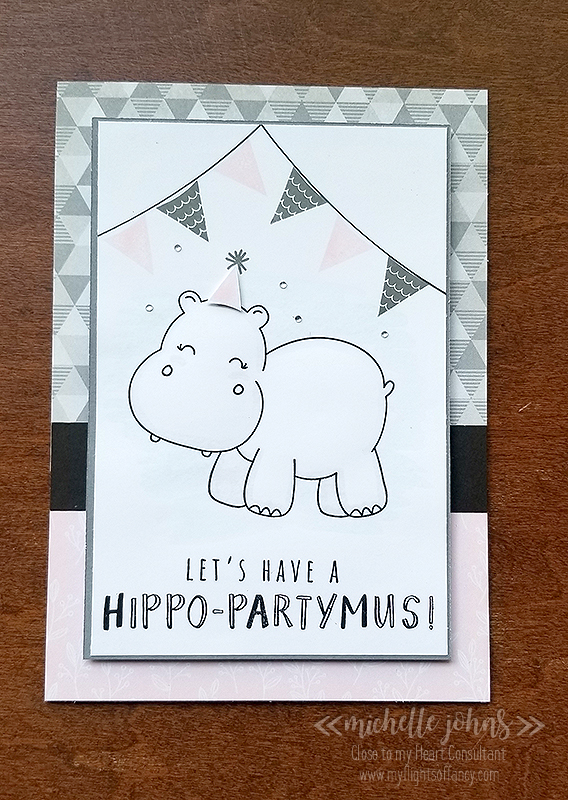
The grey comes from the Into the Wild paper packet, the pink comes from the Mix In paper packet, and the rest is plain cardstock. (black, charcoal, and white daisy). I stamped the hippo, sentiment, and the banner strings in intense black ink, since I knew I would be coloring it. Then I stamped the banners in ballerina and charcoal inks. I stamped the party hat in ballerina on a scrap piece of white daisy, and stamped the poof for the top in charcoal.

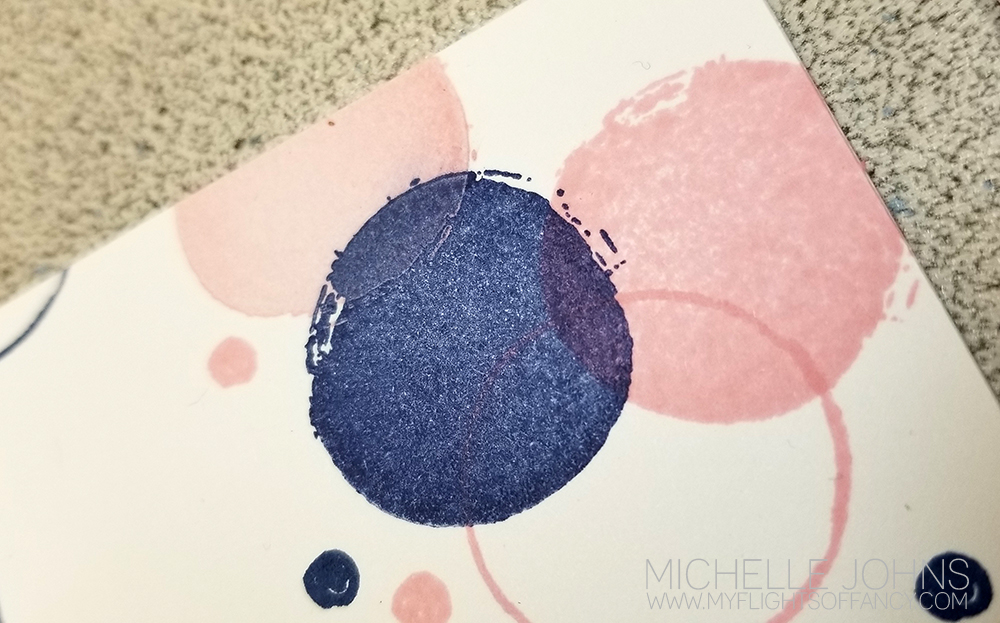
I used the medium round waterbrush to pick up a little bit of the charcoal ink from the lid of the ink pad, to outline the hippo with. I also added some rounded cheeks with the ballerina ink, the same way. Then I grabbed a bit of the sapphire ink (just a tad little bit, mind you!) and put a very slight wash of blue behind lil miss hippo. I did use my heat gun to dry the cardstock, so I could continue with my card! I used liquid glass to adhere the hippo panel to the charcoal cardstock mat.

Before I glued everything to the front, I had to decide how to put the card together. Now, if you know me, you know I like to be frugal with my paper, when I can be! Well, today’s card is no different! Would you believe me if I told you that you can get TWO cards that are 5×7 from one single sheet of cardstock? Well, you can, if you do it the same way that I did!

If you use the windmill pattern, you can get four 5×7 pieces out of one 12 x 12 piece of cardstock. Then, if you create a score line of 1/2 inch along the top (like I did), or the long side, you can then create two 5×7 cards from one sheet of cardstock!

So, I put the 1/2 inch score line along the top of the inside of the card, using liquid glass to adhere them together, so I would know they wouldn’t fall apart. Once I had the card base put together, I could put the rest of it together! I glued on the papers to the front. I then added the hippo and mat piece with lots of foam tape! I don’t want it to buckle when I sent it off!

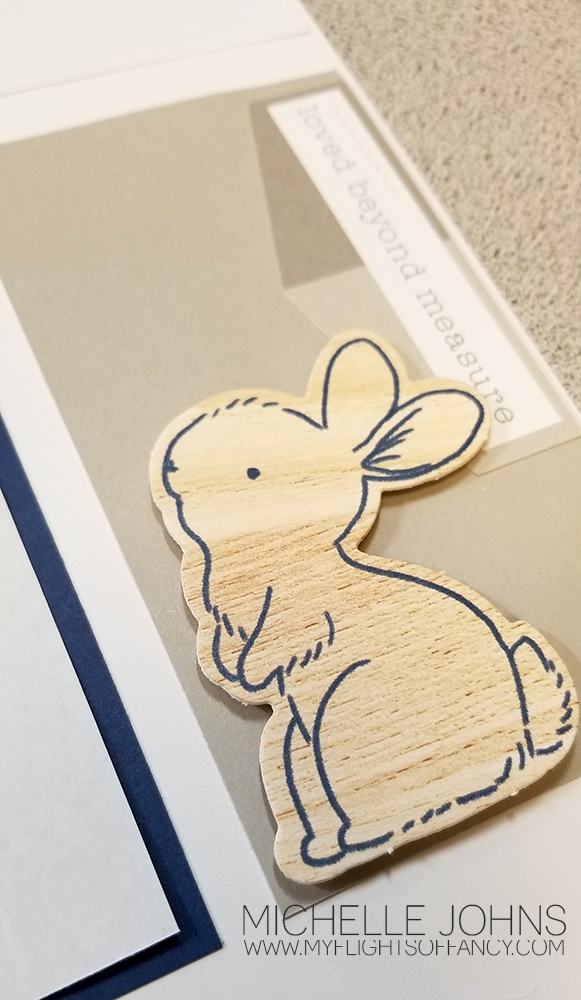
On the inside, I made my panel a bit smaller, to be 3 1/2 x 5, with a charcoal mat around it. Before I glued it together I added lil miss hippo’s head and the happy birthday sentiment.

To finish off the whole thing, I added a few bitty sparkles to lil miss hippo’s party decor! Then I decided I wanted to add a smidge more color, and used the ballerina ink and the small round waterbrush, with no water in it, to add some color to the letters in Hippo – partymus!

Isn’t this card just adorable? I love how fun it is! And, by the time you see this, I will have given it to my daughter, who loves hippos! Do you know someone that loves hippos? You only have a little bit of time left before this stamp goes away, don’t miss out!!

Thanks so much for stopping by! I would love it if you left a comment for me! I do read every one of them!

All products used are CTMH, unless otherwise noted:

Into the Wild Paper Pack
Mix In Paper Packet
White Daisy Cardstock
Charcoal Cardstock
Black Cardstock
Intense Black Ink
Ballerina Ink
Charcoal Ink
Sapphire Ink *photo shows old style lagoon pad, but it really was the sapphire pad
Liquid Glass
3-D Foam Tape
Small Round Waterbrush
Bitty Sparkles
Micro-tip Scissors
3 x 3 Clear Acrylix Block
1 x 3 1/2 Clear Acrylix Block
1 x 1 Clear Acrylix Block
Fiskars Paper Trimmer