This week’s challenge is to use Pink, Grey, Black, and White. You have until the end of the month to play along, so I hope that you do!
I knew that I wanted to use the Hippo that is one of the hostess rewards available until the end of the month. It is such an adorable set! I know you will want one too! Just ask me how to get it!
I decided that I was going to CASE the card that is in the Seasonal Expressions book for this stamp, I figure why not make my life a little easier, right? That card is a 5×7 card. I estimated the white piece to be a 4×6 piece of white daisy, and I just built my card on that basis.
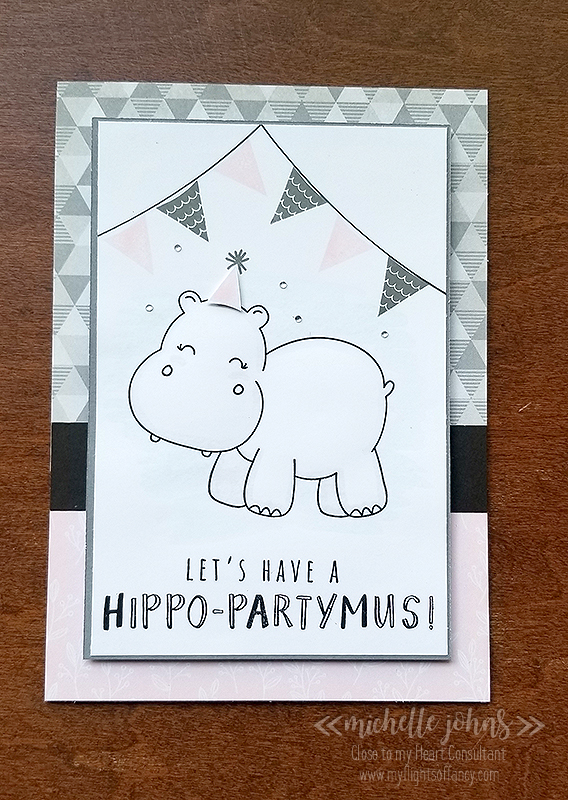
The grey comes from the Into the Wild paper packet, the pink comes from the Mix In paper packet, and the rest is plain cardstock. (black, charcoal, and white daisy). I stamped the hippo, sentiment, and the banner strings in intense black ink, since I knew I would be coloring it. Then I stamped the banners in ballerina and charcoal inks. I stamped the party hat in ballerina on a scrap piece of white daisy, and stamped the poof for the top in charcoal.
I used the medium round waterbrush to pick up a little bit of the charcoal ink from the lid of the ink pad, to outline the hippo with. I also added some rounded cheeks with the ballerina ink, the same way. Then I grabbed a bit of the sapphire ink (just a tad little bit, mind you!) and put a very slight wash of blue behind lil miss hippo. I did use my heat gun to dry the cardstock, so I could continue with my card! I used liquid glass to adhere the hippo panel to the charcoal cardstock mat.
Before I glued everything to the front, I had to decide how to put the card together. Now, if you know me, you know I like to be frugal with my paper, when I can be! Well, today’s card is no different! Would you believe me if I told you that you can get TWO cards that are 5×7 from one single sheet of cardstock? Well, you can, if you do it the same way that I did!
If you use the windmill pattern, you can get four 5×7 pieces out of one 12 x 12 piece of cardstock. Then, if you create a score line of 1/2 inch along the top (like I did), or the long side, you can then create two 5×7 cards from one sheet of cardstock!
So, I put the 1/2 inch score line along the top of the inside of the card, using liquid glass to adhere them together, so I would know they wouldn’t fall apart. Once I had the card base put together, I could put the rest of it together! I glued on the papers to the front. I then added the hippo and mat piece with lots of foam tape! I don’t want it to buckle when I sent it off!

On the inside, I made my panel a bit smaller, to be 3 1/2 x 5, with a charcoal mat around it. Before I glued it together I added lil miss hippo’s head and the happy birthday sentiment.
To finish off the whole thing, I added a few bitty sparkles to lil miss hippo’s party decor! Then I decided I wanted to add a smidge more color, and used the ballerina ink and the small round waterbrush, with no water in it, to add some color to the letters in Hippo – partymus!
Isn’t this card just adorable? I love how fun it is! And, by the time you see this, I will have given it to my daughter, who loves hippos! Do you know someone that loves hippos? You only have a little bit of time left before this stamp goes away, don’t miss out!!
Thanks so much for stopping by! I would love it if you left a comment for me! I do read every one of them!
All products used are CTMH, unless otherwise noted:
Into the Wild Paper Pack
Mix In Paper Packet
White Daisy Cardstock
Charcoal Cardstock
Black Cardstock
Intense Black Ink
Ballerina Ink
Charcoal Ink
Sapphire Ink *photo shows old style lagoon pad, but it really was the sapphire pad
Liquid Glass
3-D Foam Tape
Small Round Waterbrush
Bitty Sparkles
Micro-tip Scissors
3 x 3 Clear Acrylix Block
1 x 3 1/2 Clear Acrylix Block
1 x 1 Clear Acrylix Block
Fiskars Paper Trimmer


