Tag Archives: Thin Cuts

January Stamp of the month meets Whole Latte Love

It’s a new month, which means another new Stamp of the Month!  This one is one that everyone could use!  We all should be sending thank you cards, right?  This set gives you so many ways to say thanks!  And!  It’s free for VIP customers with a qualifying order! 

This card was so fun and easy to make!  I loved being able to use so many different products with it!  (and you could use ANY paper that you have in your stash, or any of the new papers available today!

I did a quick video, that I then sped up for you to watch how I made it!  I was inspired by pattern 25 in the Make it from your Heart volume 2 for this card set up!

I hope you enjoy it!

I can’t wait for all the craftiness that will happen this year!  Watch over the next week for different challenges and such that I will be adding to my blog!


CTMH Items used:

“Peek-a-boo!”

Welcome to the September Technique Blog Hop! This month is all about a window of some sort! I know there will be LOTS of great ideas on this hop, so make sure to visit everyone! (and make sure to leave some love along the way! EVERYONE loves to hear how much their creation resonates with others!) Today, you may have come from Lauren’s blog, or you may have started here. Either way, it will be a big circle, so you will eventually end up back here!

Today I did a fun peek a boo card, with a new technique that I hadn’t tried yet, and it was fun! Let’s take a look at the front, first, shall we?

I am IN LOVE with the wood paper packet! This is just one of the papers from the packet! It is actually a plank looking piece, so, I did some fussy cutting to be able to have it look like a solid piece (though, maybe not quite so much in person!)

That Thanks die cut is fabulous, isn’t it? That is new too! I cut three layers from White Daisy Cardstock, and the shadow layer from Mint Cardstock. Then layered them with the liquid glass, that I LOVE so much! I attached them on top of a piece of vellum with some micro glue dots. I finished fancy-ing up the card with some gold glitter gems.

Now, let’s take a look at the inside, shall we?

Oh my goodness! Isn’t that fantastic?!?! SOOOOOOOO much fun!

I used the From the Funny Farm stamp set for the adorable little birdie! I stamped it in the intense black ink and then colored with the Ice Blue Blend Tri tip marker. I used the circle thin cut from the card spinner die set for the little cut out for the bird.

The sentiment side uses the Stitched Fancy Brackets dies, in both White Daisy and Mint Cardstocks. I stamped the sentiment with the Teeny Tiny Type alpha set.

I hope you leave a bit of love for me! Then, off to another Michelle’s blog! 😉

Thanks so much for stopping by!!

In case you get lost along the way, here are all of the blogs this hop!

Melissa
Cat
Maz
Lauren
Michelle J. You Are Here!
Michelle L.
Brandi
Katy
Alyson
Miss. Carrie’s Creations

It’s time for another Color Challenge over at H2H!

Welcome to another week’s challenge from H2H! The challenges are so fun! And, sometimes, will take you outside of your normal realm! This week, the challenge is to use Saffron, Peacock, Sage, and Glacier! They do go together, quite well, it’s just not a combination that I would normally use!

That being said, I think I came up with something that is fabulous!! Don’t you just love it when things turn out better than you expected? I know I sure do!

So, today’s card uses two different stamp sets, Can’t Get Enough and Born to Bloom. Not things that you would just look at and say ‘oh, these two will work well together” . . . but, Can’t get enough has been one of my SUPER favorite sets! There is a little bit of everything in this E sized set! You should definitely add it to your collection before it sells out! (It’s technically retired, but available while supplies last for online orders!)

This card was surprisingly simple to put together! Come join me on my FB page on Monday at 5pm Pacific, and we will make it together!

So, I already told you what stamps I used. I also used the Peacock, Glacier, Saffron, and Sage inks to color this card. I used a small snippet of B&T from the Summer Vibes paper packet (it fits perfectly with the glacier color!).

Of course, if you know me, I LOVE to add another layer (or two) on the inside of my cards! And it doesn’t have to be hard! I just stuck with the black and white stamping of this fun image!

I love that the set has a thin cuts die set with it! Then I can have those pretty leaves and pots popped up off the page! It just adds a little bit more!

Like I said before, this card turned out so much better than I thought it might! Join me Monday night at 5pm Pacific to make this card! You only need a few supplies! (and that background paper could TOTALLY be something different!)

Thanks for stopping by! Make sure to check out the other design team ladies’ projects over at H2H! Then make your own, and link it up over there!

I can’t wait to make this card with you! See you Monday Night!

Supplies used for this card:
White Daisy Card base & Envelope
Summer Vibes Paper Packet
Peacock Cardstock
White Daisy Cardstock
Inks:
Peacock
Saffron
Glacier
Sage
Intense Black
Can’t Get Enough
Born to Bloom
Foam Tape
Waterbrush
Shammy
1 x 1 Block
3 1/2 x 2 Block
1 x 3 1/2 block

Just add water, you say?

At least I’m not Gizmo! That would be bad! (though, it would fit right in with how 2020 is going, right?)

So, I decided I was going to add some water to my ink! So I grabbed a piece of acetate and picked a paper, and then chose an ink. Believe it or not, both of these cards were done with the same ink color, and that was fern!

So, let’s walk through the steps, shall we?

So, first I grabbed a couple of pieces of white daisy cardstock, and used some versamark ink and stamped the little mushroom scene from the Gnome Matter stamp set. (LOVE that set!) and embossed with some white powder. Then I put some fern ink directly onto some acetate and grabbed a water brush, added some water, and then swirled it around. I then smooshed the ink and water mix onto the paper with the embossing. I dabbed it a few times, then did some heat setting. Then, a bit more ink and a smidge more water, mixed, and smooshed again some more! Then a bit more drying and the first one was done.

I decided to see what would happen if I put some ink on the back side of the paper, directly, and then added some water from behind. It gave a completely different result! But, still so fun!

I ended up getting more browns from my inks than I expected! A bit of red, too!

So, to finish the card, I cut the circle out with the solid circle from the shaker window and confetti die set. I cut the frame from that set from white daisy cardstock. I used the B&T from the Mix In paper pack. I stamped a sentiment from the set on vellum with the versamark and white embossing powder. I lined the B&T with two rows of the white and gold ribbon (retired and sold out!), then popped up the circle with some foam tape. Then I tied a double bow, and attached it with a mini glue dot.

The cards were so simple and easy to do! Super fun, and no two cards will be the same!!

Now, make sure to hop over to the H2H blog and see the other inspiration and link up your project too!

See you again soon!!

Adventure Abounds

Hey everyone! It’s time for another challenge over at H2H! This week’s challenge is adventure abounds, and I am the hostess this week! So, hop on over there to check it out, and then join in on the fun!!

I used the Fly By Greetings stamp set paired with the Card Front Spinner Thin Cuts. I think it turned out really well!

I used a number of the markers to color it, Ice Grey, brown grey, Dark Red, True blue, Citrus Blend, as well as the colorless blender.

I decided that I wanted to add a bit of texture to the background, so I grabbed the mini splatter dots from the Card subscription set. (I LOVE LOVE LOVE this set!! It is one of my go to sets for cards! I am positive that you will want it too!)

I used thin foam tape on my spinner parts, but I would HIGHLY recommend not doing that! Use the regular thickness, it will make it easier for the card to spin! (well, it spins just fine, it’s just getting my finger on it to make it spin that is a bit harder with the thin foam tape, vs. the regular!)

I hope you like my card today! It was great fun to color and put together!

Now, go back and check out what the other ladies have to share with you, and hopefully it will spark some creativity in you!

September SOTM Blog Hop – Random Act of Cardness

Welcome to another SOTM blog hop! It’s been a bit since I have done one! Today you should have arrived from Danielle’s blog. If not, that’s ok, it’s a big circle, and you will get there!

Today I mixed up a couple of stamp sets, just because they are so fun!! I used the Perk Up stamp and thin cuts for everything except the sentiment, and the September Stamp of the Month for the sentiment.

I made a rainbow background using the circle from the Perk Up Stamp set, and stamped in a whole rainbow of colors, including some new ones! Candy Apple, paprika, goldrush, canary, green apple, bluebird, wisteria, and pansy.

I used some vellum for the sentiment, so it wouldn’t completely hide the fun cup that I stamped!

See that black ribbon? Its new too! Its a fun velvet ribbon, that you will love!

I hope that you love the card! I can’t wait to use both of these sets more! And these colors are fantastic!

Thanks for stopping by! Now, hop on over to Michelle’s blog

See you guys again soon!!

Happy Birthday with Craft On

If you watched my Facebook live on Sunday, you heard that I haven’t had a chance to do much crafting this last week! Well, I decided that I would participate in a few challenge blogs! So, I came up with this card fairly quickly, since I was using the sketch from Case This Sketch #330, and I went with the AAA Birthday challenge of ‘for the girls’. Their challenge blog is ALL about birthdays! It is such a great blog to go and check out! You will find ALL sorts of ideas for birthday cards! I decided to round it off with Time Out Challenge’s prompt this fortnight, which was a prose from Oscar Wilde. “With Freedom, Flowers, and the Moon, who could NOT be happy?” Hence the flowers from the Craft On paper pack! I was also going to play along with another challenge, but I missed part of it, but that’s ok, I still like how this card turned out!

I used the shaker thin cuts for both the circle and the frame, the shaker window foam and acetate for the shaker part, and I filled it with bits and pieces from the gold sequin mix, and a few of the smaller pearls. I used the happy birthday sentiment from the Hippo-Partymus stamp set stamped in Archival Black ink.

I hope you like my little card! It went together very quickly! Plus, I have found a few fun challenge blogs to play along with! I would love it if you left a little note to let me know what you think!

Thanks for stopping by!

All products used are CTMH unless otherwise noted:
Craft On Paper Packet
Window Shaker Thin Cuts
Window foam and acetate
Gold Sequin Mix
Pearls
Micro Glue Dots
White Daisy Cardstock
Archival Black Ink
Thin Foam Tape
Liquid Glass
Fiskars Aluminum Rail Paper Trimmer

Making Waves with H2H!

This week’s challenge over at Heart 2 Heart is all about making waves! There are so many things that we could go with on this one, but I went more crafty, than photographic!

I decided to create my own B&T paper with the wave stamp from the Escape to Paradise set. I used sapphire ink on sapphire paper, and a little bit of masking to make the fun paper!

I used the Make it from your Heart, Volume 1 book, pattern 22 for this card. The stars paper is from the Into the Wild paper pack. I stamped the ship and tree with Intense black ink, and the sentiment and envelope with the archival ink. I colored the ship with the Carmine Touch Twin marker, and the tree on the inside used the Vivid Green and Clay markers. I did use the matching thin cuts to cut both the ship and the tree out. Both the front and the inside are layered with some sapphire cardstock.

I really had fun coming up with this card! I hope you enjoy it as well! Let me know what you think!

Supplies used are all CTMH unless otherwise noted:

Escape to Paradise Bundle Z4085
Into the Wild Paper Pack
White Daisy Cardstock
Sapphire Cardstock
Intense Black Ink
Archival Black Ink
Sapphire Ink *photo shows old style pad
Carmine Touch Twin Marker
Vivid Green Touch Twin Marker
Clay Touch Twin Marker
White Cards & Envelopes Value Pack
2 x 3 1/2 Clear Acrylix Block
1 x 3 1/2 Clear Acrylix Block
Fiskars Paper Trimmer

Candy Apple Color Challenge at H2H

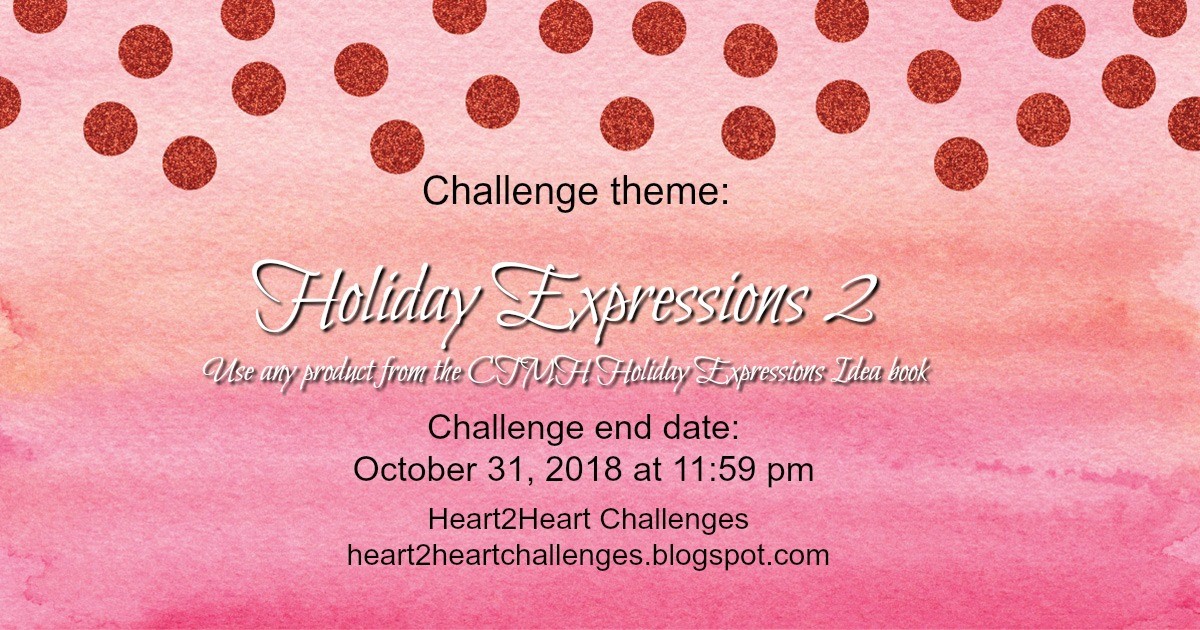
This week’s challenge at Heart 2 Heart is all about Candy Apple Red! I don’t know about you, but I LOVE how red this color is! Valentine hearts, 1950’s Chevy Truck, and Candied Apples all come in this fantastic red color! This week’s challenge is to show you different ways to use it! You have a whole month to play along with us, so I do hope that you join us!

Today I drew inspiration from the Make it from your Heart volume 1. These books give you sketches with the cutting sizes, they also give you a finished piece of artwork to help you with ideas. Today I went from the idea, more than the actual sketch! We are using pattern 20 from the book today, so go and look it up! If you don’t have these books, I promise you, they will help you so much in your crafting!

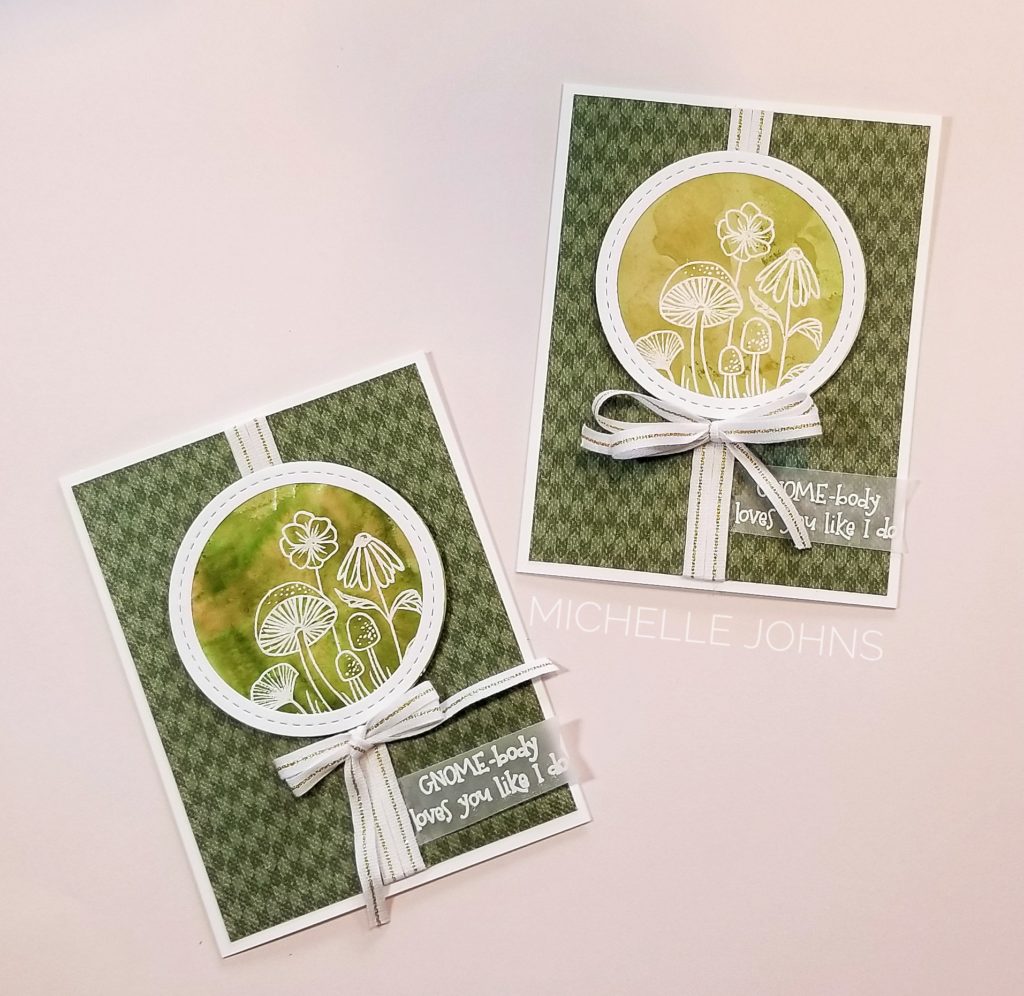
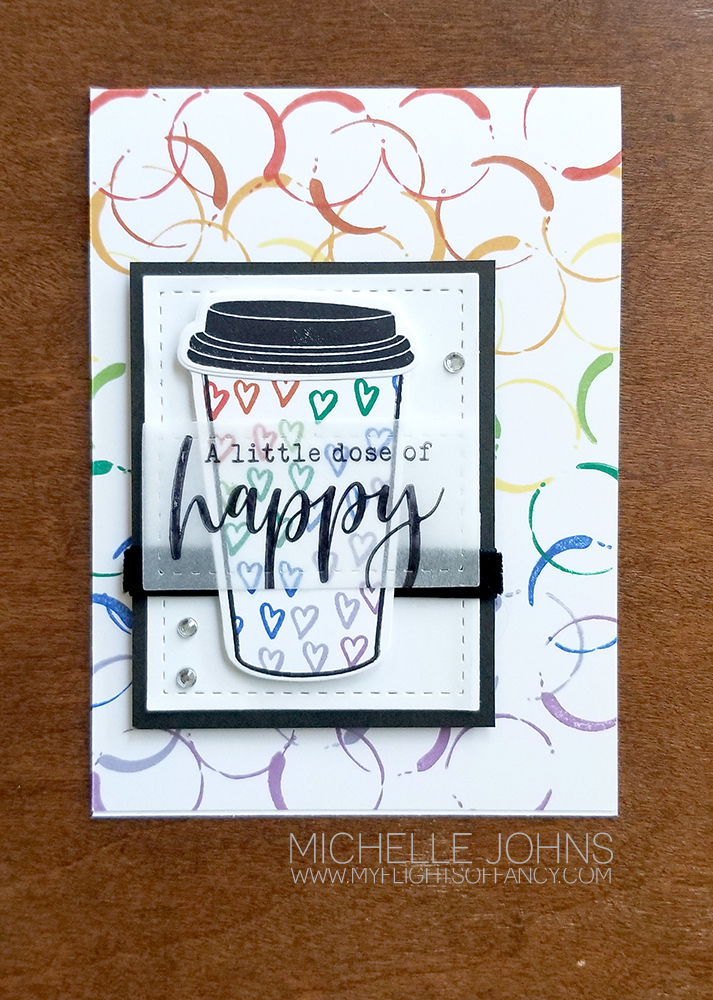
Today my colors are Candy Apple (of course), White Daisy, and Black. I used a piece of Black cardstock cut at 4 1/4 x 11, scored at 5 1/2 for my card base. I then used two pieces of white daisy cardstock, both cut to 4 x 5 1/4. One for the outside and one for the inside, as it is easier to write on white cardstock than it is to write on black (well, it is if you want it to be able to seen!)

I random stamped the large heart from Stacy Julien’s Story by Stacy, Colorful Texture stamp set in candy apple ink on one piece of the white daisy, and just one single heart in the bottom right corner of the second piece. While I had the stamp out, I random stamped the back flap of the envelope and put one single heart on the bottom left of the front of the envelope.

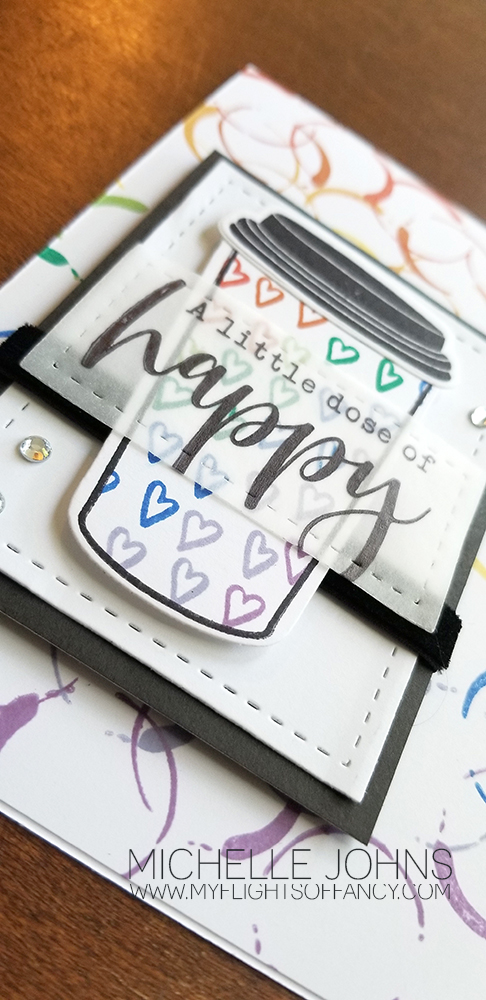
Now I did some die cutting! I used the largest heart from the Basic Shapes – Hearts thin cuts on some candy apple cardstock, the 2nd largest stitched circle from the Stitched Circles thin cuts on some white daisy cardstock, and the torn notebook edge from the decorative borders thin cuts in black cardstock.

I grabbed the words from the Colorful Texture set to create the sentiment on the card, also stamped in Candy Apple Red ink. I created the colon using the round end of my embossing tool. I used the i from ‘this’ in the stamp set, upside down, for the exclamation point after the word ‘you’. I used the journaling pen to create a stitched line on the outsides of the Candy Apple Heart.

Next, I cut off about 9 inches of the Candy Apple Striped ribbon, and used some glue dots to create the wave in the piece. I then used a few more glue dots to secure the black piece cut from the torn edge thin cut to the back of the ribbon.

Now it is time to put the whole thing together! I adhered both white daisy layers to the front and inside of the card using liquid glass. Then I glued the ribbon/paper cluster to the card just below 1/3 of the way from the bottom of the card. I used foam tape to pop up the heart from the card, and again to pop up the white circle from the heart. To finish off the card, I added some black enamel dots!

I really like how the card turned out! If you compare it to the artwork in the book, you can see that it very closely resembles it! (the stamps and such used in the book are now retired, so I used currently available items.

I hope that you like the card that I came up with! I would love to know what you think! Please leave a comment below and let me know!

Thanks so much for stopping by!

~ Michelle

Thankful

If you joined me Sunday morning, you got a chance to see me make this fun card, and even the oops that I had! If you didn’t join me, you should add me to your Sunday morning schedule, so you can watch live next Sunday, 9am Pacific time!

This card is fairly simple, and is completely and totally inspired by Amy Ulen’s card. When I made my sample, I couldn’t find my package of Kraft, so I had to figure out what I had that I could use to make my sample and then make another during my live video, so it’s amended from her card, but you can totally tell that it is inspired by hers!

Would you believe that the bright pops of color on this card are from the new water color pencils? It totally is! I LOVE the look that this gives the card, especially on the kraft cardstock!

This card was SUPER easy to make! It doesn’t take very long, and looks fantastic! You should TOTALLY give it a try! While you are at it, link it up to the Heart 2 Heart Challenge this week, which is to use ANYTHING from the new Holiday Expressions book!

Thanks so much for stopping by today! I hope you liked my project, and I hope that you will leave a comment letting me know what you think, and also join in on the challenge at H2H, that I linked above! You have through the end of the month to play along!

Until next time!
~ Michelle

Supplies Used:

These items are linked to my store to make it easier for you to find!
Kraft Cardstock
Value Card base and envelope
Watercolor Pencils
Charcoal Ink
October Stamp of the Month
2 x 3 1/2 block
1 x 3 1/2 block
Bunches of Love Stamp set
Decorative Borders Thin Cuts
Tis the Season Paper Pack
Liquid Glass
Thin 3-D foam tape
Bone Folder

Did you enjoy what I had to share today? If so, please . . .

Subscribe to my monthly newsletter & daily blog updates in the sidebar.
Join My Craft with Heart Club.
Earn FREE products by joining my Princess Club.
Check out the clearance rack and save up to 70%.
The $75 New Consultant Kit is the best deal of ALL! Discounts & benefits here.
Find me on Facebook Page where I share videos and specials
Join my Facebook Group. Prizes and fun interaction!
Follow me on Pinterest.
Subscribe to my YouTube channel with video tutorials.