Category Archives: CTMH Cards

Cards made with CTMH Products

Paste-fully Creative – CTMH Technique Blog Hop

Welcome to this month’s Technique blog hop! We are featuring the new Texture Paste! You should have come from Haley’s blog, however, if you didn’t, it’s a circle, and you will get back to her!

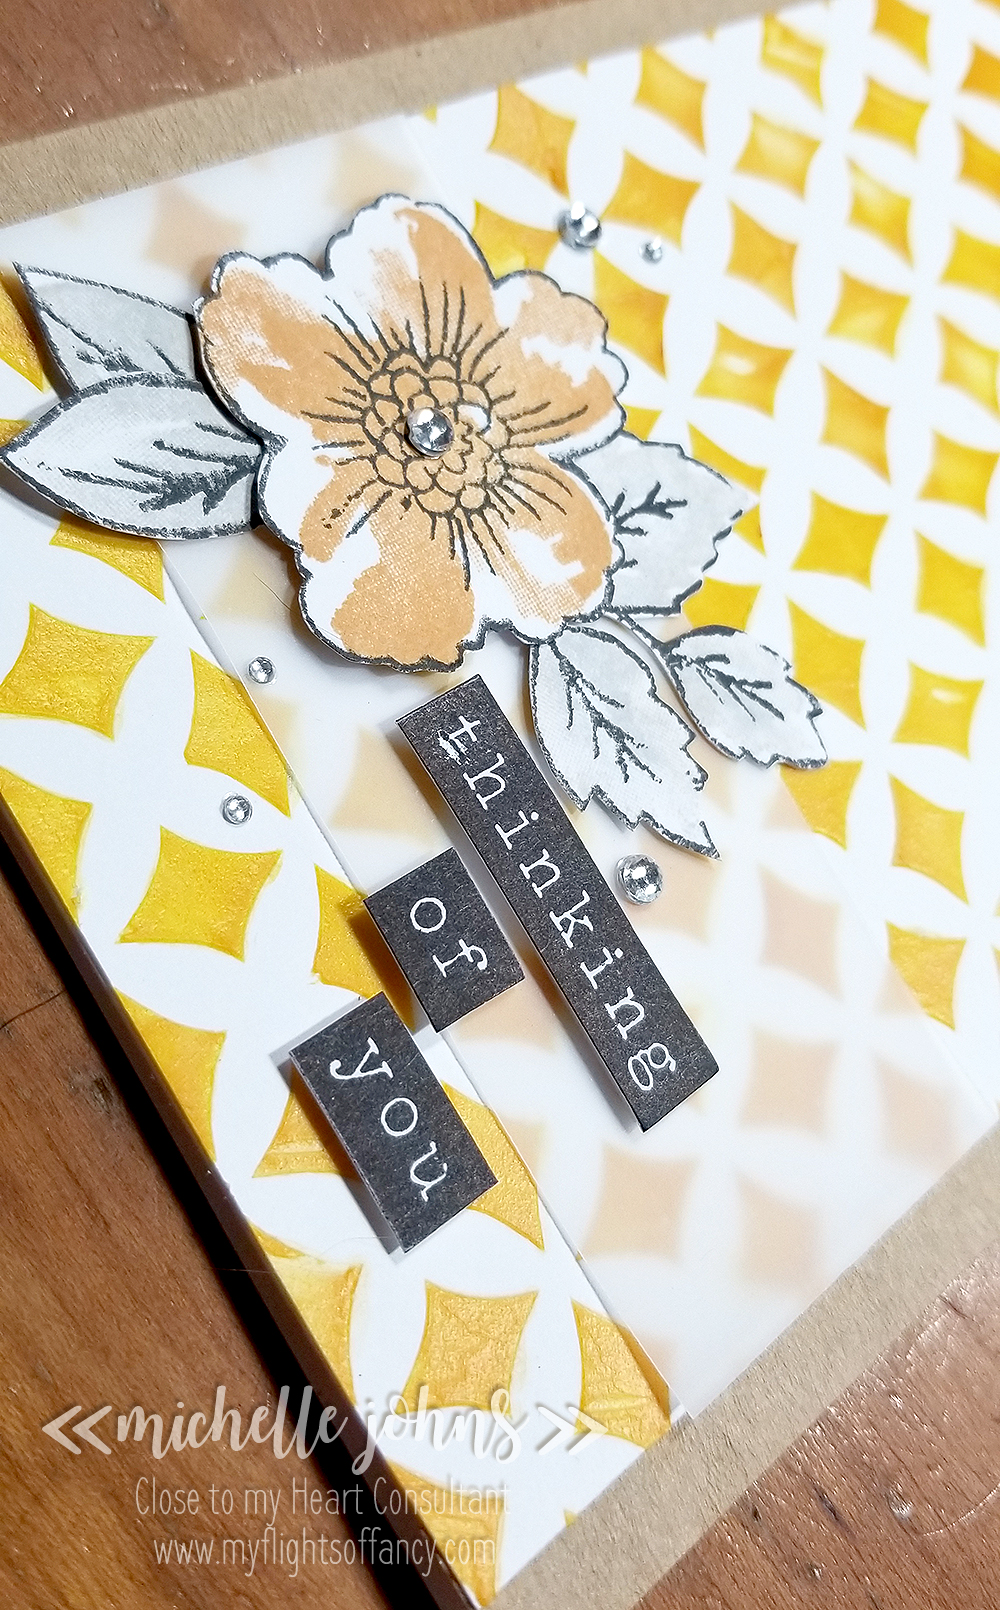
Today, I have this fun card for you! It was really fun to make, even if it wasn’t what I was originally going to do!

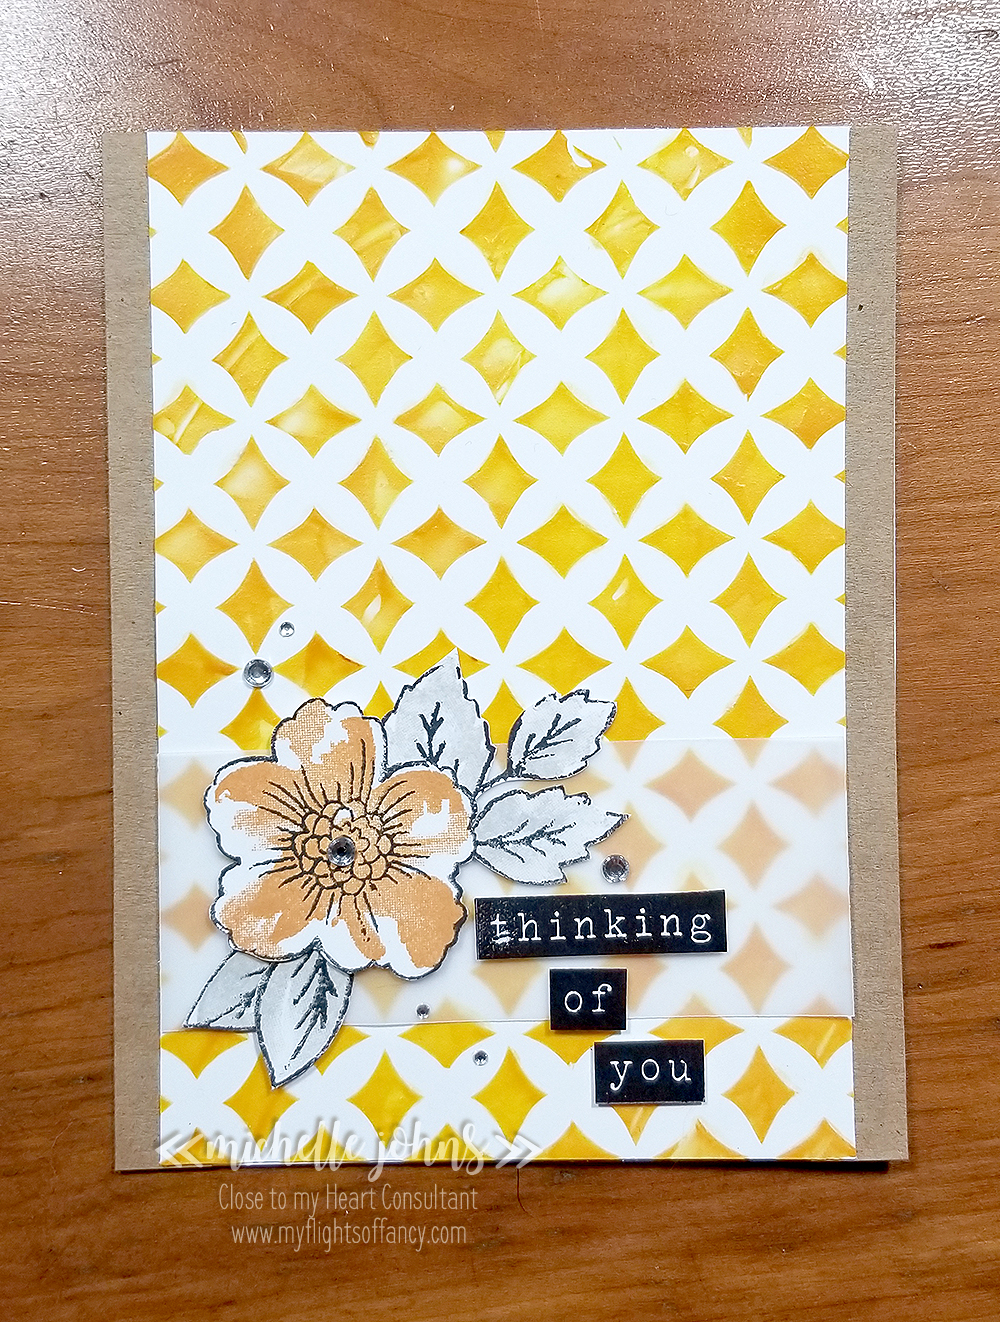
I cut a fun stencil from the Artbooking cartridge. I just used a bit of cardstock for it, but I would surely next time go with the stencil sheets, as you can see a bit where it smooshed under.

I put some saffron and goldrush inks onto the All Purpose mat, then put a little dab of the Transparant Matte paste into each. Mixed them slightly, and then spread onto the card in different spots with the palette knives, and then slightly overlapped them. I peeled off my stencil and allowed the paste to dry.

I stamped and cut the flowers and sentiment from the bunches of love stamp set, using archival black, mink, saffron, and goldrush colors. Popped them on a scrap of vellum, to help them pop off the card a bit more, and viola! You have a fantastic card! Oh, and let’s not forget the bling, shall we? I used a few clear sparkles and bitty sparkles do draw a bit more attention to the flowers!

Thanks for stopping by! I hope you liked my card! Let me know what you think! Then, hop on over to Michelle’s blog to see what she has for you!

Thankful

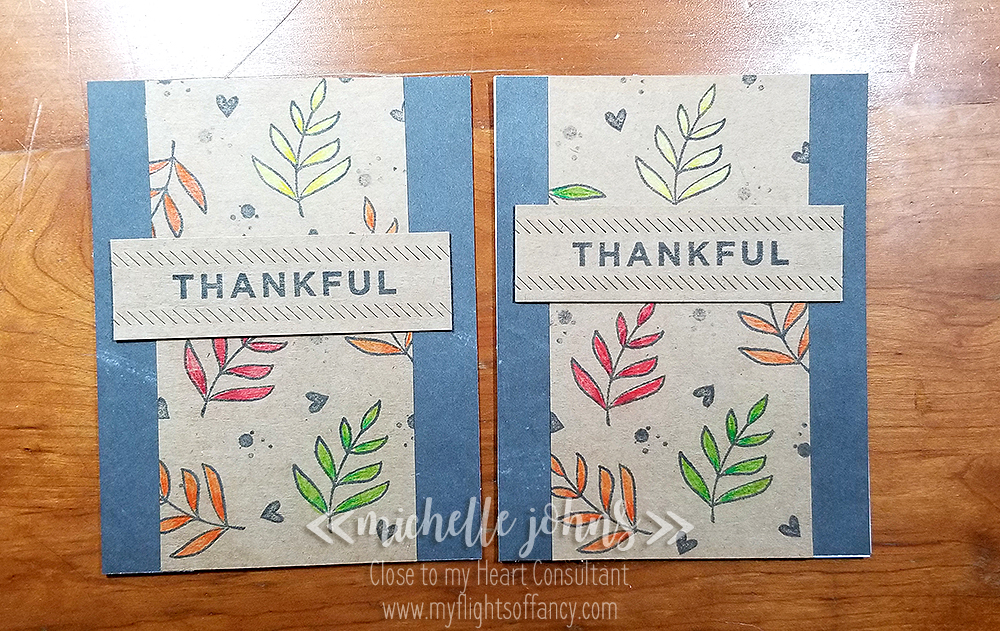
If you joined me Sunday morning, you got a chance to see me make this fun card, and even the oops that I had! If you didn’t join me, you should add me to your Sunday morning schedule, so you can watch live next Sunday, 9am Pacific time!

This card is fairly simple, and is completely and totally inspired by Amy Ulen’s card. When I made my sample, I couldn’t find my package of Kraft, so I had to figure out what I had that I could use to make my sample and then make another during my live video, so it’s amended from her card, but you can totally tell that it is inspired by hers!

Would you believe that the bright pops of color on this card are from the new water color pencils? It totally is! I LOVE the look that this gives the card, especially on the kraft cardstock!

This card was SUPER easy to make! It doesn’t take very long, and looks fantastic! You should TOTALLY give it a try! While you are at it, link it up to the Heart 2 Heart Challenge this week, which is to use ANYTHING from the new Holiday Expressions book!

Thanks so much for stopping by today! I hope you liked my project, and I hope that you will leave a comment letting me know what you think, and also join in on the challenge at H2H, that I linked above! You have through the end of the month to play along!

Until next time!
~ Michelle

Supplies Used:

These items are linked to my store to make it easier for you to find!
Kraft Cardstock
Value Card base and envelope
Watercolor Pencils
Charcoal Ink
October Stamp of the Month
2 x 3 1/2 block
1 x 3 1/2 block
Bunches of Love Stamp set
Decorative Borders Thin Cuts
Tis the Season Paper Pack
Liquid Glass
Thin 3-D foam tape
Bone Folder

Did you enjoy what I had to share today? If so, please . . .

Subscribe to my monthly newsletter & daily blog updates in the sidebar.
Join My Craft with Heart Club.
Earn FREE products by joining my Princess Club.
Check out the clearance rack and save up to 70%.
The $75 New Consultant Kit is the best deal of ALL! Discounts & benefits here.
Find me on Facebook Page where I share videos and specials
Join my Facebook Group. Prizes and fun interaction!
Follow me on Pinterest.
Subscribe to my YouTube channel with video tutorials.

Thanks & Giving SOTM Blog Hop

Welcome to this month’s SOTM blog hop! I know you will get a lot of inspiration from everyone! Today you should have arrived from Ronda’s blog. If not, thats ok, its a circle, and you will get back to her!

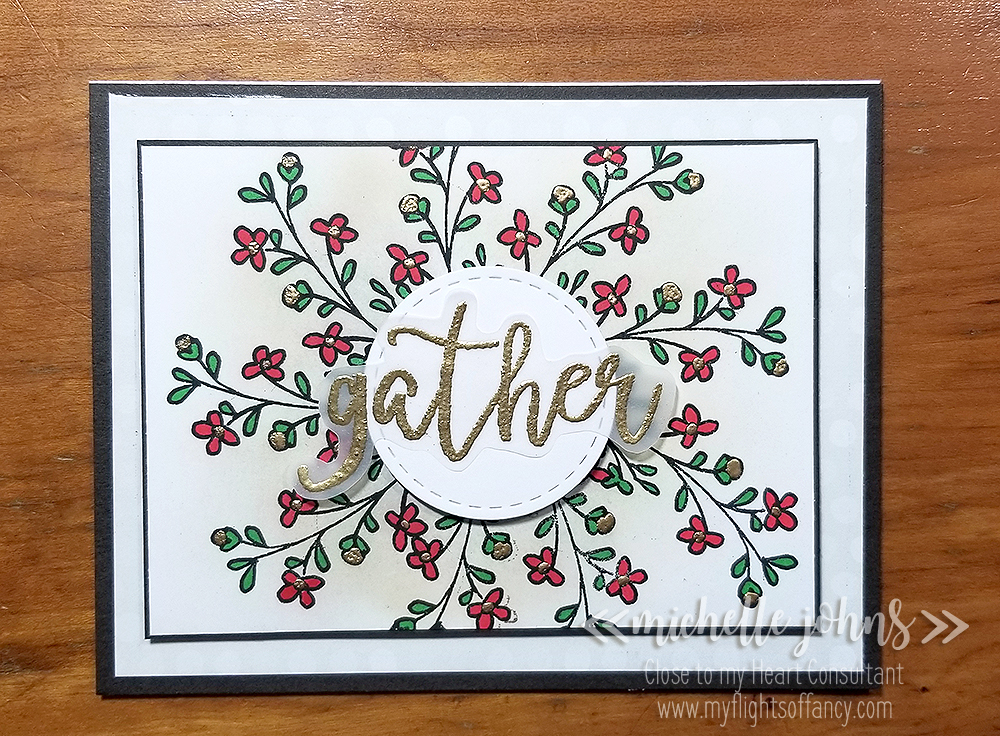
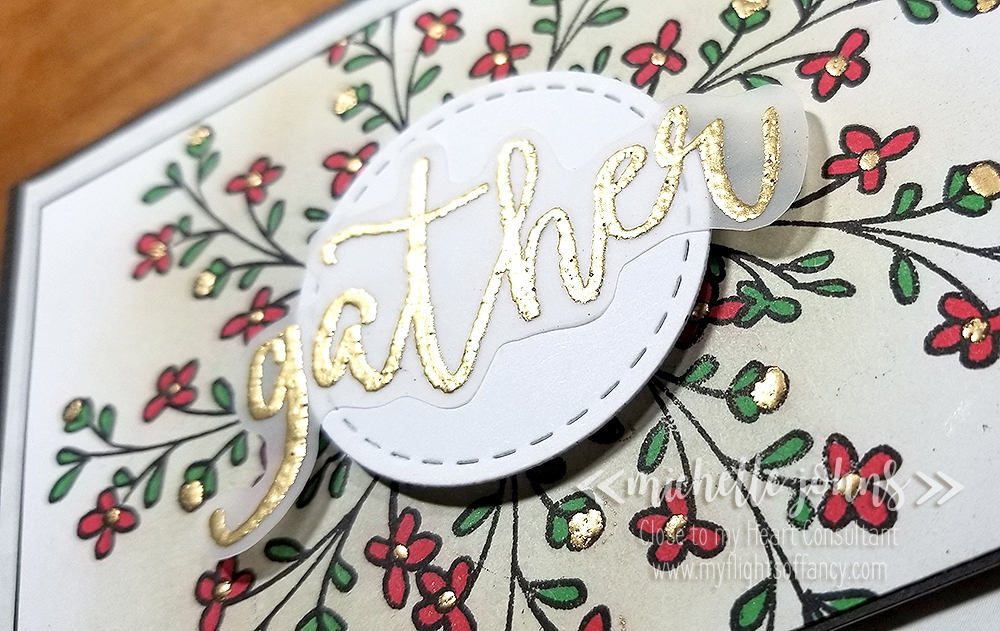
I try to find things to do with the stamp sets that are a bit different than what other people might do. Today I have this fun wreath type look for my card.

It turned out so fun!! I colored in the flower centers and buds with bonding memories glue, and then added the gold embossing powder and heat set it. I added color to the flowers and leaves with the shinhan markers.

I used one of the stitched thin cuts for the center and added the gather greeting that I had heat embossed with the gold powder o to some of our vellum, and cut out withthe micro tip scissors.

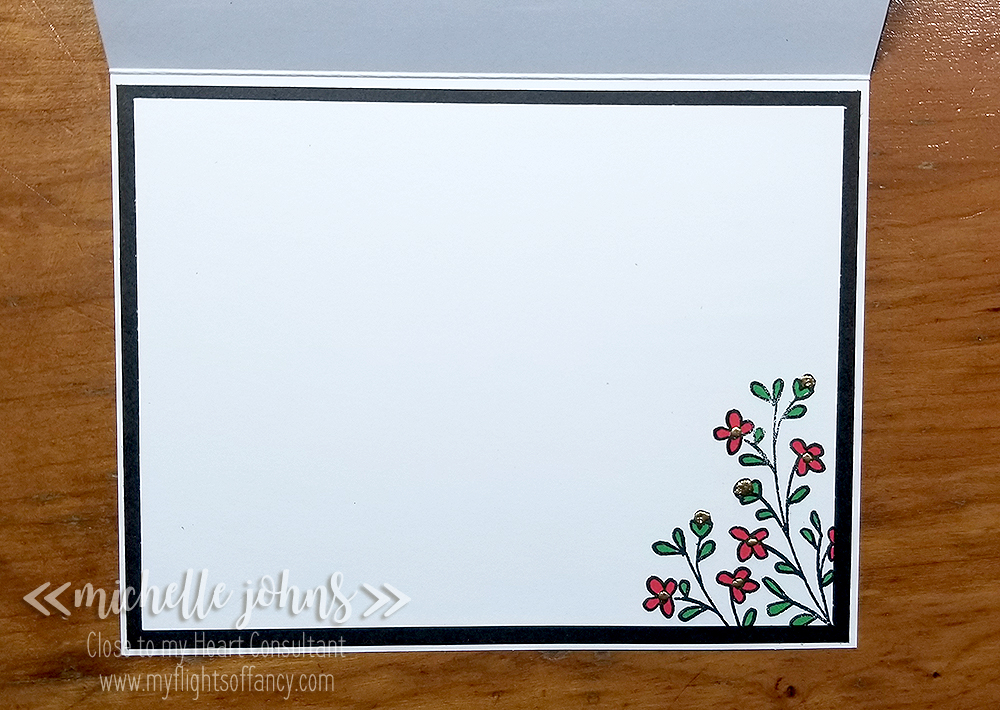
I couldn’t leave the inside blank, so I added some more of the same image, and did a bit more embossing and coloring.

I think it turned out great! What do you think? Let me know, and then hop on over to Krista’s blog!

Thanks so much for hopping by!!

Oh, and lest I forget, I am linking this up to this week’s challenge over at Heart 2 Heart challenges! It’s a photo and color inspiration challenge! You should hop over there and check it out, too!

Supplies Used:
White Cards & Envelopes Value Pack
Black Cardstock
White Daisy Cardstock
Seasonals Mix In Paper Pack
October Stamp of the Month
Archival Black Ink
Carmine Shinhan Touch Twin Marker
Vivid Green Shinhan Touch Twin Marker
Gold Embossing powder
Versamark Embossing Ink
Anti-static pouch
Bonding Memories Glue
Mink Ink
Sponge
Embossing Stylus
Stitched Circles Thin Cuts
Vellum
3-D Foam Tape
2 x 3 1/2 Acryllic Block
Fiskars Trimmer
Liquid Glass
Non Stick Micro tip Scissors
Bone Folder
Martha Stewart Scoring Board
Cuttlebug

Did you enjoy what I had to share today? If so, please . . .

Subscribe to my monthly newsletter & daily blog updates in the sidebar.
Join My Craft with Heart Club.
Earn FREE products by joining my Princess Club.
Check out the clearance rack and save up to 70%.
The $75 New Consultant Kit is the best deal of ALL! Discounts & benefits here.
Find me on Facebook Page where I share videos and specials
Join my Facebook Group. Prizes and fun interaction!
Follow me on Pinterest.
Subscribe to my YouTube channel with video tutorials.

Sew What?! – CTMH Technique Blog Hop

Welcome to the CTMH Technique blog hop! Today we are showcasing sewing (as if you couldn’t figure that one out already, right?) Today you should have arrived from Wendy’s blog. If not, that’s ok, it’s a circle and you will get back to her! Let’s jump right in, shall we?

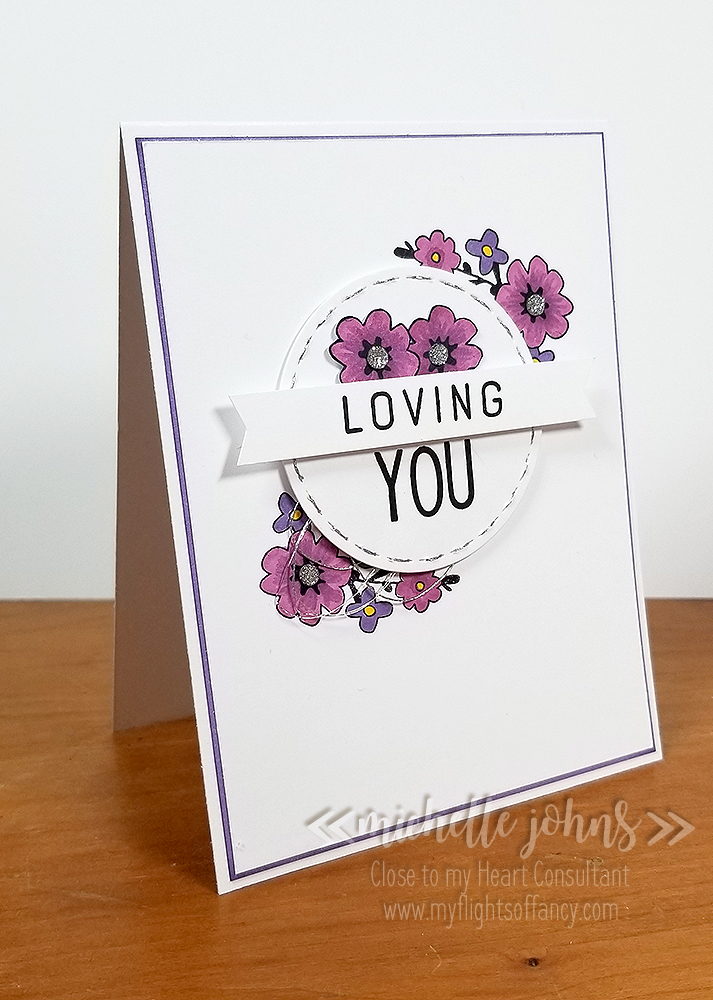
Today I am back with another “only White Daisy Cardstock” card. Now, this one was actually inspired by this card that I found on Pinterest when I was trying to figure out what to do for this hop, since I don’t have the new decorative borders thin cuts (which I cannot wait to get!)

I used three different stamp sets on this card! This is not something that I normally do, but I wanted to make something that came close to the inspiration card, and I had all of these sets, so I thought it was perfect!

I used the Lavender, Peony Purple, and Golden Yellow Shin-han markers as well as the journal pen to color these flowers and the tiny purple border that you see. The images and sentiment are stamped in archival black ink. I used the new Embellishing thread to stitch the holes from my largest circle stitched thin cut. The little bit that I had extra, I created the messy loops for a bit more interest. And, last, but not least, I added some silver glitter gems to the centers of a couple of the flowers.

Can you name the three stamp sets that I used? I will have a drawing next weekend to give away this card to those that guess correctly*! Leave your guesses here or over on my Facebook page! I will draw on 9/23 during my FB live!

I hope you like my card! I think it came out pretty close to the inspiration, with my own little twist. Let me know what YOU think!

After you leave your comment, hop on over to Michelle’s blog (yup, there’s lots of us out there!) to see her fantastic creation!

Thanks so much for stopping by! I hope you liked what I have, and what the other ladies have, and will leave everyone some love!

Until next time!

~ Michelle

*Winner must be in the US and must not be a Close to my Heart Consultant.

September SOTM – Just Treats

Welcome to the September Stamp of the Month Blog hop! This month we have more than 20 consultants sharing their fun projects with you! Today you should have arrived from Katy’s blog. If not, that’s ok, it’s a large circle, and you will get back there! This month’s stamp set is called “Just Treats“. It has 22 images on it, and is just fantastic! Just take a look!

You will be able to do so much with this set! It covers treats for each of the seasons and holidays for the remainder of the year! I will be showing so many options with this set! I can’t wait for you to see them and tell me what you think!

Let’s get to showing you what I came up with for this fun hop, now shall we?

This card is a little ‘extra’, because I had the thought of what I wanted on the inside, before I designed the rest of the outside. While I know it isn’t fall just yet, (I know, Erin, I know!) but there is pumpkin spice everything around me already, so I just had to go with a fall theme for my first card! (at least it doesn’t actually mention pumpkin in it . . . )

I used the newly available Grateful For You paper pack on the front of this card. I thought these colors went together so well! The design for the front is from the MIFYH Volume 2, pattern 23. (These books are so very handy!) Popped up the sentiment with foam tape and the cup with some thin foam dots. Add a bit of burlap ribbon, and you have a beautiful card!

Some things that I used that you may not notice or not see include the Golden Yellow, Warm Grey, Mahogany, and colorless blender ShinHan Markers, Shimmer brush, Archival black ink, Non Stick Microtip Scissors, Piercing tool, Journal pen, tweezers, and liquid glass. Scroll down further to hear how I put this fun card together! But, before you do that, check out the inside of this card!
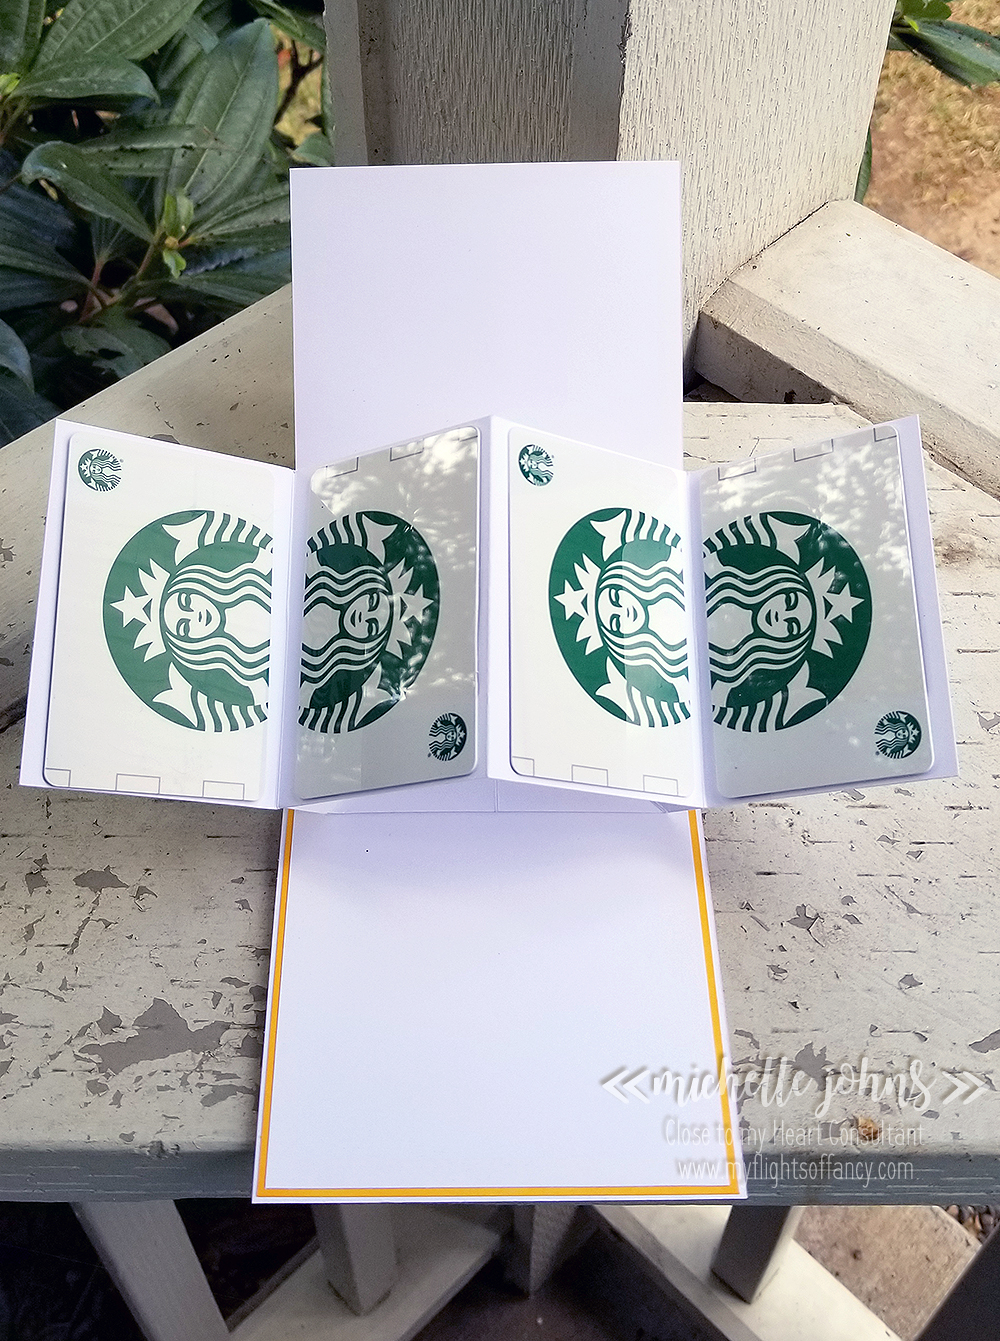
My daughter was gifted a 4 pack of these coffee cards (not naming, since that might be a no-no). And I thought that it would be really fun to make something to be able to gift something like this in the future! (these ones are used, but I will replace them with new ones (or reload these ones) when I gift the card. This card works (and will sit like this) because of the number of layers that this card has, and the strength of the liquid glass.

The inside has two layers on top of the card base. The front also has two full layers (plus a few extra pieces) on top of the card base. This makes sure that the front and back both stay flat when you are opening the card, and don’t bend, making it harder to get the card open.

Thanks so much for stopping by! Next up is Melissa! Check out her blog! If you would like more details on how I made my card, just keep reading below!

~ : ~ : ~ : ~ : ~ : ~ : ~ : ~ : ~ : ~ : ~ : ~ : ~ : ~ : ~ : ~ : ~ : ~ : ~ : ~ : ~ : ~ : ~ : ~

So, I am needing to replace some of my cardstock . . . specifically saffron and sapphire! LOL Those are the two colors that match the papers that I chose for this card. So, what to do? I knew I needed that layer on there, so I could have the stiffness that this card needed for that fun fold on the inside of the card. So, I went to my shinhan markers, to see what would work. I don’t have any dark blue markers (I could mix colors to get the right blue, but didn’t want to) so I was looking at the yellows. The Golden Yellow matches decently enough! So, I cut the layer from white daisy cardstock and used the Golden Yellow marker along the edges. No need to color the center of the cardstock, as it won’t be seen. If I had done fewer layers of color, it would have matched a bit more closely. I did this for both the outside and inside of the card.

I also used that same yellow to color in the letters on the stamp. I used the Mahogany to color in the little drops on the sentiment to look like coffee or cocoa. The Warm grey I used to create a bit of a shadow under the cup, however, because it was so dark, I used the colorless blender to soften it and move some of the color a bit further down. I used the shimmer brush on the whipped cream, just to give it a little pizzazz! Now, to get your cup to look like this, you will need to create a mask of the whipped cream, and stamp it first, cover with the mask, and then stamp the cup. That way the back of the cup isn’t seen in the whipped cream.

If you notice, my cup is ‘backwards’. I did this on purpose too! One of the benefits of cutting out your element, is that you can make some changes to it. So, after I stamped the whipped cream and the cup, I cut it out, chopping off the handle in the process (it makes a cute bowl, btw!). Then I stamped it again on a scrap of white daisy cardstock, and cut that out. Before I glued it all together, I went over the edges with the journaling pen, it gives the stamped image just that much more omph. Then I used the liquid glass to attach the handle to the other side of the mug.

This card is a “Pop and Twist” card. I modified mine from a few different videos (and would probably do a few more modifications for the next one). It will be one of the fun cards I offer in my card workshop that will happen a bit later this month! So you will want to watch for that info, coming soon!

Thanks again for stopping by! I hope you liked my card! Let me know what you think!

~Michelle
Central Park Happy Birthday!

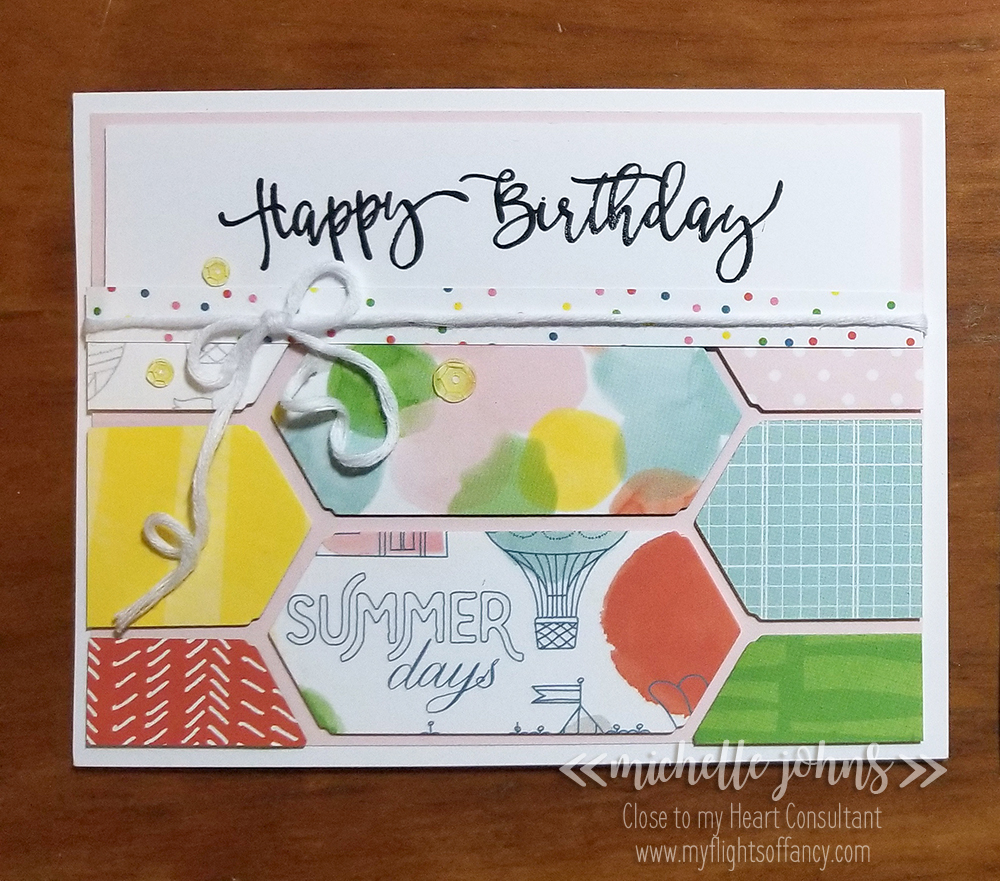
Last weekend I did a FB live video, and made this fun card. I was cutting pieces for the 2nd card as well, but didn’t put it together during the FB live video. I really like how they both turned out! They were such a fun way to use some Thin Cuts that wouldn’t necessarily be how you think of them! Today I am linking up to the H2H Challenge, “For the love of crafting”. You should join in too! You have until the end of the month to join us!

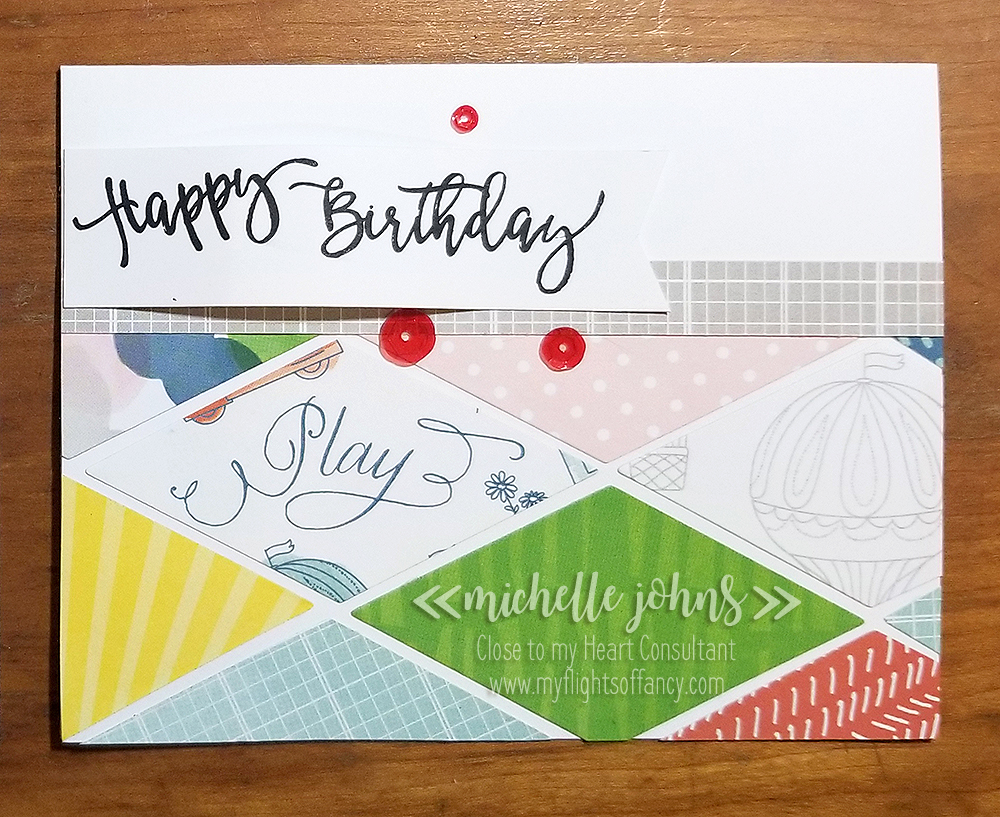
This is the card that I made during the video. Do you know which thin cuts I used? (if you didn’t watch the video) Would you believe that I used the diamond in the Fresh Air thin cuts? (which, looks like they have sold out, that is so sad!)

I just lined them up so that there was about the same amount of space between the diamonds on the whole card. Just trimmed off the excess from around the edges of the card. I used a zip strip for the middle, and a scrap of White Daisy cardstock to stamp the Happy Birthday sentiment from the Birthday Key stamp set (which you won’t find in the book, but you will find online!). I love the font that they used for this stamp!

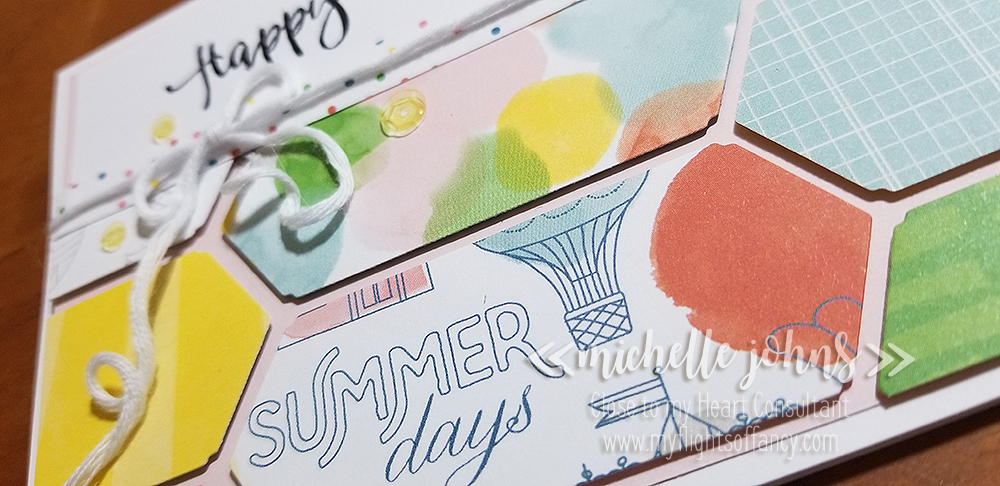
This card uses one of the other shapes in the same thin cut set. This time I decided to add a layer of bashful cardstock (retiring at the end of this month) to add a bit more interest to the card. I popped up each of the die cut pieces onto some foam tape to add more dimension.

I cut down one of the zip strips so it was less than 1/2 an inch, and wrapped some white twine around it. I used the same happy birthday sentiment on some scrap white daisy cardstock with archival black ink.

On both cards I added a few of the sequins from the central park sequin pack.

I hope you like my cards today! Come play along with us at H2H, and get your crafting on!

See you next time!
~ Michelle
Rad Dad – Masculine Themed Optional Hop

Another hop! You betcha! This month we have a special called Dad is Rad, and it’s only available until the end of June! I know you will want to get this set, and we are here to show you some ideas other than what you get with the kit itself! They will all be masculine themed, so they are perfect for the Dads (or guys) in your life! Today you should have arrived from Darlys’ blog. If not, that’s ok, it’s a circle, so you will get back there. So, let’s get started, shall we??

First, let’s start with what you get in the Dad is Rad kit. Check this out!

This kit contents:
1 – My Acrylix® Rad Dad Stamp Set (D1811)
11 – cardstock sheets (1 Almond, 1 Crystal Blue, 1 Juniper, 1 Sapphire, 2 Toffee, 4 White Daisy, 1 gold glitter)
1 – White Burlap Ribbon (Z3323)
1 – Gold Bows (Z3380)
4 – white cards & envelopes

You will also have access (even without purchase) to a pdf guide on how to create a two page layout and 5 cards with the supplies in this kit. It really is a great deal!

Now, shall I show you what I came up with? I must tell you, I totally CASEd this card I found on Pinterest. I changed the colors so that it would use what came in the kit, and I LOVE love love how it turned out!

I stamped the solid argyle image in Almond Ink and the dotted argyle in Sapphire Ink. The “Thank you” was cut with my explore, I used the font Lobster Two. I cut it four times and layered them together with liquid glass, and attached them to the card with it as well.

I used the Almond cardstock for the background and the Sapphire cardstock to tie in the ink and sentiment.

I even brought the design into the inside of the card. I just couldn’t stop stamping it!

I am LOVING how this card looks! Super classy and very masculine! Tell me what you think!! What color combos would you use??

Now, after you comment, hop on over to Alayne’s blog and see what she has for you!

Thanks so much for stopping by!

June SOTM – A Bushel & a Peck

Welcome to this month’s blog hop! This set is super cute! If you are doing the 30 days of coloring, this is the perfect set for you!!

Today you should have arrived from Darlys’ blog. If not, that’s ok, as it’s a big circle, so you will get back to her!

I don’t know about you, but I’ve had a superbusy time recently with all the grad stuff and end of the school year stuff, so I didn’t have much time to create this card! But it turned out cute!!

The coloring took more time to do than deciding on the pattern from the Make it from your heart, volume 4 book, cutting, and even adhering the papers to the card base, combined!!

I used archival black ink to stamp with, and heated it with the craft heater, so that the shinhan markers didnt pick up the ink when I was coloring. I used the 3 brown markers; bronze marker, Mahogany marker, Clay marker, the Sap green marker, cherry pink, carmine, warm grey, and black markers.

See that fun shape that the sentiment is stamped on? It is one of the shapes from the Fresh Air Cardmaking thin cuts! Isn’t it adorable?

I used my non stick micro-tip scissors to fussy cut the image out. I then used them to do stamp surgery on the sentiment stamp, so that it would look the way I wanted it to!

I used the Adventure fundamentals paper pack for the heart paper and the green water colored paper, added a bit of kraft to help the green pop a bit more against the heart paper. I wrapped some white twine around the green and kraft grouping, and then popped it with some thin foam dots. I used more thin foam dots to pop the sentiment piece.

I hope you like my card! I would love to hear what you think! Leave me a comment, I read everyone of them!

Next you are on to Gina’s blog!

Thanks so much for stopping by!!

May SOTM – Classic Summer Bash Blog Hop

Thanks for joining us for the SOTM blog hop this month! This is a fantastically fun stamp set! I have so many ideas to do with it! I know it is a set that you will want!! Today you should have arrived from Darlys’ blog. If not, that’s ok, it’s a big round circle, so you will get there if you keep hopping along! (Plus, you will see some great projects if you keep hopping!)

So, if you know me, you know that I have billions of ideas on things, then have the hardest of times narrowing down what I want to do with any given project! LOL This project is no different, I tell ya! I have a pin board of ideas to start from for this stamp set.

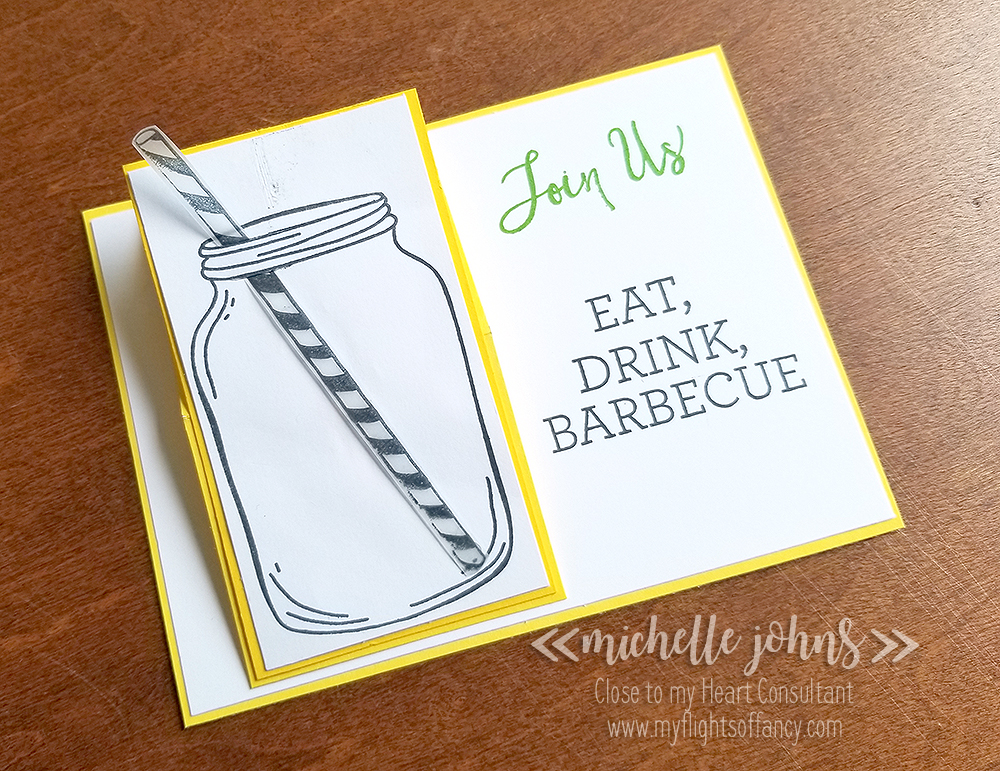
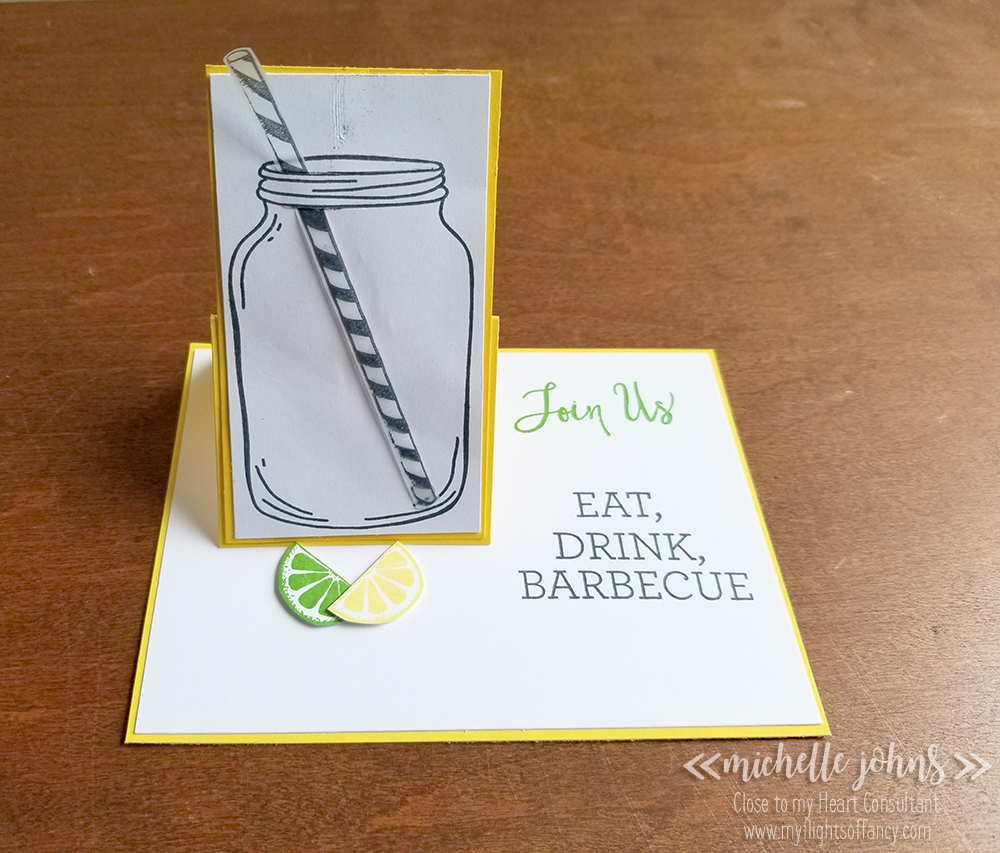
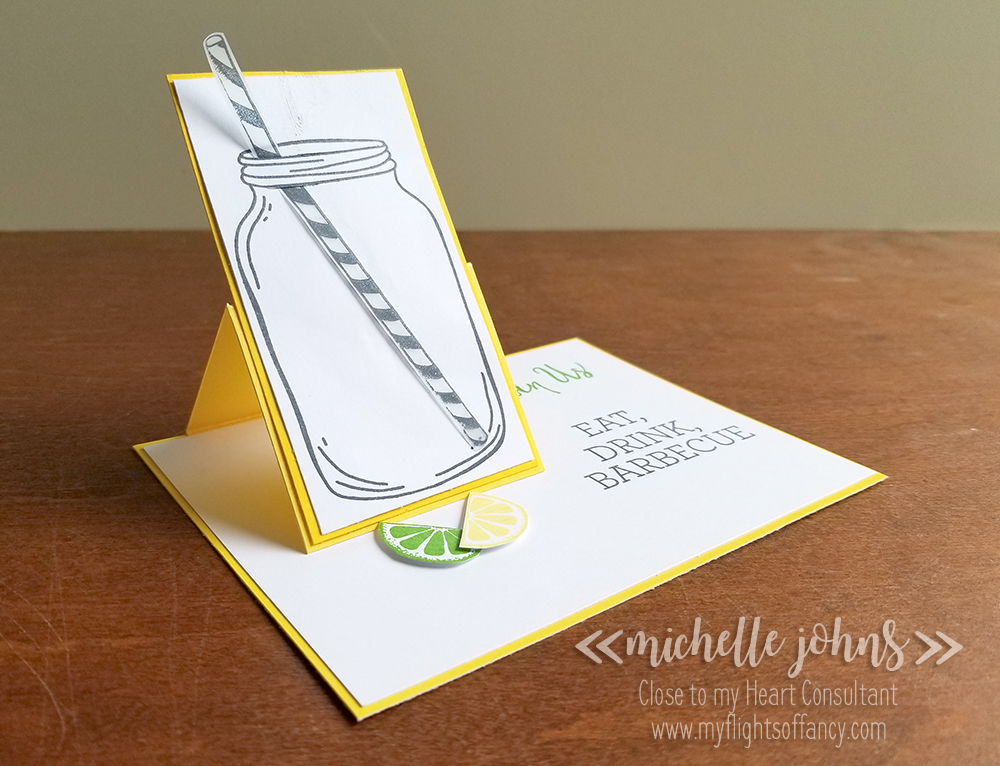
I used a scrap of our vellum for the straw, with some memento ink (I probably should have used stazon ink, but didn’t have it handy)

I stamped a couple of the citrus wedges in both willow and lemon inks. I then popped them up with some thin 3-D foam tape, to create the stopper for the easel part of the card.

I used lemon cardstock for the base, matt and easel part of the card. (I glued it wrong, or you would be able to see the different shades on the cardstock! doh!)

Take a look at this whole set, isn’t it fantastic??

I really liked how the card turned out! I hope you do too!

What would you like to see me take inspiration from to use this set? Comment below, and let me see what you would like! After that, hop on over to Kathy’s blog and see what fun things she has for us to see!

Have a crafty day, my friend!!

~ Michelle
Color Your Life – April SOTM Blog Hop

Welcome to the blog hop! Today you should have arrived from Colleen’s blog. If not, that’s ok, as it’s a big ol’ circle! If you get lost along the way, Melinda has the full list here.

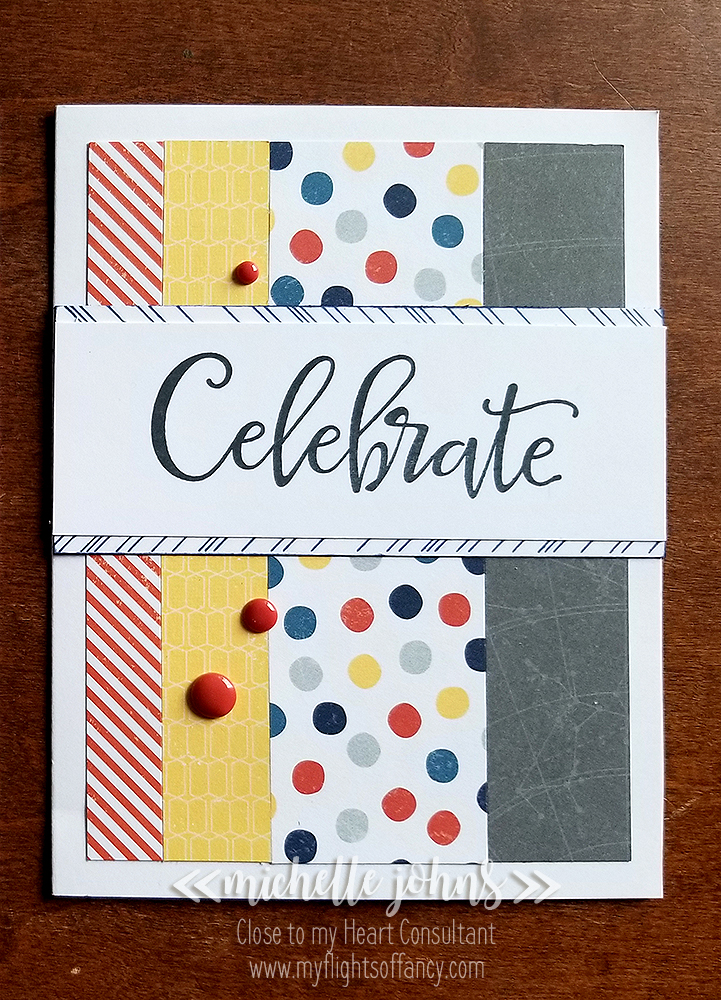
This set is such a fun set! Today, I’m using two of the stamps from this set, and making two cards. They don’t look tremendously different, but I do like how they did turn out!

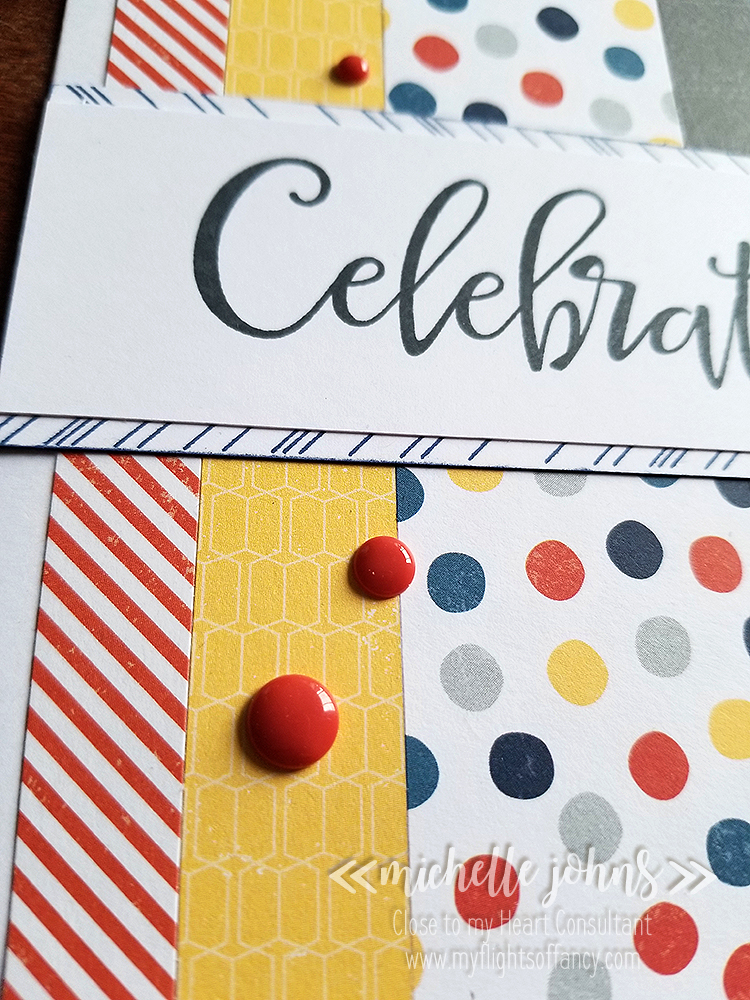
As you can see, I did one card with traditional boy colors and one with traditional girl colors. I really do like how they both turned out! I used pattern 15 from the Make it from your Heart Volume 4 book. I am LOVING this book, I’m telling you, you really need to get it! I added a layer behind the sentiment layer, to help give it more pop (and to use the second stamp in a fun way!).

I was using scraps for both of these cards. This first one uses both Make Waves and Gimmie Some Sugar. They mixed up so well together! I used pixie ink to stamp the ‘feather’ type line stamp on either side of the mat layer under the sentiment, and then ran the flat edge of all four sides of the mat on the ink pad to get the darker line to help the color pop a bit more. (I took care to make sure that the lines were going in the same direction!)

I added 3 sparkles to help it pop, and my card is done! Now, let’s look at the other card, shall we?

For the second card I used pieces from the Stargazer paper pack. I did everything the same with this card, well, mostly. The pieces are lined up slightly differently, however, they are all the same sizes. I used Sapphire ink on the mat piece for this card.

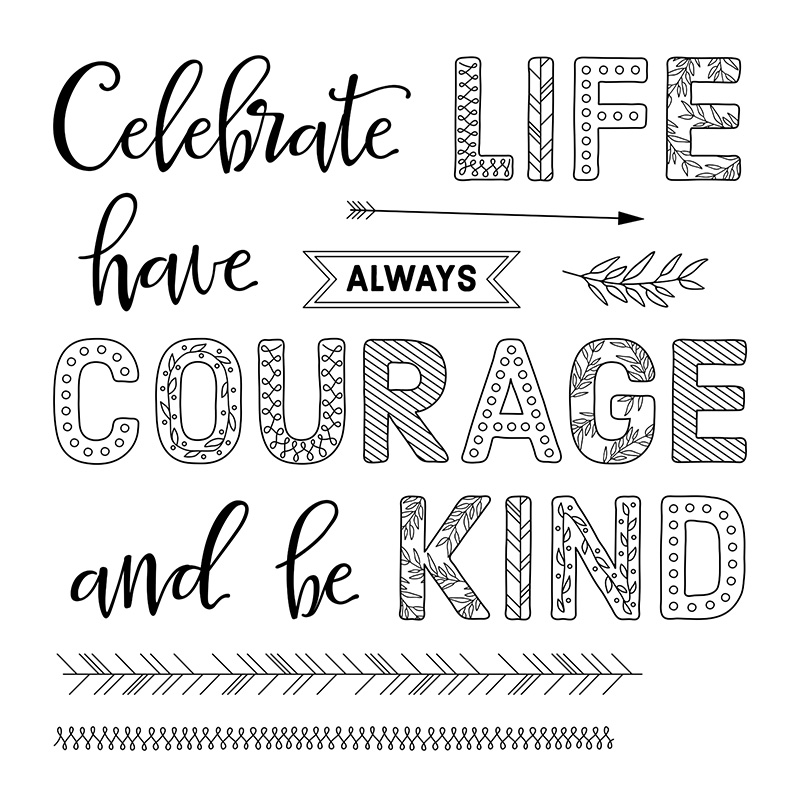
I did similar placements on the Stargazer dots, it just worked so well. I stamped both “Celebrate” sentiments with black Memento ink.

Did you know that you can get the April Stamp of the Month for just $5 with your qualifying purchase. That is a GREAT deal!

Want to know my secret for getting everything lined up both as a square and in the middle of the card base? I use washi tape! I tell my ladies to bring their “ugly” washi to classes! (now, what I used wasn’t ‘ugly washi’, but it still works!) I linked up some inexpensive washi below, in case you need to add some more to your collection! The secret is to flip your paper over, and use washi to tape your pieces together, so you have one block of papers. Then, use liquid glass to attach to the card base. This gives you a little bit of wiggle room when you put it on your card base! I LOVE using this little secret on my cards and my layouts too!
I hope you like my little cards today! Over in my facebook group, I am having a little contest, and you could win one of these cards! Come and check it out!

Thanks so much for stopping by! I hope you have enjoyed my cards! Now, hop on over to Kathy’s blog and see what fun stuff she has for you!

Items used to create my cards today:
Make Waves Paper Pack
Gimmie Some Sugar Paper Pack
Stargazer Paper Pack
Make it from your Heart Volume 4
Cards & Envelopes
White Daisy Cardstock
Sparkles
Stargazer Dots
Pixie Ink
Sapphire Ink
Black Memento Ink
Washi Tape
Liquid Glass