Category Archives: CTMH Scrapbook Layouts

Scrapbook Layouts made with CTMH products

Wednesday is Mini Day!

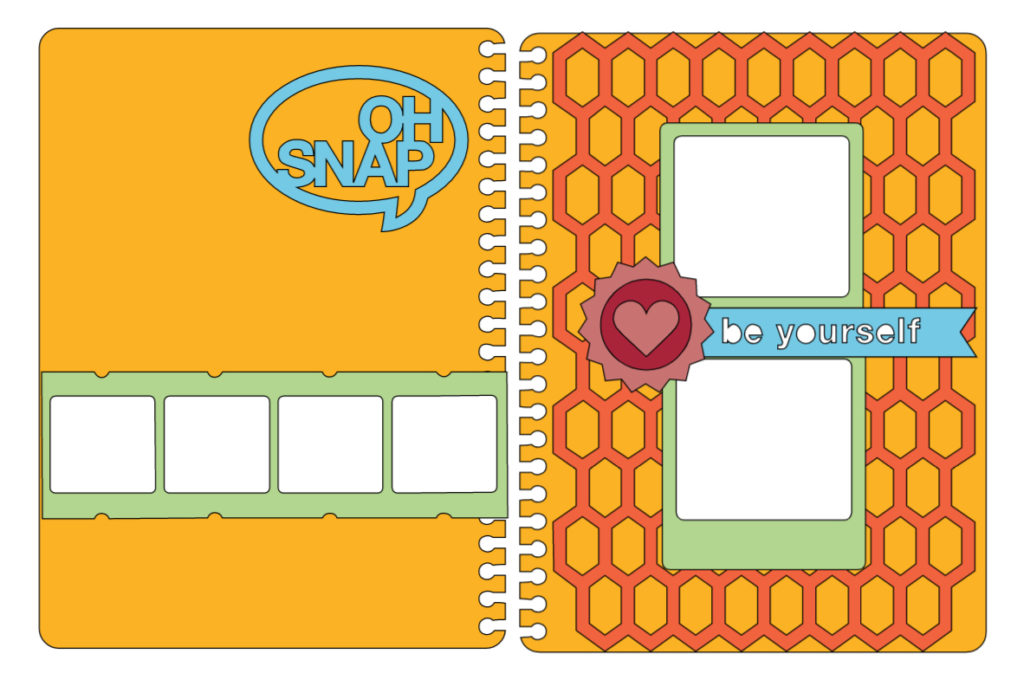
Hey everyone! Welcome back to another Mini Wednesday! As you have seen the last few weeks, on Wednesday, Danielle and I are challenging each other (and all of you) to participate in a sketch challenge! Well, today, we went a slightly different route! Danielle chose a mini album page straight off the Artbooking cartridge! Perfect! I love using my cricut!

And then, my computer and design space decided they weren’t going to play nice together! Whaaaaaa?!?!?! Sooo, she suggested that I go with using it more as a sketch, and not use my cricut. So, that’s exactly what I did!

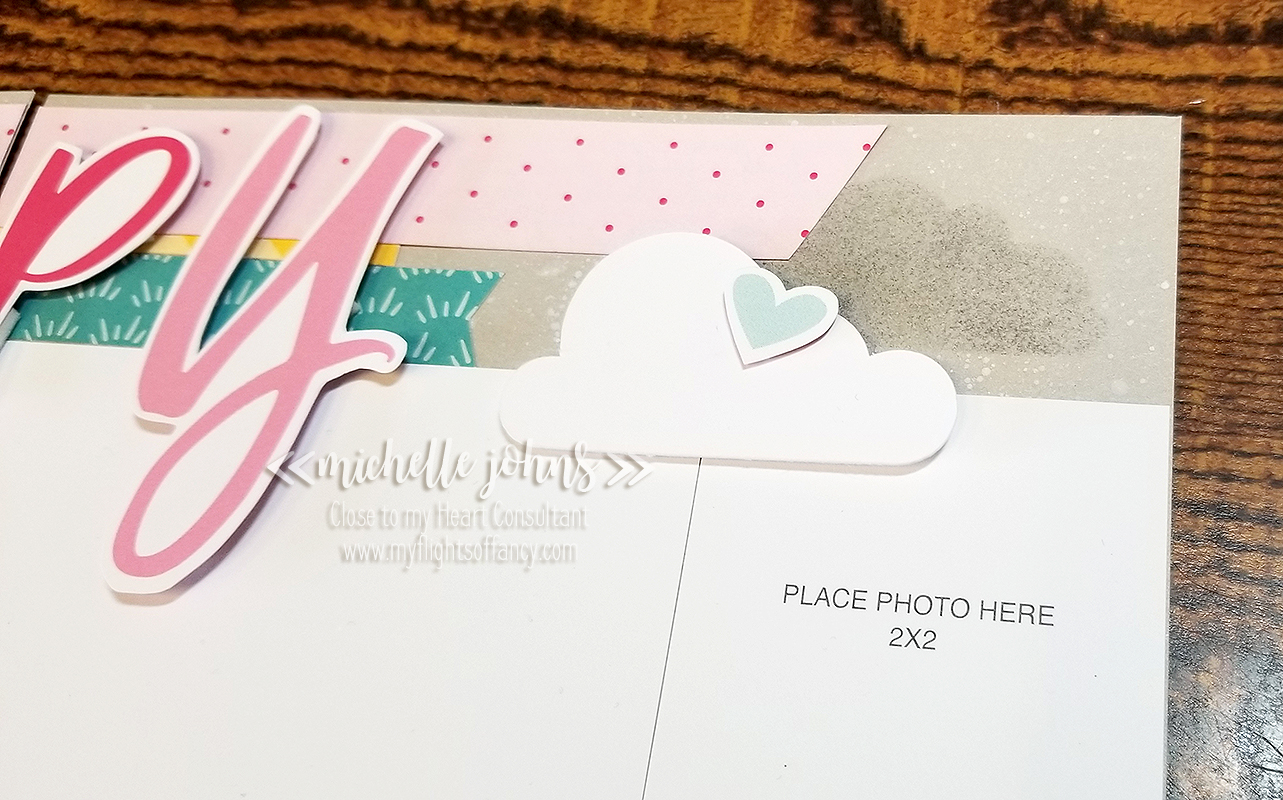
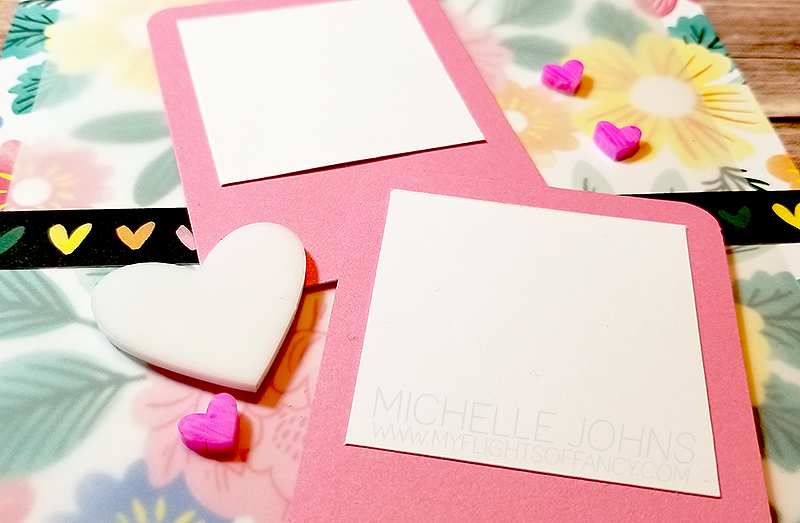
In place of the honeycomb, I used some vellum to tone down the floral paper from the Celebrate Today paper packet, just a smidge. I used pixie cardstock for some ‘Polaroid’ frames. Those acrylic hearts . . . don’t you just love them? I used the bright pink marker to give them a pop of color against the background.

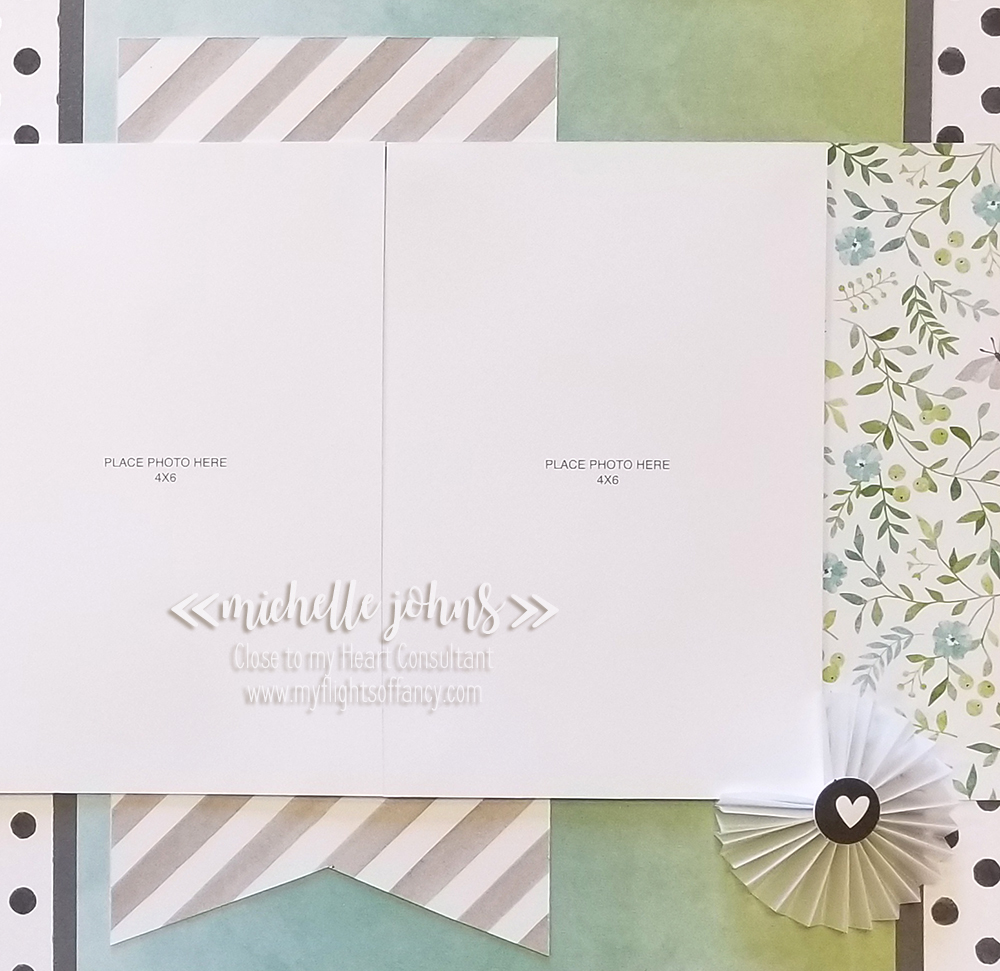
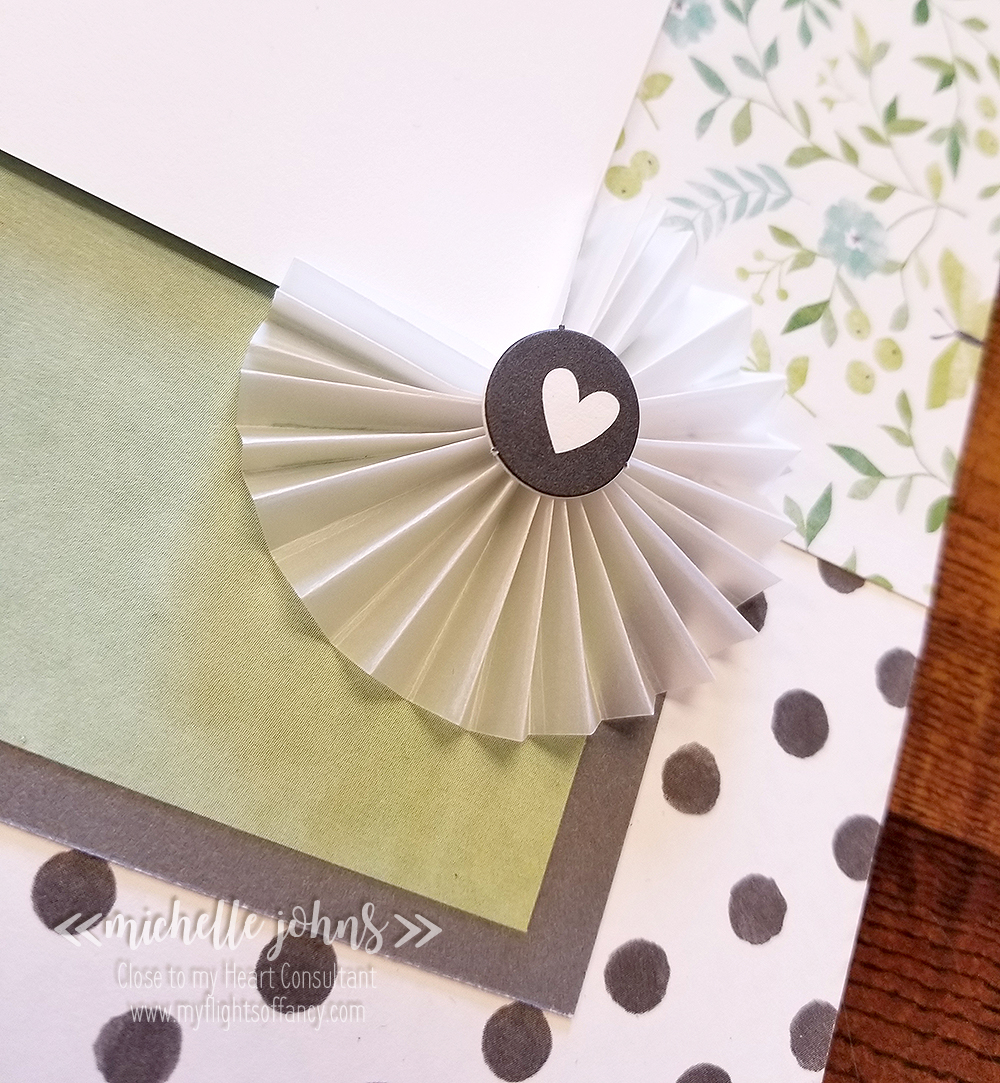
On the left page, I again used some vellum, but ran it horizontal, and the backside of the flower paper is a pink wash, and I used that to help the photos pop against the background. A quick heart from the stitched hearts die, and this page is done!

These pages went together in less than an hour, even with the coloring! It was so awesome! I love it when things are easy and fast! Especially when they turn out this good!

I would love to see what you come up with for this week’s sketch! I do hope you will share with us! If you didn’t yet, hop on over to Danielle’s blog to see what she came up with! It is super cute!

I look forward to seeing what you guys do with this one!

Until next week!

Stay Crafty my friend!

Mini Album Challenge, week 2!

Welcome back to the 2nd week of the Mini Album page challenge! Danielle and I are at it again with this weekly sketch challenge! We are having a LOT of fun with this, and we hope that you are enjoying seeing what we come up with each week!

Today we are working with this sketch.

For these challenges, we are picking a sketch, and we are working on them separately. That way you get two different ideas (in theory, at least!) for the same sketch! (in this case, if you follow the pin, there are even more ideas for this sketch, on multiple days)

Today I used the Spruced Up papers to make this fun little mini layout. the flip flaps allow me to add more photos to this small page! I just love how easy they are to add to the page protectors!

(I’ve found that it’s really hard to photograph pages in page protectors! Sorry!)

Now, I have actually created a cricut file for this page! You can find it here: Week 2 Sketch

This week I have a quick process video for you, the sketch is pretty simple, so I didn’t give any measurements, but it’s easy!

I hope you enjoy!

Remember, go over and check out the page that Danielle has for you! We would LOVE to see you participate! Let us know if you play along with the same sketch!

Join me in a Mini Album weekly challenge!

My friend Danielle and I are doing a weekly challenge between us to create a mini album page each week. We will both have the same sketch to work with, and using currently available products, we are going to make a page. I think that it will be good to get caught up on some past photos, because, what scrapbooker doesn’t have some photos that they don’t need to get caught up on, right?

I was thinking that the mini albums allow you to get things scrapped, but you don’t have to spend a lot of time to be able to do it. You have space to do some journaling, add some photos, and you are good!

Today’s page doesn’t have any photos on it yet, but I am hoping to get them on there for next week’s post. (so, that might become a thing? We’ll see!)

So, here is today’s sketch.

I think it is designed more for an 8×10 page (which you could also do), but I went with a 6×8 page.

With four kids, I have a lot of birthdays each year! Not only my kids’ birthdays, but the birthdays of the kids in their classes! So, there can be a LOT of photos for those! So, I went with a birthday theme! This page can be used for either Evan or Audrey, as they both like these colors. I used papers from the Mix Ins paper packet and the Celebrate Today paper packet! The balloons (and string) I grabbed from my stash, but they are CTMH! The balloons are Lagoon, Avonlea Teal (it was a cardstock specific to that paper packet), and I believe Juniper. So, two of those colors are retired, but they worked so well! The cardstock mat in the back is Glacier, light side.

Don’t you just love the flip flaps on this page? Yes, the balloons are outside of the page protectors! I attached them with some glue dots. (I used 3×4 and 2×2 flip flaps)

I made multiple layers with the balloons, to add more depth to the whole balloon cluster! There is room for 5 photos on this one little 6×8 scrapbook page! And even room for journaling too!

I would love to see what you do with this sketch! Won’t you play along with us? Make sure to hop over to Danielle’s blog to see what she came up with for this page!

Thanks for stopping by! I hope you will take a look around! Let me know what you think!

FBL: Into the Wild Mini Album ~ Completed!

On Sunday’s FB Live, we finished putting together the Into the Wild Mini Album! I need to order an actual album for it now! (There are a few more options coming up in the new book!) It was so fun putting it together!

The only thing that I did “off camera” was to cut the cut apart sheet pieces and die cut some of the shapes from White Daisy Cardstock. Everything else was the same as it was left at last week!

The items for this album will be retiring on Saturday, so make sure to get them before they are gone! As I said last week, there are a few options on how to get your hands on this fun-ness! Let me know if you would be interested!

I did make a quick walk through video, so that you can see the whole thing finished! Click here to see that!

To follow along with the making of the album, you can click here for part one, and click here for part two!

I hope that you enjoyed this little mini album! It was fun to make!

Thanks for joining me!

Pages & Projects: Aspen meets Into the Wild

I have a super fun page for you today! It went together quickly, even with me making the changes that I did!

Close to my Heart has a fantastic blog, that has some great tips and freebies on it, so if you don’t already follow it, you really should! You can find it here.

So, for today’s pages, I decided to take a peek at the blog, and found a great post that had a free sketch with it too! So, this is the post I am referring to, and if you scroll down, it has a link for the PDF pattern that you can download, for free!

So, grab your favorite drink, print out the pattern, grab your favorite paper pack, and click play on the video! Come make a scrapbook page with me!

https://youtu.be/CF4NTAsRciQ

{Click here if you cannot see the video in your email}

Thanks for stopping by! I hope you share your creation with me! I would love to see it!

~ Michelle

National Scrapbook Month with H2H!

Welcome to May and National Scrapbook Month! Every May, it is National Scrapbooking Month. So many companies and people and groups do all sorts of celebrations! Close to my Heart has a special for May, however that is not what I am showing you today! Today I am using the Sweet Girl Workshop Your Way to show you this super fun layout page.

I host a crafting retreat every year, and this year we happened to be at the beach on National Scrapbooking Day! It’s fantastic! I have always loved the beach, and totally wanted to incorporate the beach into my page. While I could have added sand to the page with my liquid glass, I didn’t . . . this time!

Most of the time, I plan plan plan before I cut anything. This time, I saw a layout on Pinterest, and fell in love! I just HAD to create it with the papers that I had! SO this fun, one page layout was created! I cut 3/4 x 1 1/2 inch strips from the center of the wood grain paper in the Sweet girl, then inked the edges with Almond ink and a sponge dauber. The SUPER fun part was the silver pieces! These look JUST like the inside of a seashell that you can find here on the Pacific Coast.

To do it, I started with the technique that I shared earlier this summer. (you can see that one here) So, you start with silver foil paper, then cover the whole thing with Black Shin Han Alcohol marker. Then you take an alcohol prep pad, and lightly go over it, removing some of the ink. It will look very grungy at this point. Then, you go back over it and dot the whole thing with the black marker, then the Warm Grey 7 marker, and then the Warm Grey 4 marker. Just dotting all over the place! (I used the chisel end for all of the dotting process) Then I went over with the Turquoise Blue marker, dotting here and there again, but sparingly this time. (I made sure to scribble off all of the color that it picked up, before I put it away again.

I let it dry for a bit, and then cut out the letters for BEACH out with the Block Letters Alphabet Thin Cuts, and paired it with the White Alphabet Foam Stickers and a banner that was stamped with the Modern Typewriter Alphabet stamp set. I know you can’t tell so much in the first picture, but I am hoping you can see how much shine comes through in the second picture. It turned out SO GREAT!!

I am going to put the group photo on this page for our retreat, and start an album for just those pages (which I have a few to get caught up on!). I am so please with this whole thing!

Thanks so much for stopping by! I do hope you liked my page! I would love it if you left a comment for me below, letting me know what you think! After that, head on over to the Heart 2 Heart Challenge blog, and play along with their challenge! The scrapbooking challenge is up until the end of the month, so you will have a lot of time to join us on this one!

Lovely Layers – CTMH Technique Blog Hop

Welcome to the CTMH Technique Blog Hop! This month we are all about Layers, layers, and more layers! Check out how many layers of hopping we have for you this month! Today you should have arrived from Marciava’s blog , but if not, that’s ok, it’s a big circle, and you will get back around to her!

Isn’t this just the cutest layout? It is my favorite layout in the whole workshop that I have coming out on Monday! There are So Many Layers! But, it’s so easy to put together!

This great title bit is combined from the cut apart page and the compliments for the Something Fierce paper pack. They are strung together with some fun Mink Twine. The banners that hang over the photo spots aren’t glued down, so that you can still get your photos in there! However, if you are putting this together with your photos already on it, you don’t have to worry about that part!

This adorable pink dino is another part of the cut apart page. I popped him (her?) up on some foam tape to give it a bit more dimension. The sentiment is part of the compliments pack. Add a few sparkles and you are ready for all the happenings!

This dino, like it’s dark pink companion, is part of the cut apart sheet, again, popped up on some foam tape. The little flag and hearts are all part of the compliments pack.

This little spray of hearts and sparkles continue the line from the lower left corner, and are all part of the compliments pack. Below it you see some of the fun papers and even some of the compliment borders! Adding a few more sparkles to the whole spray of hearts finishes off this fun page!

What do you think of this page? Like I said at the beginning, I am LOVING this page! It is just so fun and bright! Even if the dinos are pink, this page could easily be used for both boys and girls! I think the only thing that I might do differently, is maybe add some pewter sponging on the edges of all of the pieces. What do you think? Would you leave them as is, or add some ink on the edges?

Leave me a comment below, and let me know what you think! Do you have photos that would be perfect for this layout? I would LOVE to see them! Share them with me over on my facebook page! After you leave a comment, hop on over to Haley’s blog to see what fun she has come up to!

Thanks so much for stopping by! I really appreciate it!

~ Michelle

I Love Us

This week’s challenge over at Heart 2 Heart Challenges is “I Heart Us”. Now, you can take that, as always, in whatever fashion that you want. You can use the paper pack with the same name, or the photos that move your heart.

Today I have a fun two page spread for you, but it isn’t your traditional size that you see me make, they are 6×8 pages perfect for the Everyday Life albums!

I took the pattern 6 from the Make it from your Heart volume 1 book. Those patterns are for 12×12 pages, so I had to do some figuring, but I did, and made it work for the 6×8 pages!

First I started with some mink cardstock cut to 6×8, then I made some masks with a couple of clouds, and did some white ink splatter around the edges of the pages with my water brush. Next I used the negative of those clouds to be able to sponge some pebble and charcoal inks onto the cardstock to create the darker clouds. I cut the title from the cut apart page from the I heart us paper pack, as well as the strips of paper.

I used some foam tape to pop up the title and the clouds. Sparkles and Bitty Sparkles make some fun ‘rain’ on the left side of the left page.

I created a cut file for you to use, if you have the Artistry cartridge, you will be able to recreate this page in no time!

You can find the file here.

CTMH Picture My Life Hop

Welcome to another blog hop! Today we are sharing more about Picture My Life Cards! Today you should have come from Darlys’ Blog. If not, that’s ok, it’s a big circle, and you will get back around to her!

If you were around earlier this week, I shared a layout using a PML card from the Stargazer papers. You can see that here. Today I am showing another layout with PML cards! I LOVE to stretch my papers as much as I can, and I know that my crafty ladies love it too! (in fact, they have teased me if I use a 12″ strip that is covered by multiple things!)

See this fun striped banner? It is one of the PML cards that are printed and with the Chelsea Gardens paper pack! I LOVE this striped paper! When you tuck the pieces in under other pieces, you can totally make it look like a bigger piece of paper than it is!

The next couple of photos aren’t of PML cards, but I really LOVE how they turned out, so I had to add a close up of them for you!

This last one uses our vellum paper! It is such a soft look, but it stands out so much at the same time!

I hope you have liked my page! I would LOVE to see what YOU have done with your PML cards! Come over and join my FB group, and share your PML card creations!

Now, hop on over to Kathy’s blog and see what fun stuff she has for you!

I look forward to seeing you again soon!!

~Michelle

CTMH Technique Blog Hop – Creative with Cards

Welcome to April’s Technique Blog hop! Today you should have arrived from Catherine’s blog, however, if you started here, that’s ok, as it is a big circle, so you will loop back around to her! This month we are focusing on cards . . . PML cards, that is! What’s a PML card? Well, first it stands for Picture My Life. These are cards that are 3×4 and 4×6. All of the themed paper packs (found in the little books) have 2 sheets of them. You can also get them as stand along products that generally coordinate with at least one of the themed papers, color wise.

This layout uses one of the PML cards traditionally and one in a different way. Can you see how? I did the same thing with this card.

I used the fun dots PML card (which is a 4×6 card) as a paper ‘strip’ on this layout. This pic shows just the bottom corner, but if you look again at the full layout, you can see that it is repeated at the top, and it looks like it is a full piece from top to bottom. However, it really is just two smaller pieces!

On the right page, you can see that there is a 3×4 PML card that is ready for journaling to be added! I really like how this page turned out! It is just one of 6 layouts that are part of my Stargazer WYW Plus kit! It starts with the WYW kit and I add 3 layouts to it, with just adding a few sheets of cardstock! Let me know if you want a set, and I will gladly get them to you!

I hope you liked my layout! You know, this paper is going away at the end of the month (if it lasts that long!) You will want to make sure to get yours before its’ gone!!

Thanks for stopping by! I would love if you left me a little note to let me know what you thought about my layout!

Did you know that I have a FB group so that we can share our creations with each other? I would love to have you join! Just click here to join!

Now it’s time for you to hop on over to Katy’s blog! Have a great day!