Author Archives: Michelle

Seasonal Expressions 2 Blog Hop

Welcome to the Seasonal Expressions 2 Blog hop! This hop is to show off some of the new products in the new little book! I am LOVING it, and I am certain that you will as well! Today you should have arrived from Brenda’s Blog. If not, that’s ok, as it’s a big circle, so you will get there!

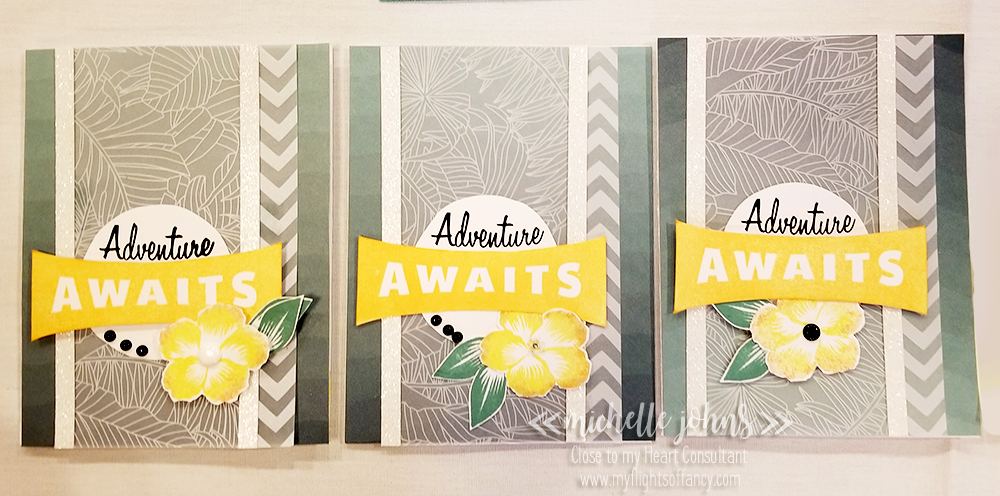
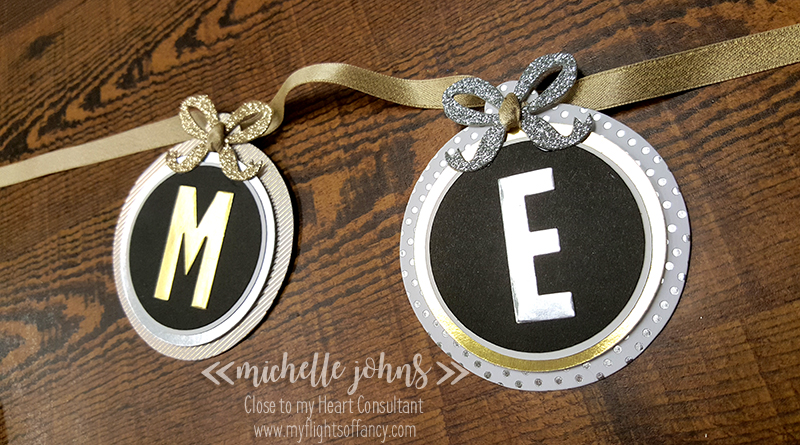
Today I have a super fun little mini album for you! I had so much fun putting this together! I just kept adding and adding and adding to it! If you have followed me for any amount of time, you know that I like to use our products in ways that most people don’t. Today, I didn’t use chipboard for the book, but multiple layers of our cardstock and liquid glass. You would never know, if I didn’t tell you, that there isn’t actually chipboard in this book!

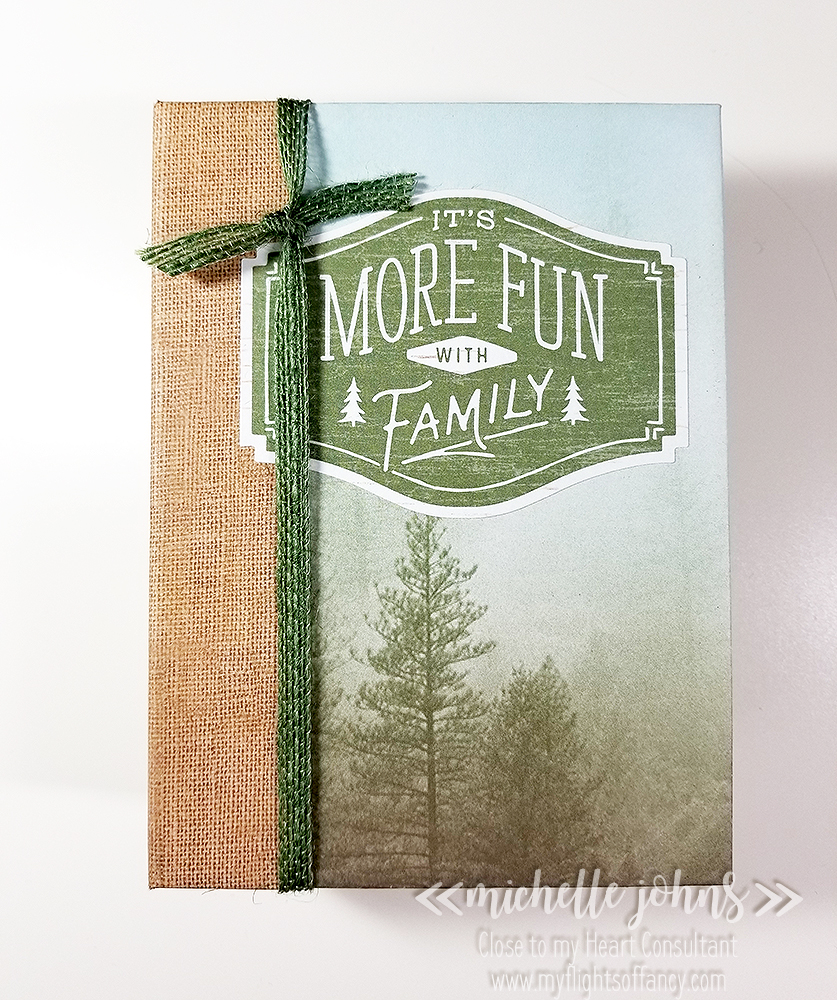
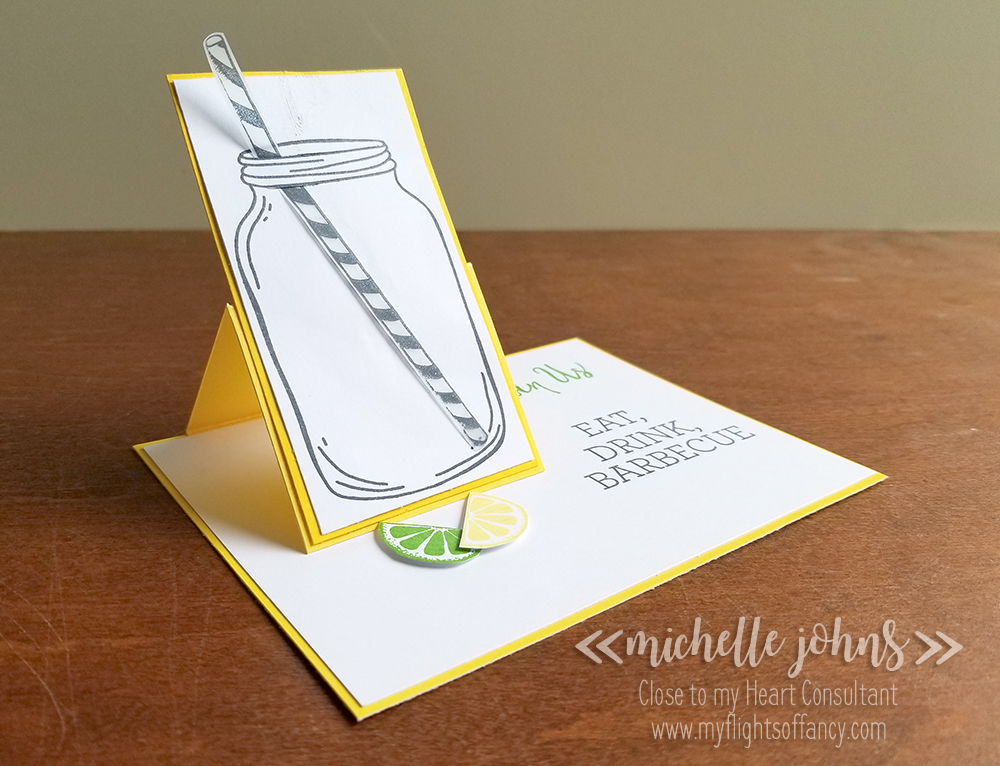
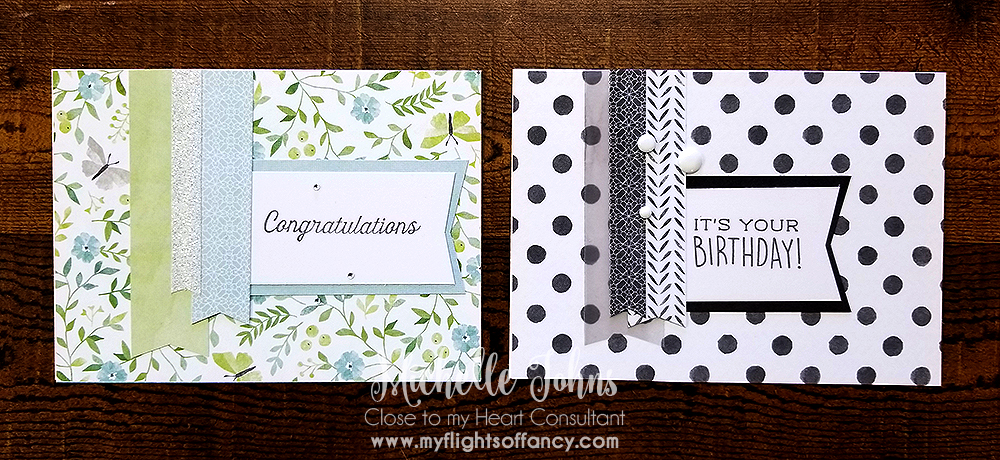
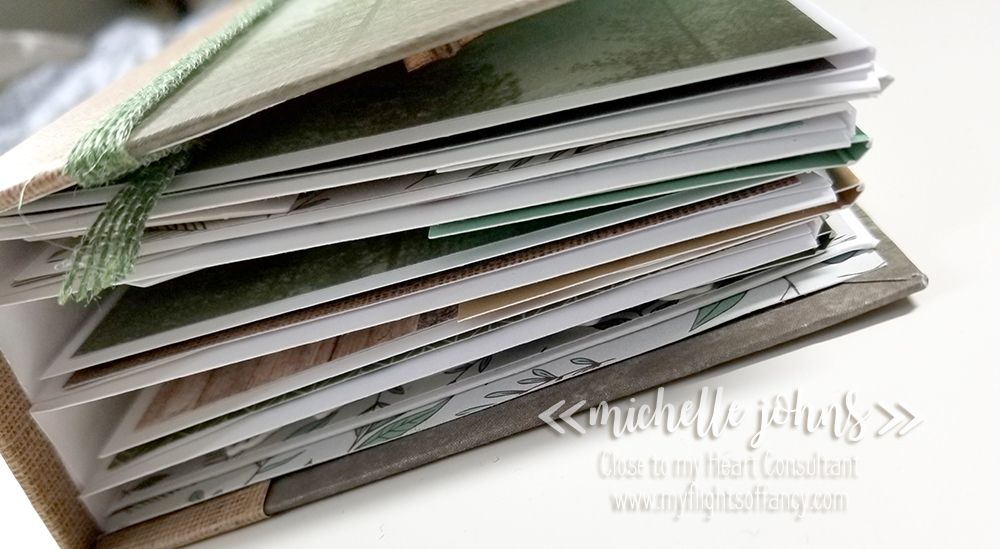
The pages of this mini album are made out of envelopes from the value pack. I also used the card bases from the value pack as some of the flip pages. Look at how chunky this little thing is! I just love it!

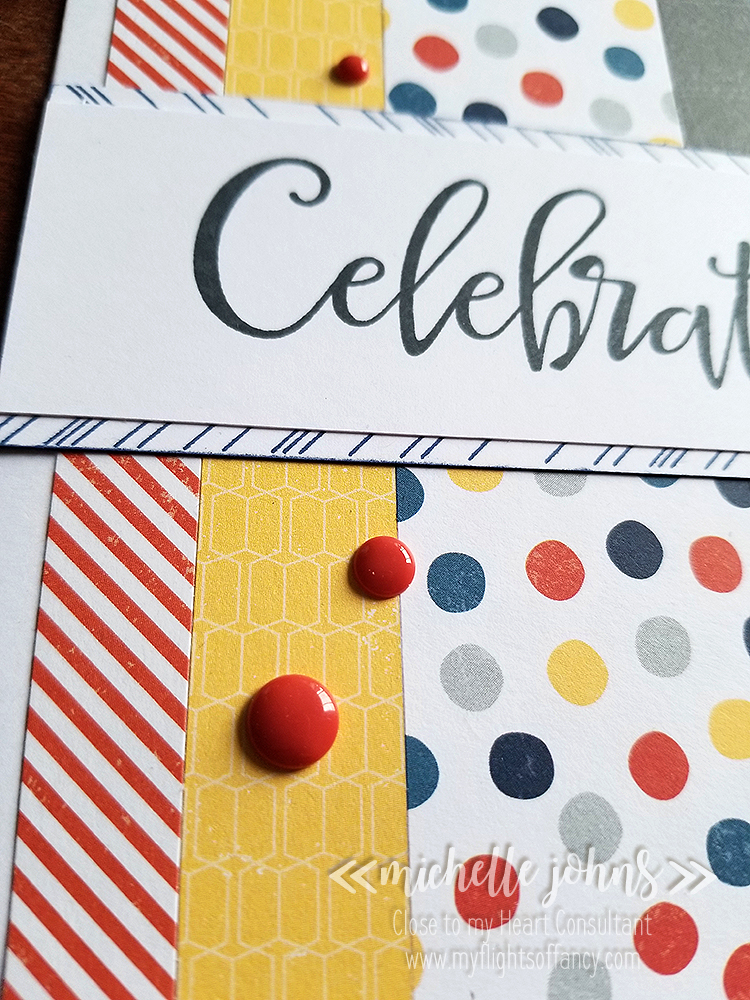
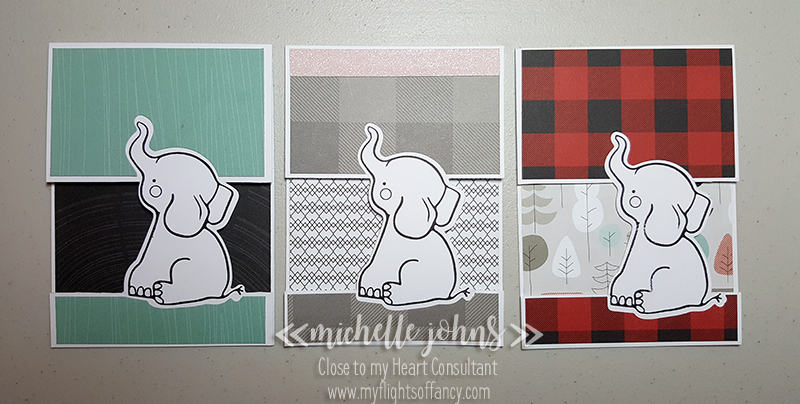
I used the Fresh Air paper pack for this mini. I also included sheets of cardstock from Fresh Air Coordinating Cardstock pack. You will also see some of the New England Ivy Burlap Ribbon and the Fresh Air Compliments.

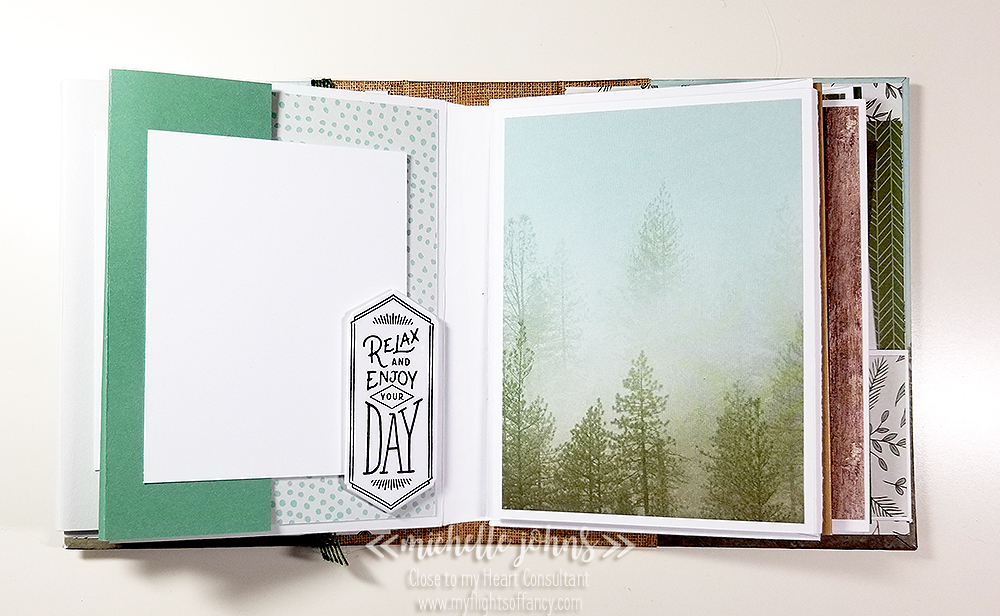
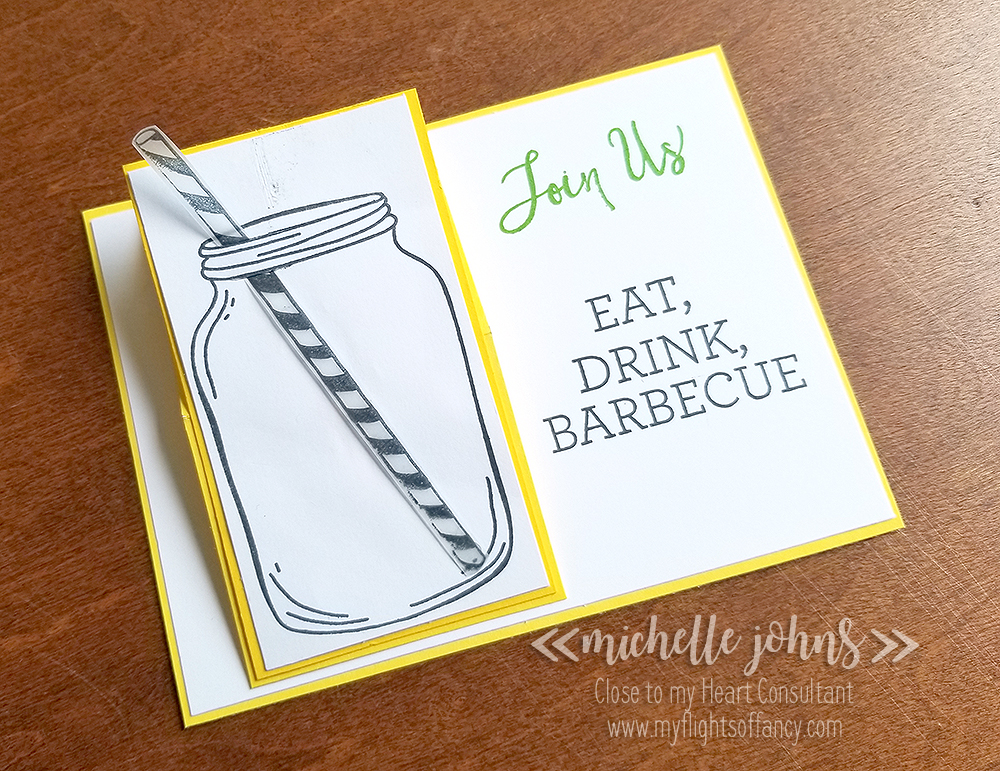
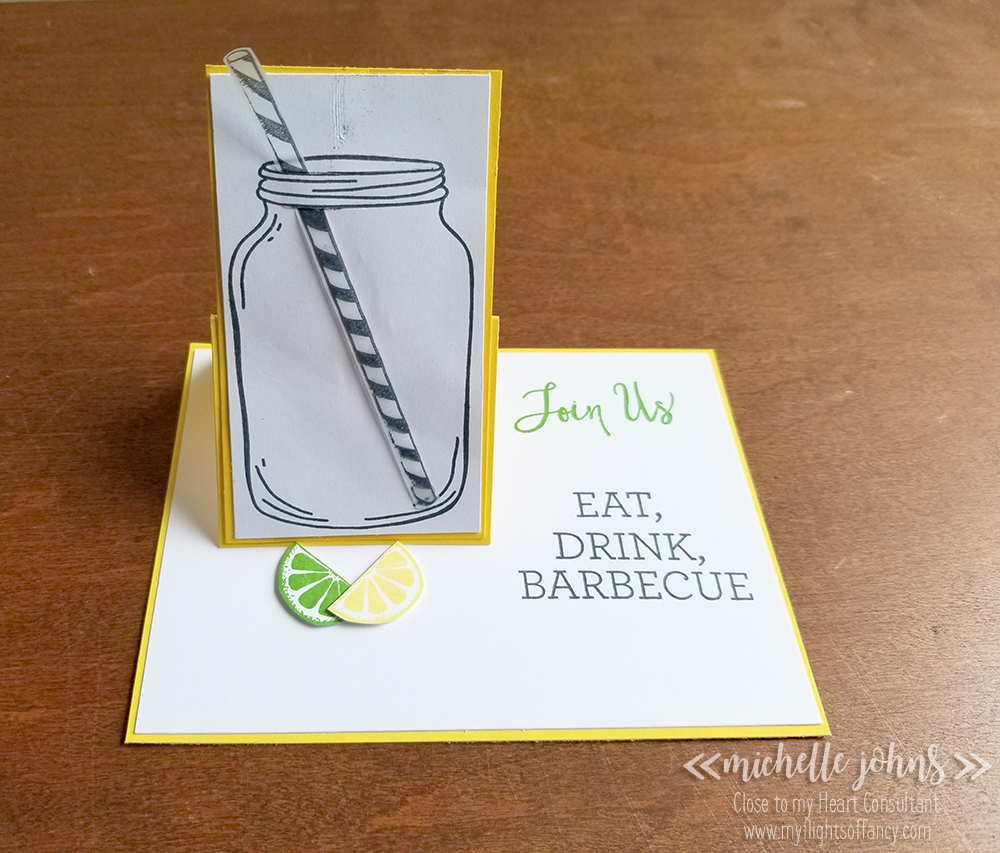
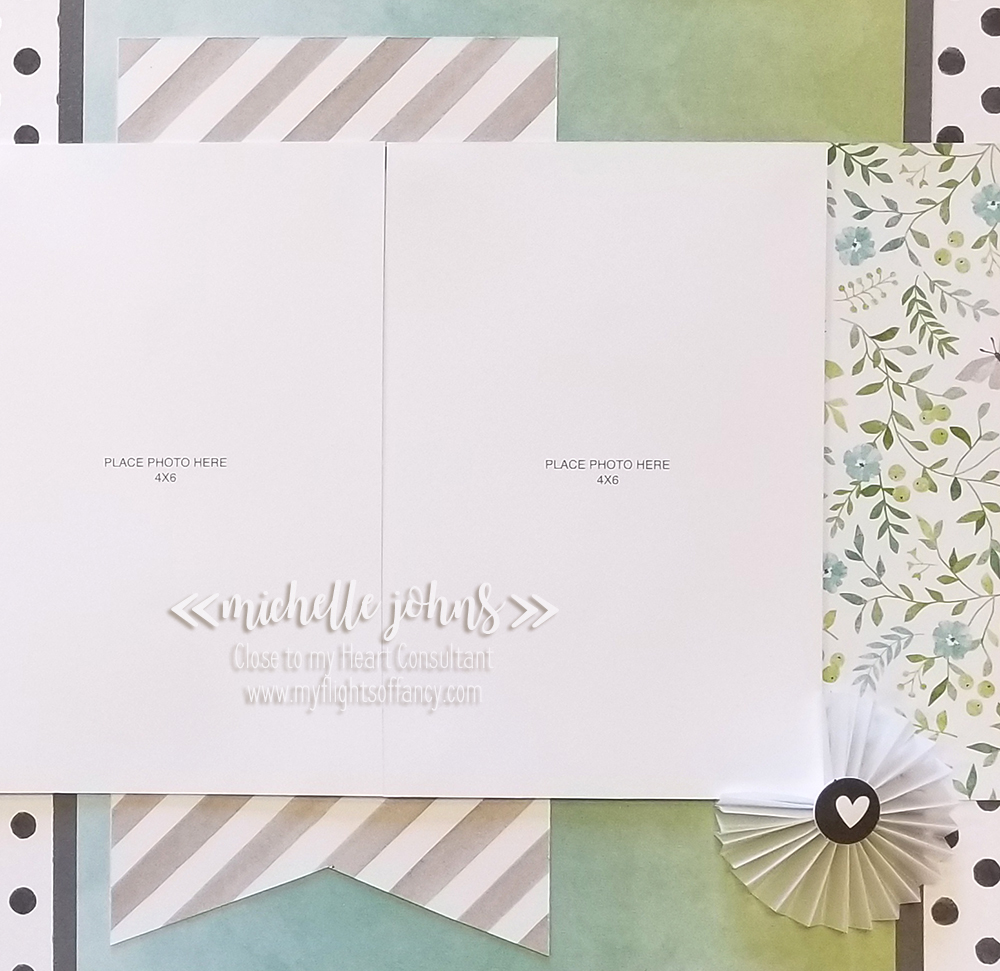
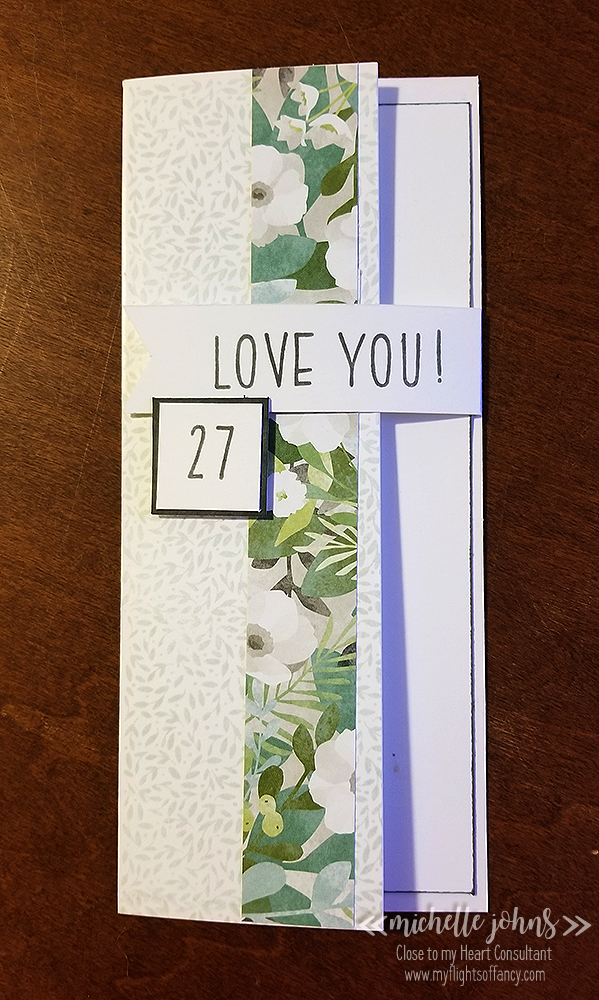
While this mini won’t fit full 4×6 photos, the photos could still be fairly large. There are so many flips and flaps in this little mini album!! Take a look at the video to see the whole thing!

Want to see all of the little bits and pieces? Check out the video!

Thanks again for stopping by! Next you will hop on over to Wendy’s blog. I’m certain that she will have some fun stuff for you too!

National Scrapbooking Month – Postcard Perfect

Hey everyone! Sorry about the blip of the post originally! Today it really is a blog hop for the Postcard Perfect special for the month of May. Today you should have arrived from Brenda’s blog. If not, that’s ok, it’s big round circle, and you will get back to hers!

Today’s card is thanks to one of my uplines, Naomi Smith. We had a fun meeting that we got to learn about the new items coming up, and she issued a challenge to us. We grouped up and had to pick a pattern from the Make it from your Heart Volume 3 or Volume 4. I got paired up with Karen and Lisa, and we made these fun cards! The only ‘warning that we had was to bring the paper and the MIFYH books. Then we found out we had an hour to pick a recipe and create the item from the Postcard papers.

We chose pattern #10 from the MIFYH V4 book. It was such a fun card to do!

We used the zip strip as one of the sides of the paper, used one of the cups from the hotel to hand cut the circles, stamped and trimmed the sentiment in tangerine and then archival black, and our fun cards were born! Which one do you think is my card? I would love to hear what you think! After you comment below, please hop on over to Wendy’s blog to see what fun project she has for you!

May SOTM – Classic Summer Bash Blog Hop

Thanks for joining us for the SOTM blog hop this month! This is a fantastically fun stamp set! I have so many ideas to do with it! I know it is a set that you will want!! Today you should have arrived from Darlys’ blog. If not, that’s ok, it’s a big round circle, so you will get there if you keep hopping along! (Plus, you will see some great projects if you keep hopping!)

So, if you know me, you know that I have billions of ideas on things, then have the hardest of times narrowing down what I want to do with any given project! LOL This project is no different, I tell ya! I have a pin board of ideas to start from for this stamp set.

I used a scrap of our vellum for the straw, with some memento ink (I probably should have used stazon ink, but didn’t have it handy)

I stamped a couple of the citrus wedges in both willow and lemon inks. I then popped them up with some thin 3-D foam tape, to create the stopper for the easel part of the card.

I used lemon cardstock for the base, matt and easel part of the card. (I glued it wrong, or you would be able to see the different shades on the cardstock! doh!)

Take a look at this whole set, isn’t it fantastic??

I really liked how the card turned out! I hope you do too!

What would you like to see me take inspiration from to use this set? Comment below, and let me see what you would like! After that, hop on over to Kathy’s blog and see what fun things she has for us to see!

Have a crafty day, my friend!!

~ Michelle

CTMH Picture My Life Hop

Welcome to another blog hop! Today we are sharing more about Picture My Life Cards! Today you should have come from Darlys’ Blog. If not, that’s ok, it’s a big circle, and you will get back around to her!

If you were around earlier this week, I shared a layout using a PML card from the Stargazer papers. You can see that here. Today I am showing another layout with PML cards! I LOVE to stretch my papers as much as I can, and I know that my crafty ladies love it too! (in fact, they have teased me if I use a 12″ strip that is covered by multiple things!)

See this fun striped banner? It is one of the PML cards that are printed and with the Chelsea Gardens paper pack! I LOVE this striped paper! When you tuck the pieces in under other pieces, you can totally make it look like a bigger piece of paper than it is!

The next couple of photos aren’t of PML cards, but I really LOVE how they turned out, so I had to add a close up of them for you!

This last one uses our vellum paper! It is such a soft look, but it stands out so much at the same time!

I hope you have liked my page! I would LOVE to see what YOU have done with your PML cards! Come over and join my FB group, and share your PML card creations!

Now, hop on over to Kathy’s blog and see what fun stuff she has for you!

I look forward to seeing you again soon!!

~Michelle

CTMH Technique Blog Hop – Creative with Cards

Welcome to April’s Technique Blog hop! Today you should have arrived from Catherine’s blog, however, if you started here, that’s ok, as it is a big circle, so you will loop back around to her! This month we are focusing on cards . . . PML cards, that is! What’s a PML card? Well, first it stands for Picture My Life. These are cards that are 3×4 and 4×6. All of the themed paper packs (found in the little books) have 2 sheets of them. You can also get them as stand along products that generally coordinate with at least one of the themed papers, color wise.

This layout uses one of the PML cards traditionally and one in a different way. Can you see how? I did the same thing with this card.

I used the fun dots PML card (which is a 4×6 card) as a paper ‘strip’ on this layout. This pic shows just the bottom corner, but if you look again at the full layout, you can see that it is repeated at the top, and it looks like it is a full piece from top to bottom. However, it really is just two smaller pieces!

On the right page, you can see that there is a 3×4 PML card that is ready for journaling to be added! I really like how this page turned out! It is just one of 6 layouts that are part of my Stargazer WYW Plus kit! It starts with the WYW kit and I add 3 layouts to it, with just adding a few sheets of cardstock! Let me know if you want a set, and I will gladly get them to you!

I hope you liked my layout! You know, this paper is going away at the end of the month (if it lasts that long!) You will want to make sure to get yours before its’ gone!!

Thanks for stopping by! I would love if you left me a little note to let me know what you thought about my layout!

Did you know that I have a FB group so that we can share our creations with each other? I would love to have you join! Just click here to join!

Now it’s time for you to hop on over to Katy’s blog! Have a great day!

Color Your Life – April SOTM Blog Hop

Welcome to the blog hop! Today you should have arrived from Colleen’s blog. If not, that’s ok, as it’s a big ol’ circle! If you get lost along the way, Melinda has the full list here.

This set is such a fun set! Today, I’m using two of the stamps from this set, and making two cards. They don’t look tremendously different, but I do like how they did turn out!

As you can see, I did one card with traditional boy colors and one with traditional girl colors. I really do like how they both turned out! I used pattern 15 from the Make it from your Heart Volume 4 book. I am LOVING this book, I’m telling you, you really need to get it! I added a layer behind the sentiment layer, to help give it more pop (and to use the second stamp in a fun way!).

I was using scraps for both of these cards. This first one uses both Make Waves and Gimmie Some Sugar. They mixed up so well together! I used pixie ink to stamp the ‘feather’ type line stamp on either side of the mat layer under the sentiment, and then ran the flat edge of all four sides of the mat on the ink pad to get the darker line to help the color pop a bit more. (I took care to make sure that the lines were going in the same direction!)

I added 3 sparkles to help it pop, and my card is done! Now, let’s look at the other card, shall we?

For the second card I used pieces from the Stargazer paper pack. I did everything the same with this card, well, mostly. The pieces are lined up slightly differently, however, they are all the same sizes. I used Sapphire ink on the mat piece for this card.

I did similar placements on the Stargazer dots, it just worked so well. I stamped both “Celebrate” sentiments with black Memento ink.

Did you know that you can get the April Stamp of the Month for just $5 with your qualifying purchase. That is a GREAT deal!

Want to know my secret for getting everything lined up both as a square and in the middle of the card base? I use washi tape! I tell my ladies to bring their “ugly” washi to classes! (now, what I used wasn’t ‘ugly washi’, but it still works!) I linked up some inexpensive washi below, in case you need to add some more to your collection! The secret is to flip your paper over, and use washi to tape your pieces together, so you have one block of papers. Then, use liquid glass to attach to the card base. This gives you a little bit of wiggle room when you put it on your card base! I LOVE using this little secret on my cards and my layouts too!

I hope you like my little cards today! Over in my facebook group, I am having a little contest, and you could win one of these cards! Come and check it out!

Thanks so much for stopping by! I hope you have enjoyed my cards! Now, hop on over to Kathy’s blog and see what fun stuff she has for you!

Items used to create my cards today:
Make Waves Paper Pack
Gimmie Some Sugar Paper Pack
Stargazer Paper Pack
Make it from your Heart Volume 4
Cards & Envelopes
White Daisy Cardstock
Sparkles
Stargazer Dots
Pixie Ink
Sapphire Ink
Black Memento Ink
Washi Tape
Liquid Glass

CTMH Technique Blog Hop – Purposeful Patterns

Welcome to this months Technique Blog Hop! This month we are working with the Make if From Your Heart volumes 3 and 4. You should get plenty of great ideas from this blog hop, and I am certain that you will want one or both of these books by the time you are done! You should have arrived from Danielle’s blog. If you didn’t, and you started here, that’s ok, it’s a big round circle, and you will get back to her blog!

Today I am working with Volume 4, which is all about cards! I had a hard time choosing which pattern to use, but decided to go with pattern #4.

This is the first card that I made. Now, I did make some adjustments for this card. I left off the piece on the left, and I added another banner piece, plus the sentiment piece as well.

I loved the flowers and the butterflies on this PML card from the Chelsea Gardens paper pack. So, I trimmed it to 4 x 5.5, trimmed the card base down to the same size, and started layering things! This whole card (minus the base) is used from scraps from my projects that I have made already! That lacey banner piece, that was part of a 3×4 PML card. The mat under the sentiment? It’s the same PML card! I used charcoal ink to stamp the sentiment with and the Many Congratulations stamp set. I used just a bit of the White Shimmer Trim to give a bit more sparkle. Topped it off with some bitty sparkles, and you have a beautiful card!

The next card, believe it or not, is from the same Chelsea Gardens paper pack! I wanted to show that there is great versatility in this paper pack! I even used the same card pattern! The only difference is the size of the sentiment banner!

This is a MUCH more boy-ish card! It is very monochromatic! I am loving this card too! The dark banner piece is one of the zip strips from this paper line. That see through piece? That is our vellum that I colored with the Warm Grey 7 marker! I used that same marker to color the mat piece for the banner! The sentiment is from March’s Stamp of the Month. Like the first card, I stamped with Charcoal ink. I couldn’t leave it plain, so added a few of the white dots to finish it off, and it looks great!

I love that these cards look the same, but so different at the same time! It just goes to show that these card patterns can be used so very many different ways!

The books show you the sketch of the pattern, the dimensions (which I’ve covered in the photo), and two samples of the cards as well. These volumes come hole punched and ready for you to put in an album. You can use any of the mini albums available right now!

Thanks for stopping by! Let me know which card is your favorite! Now you are on to Tammy’s blog.

CTMH Technique Blog Hop – Blushing Backgrounds

Welcome to January’s blog hop! This month we are focusing on stamped backgrounds! There are so many fun options, I know you will get some great ideas from the ladies in the hop! Today you should have arrived from Darlys’ blog. If not, that’s ok, it’s a big circle, and you will get back to her!

Today, I made a card for one of my dear friends. (she will probably see it online before she gets it, if she reads my blog, anyway!) It started out with one idea, and totally went to another, and this is what I ended up with!

I used the Wishes book to find a card idea. I ended up using the “Classic Closure” card on page 62.

As you can see, this card front doesn’t go all the way to the right side. I like the effect that it gives. The book shows a brad and twine closure, however, we don’t carry those anymore, so I thought I would come up with another fun idea. This banner is stamped with Jennifer’s Hand in pewter ink, trimmed with the micro tip scissors, and then attached with liquid glass, and sits just under the inside layer. I inked the layer’s edge with the pewter ink to help it stand out just a bit, and not have to have yet another layer.

The front panel is stamped with one of the background stamps included in the Flower Market Cartridge bundle in heather ink. I used a bit of the Chelsea Gardens paper for a bit of accent.

The mat under the 27 is inked with the pewter ink, so that it would match the inks used. (I could have used cardstock, but it was just such a small piece, that I used what I had immediately available. I popped up just the bottom of the 27 with some foam tape, so that the banner could tuck under it, just a smidge, to keep the card closed.

I added some bitty sparkles and some clear sparkles to give it a bit more pop!

I hope you have enjoyed my little card!! Now, hop off to Debi’s blog for her inspiration on the blushing backgrounds!

Have a great day!!

~Michelle

CTMH Technique Blog Hop – Fabulous Foil

Welcome to the CTMH Technique blog hop! You should have arrived from Michelle’s blog, if not, that’s ok, it’s a big circle, so you will get back to her!

Today we are focusing on our new Foil papers! Have you seen them? They are GREAT!! Our foil paper is 10 lb cover weight, so it’s nice and sturdy. Hopefully you will hop through the blog hop and get some great fun new ideas to use this fabulous new product!

Now, I know that summer is still here, and that fall is just around the corner, but I just HAD to share this with you. In the new ‘little book’ (i.e. Holiday Expressions), you will find 2 different Christmas papers, a cut above card kit (also Christmas) and a Tag set too! (As well as two other paper packs that aren’t Christmas!) Well, I just had to show you something SUPER fun that you can do with this tag set!

I know, I know, BUT, you can totally use this idea and make a Celebrations banner, or Happy New Year, or Happy Birthday, or Happy Anniversary! The options are almost endless, really!!

To get to the end result, I added a few things to the tag set. The Black Cardstock helps the shimmer of the gold and silver pop against the white. The Gold and Silver Foil papers were added (of course), and the Basics Ribbon Pack. I used the Block Alphabet Thin Cuts to cut the letters from the foil papers. The tags (both gold and silver), the glitter bows, and the white circles are all included in the tags kits, along with some white twine, which I did not use in this project.

Now, I know my lighting isn’t the best, but just LOOK at all that shine!! I used the gold foil paper for the letters on the tags that had the gold embossing on them, and used the silver foil paper for the circle under the gold letters. For instance, this M from Merry Christmas:

This fun banner was super simple to put together! I know you will want to make something similar! I can’t wait to see what YOU do!

Next up is Sarah, so hop on over to her blog, and see what fun things she has made for you!

Thanks for stopping by! I hope to see you again soon!

~Michelle

Fancy Elephants

My oldest loves elephants. She hasn’t seen this one just yet, but I know she would love it too!

I’ve seen similar cards in the past, so knew that I wanted to try it! When I saw this stamp set in the new Annual Inspiration book, I KNEW that I had to try it!

Look how cute it is when it’s standing! Believe it or not, the card base and the elephant are all just one piece!

This is one of the cards that I will be teaching at my fancy folds class that will be coming up soon! It uses the Sweet Baby stamp and thin cuts bundle.

All three of these cards are made with the Jack Paper Pack that will be retiring at the end of this month! So, if you want to re-create these cards, you will definitely need to get some ordered before then!! See that pink sparkly strip at the top? It is a small bit of the Bashful Glitter Paper, isn’t it adorable? I think I need to grab my small water brush and my bashful ink pad and color in his little cheeks!

I love how they are all the same, but that paper gives them each a totally new look!!

I hope you like them! Do you have this fun Elephant stamp yet? What about those Jack papers? Share what you have made with them!

Until next time!

~Michelle