Tag Archives: Christmas

New Product Blog Hop!

Have you seen the new stuff? Oh My Goodness!! All the holiday stuff you could want! (ok, well, I guess that depends on the holiday that you celebrate, but so much fun stuff!!) We will have 22 ladies participating in this fun hop, you may have started at Alyson’s blog, or you may have started here, either way, you will have plenty to go see! If you get lost along the way, Melinda has the whole list over on her blog.

Let’s get started, shall we?

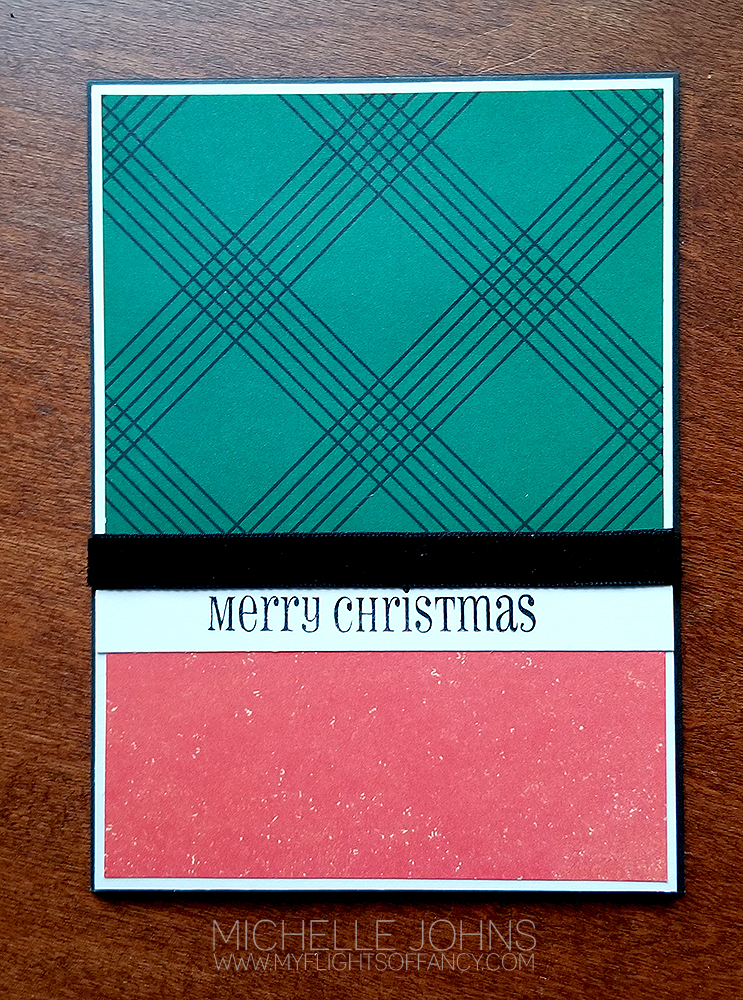
Today I have this fun card that mixes the new Cedar & Pine paper packet and the continuing Holiday Cheer special.

I stamped the truck image by sponging the stamp with Candy Apple Red and Evergreen inks onto one of the tags from the Holiday Cheer special. Then I added the sequins and the foam and acetate from the window foam and acetate. I used the Shaker window thin cuts to cut the gold glitter paper that also comes in the Holiday Cheer special.

I used a pattern for the card from the old Wishes how to book. This card measures 3 1/2 x 8 inches. I used a bit of the white and gold ribbon to hang the ornament from. I just taped the ribbon to the back, to make it easily removable from the card once the recipient gets it.

Thanks so much for stopping by! I hope you will leave me a comment to let me know what you think! After to take a few moments to do that, hop on over to Krista’s blog!

Back to the Basics a blog hop!

Welcome to the Technique Blog Hop! This month, we are going back to the basics! You will see many different things (and maybe a few versions of the same thing) I know you will see some things that you forgot about, and maybe even a few things that are new to you! I can’t wait to see everyone else’s things, I know you will too! So, you should have gotten here from Krista’s blog, but if not, it’s a circle, and you will get back around to her!

Today I went back to the basics, and let my paper do the talking for me! (at least mostly!) I grabbed two pieces from the newly available Cedar & Pine paper packet, a piece of linen cardstock and a piece of black cardstock! Keeping the design basic was key to all of this!

Let me share the sizes with you!

Black: 4 x 11
Linen: 3 7/8 x 5 3/8 (x2) & 3 3/8 x 1/2
Evergreen B&T: 3 3/4 x 3
Red B&T: 3 3/4 x 3

Super simple! I could easily get 3 cards from these sheets of cardstock!

I used the Say it in Style stamp set for the sentiment. I could totally make this card be for ANY occasion! There are so many great sentiments on this set! You will definitely want to have it in your stash!

I added a bit of the black velvet ribbon to finish it off and give it a nice polished look! You could easily use a piece of black cardstock to get a similar effect, if you don’t have that ribbon yet!

Oh, and just to give you an idea of how ‘back to basics’ this card was . . . . I had TOTALLY forgotten that I was supposed to do this hop! When I signed up I was going to do a different technique, however, when I remembered, I had just over an hour and a half to design, make, photograph, edit, and type up this whole post. Plus wait for my food that I had just ordered and then get home! Just so you know, I did it, and I have a few minutes to spare, even! (so long as everything doesn’t crash when I hit publish! hahahahahhaa!!)

Thanks so much for stopping by! I hope you enjoyed my card with a back to basics card design! Now, leave a bit of love below, and then hop on over to Melissa’s blog to see what she has for you!

Until next time, have some crafty fun!

~ Michelle

Season’s Greetings!

It’s another weekly challenge over at Heart 2 Heart Challenges! This week’s is Season’s Greetings! You can have it be anything that you think fits into that theme!

Today I am sharing a 5×7 photo card, perfect for those Christmas Cards that you want to send out.

The best part is, I even have a video for you on how to make it! You can find it HERE.

Check out the fun details that I have on here! I used the Oh What Fun paper pack, the Christmas Countdown stamp set, Candy Apple cardstock, Intense Black and Clover green inks, Red gems (sold out), and Candy Apple striped ribbon.

In the video I share how to get two 5×7 cards from one sheet of cardstock, how to make the frame, the pull out for the photo, and other fun tips! You should check it out!

After you have watched, click follow, and then head on over to the H2H blog to see what other fun creations there are for you this week! Remember, you have the rest of the month to play along with any of the challenges in December!

Thanks so much for stopping by!

~Michelle

CTMH Technique Blog Hop – Fabulous Foil

Welcome to the CTMH Technique blog hop! You should have arrived from Michelle’s blog, if not, that’s ok, it’s a big circle, so you will get back to her!

Today we are focusing on our new Foil papers! Have you seen them? They are GREAT!! Our foil paper is 10 lb cover weight, so it’s nice and sturdy. Hopefully you will hop through the blog hop and get some great fun new ideas to use this fabulous new product!

Now, I know that summer is still here, and that fall is just around the corner, but I just HAD to share this with you. In the new ‘little book’ (i.e. Holiday Expressions), you will find 2 different Christmas papers, a cut above card kit (also Christmas) and a Tag set too! (As well as two other paper packs that aren’t Christmas!) Well, I just had to show you something SUPER fun that you can do with this tag set!

I know, I know, BUT, you can totally use this idea and make a Celebrations banner, or Happy New Year, or Happy Birthday, or Happy Anniversary! The options are almost endless, really!!

To get to the end result, I added a few things to the tag set. The Black Cardstock helps the shimmer of the gold and silver pop against the white. The Gold and Silver Foil papers were added (of course), and the Basics Ribbon Pack. I used the Block Alphabet Thin Cuts to cut the letters from the foil papers. The tags (both gold and silver), the glitter bows, and the white circles are all included in the tags kits, along with some white twine, which I did not use in this project.

Now, I know my lighting isn’t the best, but just LOOK at all that shine!! I used the gold foil paper for the letters on the tags that had the gold embossing on them, and used the silver foil paper for the circle under the gold letters. For instance, this M from Merry Christmas:

This fun banner was super simple to put together! I know you will want to make something similar! I can’t wait to see what YOU do!

Next up is Sarah, so hop on over to her blog, and see what fun things she has made for you!

Thanks for stopping by! I hope to see you again soon!

~Michelle