Monthly Archives: September 2020

Teeny Tiny things are adorable!

Wouldn’t you agree? I do love some teeny tiny things!! This week’s challenge over at the H2H Challenge blog is all things Teeny Tiny!

Today I was inspired by the retired Originals Cards book to make these adorable little 3×3 cards.

I used half a sheet of nectarine cardstock for the card bases. I scored them at every half inch and sanded those lines to reveal the white core of the cardstock.

I used two stamp sets for this little card. First, the Bloom with Grace Cardmaking Stamp and Thin cuts. I stamped the pumpkin on some white daisy cardstock with the intense black ink, and then colored it with the Yellow Green TriBlend™ Marker, Tan Blend TriBlend™ Marker, Gold Yellow Blend TriBlend™ Marker, and the Orange Blend TriBlend™ Marker.

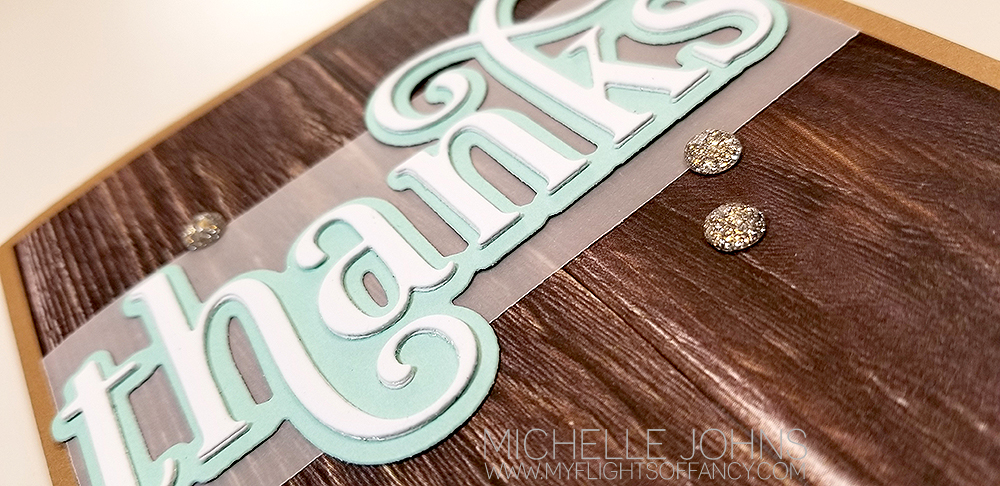
Next I used the Pennant Banner Alphabet & Thin Cuts for the sentiment on these cards. I used the grid stamp to stamp in Canary ink. Then I used the same set, and offset stamped it in mink ink. Then I stamped the letters in intense black ink.

I grabbed some string from my stash, and popped up the pumpkin and banners on some foam tape. Add some bows with some micro glue dots, and viola! You have these adorable Teeny Tiny cards!

I would love to know what you think about these cards!

“Peek-a-boo!”

Welcome to the September Technique Blog Hop! This month is all about a window of some sort! I know there will be LOTS of great ideas on this hop, so make sure to visit everyone! (and make sure to leave some love along the way! EVERYONE loves to hear how much their creation resonates with others!) Today, you may have come from Lauren’s blog, or you may have started here. Either way, it will be a big circle, so you will eventually end up back here!

Today I did a fun peek a boo card, with a new technique that I hadn’t tried yet, and it was fun! Let’s take a look at the front, first, shall we?

I am IN LOVE with the wood paper packet! This is just one of the papers from the packet! It is actually a plank looking piece, so, I did some fussy cutting to be able to have it look like a solid piece (though, maybe not quite so much in person!)

That Thanks die cut is fabulous, isn’t it? That is new too! I cut three layers from White Daisy Cardstock, and the shadow layer from Mint Cardstock. Then layered them with the liquid glass, that I LOVE so much! I attached them on top of a piece of vellum with some micro glue dots. I finished fancy-ing up the card with some gold glitter gems.

Now, let’s take a look at the inside, shall we?

Oh my goodness! Isn’t that fantastic?!?! SOOOOOOOO much fun!

I used the From the Funny Farm stamp set for the adorable little birdie! I stamped it in the intense black ink and then colored with the Ice Blue Blend Tri tip marker. I used the circle thin cut from the card spinner die set for the little cut out for the bird.

The sentiment side uses the Stitched Fancy Brackets dies, in both White Daisy and Mint Cardstocks. I stamped the sentiment with the Teeny Tiny Type alpha set.

I hope you leave a bit of love for me! Then, off to another Michelle’s blog! 😉

Thanks so much for stopping by!!

In case you get lost along the way, here are all of the blogs this hop!

Melissa
Cat
Maz
Lauren
Michelle J. You Are Here!
Michelle L.
Brandi
Katy
Alyson
Miss. Carrie’s Creations

Who wants to see some MORE new products?

We are having another blog hop, so that you can see more of the new products! We are focusing on the items in the smaller 2 month book with this hop, so grab something to drink, and let’s get hopping! Remember to leave a little love along the way! Your comments bring smiles to the faces of the consultants sharing their work with you! Today you may have started here, or come from ____________’s blog. Either way is great! The hop, as always, is a big circle, and you will end up back where you started!

So, what do I have for you today? Let’s take a look!

Wood You Rather?

Welcome to another H2H challenge! This week’s challenge is all about “Wood”! I know we have some great examples for you this week!

Today, I have some Timber paper that has moved to the Online Only portion of our websites, but I do love the wood paper on it so much! (I was going to use a new product, but it hasn’t arrived yet!)

These cards come from my Cards for Guys class (with NO stamping!)! They are SUPER fun! I loved putting them together! In this class you have two cards per basic design, however each card is just a bit different. And, did you see, NO STAMPING! Incredible, right??

Now, after you see these cards, you will have to let me know which is YOUR favorite!

As you can see, these cards have the same basic set up, however are very different in looks! I used one brad and a bit of silver embellishing thread for the left one, and some extra foam tape and a wood arrow from the Wooden Arrows Assortment.

I did cut the mountain sticker a bit, so that it would fit in the ‘photo frame’, but I don’t think it’s terribly noticeable, do you?

Look at that wood paper! It totally looks like it has dimension, itself! (it doesn’t, but it looks like it does!)

So, tell me, which “Wood you rather?” 😉

I would love it if you left me a comment! Then, play along with the challenge! You have the whole month to do so!

More info on the class coming shortly, so make sure to watch for it!