Tag Archives: CTMH

Back to the Basics a blog hop!

Welcome to the Technique Blog Hop! This month, we are going back to the basics! You will see many different things (and maybe a few versions of the same thing) I know you will see some things that you forgot about, and maybe even a few things that are new to you! I can’t wait to see everyone else’s things, I know you will too! So, you should have gotten here from Krista’s blog, but if not, it’s a circle, and you will get back around to her!

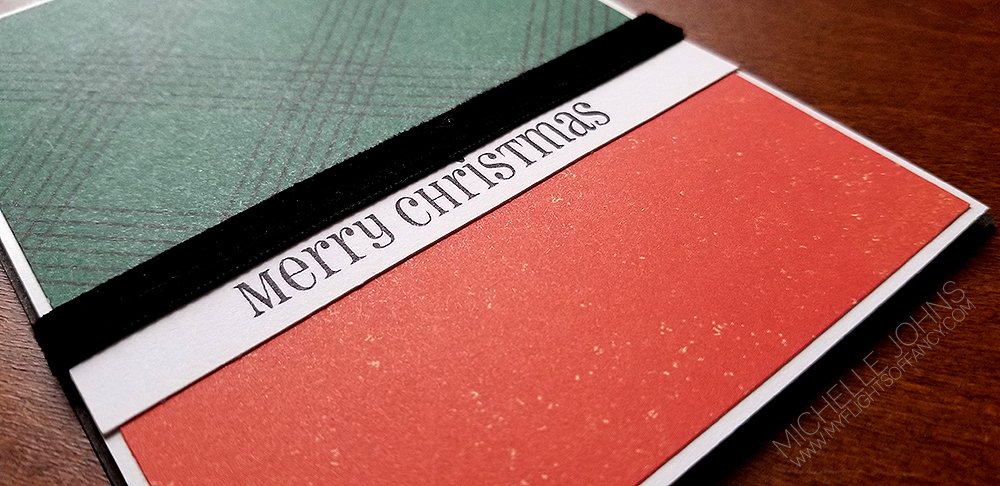
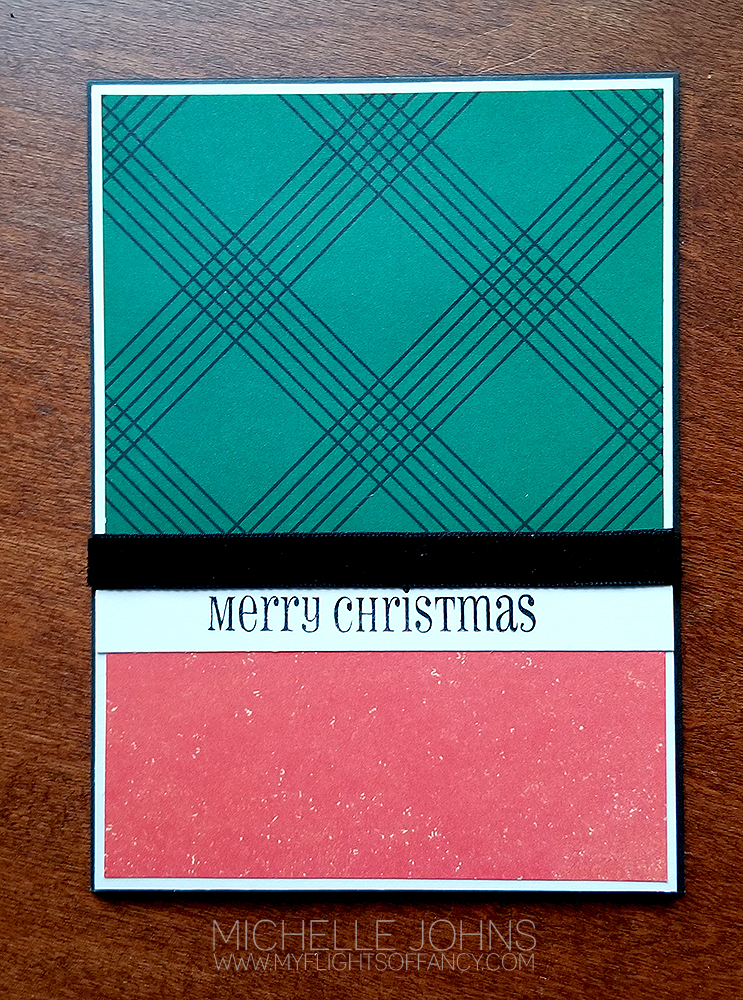
Today I went back to the basics, and let my paper do the talking for me! (at least mostly!) I grabbed two pieces from the newly available Cedar & Pine paper packet, a piece of linen cardstock and a piece of black cardstock! Keeping the design basic was key to all of this!

Let me share the sizes with you!

Black: 4 x 11
Linen: 3 7/8 x 5 3/8 (x2) & 3 3/8 x 1/2
Evergreen B&T: 3 3/4 x 3
Red B&T: 3 3/4 x 3

Super simple! I could easily get 3 cards from these sheets of cardstock!

I used the Say it in Style stamp set for the sentiment. I could totally make this card be for ANY occasion! There are so many great sentiments on this set! You will definitely want to have it in your stash!

I added a bit of the black velvet ribbon to finish it off and give it a nice polished look! You could easily use a piece of black cardstock to get a similar effect, if you don’t have that ribbon yet!

Oh, and just to give you an idea of how ‘back to basics’ this card was . . . . I had TOTALLY forgotten that I was supposed to do this hop! When I signed up I was going to do a different technique, however, when I remembered, I had just over an hour and a half to design, make, photograph, edit, and type up this whole post. Plus wait for my food that I had just ordered and then get home! Just so you know, I did it, and I have a few minutes to spare, even! (so long as everything doesn’t crash when I hit publish! hahahahahhaa!!)

Thanks so much for stopping by! I hope you enjoyed my card with a back to basics card design! Now, leave a bit of love below, and then hop on over to Melissa’s blog to see what she has for you!

Until next time, have some crafty fun!

~ Michelle

Thinking of You Gifts

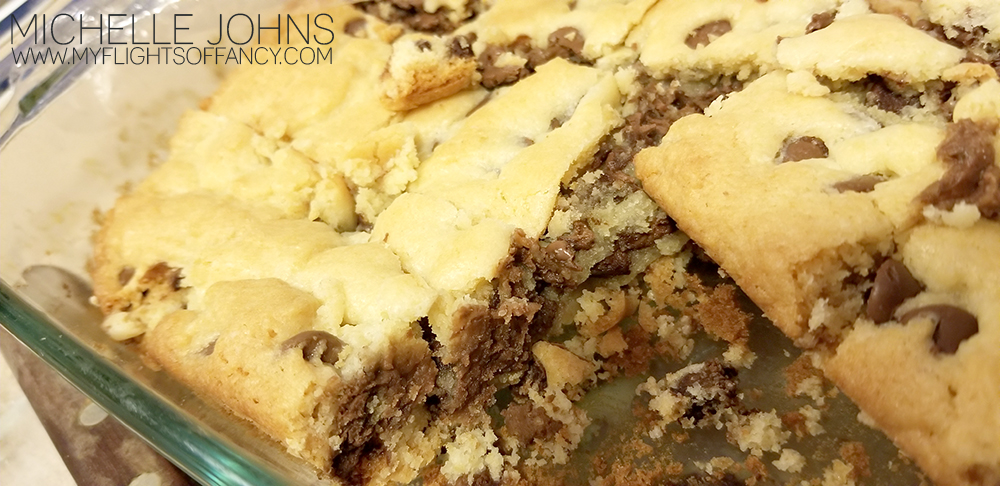
Sunday’s live video was all about giving some yummy treats to someone, just because. We decorated a mug and added some yummy cookie bars and come coffee packs, just because.

These little gifts were super fast to make. You will spend more time waiting for the cookie bars to bake than anything else! (and even that isn’t too long!)

So, click on over to the FB group and watch the live video (on replay) and make yourself some fun mugs!

Now that you have watched the fun video, let’s make some of these fantastically easy cookies, shall we?

I did NOT come up with this idea by myself, it was a fantastic pinterest find! (actually, we found a bunch of sites that copied the first one, but left some of the info out, so I went searching for the original, and luckily, I found it!)

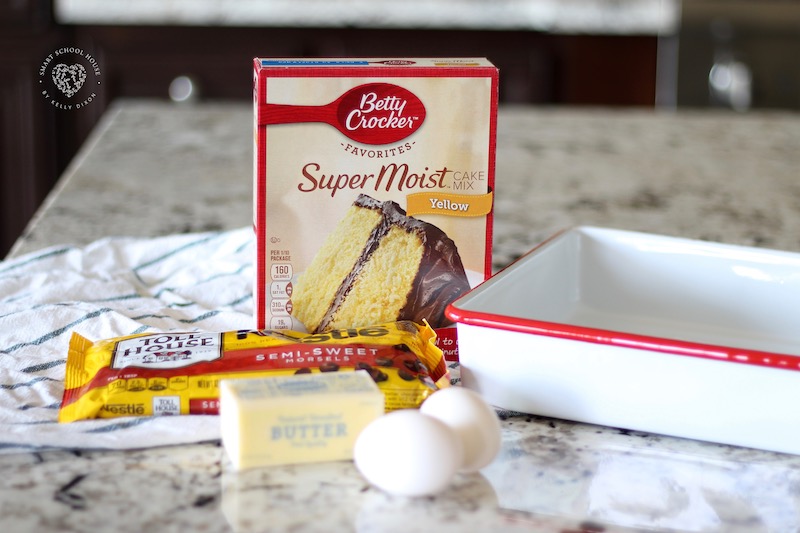
Look at this beautiful photo . . . . this is all that you will need to make these cookies!


(Image from smartschoolhouse.com)

And if you click here, you will find the recipe and instructions, and even a short video of her making them!

I am telling you, these are so easy to make, and they are sooooooooooo good! They puff up much more than you think they will! I don’t think there is a size of pan listed. I would stick close to an 8×8 sized pan!

You will add these to your go to treat list, I promise!

Thanks for stopping by! I hope you have a great day!

Let me know if you decide to make the treats (food or mugs) and share a photo! I would love to see!

See you next time!

Feature Friday: Stamp sets

If you are following my blog, you probably know that I LOVE my CTMH stamp sets! I think I have shared the story before, but just in case I haven’t, let me share now.

10 years ago, I was a party of a monthly group that would get together to make a set of projects (usually cards) and place an order of product. I was getting my crafty time in with other ladies, and I was having a blast! I ordered a stamp set that I LOVED the concept of!

It was a “people” set. There were guys and gals and kids and baby heads, and bodies and each arm individually, and legs, and feet, and other items too. There were a LOT of stamps in that set!

I had hundreds of ideas on things to make with it! However, each of those pieces was on a square wood block. So, just in case you didn’t already know, most people can’t see through wood! (amazing, right?!?!) So, while I loved the set, I just could NOT get anything to line up, for the life of me! (And it looks really strange to have the head and neck floating above the neckline of the body below it!)

That being said, I was still excited, and was getting ready to sign up to be a representative of that company. I mentioned it to a friend that lived (and still does) across the US from me), and she asked “Have you heard of CTMH?” I responded with “I don’t even know what CTMH stands for, so, no? Probably not!”

Well, as you can probably guess, it stands for Close To My Heart, and I LOVE it!! She told me that the stamps were clear and the blocks were clear, and you could see through them. I was in love without ever having used them! My problem had been solved! They, of course, didn’t have that stamp set that I loved so much, but they had so many other things that I loved!

I signed up and was Tickled Pink! (that was the campaign that was happening then!)

So, let me show you some about these stamps!

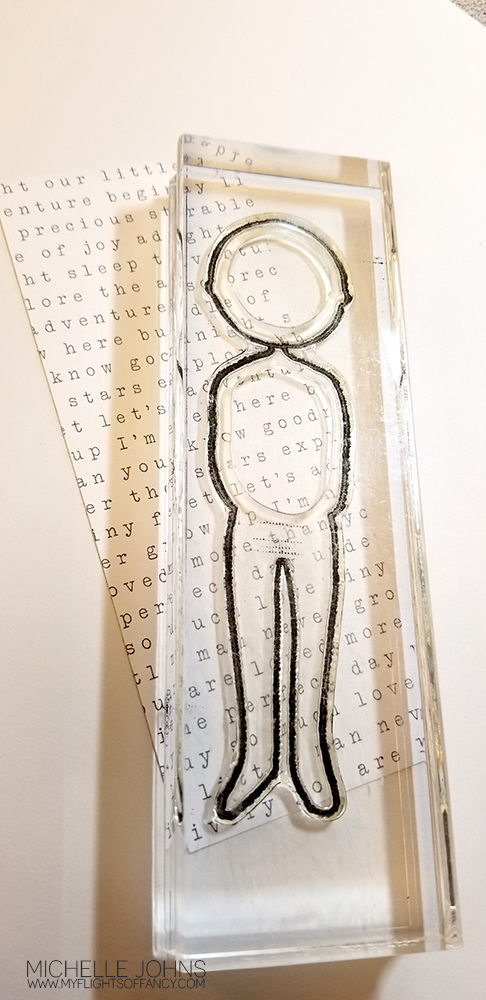
1. They are clear. Every stamp set is clear. You can see through them to get your stamping aligned just how you want it!

2. You don’t have to store wood! This isn’t a big thing to everyone, however I have 4 kids and pets, so storage space is at a premium! If I don’t have extra stuff to store, then that means I can keep it in a smaller space (or, you know, get more things to fill the space that the wood would have taken up, right?) CTMH stamps use acrylic blocks to stamp with. Once you have a few, you are good to go!

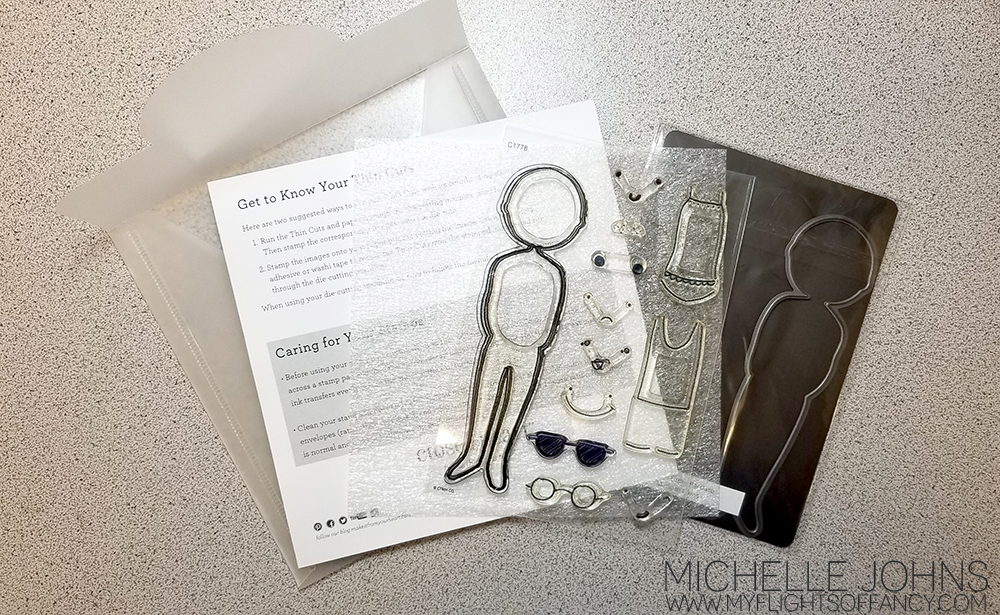
3. They don’t take up much space! Each stamp set comes as a 6×6 sheet with a foam piece and care instructions, inside a plastic storage envelope. They are about 1/4 thick, and if the set has matching dies, they fit right inside the same envelope.

4. Stamping Surface Every stamp set includes a foam sheet to help you get a nice, crisp image. The old red rubber stamps have foam between the rubber and the wood to help give cushion to the stamping for a nice image. Removing the foam means that the stamp can continue to be clear and see through, so you know exactly where you are stamping.

5. Flexability One of the best things about these stamps is the ability to change them! You can take a straight line and use it straight, and then put a little (or a big) curve into it, and continue using it! So very many options!

This is just a small list of things that are awesome about the Close to my Heart stamps, I would love to know what else YOU love about them!

I figured I would share the card that came of the images above, because I thought it was pretty cute!

And, because I know you can’t see the shirt very well, I decided I needed to add a bit more to it, so, using masking, I created this MOM Hugs shirt! {I actually clapped when it worked PERFECTLY!}

I would love to send this fun MOM Hugs card out to someone! Share this post on social media, and leave a comment here stating that you did so. On Friday 8/16 I will draw a name from those comments and send this card out to you!

Thanks so much for stopping by! I hope I brighten your day just a bit!

See you tomorrow!

What is a Basic Tool Kit?

Have you ever seen a class or event listing that says “bring your basic tool kit”? And think to yourself, but what does that mean?? I know I have! So, I thought I would share with you what MY definition of a ‘basic tool kit’ is.

So, it kind of looks like a lot of stuff, but that’s just because it’s all laid out pretty, just for you guys! I know I like to see things, and not just a list sometimes. So, let’s go over what we see in the photo, shall we?

First, a paper trimmer and refill blades. Now, there are ALL sorts of paper trimmers out there. This is the one that I am currently using. I really do like it! Fiskars is a really great brand, that stand behind their product! Can you paper craft without a paper trimmer? Of course you can, this just makes the job so very much easier!

Right next to the paper trimmer, you see a number of different adhesives. Glue dots (two sizes, regular and micro are what I use the most often!), Liquid Glass (with the fine tip applicator, a tape runner, and foam tape. These are all great for different reasons, and I use them all often! At the end of that column, you will see an anti static pouch. Yes, that is kind of the opposite of ‘sticky’, and let me tell you why it’s here! When you are using the compliment stickers, you may want to pop one up. If you don’t make it not sticky, when you put it into your page protector, and then into your book (assuming a scrapbook layout in this example), when there is pressure, the parts that don’t have foam tape on them specifically, may stick to your project, giving it an odd dimension. If you use the anti static pouch on the back side of the sticker first, then it will pop up quite nicely, and you won’t have to worry about it sticking where you don’t want it to!

Next up we have blocks. I have a small variety of sizes shown. The top/left three of those shown are in the block starter kit. This kit is a fantastic place to start! You have most of your bases covered with those three blocks. I have added an additional two blocks, as they are perfect for sentiments and tiny stamps. All of the block sizes shown here are: 3×3, 2×2, 2×3 1/2, 1×3 1/2, 1×1.

Continuing on, we have scissors, of course! I show two pairs here, however, you don’t need to have two. Both of these are micro-tip scissors, which make them great for fussy cutting out images from the B&T paper or stamped images. The grey pair (in this photo) are non stick as well. Which means that I can cut the foam tape with these, and not have to worry about them getting sticky! My blue pair (they are sold in grey now) are 10 years old, and I have never had to have them sharpened or replaced! While I don’t craft every day, I can say that I average at least one day per week during that whole time, and probably even more frequently than that! These are nice, quality scissors!

Directly below the scissors we have some washi tape and post it notes. I tell my ladies to have their “Ugly Washi” in their kits, as we use it on the back sides of projects for various reasons! It doesn’t have to be ugly, but if you buy a pack, and have one roll that you KNOW you will never use on a project, this is the perfect use for it! We will use it to tape ribbons on the back sides of layouts and cards, tape small pieces together to make them easier to glue on as a whole, and a few other reasons too! It just comes in handy! The post it notes are used for masking our projects and making notes as well. Maybe you want to use a specific photo on a layout, or you can’t remember what size photos you want to put onto the layout. Post it notes are perfect for this!

Moving to the last ‘group’ of items. Most of these will be pretty self explanatory, but I do still want to list them for you. We have an embossing tool, a piercing tool, a pencil, journaling pen, ruler, and a bone folder. I think most of those are pretty clear, right? The embossing tool for scoring card bases, and even making fun designs on things, the piercing tool is great for piercing (go figure!) and also picking up the already sticky embellishments to put them onto your projects. The pencil, pen, and ruler speak for themselves, I do believe! And the bone folder is great for burnishing the card bases, and smoothing out the liquid glass, to give a great finish to your project!

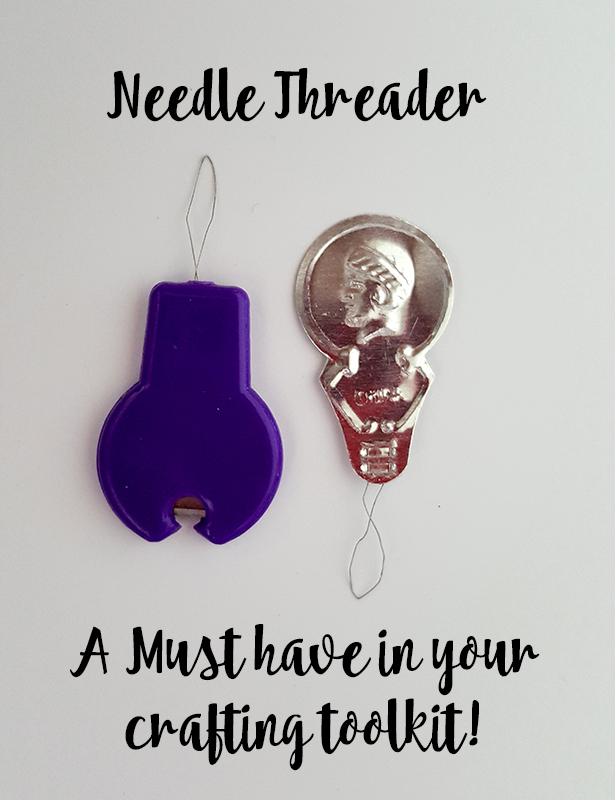
The last two items in this photo are a Rub & Remove eraser and a needle threader (ok, well, two of those . . . that’s how they come!) The eraser is great for getting stray adhesive off of your projects or your tools. And the needle threader? Well, that comes in super handy for the twine that you are trying to get through holes of paper or buttons! This super inexpensive little tool has come in SO handy, you will for SURE want to add it to your basic tool kit!

The other thing that I will usually bring, but didn’t get into the photo, is my VersaMat. This is a self healing, gridded cutting mat on one side, and a soft stamping surface on the other side.

Now, hopefully I didn’t get TOO wordy for you today! At least I had a picture as well, right?? Do you have something in your basic tool kit that I don’t have in mine? Do I have something that you hadn’t thought to have in yours? I would love to hear about those items! Do share!! (I know my friend Eileen has dental floss in hers, to get her paper up after she has glued it down, if she placed it wrong, or forgot a layer that should have gone down first)

Want more inspo? Check out my friend, Danielle’s blog post! She has a few different things than I do!

Thanks so much for stopping by! Let me know what you think of my list!

See you tomorrow!!
I love color, how about you?

Today’s challenge over at Heart 2 Heart challenges is all about color. This can be interpreted in so many different ways! You can choose to use your own favorite color or color combo, you can use all of them, you can take inspiration from somewhere else, nature, pinterest, other challenges, photos, and so much more, including the CTMH Love of Color Book. Inspiration is everywhere! Today I grabbed a little from here, and a little from there.

So, along with the H2H challenge, I am playing along with Fusion and Color Throwdown! I knew I wanted to play with the sapphire color, and Color Throwdown happened to have a dark blue, Green, and Grey color palette for this week’s challenge . . . how perfect! Over at Fusion, they have a sketch or a photo that you can take inspiration from. Their photo this week is some adorable Penguins, and I’m telling you, if I had the Hostess only stamp set, “Got Snow?” . . . I would totally be using a super cute penguin on my card today! However, that is not one that I have (but I wish I did!), so I couldn’t use it.

Now, the colors that I use are partially one of the color suggestions in the Love of Color book, there are more options in the palette that they suggest, but I wanted to stick with the few for the throwdown challenge! These are very traditional ‘boy’ colors, but it just popped so well!!

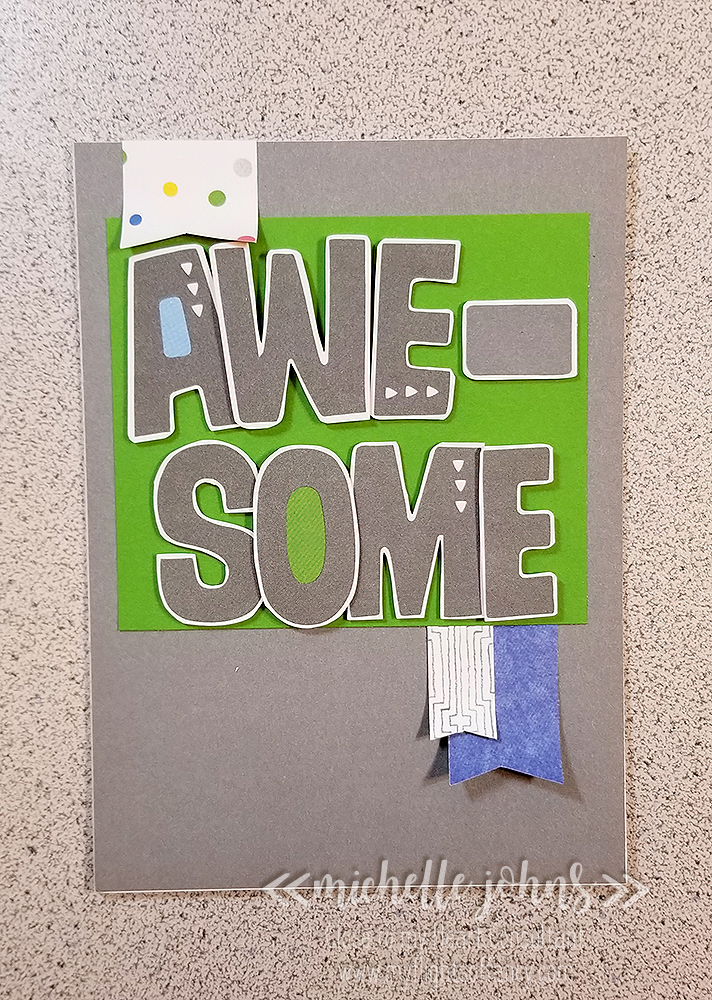
This card is mostly plain cardstock, I almost think I should have done a bit of background stamping on the pewter cardstock, but it looks ok anyway! The sentiment is in the cut-aparts from the Something Fierce paper pack, and the banners are scrap pieces that I have had leftover from other projects using this same paper pack!

I love how simply this fun card came together! Tell me what you think of it? If you had this card, who would YOU give it to?

Tuesday Treats: Gem Box

Hey everyone! It’s time for some more treats!!

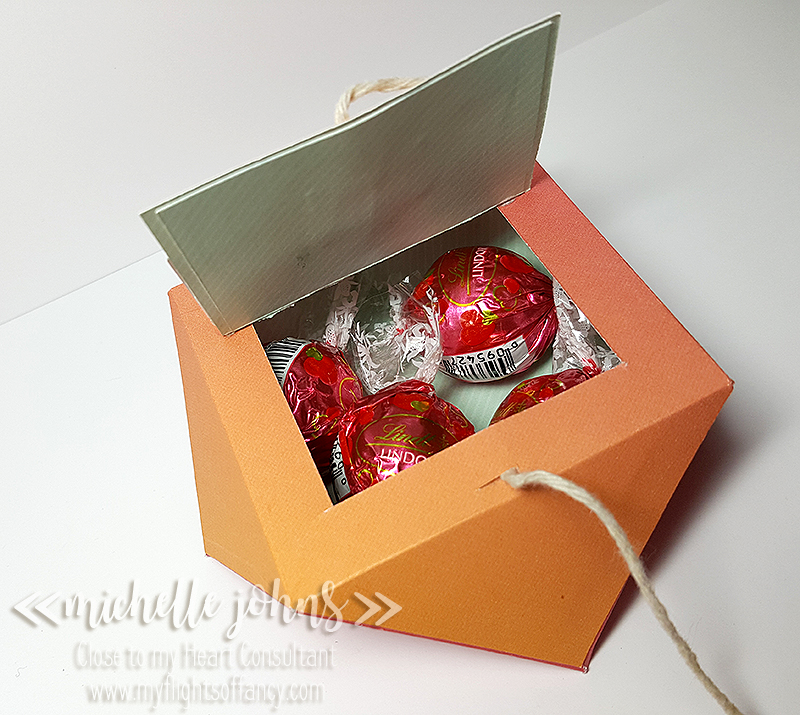
This is a super fun box that I saw a tutorial for, using the Envelope Punch board. Well, I have many, many tools, but that isn’t one of them. Well, I KNOW that I can make that without the punch board, so I did!

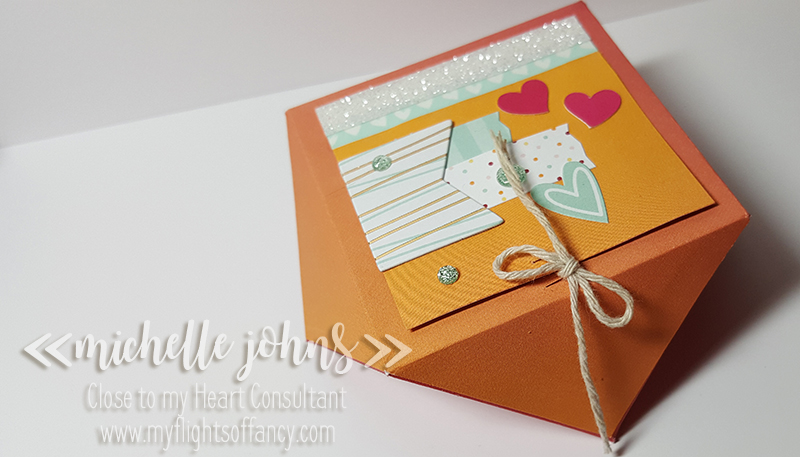
I used one of the sheets from a past paper pack, some embellishments from the Sugar Rush Compliments, a bit of white shimmer trim, some of the heart washi, and some twine that I had laying around. (We have had some severe weather (for us) so I’m trying to drive as little as possible) I had a few hearts from the Raspberry cardstock left from another product, so I added those too, and finished off with some Sugar Rush Dots.

As you can see, this fits 4 Lindor truffles, these are pink (fit the box colors!) and are milk and white chocolate.

This fun little box isn’t going to just sit here, this is going to go to Robyn! I had to cancel my last crop because of weather, and challenged the ladies that were going to come to do something crafty, and share a picture of what they created. For doing so, they would get an extra little something at the next crop. Well, Robyn was the only one that shared her projects, so she gets this fantastic little box!

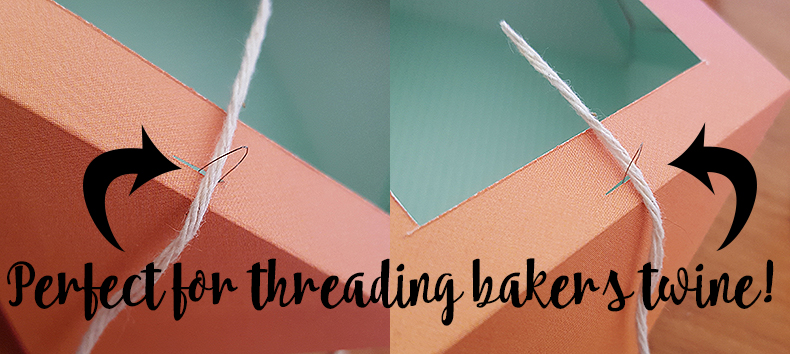
Now, one of the tools that I suggest that you have in your crafter’s tool kit . . . a needle threader!! While, yes you can use it for sewing . . . you can also use it to get your bakers twine or thin ribbons into small holes!

So, the next time you are at the store, grab a package! They are usually less than $2!

I hope you like my little box!

I’ll be back tomorrow with a scrapbook page! Hopefully you will join me!

~Michelle

Sprinkled with Love

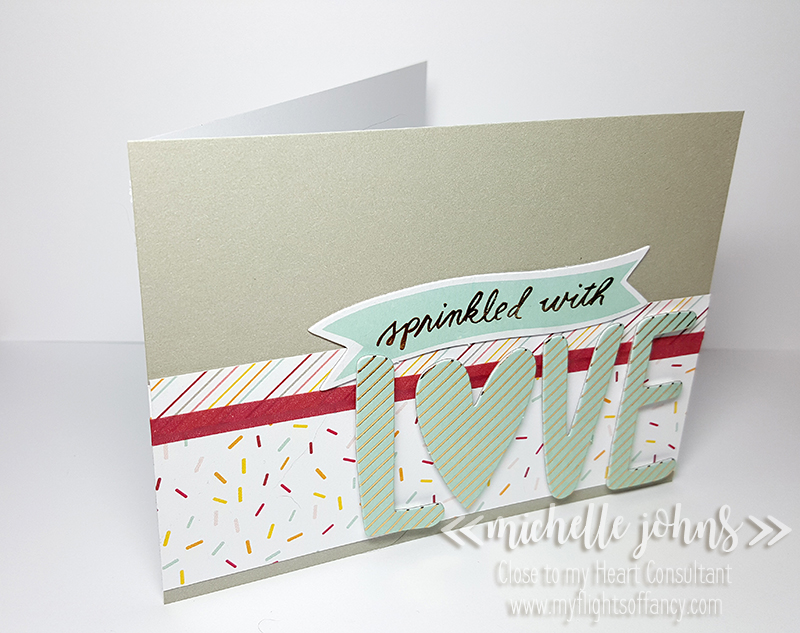
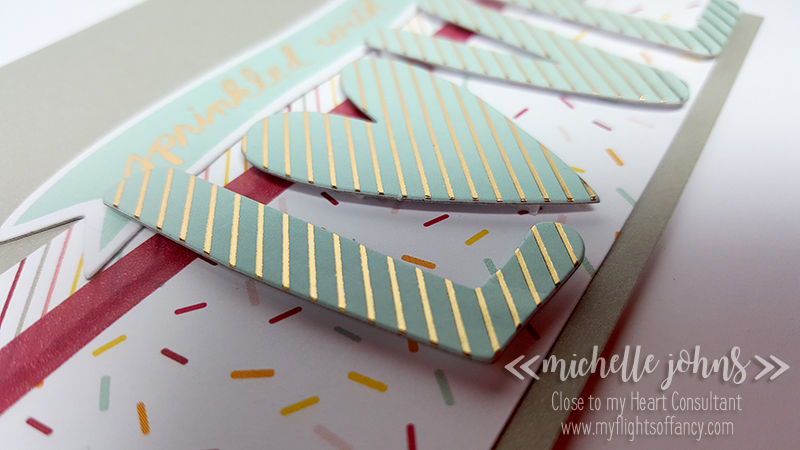
Who doesn’t like sprinkles, right?? Today I am back with another card! I’ve used more of the Sugar Rush papers for this card, and the coordinating Complements pack. There is NO stamping on this card, and it was quick and easy!!

I was inspired by Global Design Project’s Sketch.

This fun chipboard has gold foil stripes on it! It makes it sparkle very nicely!

Here I created the shadow so that you could see that the gold foil really does stand out! The sentiment is foil as well. The Whisper cardstock and the Pomegranate washi add just enough of a pop of color to really stand out!

I hope you have enjoyed this little card today!


You only have a short time left to get the Welcome Home Wreath and the January Stamp of the Month! You definitely don’t want to miss out!

Something else you won’t want to miss out on is the Spring Retreat at the Beach! I have spots still available! You can find the specifics here.

Thursday Tutorial : CTMH How-To Books

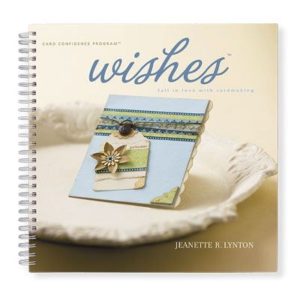
If you’ve been around my blog or attended any of my classes or crops, you have probably heard me talk about the CTMH books. Now, I’m not talking about the Idea Books (those are FANTASTIC, but still) . . . I’m talking about the How To books. In the current “big book”, they are on page 110, or you can find them online, here.

Now, why are these books so great? Well, because they give you everything you need, at the tip of your fingers! You have artwork made with the sketch provided (sometimes exactly the same, and sometimes with something a bit different!), you have cutting guides, telling you how many and what styles of paper you need, and how to best cut them to save time and money.

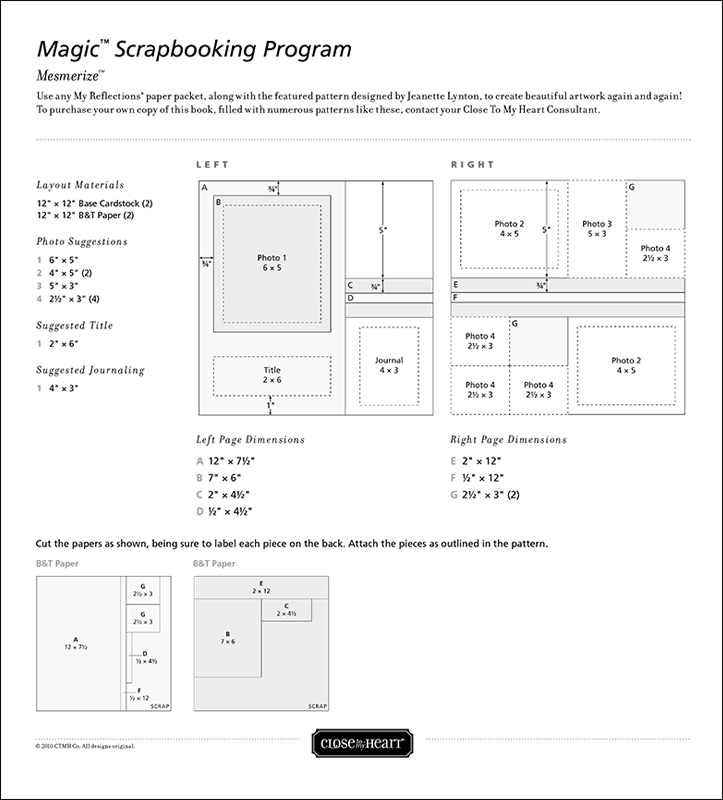
Last week, I shared a layout with you that used a pattern from Cherish. I wanted to share another example with you. Now, this is from a PDF (that I will also share with you), so it doesn’t include the artwork that is in the book, but it is very helpful!

This image shows you the sketch, the sizes of each of the pieces, and how to cut them, like I mentioned above. You can download the PDF here.

There are books for just Layouts, books for just Cards, and books that include both! One of the things that I will do if I have a creative block, is flip through the books looking at the artwork. Maybe I have an idea of the paper I want to use, or even the purpose for the card. I can flip through the book and find something that I like, and be able to make it! (the card books have 2 totally different designs of each card, spread throughout the book. While you may not like the design in one paper, you may find that you really like it in a different paper!)

Next time you are at one of the crops or classes, feel free to flip through them! They are always there to use during the crops!

Until tomorrow, stay crafty my friend!

~ Michelle

Sweet! Yum! Treat Bag!

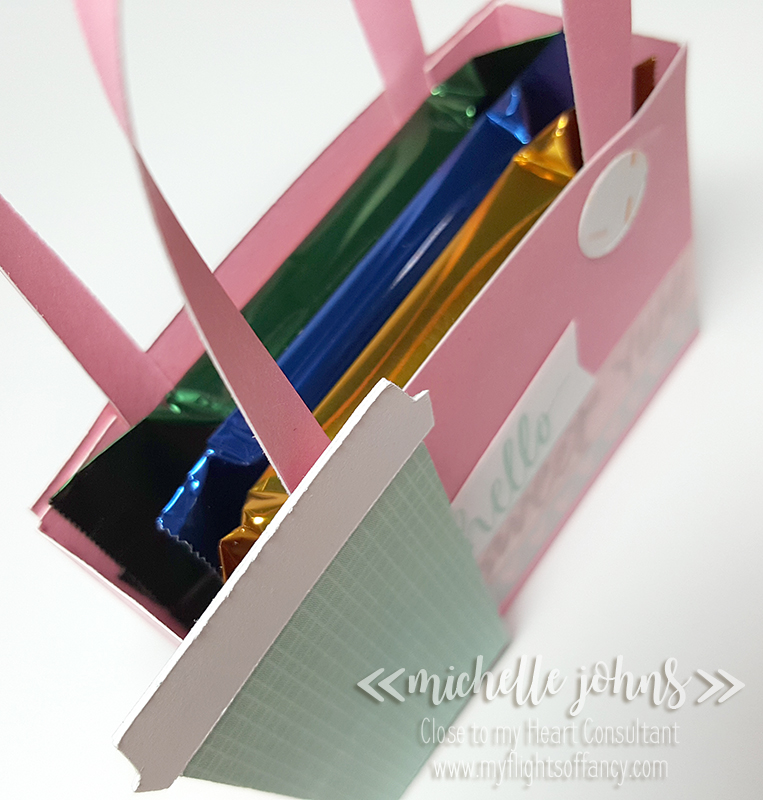
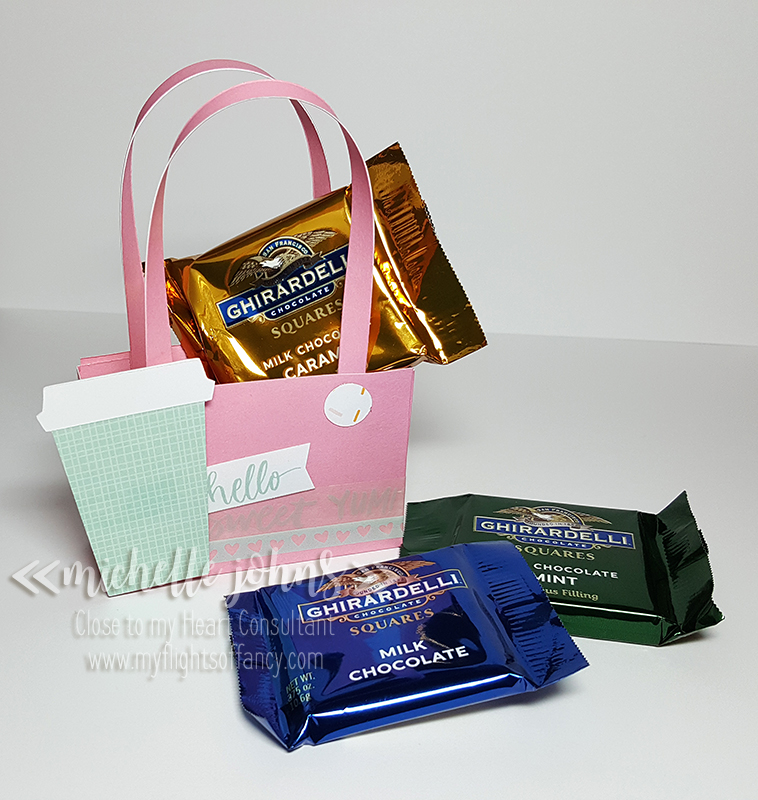
Welcome back to Bags & Tags Tuesday! Today I have this sweet little bag of chocolate for you! It would be paired perfectly with a coffee, mocha, hot cocoa, or even tea!

As you can see, this sweet little bag will hold 3 Ghirardelli chocolates perfectly!

I used Pixie Cardstock for the bag and the straps. The little dot is the middle of the donut hole from yesterday’s card! (there are 2 more on the back side, since I mis-cut one of the donuts yesterday!) The dots and cup are from the Sugar Rush paper packet, as well as the “hello” sentiment (it’s from the same zip strip as yesterday’s card).

I used two of the three washi tapes that come in the Sugar Rush Washi Pack. They add just a bit to the whole bag, making it not too bland!

I hope you enjoyed this little bag! I’ll include the dimensions and such below!

Until tomorrow!!
~ Michelle

Bag dimensions and info:

3 x 4 15/16
scored at 2″ from each 3″ side. (so the long part across the top)

(2) 2 1/2 x 1 7/8
scored at 1/2″ on 3 sides (2 long and one short)
slightly miter the squares on the 2 corners

(2) 1/4 x 10 (handles)

Use your bone folder to crease the score lines.
Attach handles 1/2″ in from the sides, lining them up just along the score line.
Decorate the front of your bag before you put it together, as it will be easier to do at this point.
Attach center piece of the bag sides first (do both sides).
Then attach the sides to the front of the bag, and repeat on the back.

Life is Sweet

Welcome back to the blog! Monday’s are card days! (I’d go with Make a Card Monday, but it’s already been taken by a number of people, but one of my idols, Kristina Werner was the first! (at least that I know of!)) So, until I come up with another catchy title, I’ll just go with something generic! hahaha!

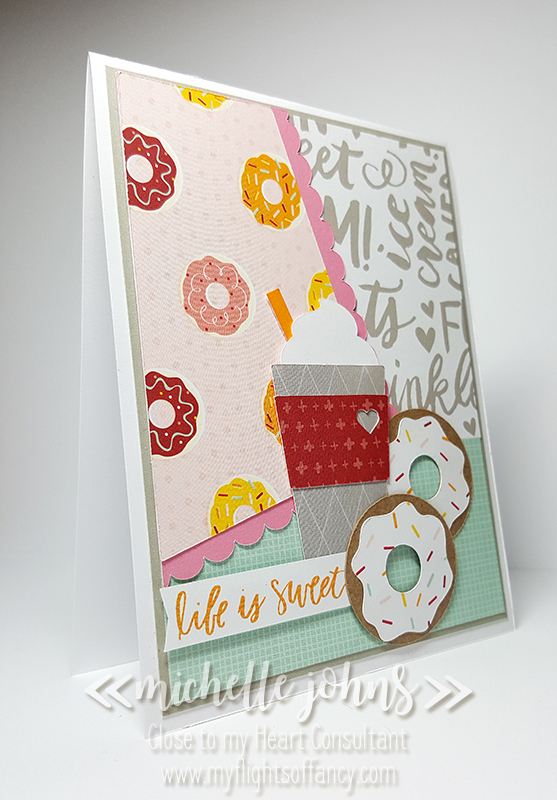
I had so much fun making this card! It was directly inspired by this card! I loved the whipped cream on top of the coffee! Can you guess what image I used off of one of the CTMH cartridges that I used to make it?

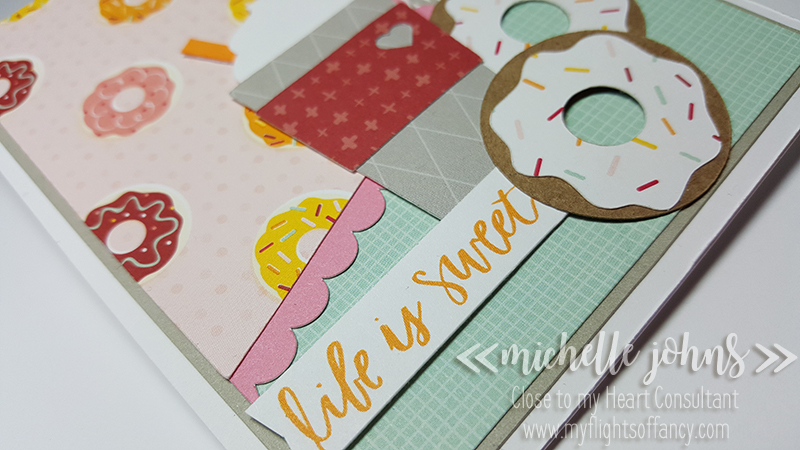
I’ve gotten a lot of use out of this latte cup from the Artistry cartridge! I just used the slice feature on my cricut to not cut the lid of the cup. The sentiment on the card comes from one of the zip strips from the Sugar Rush papers (which is what I used for this entire card). This new paper pack is SOOOOOO fun!!
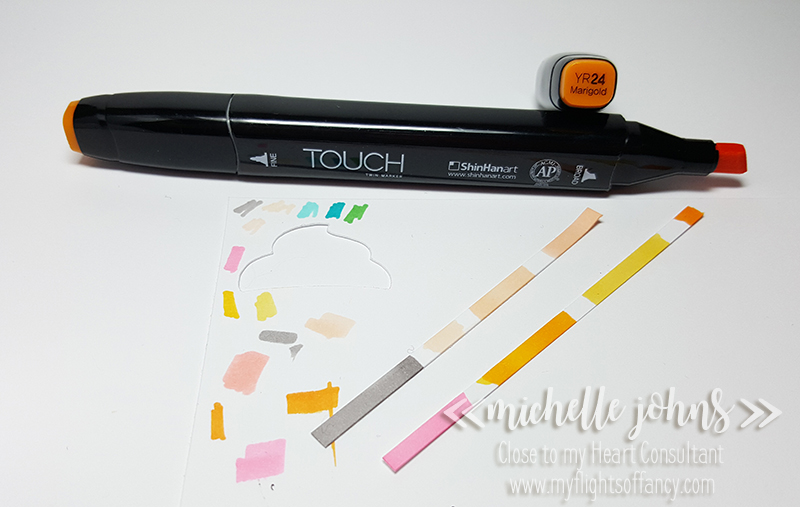
I used one of the Touch Twin markers to color the straw. I did have it white, but it didn’t stand out from the whipped cream, so I needed to do something different. So, here you can see my test scratch paper, and then the little strips that I was using to test the colors.

I hope you like the card today! Tell me, who would YOU send it to, and why?
Until tomorrow!

~ Michelle