Love of Color – CTMH Technique Blog Hop

Welcome to the CTMH Technique Blog hop! This month we are focusing on the new Love Of Color book! Today you should have arrived from Wendy’s blog, but if not, that’s ok, it’s a big circle, so you will get back around to her!

Today I have a set of 3 cards for you. The colors I am using are Canary, Lagoon, and Sapphire. These are a GREAT color combo! I love how they turned out!

First off, let me tell you I am using the Love Note stamp set for these cards, and it is SO MUCH FUN!! It is retiring at the end of this month, so you want to make sure to pick up your copy!!

Ok, so, the first card was done with the marble background piece. I used sapphire ink on sapphire cardstock to give the tone on tone look, and I LOVE it! I was struggling for a bit for a sentiment, because I didn’t want to cover it up! Then, I realized that some of the sentiments are bold enough to stand out wonderfully against the background if I heat embossed, so that is exactly what I did! I made sure the ink was dry, then used my anti static pouch over top of it. Stamped it with versa mark and used the White embossing powder. It’s beautiful! Before I adhered the marbled piece, I stamped a frame around the canary base with the little circle shaped stamp that has the dashes on it.

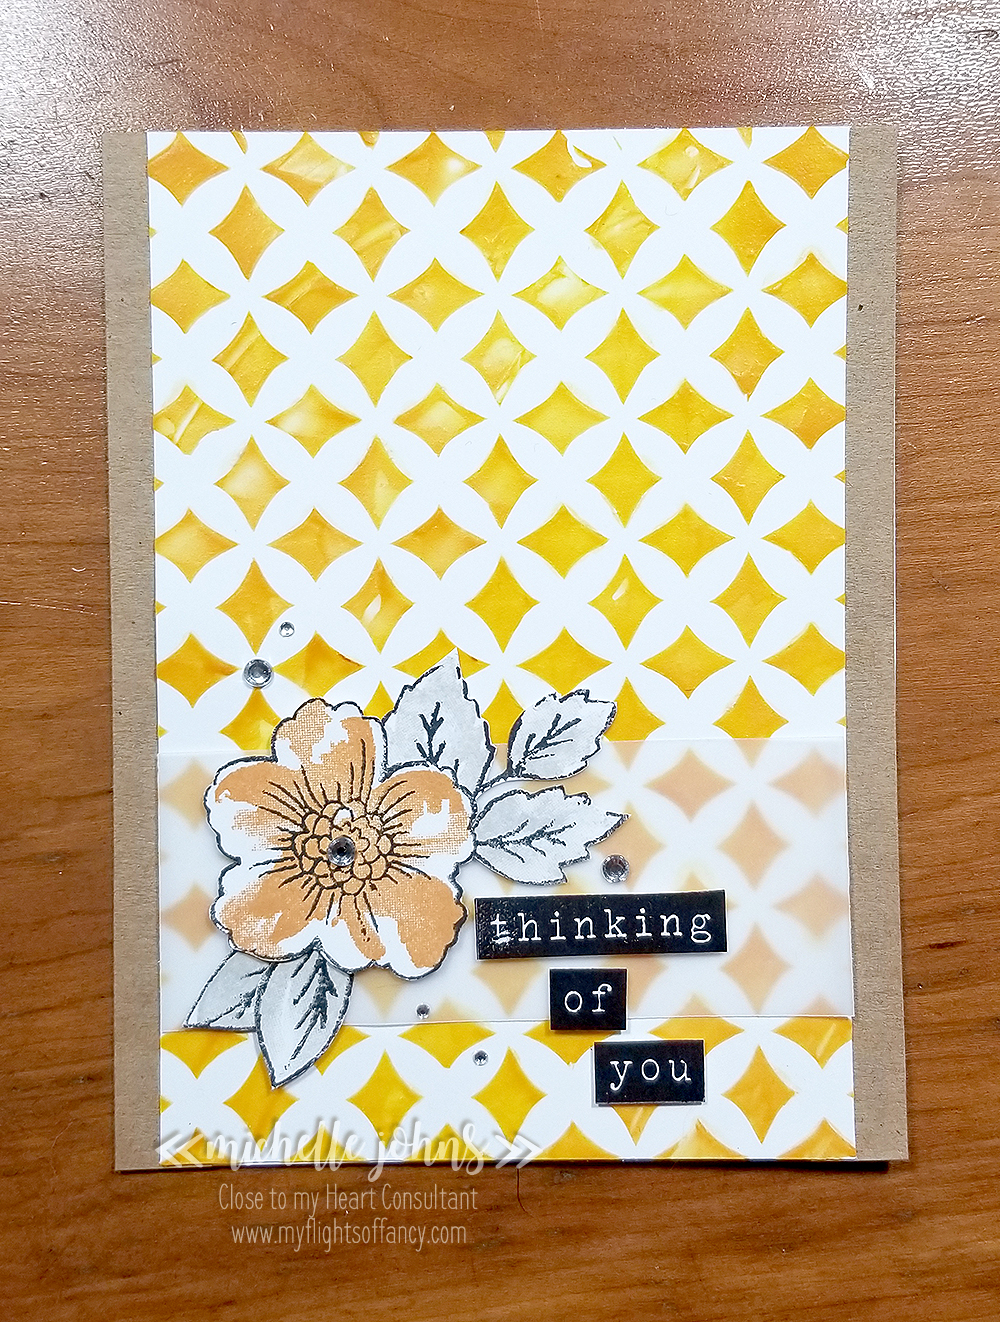
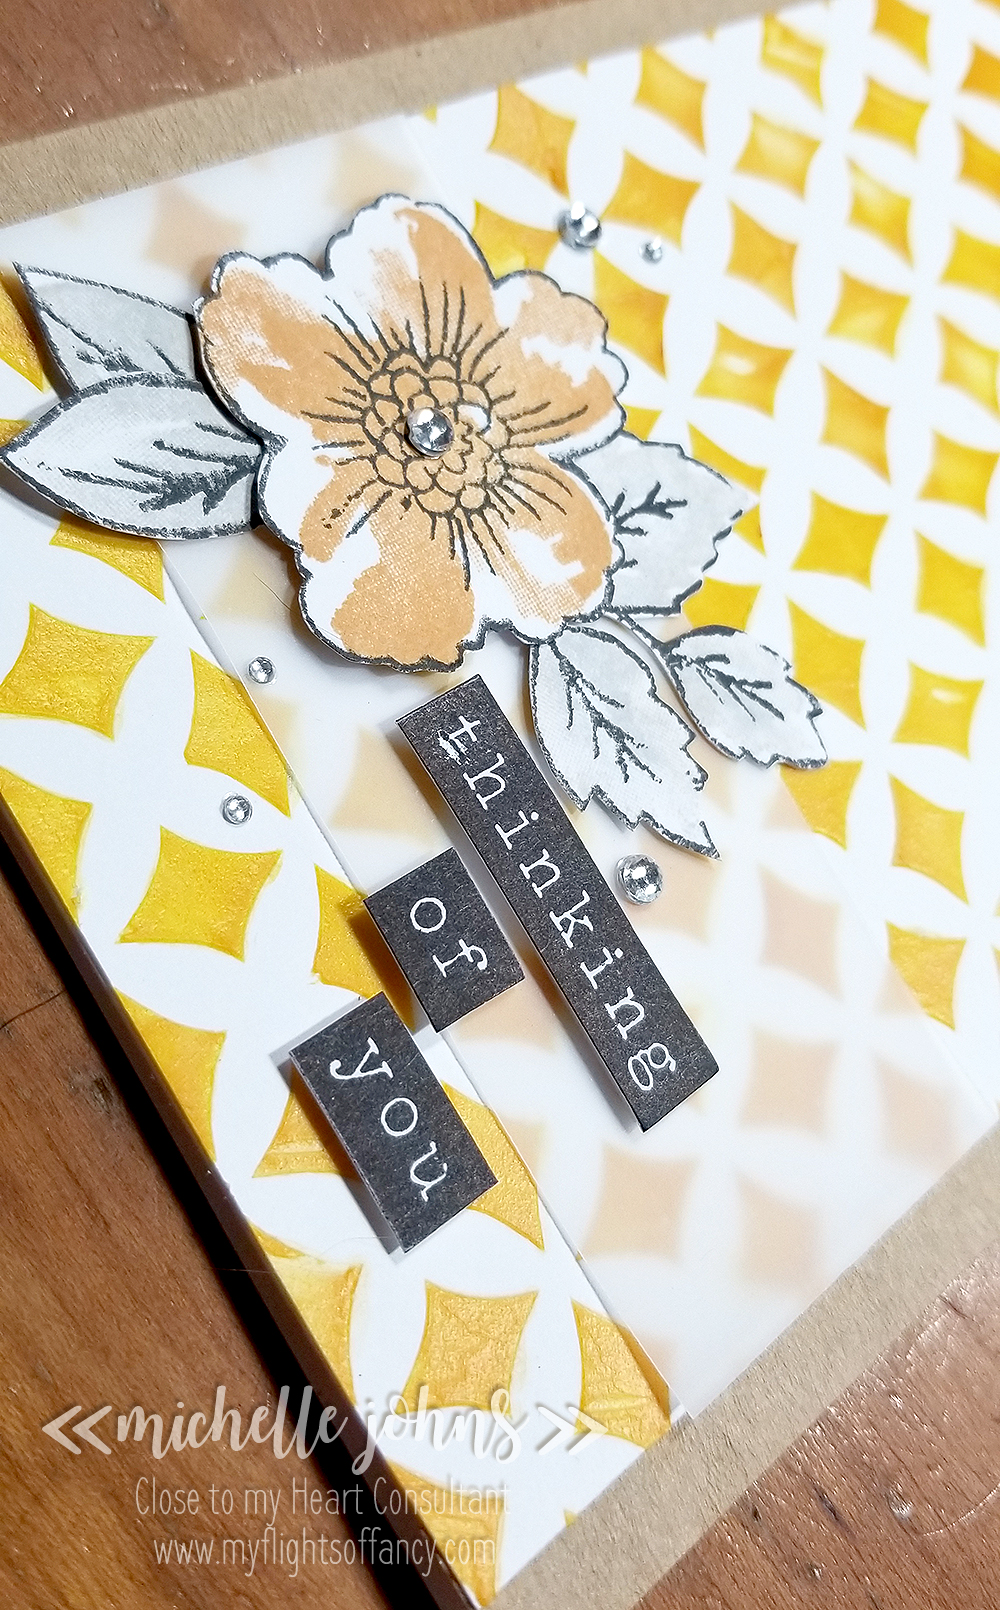
Next up is the Thinking of You card. I used the round dot in the set to stamp more tone on tone with lagoon ink on lagoon cardstock. Then I stamped the Thinking of you sentiment twice, once in canary ink and once in lagoon ink. I cut out the outside of the canary frame and the inside of the lagoon frame, and glued them together with liquid glass for a two toned sentiment. I stamped the geometric pattern on the canary cardstock with some canary ink (do you sense a theme here yet?) for that little yellow banner. Popped up the sentiment with foam tape and viola! We are done!

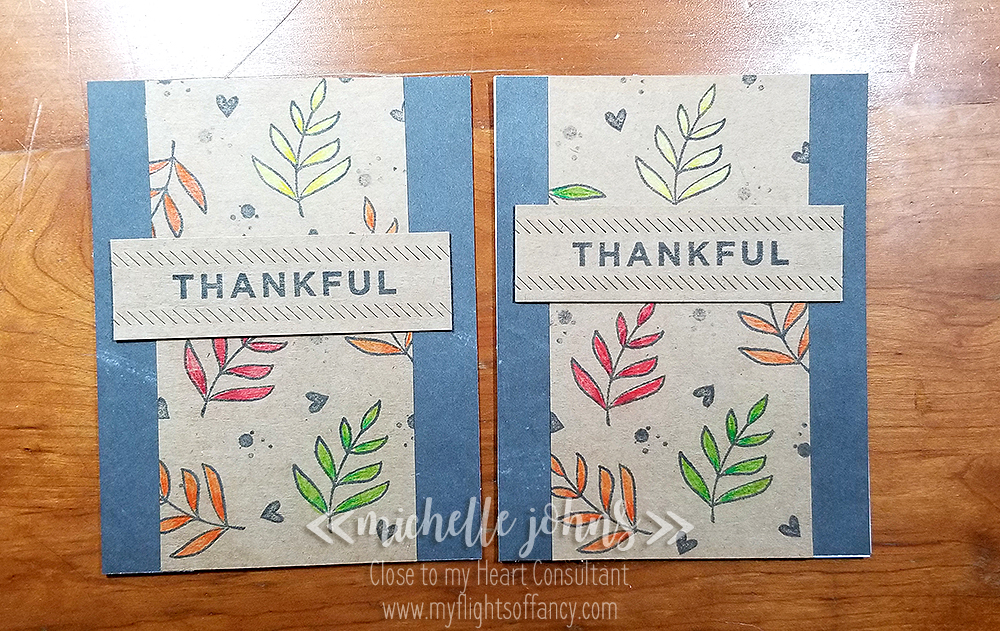
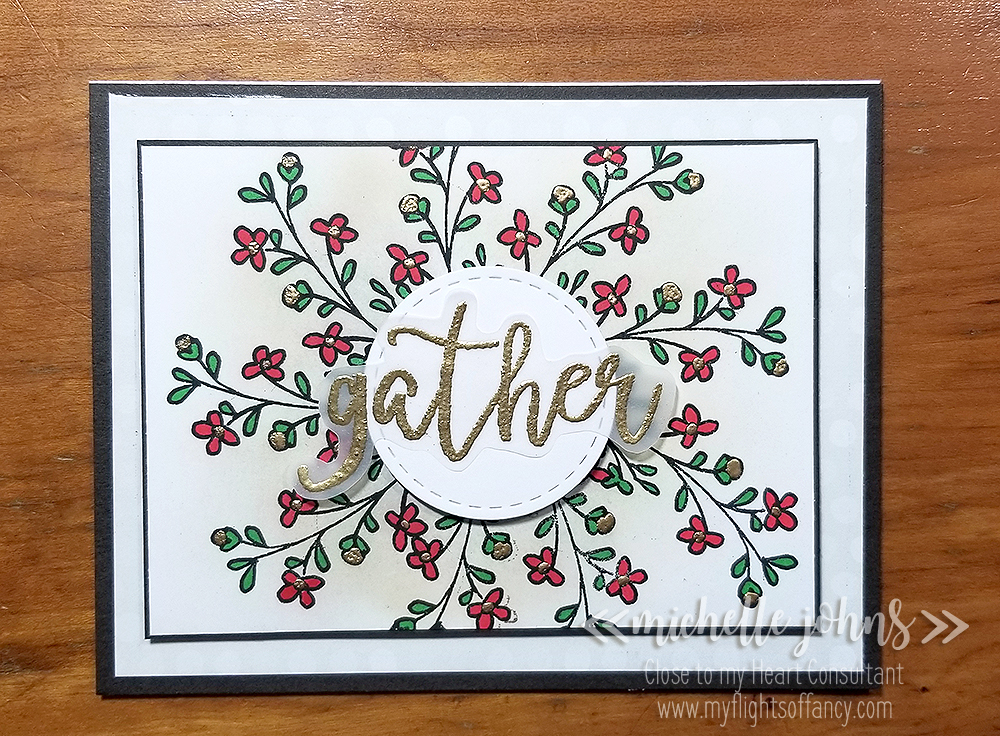
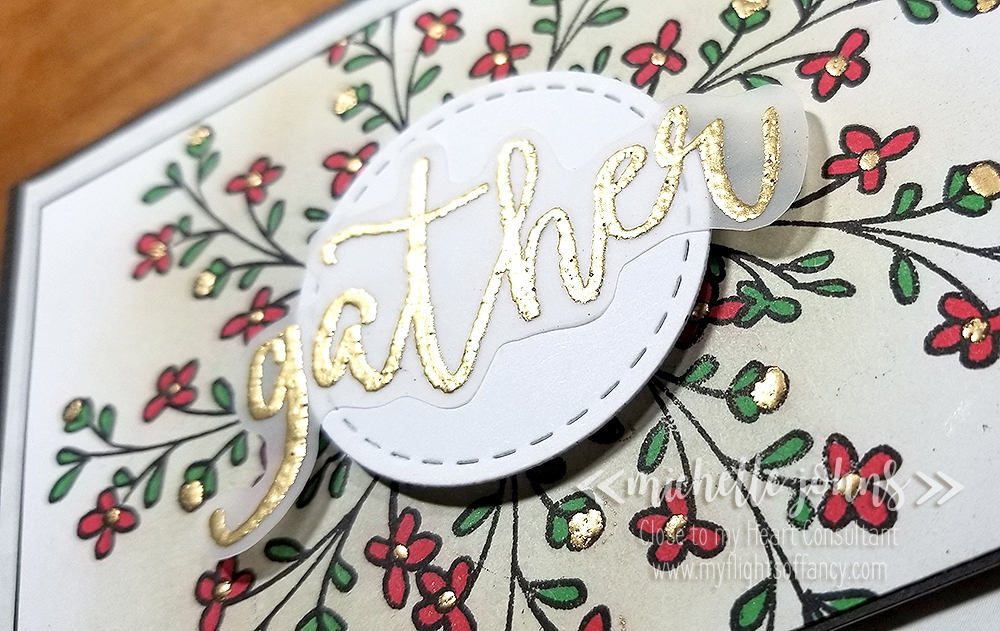
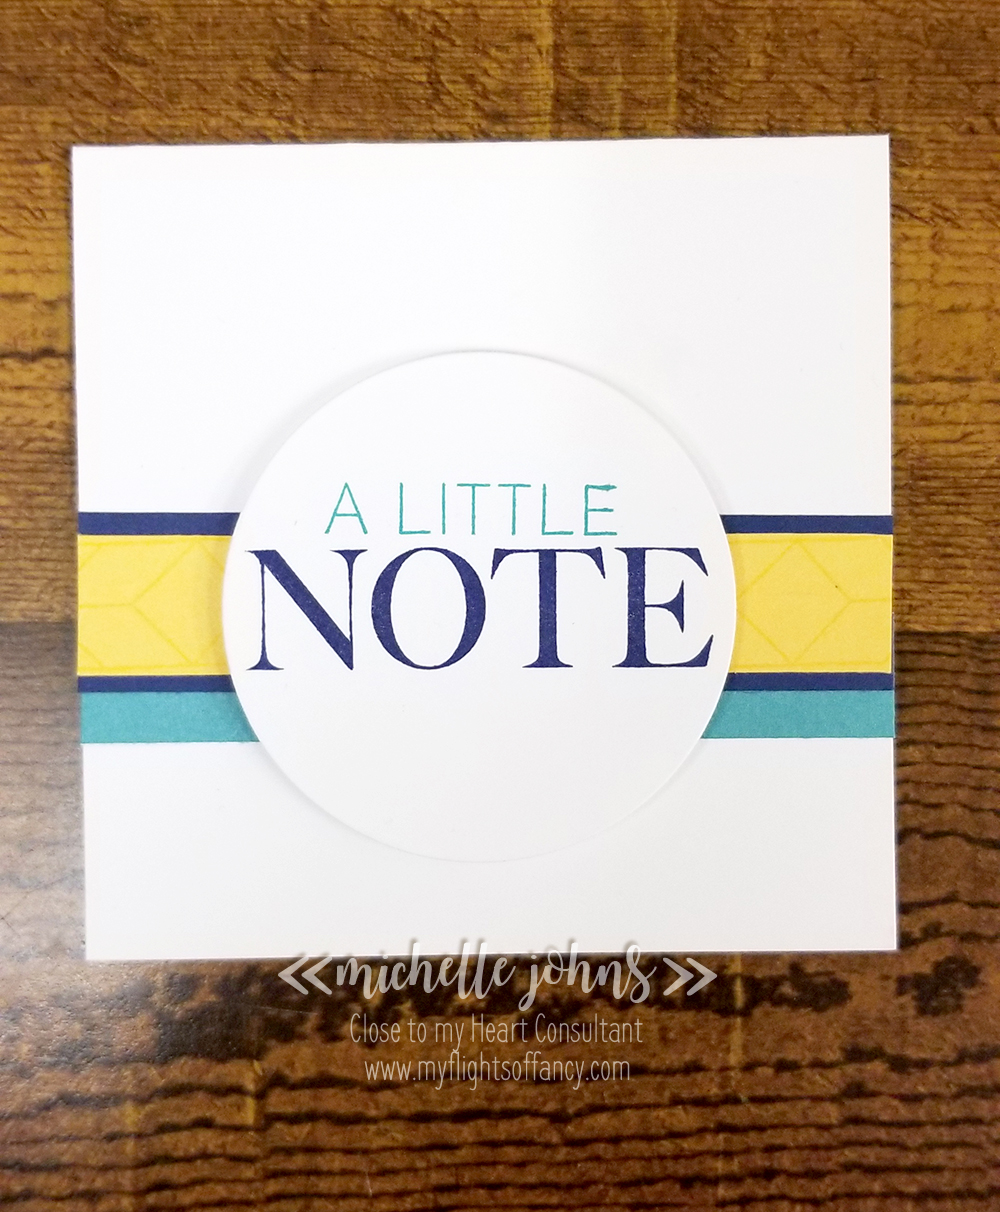
Last up is the A little note card. I again used some of that strip of canary ink on canary cardstock for a bit of interest. I used small strips of the sapphire cardstock to make the yellow pop, and a larger piece of the lagoon to help balance out the lagoon on the sentiment. I used the circles basic thin cuts to cut the largest circle for the sentiment. Note is stamped in sapphire ink and a little is stamped in lagoon.

All in all, I think these cards came out GREAT! It was super fast, too! The Love of Color book has three different ideas for each of our main colors. Plus it gives art examples to help give you some ideas. There are cards, layouts, boxes, frames, and various other bits of artwork! For just $17.95, this book is chalk full of ideas for you!

Let me know what you think of my card set! Then hop on over to Marciava’s blog to see what fun colors she has for you!

Just so Thankful

Hello friends! Today brings yet another H2H challenge! This week’s challenge is all about Thankful Hearts.

I am guilty of not sending out thank you cards as quickly as I should (or, ya know, at all.)

So, it’s really nice to be able to throw together a super quick card, that I don’t even have to do any stamping on. In fact, because I had a piece of kraft cardstock in my stash that I had already done this fun effect on, the hardest thing I did on this card was the sponging on the edges of all of the pieces!

The kraft cardstock I scored every half inch, and then I turned the sheet over, and scored the opposite half inch, so that there was a score mark every quarter inch, just one was raised and one was indented. It gives a nice look to this cardstock, I think!

The focal image is a 3×4 PML card from the Grateful heart paper pack, as is the green dotted mat behind it. I trimmed the white PML card down 1/8″ on all four sides (to help keep the image centered), lightly sponged it with toffee ink, and then glued to the green card, that I had also sponged with toffee ink.

I wrapped a bit of the mink twine around the two cards three times and tied it in a knot. Popped the whole thing up on some 3D foam tape and put it on the front of the card, and viola! A beautiful, fun, easy card ready to be given in less than 5 minutes!

I would love to know what you think of it! Please leave me a comment to share your thoughts!

Thanks so much!

~Michelle

Shake Things Up! – CTMH Technique Blog Hop

Are you ready to shake things up? Today’s blog hop is all about shakers! You can make just about anything a shaker these days! Cards, bags, layouts, key chains, you name it! Today you should have gotten here from Wendy’s blog. If not, that’s ok, its a big circle, so you will get back to her!

Today I have a fun card for you! It is super easy to do, especially with the new shaker card dies! So easy, in fact, that I had Audrey do it, with only verbal instructions on how to do it (I wasn’t around to point to things to say ‘use this’ or ‘color there’)! Today’s artwork is actually completely done by her! It was inspired by a card on Pinterest, however I can’t find that card, now.

She cut a Polaroid shape on the paper trimmer, stamped a sentiment from the My Type of Note stampset in intense black ink. Ran some tape along the back side, and used a sandwich baggie for the cover. She colored some white daisy cardstock with some Shanhan markers, and ran it with the heart shapes from the shaker die set.

Layered the whole thing with some foam tape, added a back to the shaker element, and then glued it onto a card base with some liquid glass. Super easy, super fun! And it wasn’t hard for her to do!

Next time, I think I would use a stronger baggie, part of a flip flap, or even part of a page protector, just to make the front a little stronger. But, sometimes you just have to use what you have!

Thanks for stopping by! Next you are off to Michelle’s blog!

Thankful for You

Over at Heart 2 Heart Challenges, they have a new challenge! (go figure, right?) If you didn’t already know, they have a new challenge each week, on Mondays! Today’s challenge is Inspired by Nature. So, since I don’t have my cricut handy (whaaaat??) . . . I decided to go with stamp sets! I went with My Type of Note. I know, you are thinking what the heck is she thinking?? Right? Well, if you haven’t already noticed, not only is there a typewriter in that set, but also a fun little floral cluster!

So, instead of going to our fantastic Make it from your Heart books, I went to pinterest, and found this fun card. I really liked the circles with the leaves and such poking through.

I used both the basic circle thin cuts and the stitched circle thin cuts to get my circles cut out of the front of the B&T. The original card had some white netting, which I don’t have, so I went with some vellum. I stamped the image in Espresso ink on the kraft cardstock. I glued the vellum do the back side of the striped paper, and then used thin foam 3-D tape to pop those layers up above the kraft (which was glued directly to the card base).

I realized after I popped up the panels, that I had forgotten the sentiment! No worries, there are no mistakes in crafting, am I right? So, I grabbed a scrap of white daisy and used both the Living My Best Life and Simply Said stamp sets to create this fun sentiment.

I added a bit of the white burlap ribbon and gold glitter gems, and my card is done! It took more time to figure out which circles to use than it did to create the rest of the card!

Thanks for stopping by today! I hope you will come and play along with the Heart 2 Heart challenges!!

~Michelle

Paste-fully Creative – CTMH Technique Blog Hop

Welcome to this month’s Technique blog hop! We are featuring the new Texture Paste! You should have come from Haley’s blog, however, if you didn’t, it’s a circle, and you will get back to her!

Today, I have this fun card for you! It was really fun to make, even if it wasn’t what I was originally going to do!

I cut a fun stencil from the Artbooking cartridge. I just used a bit of cardstock for it, but I would surely next time go with the stencil sheets, as you can see a bit where it smooshed under.

I put some saffron and goldrush inks onto the All Purpose mat, then put a little dab of the Transparant Matte paste into each. Mixed them slightly, and then spread onto the card in different spots with the palette knives, and then slightly overlapped them. I peeled off my stencil and allowed the paste to dry.

I stamped and cut the flowers and sentiment from the bunches of love stamp set, using archival black, mink, saffron, and goldrush colors. Popped them on a scrap of vellum, to help them pop off the card a bit more, and viola! You have a fantastic card! Oh, and let’s not forget the bling, shall we? I used a few clear sparkles and bitty sparkles do draw a bit more attention to the flowers!

Thanks for stopping by! I hope you liked my card! Let me know what you think! Then, hop on over to Michelle’s blog to see what she has for you!

Thankful

If you joined me Sunday morning, you got a chance to see me make this fun card, and even the oops that I had! If you didn’t join me, you should add me to your Sunday morning schedule, so you can watch live next Sunday, 9am Pacific time!

This card is fairly simple, and is completely and totally inspired by Amy Ulen’s card. When I made my sample, I couldn’t find my package of Kraft, so I had to figure out what I had that I could use to make my sample and then make another during my live video, so it’s amended from her card, but you can totally tell that it is inspired by hers!

Would you believe that the bright pops of color on this card are from the new water color pencils? It totally is! I LOVE the look that this gives the card, especially on the kraft cardstock!

This card was SUPER easy to make! It doesn’t take very long, and looks fantastic! You should TOTALLY give it a try! While you are at it, link it up to the Heart 2 Heart Challenge this week, which is to use ANYTHING from the new Holiday Expressions book!

Thanks so much for stopping by today! I hope you liked my project, and I hope that you will leave a comment letting me know what you think, and also join in on the challenge at H2H, that I linked above! You have through the end of the month to play along!

Until next time!
~ Michelle

Supplies Used:

These items are linked to my store to make it easier for you to find!
Kraft Cardstock
Value Card base and envelope
Watercolor Pencils
Charcoal Ink
October Stamp of the Month
2 x 3 1/2 block
1 x 3 1/2 block
Bunches of Love Stamp set
Decorative Borders Thin Cuts
Tis the Season Paper Pack
Liquid Glass
Thin 3-D foam tape
Bone Folder

Did you enjoy what I had to share today? If so, please . . .

Subscribe to my monthly newsletter & daily blog updates in the sidebar.
Join My Craft with Heart Club.
Earn FREE products by joining my Princess Club.
Check out the clearance rack and save up to 70%.
The $75 New Consultant Kit is the best deal of ALL! Discounts & benefits here.
Find me on Facebook Page where I share videos and specials
Join my Facebook Group. Prizes and fun interaction!
Follow me on Pinterest.
Subscribe to my YouTube channel with video tutorials.

Thanks & Giving SOTM Blog Hop

Welcome to this month’s SOTM blog hop! I know you will get a lot of inspiration from everyone! Today you should have arrived from Ronda’s blog. If not, thats ok, its a circle, and you will get back to her!

I try to find things to do with the stamp sets that are a bit different than what other people might do. Today I have this fun wreath type look for my card.

It turned out so fun!! I colored in the flower centers and buds with bonding memories glue, and then added the gold embossing powder and heat set it. I added color to the flowers and leaves with the shinhan markers.

I used one of the stitched thin cuts for the center and added the gather greeting that I had heat embossed with the gold powder o to some of our vellum, and cut out withthe micro tip scissors.

I couldn’t leave the inside blank, so I added some more of the same image, and did a bit more embossing and coloring.

I think it turned out great! What do you think? Let me know, and then hop on over to Krista’s blog!

Thanks so much for hopping by!!

Oh, and lest I forget, I am linking this up to this week’s challenge over at Heart 2 Heart challenges! It’s a photo and color inspiration challenge! You should hop over there and check it out, too!

Supplies Used:
White Cards & Envelopes Value Pack
Black Cardstock
White Daisy Cardstock
Seasonals Mix In Paper Pack
October Stamp of the Month
Archival Black Ink
Carmine Shinhan Touch Twin Marker
Vivid Green Shinhan Touch Twin Marker
Gold Embossing powder
Versamark Embossing Ink
Anti-static pouch
Bonding Memories Glue
Mink Ink
Sponge
Embossing Stylus
Stitched Circles Thin Cuts
Vellum
3-D Foam Tape
2 x 3 1/2 Acryllic Block
Fiskars Trimmer
Liquid Glass
Non Stick Micro tip Scissors
Bone Folder
Martha Stewart Scoring Board
Cuttlebug

Did you enjoy what I had to share today? If so, please . . .

Subscribe to my monthly newsletter & daily blog updates in the sidebar.
Join My Craft with Heart Club.
Earn FREE products by joining my Princess Club.
Check out the clearance rack and save up to 70%.
The $75 New Consultant Kit is the best deal of ALL! Discounts & benefits here.
Find me on Facebook Page where I share videos and specials
Join my Facebook Group. Prizes and fun interaction!
Follow me on Pinterest.
Subscribe to my YouTube channel with video tutorials.

Sweet Treats

Welcome to another week, and another challenge at H2H! (Heart 2 Heart Challenges) This week, we are focusing on Sweet Treats. Now, this could mean so very many things, but I think you will agree with me, in that it ‘should’ be candies or cookies or maybe even cupcakes or brownies! (or maybe even kek, as a friend and I joke!)

So, this week, I have a fun little box, using the September SOTM, of course, because that thing is my favorite SOTM, like EVAH!!

Now, from the top, it doesn’t look like much, I know. But from the side, it’s super cute! I didn’t get a photo of it open, but I can assure you, that it includes candy!! And while this little box is little, it can sure hold a LOT of candy!!

If you didn’t know, I do a facebook live every Sunday morning (well, morning for me, anyway!). During my last FB live, I made this adorable box! So, go on over to my fb page and take a look at the video! You can even watch a few of my past videos too! If you like what you see, I would love for you to like my page too!

Let me know what you think of my little box! Did you go and watch the how to video? I’d love to see your little box, too!

Supplies Used:
White Daisy Cardstock
Seasonals Mix In Paper Pack
Black Cardstock
September Stamp of the Month
Archival Black Ink
3×3 Acryllic Block
Fiskars Trimmer
Liquid Glass
Non Stick Micro tip Scissors
Bone Folder
Embossing Stylus
Martha Stewart Scoring Board

Did you enjoy what I had to share today? If so, please . . .

Subscribe to my monthly newsletter & daily blog updates in the sidebar.
Join My Craft with Heart Club.
Earn FREE products by joining my Princess Club.
Check out the clearance rack and save up to 70%.
The $75 New Consultant Kit is the best deal of ALL! Discounts & benefits here.
Find me on Facebook Page where I share videos and specials
Join my Facebook Group. Prizes and fun interaction!
Follow me on Pinterest.
Subscribe to my YouTube channel with video tutorials.

Sew What?! – CTMH Technique Blog Hop

Welcome to the CTMH Technique blog hop! Today we are showcasing sewing (as if you couldn’t figure that one out already, right?) Today you should have arrived from Wendy’s blog. If not, that’s ok, it’s a circle and you will get back to her! Let’s jump right in, shall we?

Today I am back with another “only White Daisy Cardstock” card. Now, this one was actually inspired by this card that I found on Pinterest when I was trying to figure out what to do for this hop, since I don’t have the new decorative borders thin cuts (which I cannot wait to get!)

I used three different stamp sets on this card! This is not something that I normally do, but I wanted to make something that came close to the inspiration card, and I had all of these sets, so I thought it was perfect!

I used the Lavender, Peony Purple, and Golden Yellow Shin-han markers as well as the journal pen to color these flowers and the tiny purple border that you see. The images and sentiment are stamped in archival black ink. I used the new Embellishing thread to stitch the holes from my largest circle stitched thin cut. The little bit that I had extra, I created the messy loops for a bit more interest. And, last, but not least, I added some silver glitter gems to the centers of a couple of the flowers.

Can you name the three stamp sets that I used? I will have a drawing next weekend to give away this card to those that guess correctly*! Leave your guesses here or over on my Facebook page! I will draw on 9/23 during my FB live!

I hope you like my card! I think it came out pretty close to the inspiration, with my own little twist. Let me know what YOU think!

After you leave your comment, hop on over to Michelle’s blog (yup, there’s lots of us out there!) to see her fantastic creation!

Thanks so much for stopping by! I hope you liked what I have, and what the other ladies have, and will leave everyone some love!

Until next time!

~ Michelle

*Winner must be in the US and must not be a Close to my Heart Consultant.

Holiday Expressions New Product Optional Hop

It’s September! This means that it is time for new product! Waaaahoooooo!! I don’t know about you, but I am always excited for new product! Not that I don’t love the old product, believe me, I do, and like you, am sad when some of it goes away! But, there is always something nice about nice new stuff to play with, wouldn’t you agree? So, today we have a small hop for you to travel along on, to see some fantastic products from the new book! Today, you should have arrived from Darlys’ blog, if not, that’s ok, it’s a circle and you will get back to her!

I have another self closing bag for you today, and a video to show you how to do it!

This fun little box uses the Hello Pumpkin papers, white glitter paper, and the September Stamp of the Month.

After stamping the sentiment in Archival Black Ink, I used the Marigold Shinhan marker to add a smidge of color to the sentiment. I popped the sentiment on with thin foam dots.

At the beginning of the post, I mentioned that I had a video for you so that you can make your own little box! I had a Facebook live video on Sunday to show you how to do that! Just hop on over to my Facebook page and check it out!

Thanks so much for stopping by! I would love to know what you think of my little box! Let me know if you try your own, I would LOVE to see! Now, hop on over to Jean’s blog to see what fun new stuff she has for you!

Make sure to enjoy some crafty time each week!

See you next time, friends!