Man Card Monday ~ Thanks for Sticking by me!

Today marks the fist in a new series for me! This Man Card Monday is for those of us that love making cards, but have a hard time with the cards for the guys. Guys are hard! We want to put bling and pretty bits on the cards that we take the time to make, but the guys . . . well, they don’t generally wants the glitz and bling!

So, each Monday, watch for a video from me that will walk you through making the cards, maybe with a little too much talking, sometimes . . . but that’s me! Some cards will be easier than others. Today’s card is a bit of a futzy one, but I LOVE how it turned out!

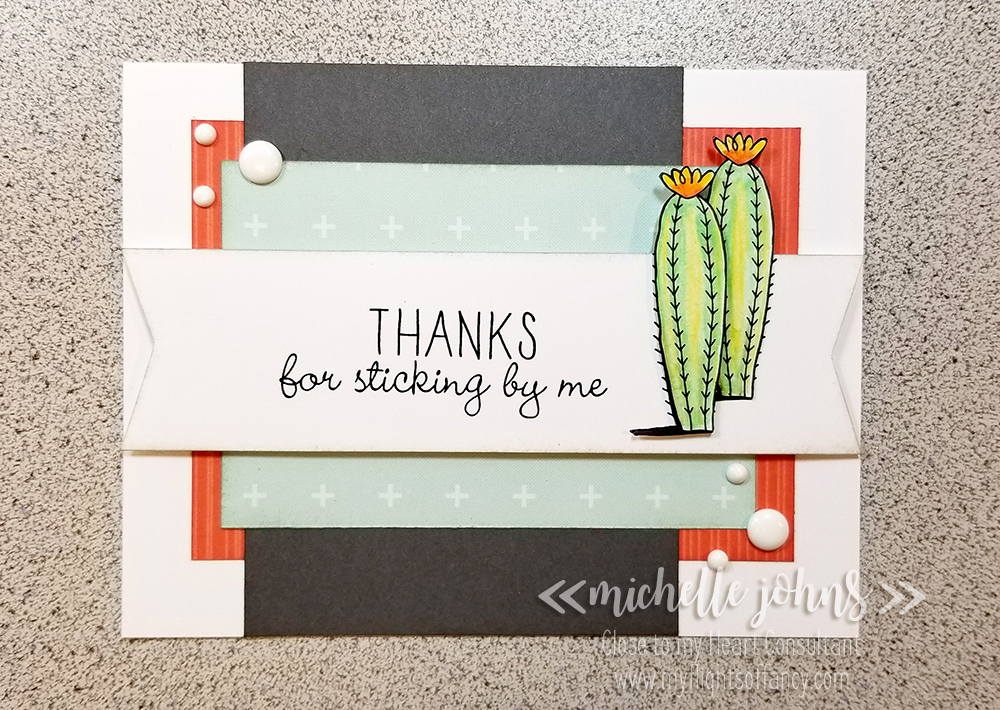
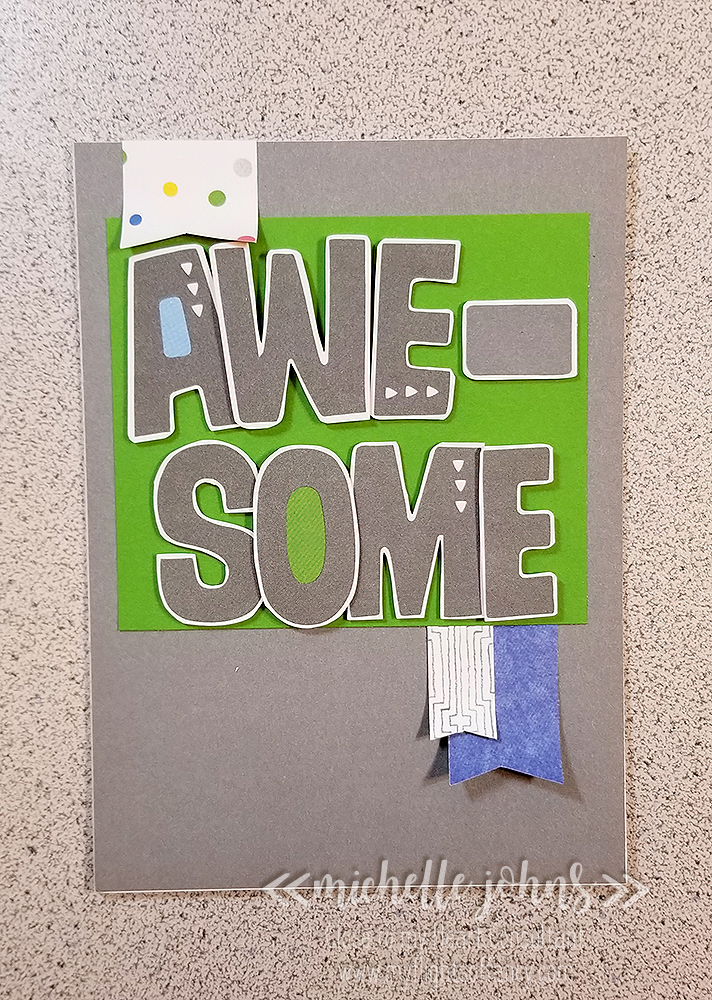
Today’s card uses papers from both I Heart Us and So Much Happy. Using the Make it From Your Heart, Volume 4 book made it REALLY easy to do!

The white dots from the Black and White Dots helps give it some ‘bling’, but still makes it ok for the guys!

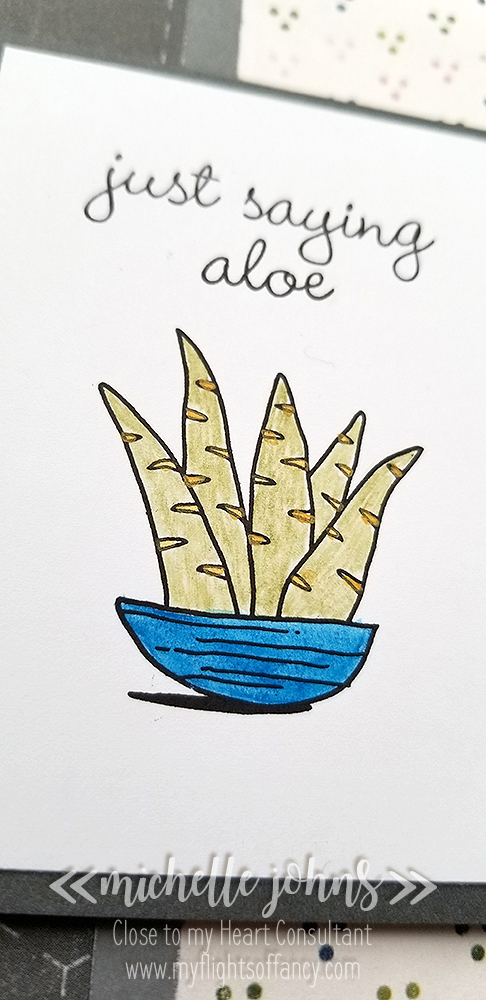
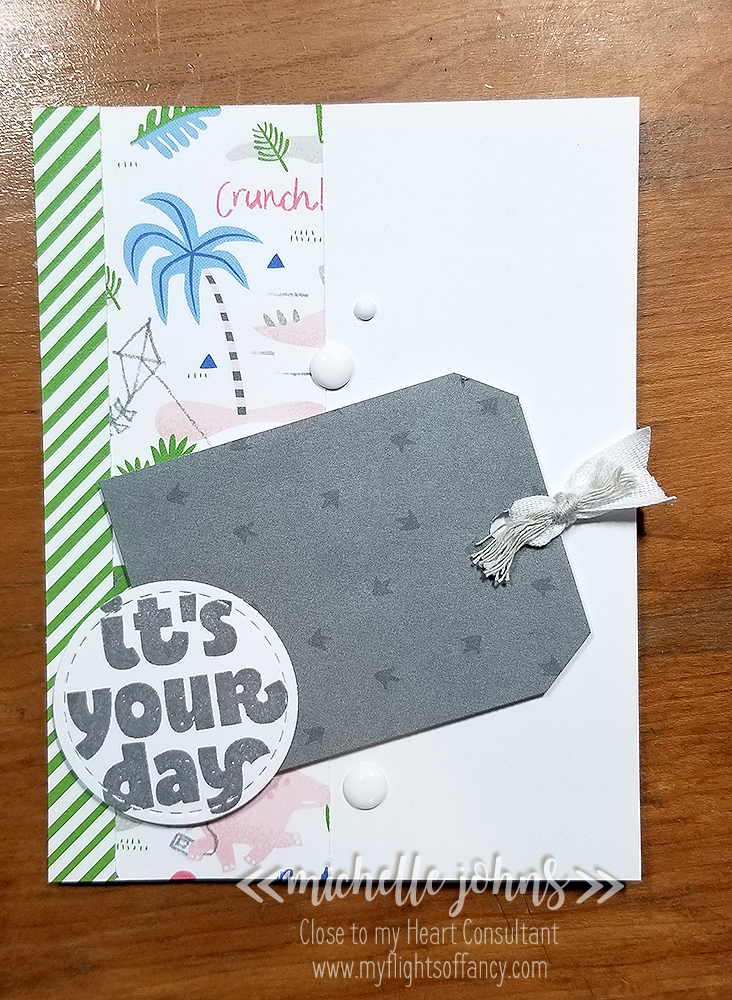
Adding the water coloring on the cacti is what took the most amount of time, well, maybe fussing cutting them took a bit more time? Anyway, those cacti took the most amount of time of the whole card, but I think they are totally worth it!


(Don’t see this video? Click here to watch it on YouTube!)

I hope you like the cards, and that you join me each week for Man Card Monday! I look forward to seeing you next week!

~Michelle

If you like what you see in this post, why not;

  • Subscribe to my Youtube channel
  • Subscribe to my blog.
  • Ask me how to earn a free pre-cut kit each month, with a qualifying purchase
  • Join my CTMH Team!
  • Here is the supply list for the cards, today. They are linked directly to my shop, so if you feel the need to have some come live with you, by all means, click away!

    So Much Happy Paper
    I Heart Us Paper
    White Daisy Cardstock
    Pewter Cardstock
    Value Pack Card Base & Envelope
    C1751 Sticky Notes Stamp Set
    Archival Black Ink
    Black and White Dots
    Make it From Your Heart, Volume 4
    Water color Pencils
    Small Round Water Brush
    Micro Tip Scissors
    Piercing Tool
    3-D Foam Tape
    3-D Thin Foam Dots
    Fiskars Paper Trimmer

    Thanks again for stopping by! Have a great day!

    March SOTM Blog Hop – This Happened

    Welcome to the March Stamp of the month blog hop! This month’s stamp is called This Happened, and is a super fun set! It can be used for scrapbooking or even card making! This set is available for just $5 with a qualifying purchase. Today you should have arrived from Erin’s blog, but if not, that’s ok, it’s a circle, and you will come back around to her!


    This super fun card uses the I Heart Us paper bundle that is on special during March. It also uses some of the white gems from the Grey Gems that are available online, but are not in the Seasonal Expressions book.


    I added some fun doodles with the LePen Journaling pen. The sentiment was stamped with Intense Black Ink onto the canary cardstock.

    Want to get this card and 4 mini album pages free? Place an order that qualifies to get the SOTM for $5 (and get the SOTM), and I will send you a pre-cut kit that includes this card, for FREE!

    Thanks so much for stopping by! I would love it if you left a comment before you hop on over to Amy’s blog! I’m positive that she has some super cute somethings to show you with this set!

    Happy Crafting!

    ~ Michelle

    Case File: CTMH Seasonal Expressions 2019

    I’m sure that by now, you have seen the CTMH book, with all the fun products that we have, just teasing us with fun, spring papers! I know many of us are very much in the middle of winter weather, right now!

    Today, over at the Heart 2 Heart Challenge blog, we were challenged to CASE something from the book, but we were able to put our own twist onto the project. So, I thought I might have some fun with it!

    So, I decided to go with one of the cards from the I Heart Us Card workshop (which is actually called Workshops Your Way® Lucky Friendship Cardmaking Kit) I went with this for a couple of reasons. 1. I like the paper. 2. It was an easy card design 3. I wanted to show that you can use those card designs (which come with a cutting diagram!) with any other papers and/or stamps, as well!

    So, I started with the card design as shown, using the I Heart Us papers. It does call for black glitter paper, but I decided to stick with the sapphire cardstock that I used for the stripe down the middle.

    I then reached for the Sticky Notes stamp set. I stamped with some Archival Black Ink, and colored with the water color pencils and the small round water brush.

    I then decided to use the Feels Like Home paper pack (well, just two designs from the pack). Like with the first card, I decided to stick with the cardstock for the strip and the sentiment mat, in this case, Charcoal cardstock. Again, stamped with Archival Black Ink and colored with the watercolor pencils and small water brush.

    I have two secrets to put cards like this together. The first is to flip the papers over to the back side, and use bits of washi tape to hold all the pieces together. Then I will essentially be gluing just ‘one’ piece of cardstock to the front of the card base. The second is to use liquid glass to attach said ‘one piece’ to the card. This allows for some wiggle room, to make sure that it is lined up straight and has even borders all around. These two secrets help make this card design SUPER easy to put together!

    Thank you so much for stopping by my blog today! I hope that I have inspired you to case something out of the book! I would love to see what you create with this in mind!

    Remember to stop over at the H2H challenge blog to see some other fun examples, and to join in on the challenge!

    Lovely Layers – CTMH Technique Blog Hop

    Welcome to the CTMH Technique Blog Hop! This month we are all about Layers, layers, and more layers! Check out how many layers of hopping we have for you this month! Today you should have arrived from Marciava’s blog , but if not, that’s ok, it’s a big circle, and you will get back around to her!

    Isn’t this just the cutest layout? It is my favorite layout in the whole workshop that I have coming out on Monday! There are So Many Layers! But, it’s so easy to put together!

    This great title bit is combined from the cut apart page and the compliments for the Something Fierce paper pack. They are strung together with some fun Mink Twine. The banners that hang over the photo spots aren’t glued down, so that you can still get your photos in there! However, if you are putting this together with your photos already on it, you don’t have to worry about that part!

    This adorable pink dino is another part of the cut apart page. I popped him (her?) up on some foam tape to give it a bit more dimension. The sentiment is part of the compliments pack. Add a few sparkles and you are ready for all the happenings!

    This dino, like it’s dark pink companion, is part of the cut apart sheet, again, popped up on some foam tape. The little flag and hearts are all part of the compliments pack.

    This little spray of hearts and sparkles continue the line from the lower left corner, and are all part of the compliments pack. Below it you see some of the fun papers and even some of the compliment borders! Adding a few more sparkles to the whole spray of hearts finishes off this fun page!

    What do you think of this page? Like I said at the beginning, I am LOVING this page! It is just so fun and bright! Even if the dinos are pink, this page could easily be used for both boys and girls! I think the only thing that I might do differently, is maybe add some pewter sponging on the edges of all of the pieces. What do you think? Would you leave them as is, or add some ink on the edges?

    Leave me a comment below, and let me know what you think! Do you have photos that would be perfect for this layout? I would LOVE to see them! Share them with me over on my facebook page! After you leave a comment, hop on over to Haley’s blog to see what fun she has come up to!

    Thanks so much for stopping by! I really appreciate it!

    ~ Michelle

    I Love Us

    This week’s challenge over at Heart 2 Heart Challenges is “I Heart Us”. Now, you can take that, as always, in whatever fashion that you want. You can use the paper pack with the same name, or the photos that move your heart.

    Today I have a fun two page spread for you, but it isn’t your traditional size that you see me make, they are 6×8 pages perfect for the Everyday Life albums!

    I took the pattern 6 from the Make it from your Heart volume 1 book. Those patterns are for 12×12 pages, so I had to do some figuring, but I did, and made it work for the 6×8 pages!

    First I started with some mink cardstock cut to 6×8, then I made some masks with a couple of clouds, and did some white ink splatter around the edges of the pages with my water brush. Next I used the negative of those clouds to be able to sponge some pebble and charcoal inks onto the cardstock to create the darker clouds. I cut the title from the cut apart page from the I heart us paper pack, as well as the strips of paper.

    I used some foam tape to pop up the title and the clouds. Sparkles and Bitty Sparkles make some fun ‘rain’ on the left side of the left page.

    I created a cut file for you to use, if you have the Artistry cartridge, you will be able to recreate this page in no time!

    You can find the file here.

    I love color, how about you?

    Today’s challenge over at Heart 2 Heart challenges is all about color. This can be interpreted in so many different ways! You can choose to use your own favorite color or color combo, you can use all of them, you can take inspiration from somewhere else, nature, pinterest, other challenges, photos, and so much more, including the CTMH Love of Color Book. Inspiration is everywhere! Today I grabbed a little from here, and a little from there.

    So, along with the H2H challenge, I am playing along with Fusion and Color Throwdown! I knew I wanted to play with the sapphire color, and Color Throwdown happened to have a dark blue, Green, and Grey color palette for this week’s challenge . . . how perfect! Over at Fusion, they have a sketch or a photo that you can take inspiration from. Their photo this week is some adorable Penguins, and I’m telling you, if I had the Hostess only stamp set, “Got Snow?” . . . I would totally be using a super cute penguin on my card today! However, that is not one that I have (but I wish I did!), so I couldn’t use it.

    Now, the colors that I use are partially one of the color suggestions in the Love of Color book, there are more options in the palette that they suggest, but I wanted to stick with the few for the throwdown challenge! These are very traditional ‘boy’ colors, but it just popped so well!!

    This card is mostly plain cardstock, I almost think I should have done a bit of background stamping on the pewter cardstock, but it looks ok anyway! The sentiment is in the cut-aparts from the Something Fierce paper pack, and the banners are scrap pieces that I have had leftover from other projects using this same paper pack!

    I love how simply this fun card came together! Tell me what you think of it? If you had this card, who would YOU give it to?

    Creativity is in the cards!

    Welcome back! Today I have a super fun card for you! Over at H2H, the challenge this week is to make a non A2 sized. That means that it should be something other than 4 1/4 x 5 1/2. Also today, over at Atlantic Hearts Sketches, is their 300th sketch! So, they are celebrating a bit, go and check it out!

    My card today is 3 3/4 x 9 1/4, and fits perfectly into a number 10 envelope. (This is the ‘normal’ long envelope that you see mailed)

    I’ve used the Something Fierce papers today, and as you can see, there isn’t a dino in sight, anywhere! This paper pack is so versatile!

    I decided to turn the sketch on it’s side, and of course, since I’m doing a skinnier, longer card, things had to be stretched out a smidge.

    I cut the coffee cups from the Artistry cartridge, and I was going to do a banner from there as well, but decided to just use a scrap of white cardstock, and wrap the banner myself.

    I also decided to make this card be a fun to give card, so there is a small pocket on the inside so that you could put cash or a gift certificate, or even a gift card.

    I used three different stamp sets on this card, which is unusual for me, but it turned out so cute! I used the letters from the Simply Said stamp set, the word Enjoy from Picture Perfect, which is one of the sets from the Artistry cricut bundle, and the ‘for you from me’ from Sending Smiles, which is one of the sets from the Flower Market cricut cartridge.

    I used the cut outs of the hearts from the cozy on the cups, on the inside of the card. I backed the open hearts on the cozies with scraps from the pink pieces that you see as banners, then I colored them with a couple of coats of the clear shimmer brush. Once that dried, I added a few drops of liquid glass to give it some shine to go with that shimmer!

    To make the banner, I stamped on a piece of white daisy cardstock that was 3/4 x about 6 inches. I stamped the sentiment with Archival Black ink, and then I spaced out the coffee cups about how I wanted them (not gluing them down yet) and found a piece of scrap cardstock that I could use to start the folds of the banners. So, I wrapped the scrap cardstock with the banner, but pinched only just the top corner, making sure to angle out the bottom of the banner. Then I folded the end pieces back again, making sure they (mostly) lined up with the straight bottom of the main part of the banner. At that point, I trimmed the ends to be about the same length, and dove tail cut the ends. I used some thin foam tape to pop up the space between the two folds to give it some dimension. Used the same thin foam tape behind the coffee cups, to make it an even lift.

    I used some black shimmer trim to help tie in the black of the sentiment on the front and inside of the card.

    I do have to say, this is one of my favorite cards in the last little white! So, I hope that you will come join in on both of the challenges this week! The “Not your typical sized card” challenge that is over at Heart 2 Heart and the sketch that is over at Atlantic Heart Sketches!

    I would love to hear what you think about this fun little card! Leave a little comment below, and then go check out those fun challenges!

    Until next time, stay crafty, my friends!

    ~Michelle

    Tag, You’re It! – CTMH Technique Blog Hop

    Welcome to the CTMH Technique Blog Hop! This month we are playing with tags! Tags come in all sorts of shapes and sizes, so make sure you hop along with us to see how many we can share with you! Today you should have arrived from Michelle’s blog, but if not, that’s ok, it’s a big circle, and you will get back around to her!

    So, today I am playing with the Something Fierce paper pack, which is just so fun! I am using the sketch from Fusion Challenge is celebrating their 5th anniversary, and I wanted to share another fun challenge site with you guys!

    The sketch is simple, and allows for adding things and making a few little easy changes, and I wanted to show how easy it is to do the same thing with the same cards and papers, and end up with two very different looks!

    My first card is very ‘girly’ card. Lots of pinks and greys.

    My tag is just a pewter cardstock that I trimmed the corners off of, to match some tags that I have in my stash. I punched a hole with just a hand held punch. Then I used a bit of washi and taped it to a sheet of lined paper, and used the line of dots from the Years of Sweetness stamp set to add some interest. Check it out!

    I just alternated where the dots fell, so they weren’t straight lines from the top to the bottom!

    I used some white ribbon and mink twine for the punched end, and I added a bit of bling with some sparkles.

    My second card is much more ‘boyish’ looking, though it would work for boys or girls. Unfortunately, most of the dinos are hidden under the other elements!

    I used the white ribbon again, but paired it with some thick whisper twine. The tag already had the dino feet on it, so I didn’t do any stamping there. To finish it off, I used some of the black and white dots.

    I used the same Years of Sweetness set for the sentiments on both cards. On the girl card I stamped the cupcake frosting in ballerina, the candle in first and second generation raspberry ink, and the flame in lemon ink. The Yay was stamped in archival black. On the boy card, the sentiment is stamped in pewter ink. The sentiments are stamped on circles cut with the stitched circles thin cuts.

    I hope you have liked my cards today, I would love it if you left me a comment to let me know what you think, or what you might have done differently! (everyone would tweak something just a smidge!)

    Next up, is Haley! So, hop on over to her blog, and leave her some love too!

    ~ Michelle

    Have you tried stamping yet?

    This week’s challenge for H2H is background stamping. This week you will see some fun examples of different ways you can get different personalized papers using just your own inks and stamps! It’s the perfect way to be able to make sure your project matches what you are looking for, perfectly!

    I showed how to make this card on my weekly FB live, so if you want to watch step by step, jump on over there to check it out!

    So, for today’s card, I used both Ballerina and Archival Black inks, Colorful Texture and Years of Sweetness stamp sets, and I used Black and White Daisy cardstock on top of one of the card bases from the Value Pack. I used the decorative borders thin cuts to get the fun scalloped border, glued it all together with some liquid glass, and finished it off with some white ribbon.

    Season’s Greetings!

    It’s another weekly challenge over at Heart 2 Heart Challenges! This week’s is Season’s Greetings! You can have it be anything that you think fits into that theme!

    Today I am sharing a 5×7 photo card, perfect for those Christmas Cards that you want to send out.

    The best part is, I even have a video for you on how to make it! You can find it HERE.

    Check out the fun details that I have on here! I used the Oh What Fun paper pack, the Christmas Countdown stamp set, Candy Apple cardstock, Intense Black and Clover green inks, Red gems (sold out), and Candy Apple striped ribbon.

    In the video I share how to get two 5×7 cards from one sheet of cardstock, how to make the frame, the pull out for the photo, and other fun tips! You should check it out!

    After you have watched, click follow, and then head on over to the H2H blog to see what other fun creations there are for you this week! Remember, you have the rest of the month to play along with any of the challenges in December!

    Thanks so much for stopping by!

    ~Michelle