Category Archives: CTMH

15 years of Close to my Heart goodness!

Thursday Tutorial : CTMH How-To Books

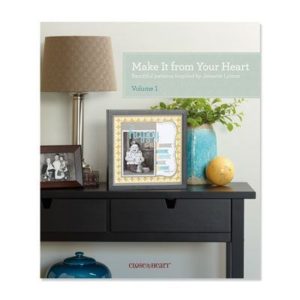
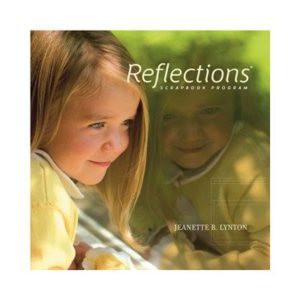
If you’ve been around my blog or attended any of my classes or crops, you have probably heard me talk about the CTMH books. Now, I’m not talking about the Idea Books (those are FANTASTIC, but still) . . . I’m talking about the How To books. In the current “big book”, they are on page 110, or you can find them online, here.

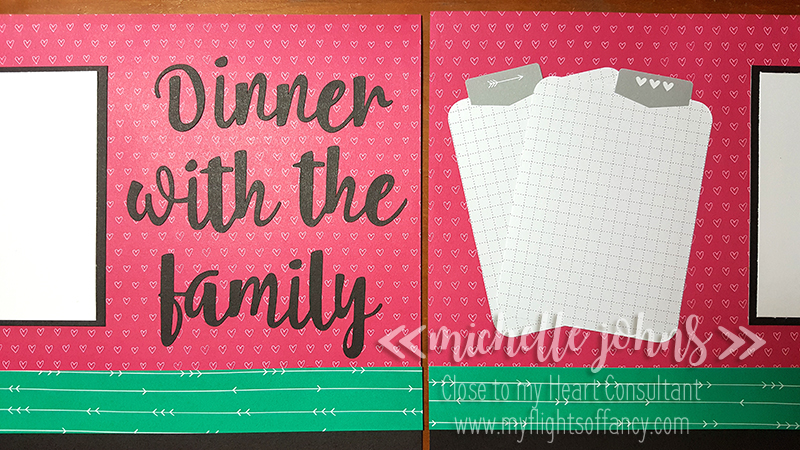
Now, why are these books so great? Well, because they give you everything you need, at the tip of your fingers! You have artwork made with the sketch provided (sometimes exactly the same, and sometimes with something a bit different!), you have cutting guides, telling you how many and what styles of paper you need, and how to best cut them to save time and money.

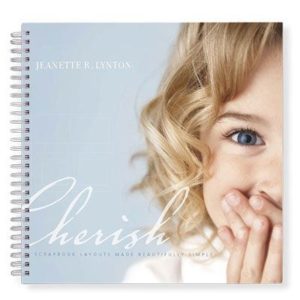
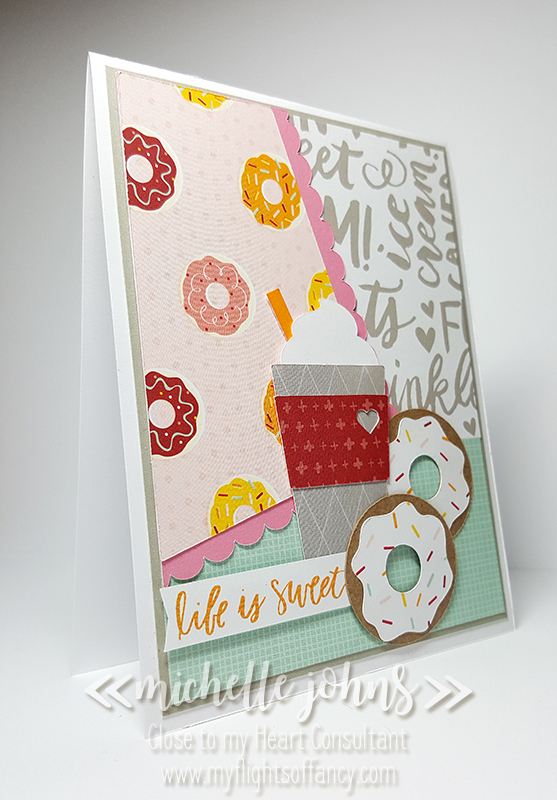
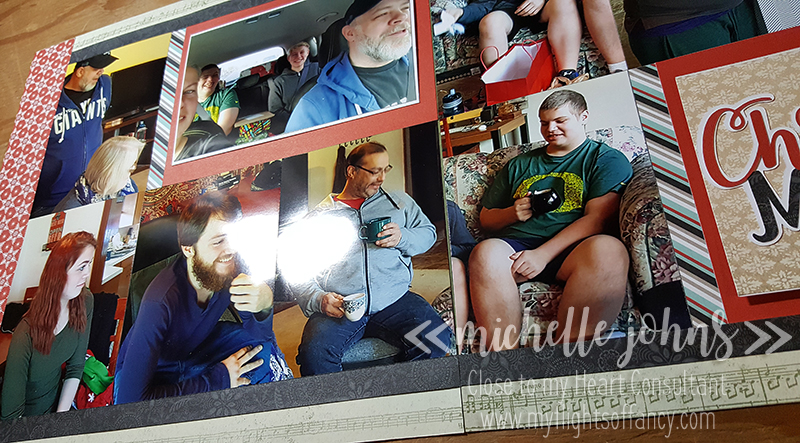
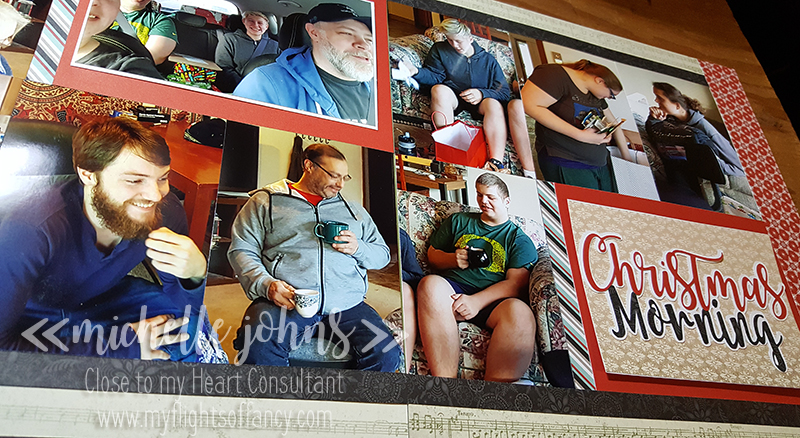
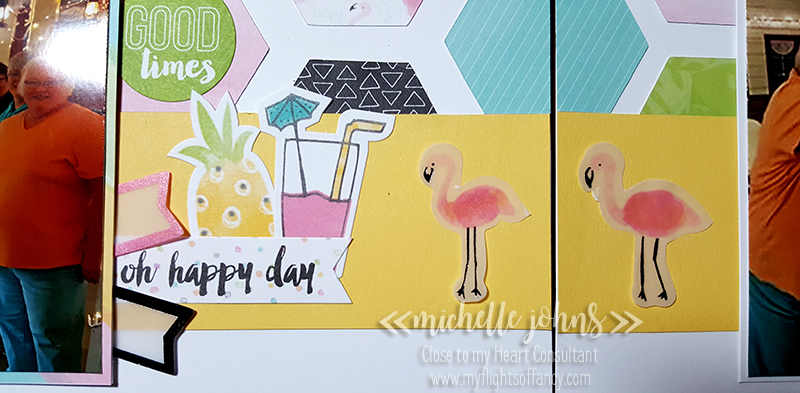
Last week, I shared a layout with you that used a pattern from Cherish. I wanted to share another example with you. Now, this is from a PDF (that I will also share with you), so it doesn’t include the artwork that is in the book, but it is very helpful!

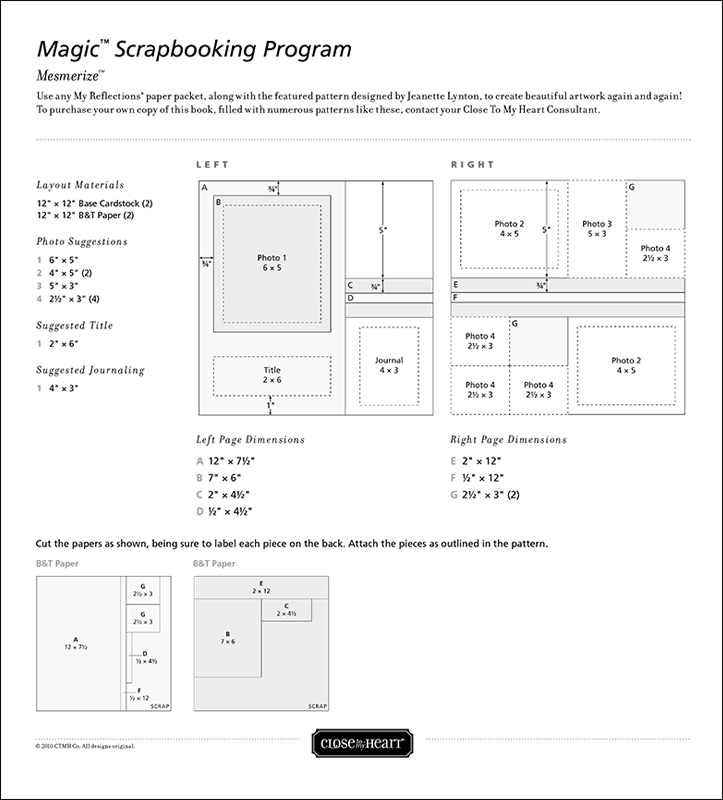
This image shows you the sketch, the sizes of each of the pieces, and how to cut them, like I mentioned above. You can download the PDF here.

There are books for just Layouts, books for just Cards, and books that include both! One of the things that I will do if I have a creative block, is flip through the books looking at the artwork. Maybe I have an idea of the paper I want to use, or even the purpose for the card. I can flip through the book and find something that I like, and be able to make it! (the card books have 2 totally different designs of each card, spread throughout the book. While you may not like the design in one paper, you may find that you really like it in a different paper!)

Next time you are at one of the crops or classes, feel free to flip through them! They are always there to use during the crops!

Until tomorrow, stay crafty my friend!

~ Michelle

Sweet! Yum! Treat Bag!

Welcome back to Bags & Tags Tuesday! Today I have this sweet little bag of chocolate for you! It would be paired perfectly with a coffee, mocha, hot cocoa, or even tea!

As you can see, this sweet little bag will hold 3 Ghirardelli chocolates perfectly!

I used Pixie Cardstock for the bag and the straps. The little dot is the middle of the donut hole from yesterday’s card! (there are 2 more on the back side, since I mis-cut one of the donuts yesterday!) The dots and cup are from the Sugar Rush paper packet, as well as the “hello” sentiment (it’s from the same zip strip as yesterday’s card).

I used two of the three washi tapes that come in the Sugar Rush Washi Pack. They add just a bit to the whole bag, making it not too bland!

I hope you enjoyed this little bag! I’ll include the dimensions and such below!

Until tomorrow!!

~ Michelle

Bag dimensions and info:

3 x 4 15/16
scored at 2″ from each 3″ side. (so the long part across the top)

(2) 2 1/2 x 1 7/8
scored at 1/2″ on 3 sides (2 long and one short)
slightly miter the squares on the 2 corners

(2) 1/4 x 10 (handles)

Use your bone folder to crease the score lines.
Attach handles 1/2″ in from the sides, lining them up just along the score line.
Decorate the front of your bag before you put it together, as it will be easier to do at this point.
Attach center piece of the bag sides first (do both sides).
Then attach the sides to the front of the bag, and repeat on the back.

Life is Sweet

Welcome back to the blog! Monday’s are card days! (I’d go with Make a Card Monday, but it’s already been taken by a number of people, but one of my idols, Kristina Werner was the first! (at least that I know of!)) So, until I come up with another catchy title, I’ll just go with something generic! hahaha!

I had so much fun making this card! It was directly inspired by this card! I loved the whipped cream on top of the coffee! Can you guess what image I used off of one of the CTMH cartridges that I used to make it?

I’ve gotten a lot of use out of this latte cup from the Artistry cartridge! I just used the slice feature on my cricut to not cut the lid of the cup. The sentiment on the card comes from one of the zip strips from the Sugar Rush papers (which is what I used for this entire card). This new paper pack is SOOOOOO fun!!

I used one of the Touch Twin markers to color the straw. I did have it white, but it didn’t stand out from the whipped cream, so I needed to do something different. So, here you can see my test scratch paper, and then the little strips that I was using to test the colors.

I hope you like the card today! Tell me, who would YOU send it to, and why?

Until tomorrow!

~ Michelle

Weekly Mini Album | Week 2

Hi All!!

Remember last Sunday when I showed you the title page for my mini album? Well, I have the next week’s spread for you!

My thought process is, I will put all of my photos that I have taken over the week into the book. However, that isn’t always going to happen . . . I took a few extra pics this week! LOL!! You can see that I added a 3×4 flip flap to one of the photo spots!

I captioned the photos in Photoshop using the Umbrella font.

On the 2nd page, I wanted to use a 4×6 photo of the Gorge that I took, and had another picture of the “snowstorm” that we got, and needed journaling too, so those all went on the same page.

I had fun this week, and my family had fun this week, so that means it was a good week!

I hope your week has been great, and that next week is just as good or better!

Until tomorrow!

~ Michelle

Scrap Your Stash : Christmas Morning

So, Saturdays are going to be Scrap Your Stash. Those fun things that you have had in your stash for more than 6 months . . . they may not be new and exciting . . . but you bought them for a reason! So, I invite you to join me, and use your stash up!!

So, I found this sketch on pinterest, and tracked it down to the exact location, and they even have a PDF download!!

I made sure to snap a photo of everyone that was opening presents on Christmas morning, and some of them are blurry and not so great, but, that’s ok!!

Now, the two different 4×6 spots aren’t glued down because I am going to be putting them into flip flaps when I put them in the page protector. I will be adding journaling to the page under those flip flaps.

This was fairly simple to put together, once I figured out what paper combinations that I wanted! I used both Yuletide Carol and Snowhaven paper packs. I used Watermelon and Umbrella fonts for my title, and used Photoshop to create the ‘shadow’ for it. Audrey helped me pick the papers for the words, and she is excited about this layout!

So, a couple of notes for you. . . . Kids LOVE to see photos of themselves. (at what point does that change, do you know? I remember being excited when I was young, to see pictures of me!) So, get the photos in front of them! Be it scrapbook pages, photo books, or even the digital photo frames!!

Now, the second note . . . you know that pretty paper that you got because it was just awesome! You know where it’s stashed, right? In the third box from the bottom of the cupboard, with some other papers that you loved when you bought them too, right? When was the last time you laid eyes on that paper? Not any time recently, huh? So, how about this for a mind blowing thought . . . if you put that paper onto a project, then you can share that paper with A. Yourself, B. Your family, and C. Your friends!! That means that EVERYONE can enjoy that paper that you loved when you bought it! (and let’s go Velveteen Rabbit here . . . all the paper wants to be loved!) So, I challenge you, in the next week, to pull out at least ONE of your “I can’t use this paper because it’s too pretty” paper, and create something with it. Scrapbook page, card, home decor item, a box, anything that brings you joy!!

Thanks for stopping by today!! I hope you enjoyed my page! I can’t wait to see what you have done with your stash!!

Until Tomorrow!

~ Michelle

Be Happy Layout

So, today is Scraplift day! This day will include layouts and cards and basically anything that inspires me! I have many different pinterest boards for this, and boy, is my scrapbook one full!! Today, I was inspired by this layout. Seeings as I usually do 2 page layouts, I decided to create a second page to go with it. It ended up being an “inspired by” more than scraplifted, but I think it’s all good!

So, I started with Cricut Design Space, and created the following layout:

This page uses the Artbooking, Artistry, and Flower Market Cartridges. You can find the Design Space file here.

So, once I got this designed, I had to choose some photos. So, I went looking through my folders, and found some from my retreat in October, AND, it’s my friend Vickie’s birthday today, and had these GREAT photos of her and Jenn, and just KNEW that I had to use them!! (Sorry Mary, for you getting cut off in the photo! Definitely going to have to reprint them all so that everyone is on there, and they are better quality!)

I knew what paper I wanted to use too, because she just LOVES this paper! So, away I started cutting! Now, if you compare my hexagons to the design space file, you will see that a few are in different spots. As with any creative project, sometimes, things just have to change a little. (you’ll note that the banners didn’t end up on the layout either!)

Now, this paper pack (now retired) is a very summery paper pack, by design, especially with the complements. However, I just made it do what I wanted it to do!!

I created a little cluster with the stickers and vellum pieces, it’s so fun to put all the bits and pieces together! You can sorta see, in the photo above, the pink and yellow banner tails, those were long dove tailed on both ends banners (one pink and one yellow) . . . well, I wanted to make these little flags sticking out, so I cut it in half, and used them how *I* wanted to use them!

We did indeed have good times at the retreat! I am so glad to know all of the ladies that come to my crops, workshops, and retreats!

Thanks for stopping by to visit! I hope you are enjoying all of the artwork!! Now, remember, there are some January only things, you won’t want to miss out on them!

Welcome Home Wreath
January Stamp of the Month : Adore You

Thank you again for stopping by! I hope you have a great day! If you are in the local area, (or anywhere being hit by storms) stay home, stay safe, stay warm! Maybe do some crafting! I have a challenge up on my crop event, since it’s been cancelled, if you click that you are going, and post something that you craft on Saturday, I will have a fun little something for you! So, go and check it out!

Until tomorrow!

~ Michelle

Thursday Tutorial: Shimmer Brush

If you haven’t played with CTMH’s shimmer brushes yet, you are missing out! These things work like a DREAM!!

That being said, sometimes it’s a bit hard to figure out how to work them. So, I created a quick video on how to put it together so that you can start using them on your projects.


{If you are reading this in email, click through to the web page to view the video}

In the video I show you the Clear Shimmer Brush, and you can also now get the Gold Shimmer Brush.

Hopefully this was a bit helpful to you!

Until tomorrow, have a crafty day!

~ Michelle

Dinner with the Family

The other morning, one of my girls called and wanted to go out to dinner, as a whole family. Seeing as I don’t get to see them very often, now that they have moved out, I agreed!

While I didn’t get many photos, they were fun, and the evening was great!

I started with the Vistual Texture pattern from the Cherish book. These books are so fun! Can you see what I did with the pattern to get to my finished page?

cherish-visual-texture   <–Click here to download a PDF of this pattern!

I used the Adventure Fundamentals paper pack. The raspberry and willow are so pretty together, don’t you think? I have the tabbed journaling cards there to add some journaling to (which I WILL do, after I get the photos printed and added to the page)

Like the other day, I used my explore to cut the title. This time I used the Umbrella Regular font on CTMH’s Black Cardstock. I even have a little hint to share with you about it.

All of CTMH’s cardstocks have a white core. This is done so that the color on the cardstock is consistant. This also means that when you cut it, you can see the white on the inside. Sometimes, that is not really what you want, and you ink the edges to remove some of the white (or hide it a bit). However, with this title, I didn’t want to have to edge all the little bits here and there. So, let me show you my fun and easy trick!

This is the title cut, (mirrored) while still on my cricut mat. You can see that the word “the” is repeated, this was my “test” sample to show you. As you can see, the white shows already, before I take it off the mat.

So, after I take them off the mat, and put them onto the remainder of the black cardstock (yeah, it doesn’t look like it, because of the light), you can see the differences. (the arrows help some). On the left, is a fairly straight above photo. You can see on the lower word, there are many more white spots vs. the upper one.

On the right photo, the angle is slightly moved to a lower position, and you can see even more of the white showing.

Here is a comparison of the words on the same background paper, with better lighting. While very similar, you can still see more white on the one on the right. So, my little trick to share with you is to mirror your white cored paper to minimize the amount of white that shows!

I will be having the photos printed soon, and will show an updated photo on another post, so keep watch for it!

Now, I’ve shown you the wreath that is a special for January, but have you seen the Stamp of the Month? It is a GREAT stamp to add to your collection if you love making valentines, or plan on doing pages for valentines (Kids? Grandkids? that special someone?). It’s just $5 with a $50 purchase, or you can get it by itself for just $17.95.

I hope your week is flying by! I know it has been for me! Saturday I have a crop coming up for the local ladies. Are you nearby? I have a few spots open still! Just let me know if you are interested!

Until tomorrow!

~Michelle

Chocolate holder, take 1!

So, Tuesdays are going to be Tags, Bags, and Treat Holders! Yesterday I told you I was going to have something for you to be able to gift to friends . . . we all like little gifts! Especially when they are made pretty first!

So, I used another paper from the Rustic Home Fundamentals paper pack. This pack is so fun!

Here you can see it is a matchbook style treat holder. Inside is just one little Ghirardelli square, perfect for a little “I’m thinking about you” treat.

This is such a fun little treat holder!! You could easily make up many of them for valentines or treats for birthdays, or even just because!!

Remember those hearts that I told you I colored yesterday? Well, they came in perfectly today for the front of this little treat holder! They are all cut from White Daisy cardstock, and then colored with the ShinHan Touch Twin markers.

I hope you liked the little holder today! Who would YOU give one to? Join me tomorrow for another fun crafting bit!

Until then, have a fabulously crafty day!

~ Michelle

Be Happy

Happy Monday! This week is a bit off for me, being that it is a short week. I am sure that others feel the same!! The bonus is, I got to craft more! Always a good thing, right?

Today I am sharing a card that is missing patterned cardstock. I wanted to remind everyone, that you don’t have to have patterned papers to make beautiful things! I used the Artistry Cartridge and bundled stamps for this card. I was greatly inspired by this card I found on Pinterest.

Today I used Pacifica, Pixie, and White Daisy cardstocks.

When I am ready to send it, I will create an inside liner, write my message, and then glue it in. (that way, if I mess up, I can just make a new liner, and not have to make a new card!)

The cricut explore cut this doily image just beautifully! And would you believe, the doily and the heart are both white daisy cardstock?

I knew when I was cutting the images, that I was going to color the heart with one of my Touch twin Shinhan markers. Now, the key to getting not blotchy color, is to completely saturate the cardstock. So, I cut a few, colored a few, a few different colors, and then decided at the end of the card making which I wanted. Well, this one was just a happy little accident! The side you see is actually the BACK side of the heart that I colored. When I went to put the thin foam tape on the back, I decided that I liked it MUCH better than the front! It is just so much softer looking, and I thought it complimented the card well.

Now, if you come to my crops, you know that you can use anything there, and I encourage it! Very few people have limited themselves to just one company’s products. Generally, when I show things on my blog, I try to use only CTMH products, however, this time, I just HAD to use this pen. It is a pen that I was introduced to at my friend Erin’s house. It is a glittery gelly roll pen, and it is fantastic! Today I used it in my cricut explore to draw these little hearts, to give the background just a little something. I think it worked quite nicely, don’t you?

So, that’s my card for today! I will have another next Monday! Join me tomorrow when I show you a little something to give away chocolate. (WHAT?!?!?! Give AWAY chocolate? . . . well, yeah, it helps our friends feel good too!) You will want to come back and see!

Before you go, though, have you seen this fantastic wreath?

It’s available in January, thanks to National Papercrafting month! Every January, we celebrate National Papercrafting Month as a way of acknowledging the pure joy of playing with paper! We scrapbook with it, we make cards with it, we decorate with it—in short, we craft with it! This January, we’ll be celebrating the joys of papercrafted home décor with the beautiful Welcome Home wreath kit. This kit comes with precut pieces you can simply pop out and attach to the sturdy chipboard wreath base, making a welcoming décor piece for your home. The wreath kit can be yours for just $18.95, or you can get it FREE with a qualifying $60 USD purchase. In addition, hostesses with qualifying Gathering totals and new Consultants who sign up in January can also receive a free Welcome Home wreath kit. Celebrate your love of papercrafting with the exclusive, easy-to-assemble Welcome Home wreath kit.

This kit comes with almost everything you need to put it together, including the gold stickers to spell welcome or your name, all you need to add is glue! All of the pieces are pre-cut (just like my workshops!) I know you will enjoy putting it together! Just remember, this fun wreath is ONLY available in January!

Until tomorrow, stay crafty, my friend!

~ Michelle