Category Archives: CTMH Cards

Cards made with CTMH Products

Happy Birthday with Craft On

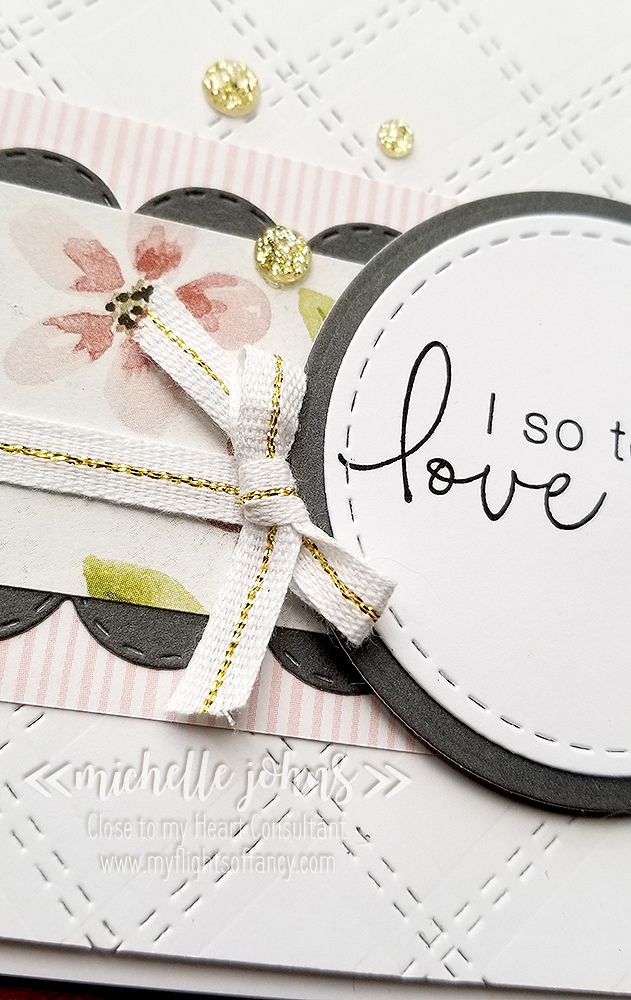
If you watched my Facebook live on Sunday, you heard that I haven’t had a chance to do much crafting this last week! Well, I decided that I would participate in a few challenge blogs! So, I came up with this card fairly quickly, since I was using the sketch from Case This Sketch #330, and I went with the AAA Birthday challenge of ‘for the girls’. Their challenge blog is ALL about birthdays! It is such a great blog to go and check out! You will find ALL sorts of ideas for birthday cards! I decided to round it off with Time Out Challenge’s prompt this fortnight, which was a prose from Oscar Wilde. “With Freedom, Flowers, and the Moon, who could NOT be happy?” Hence the flowers from the Craft On paper pack! I was also going to play along with another challenge, but I missed part of it, but that’s ok, I still like how this card turned out!

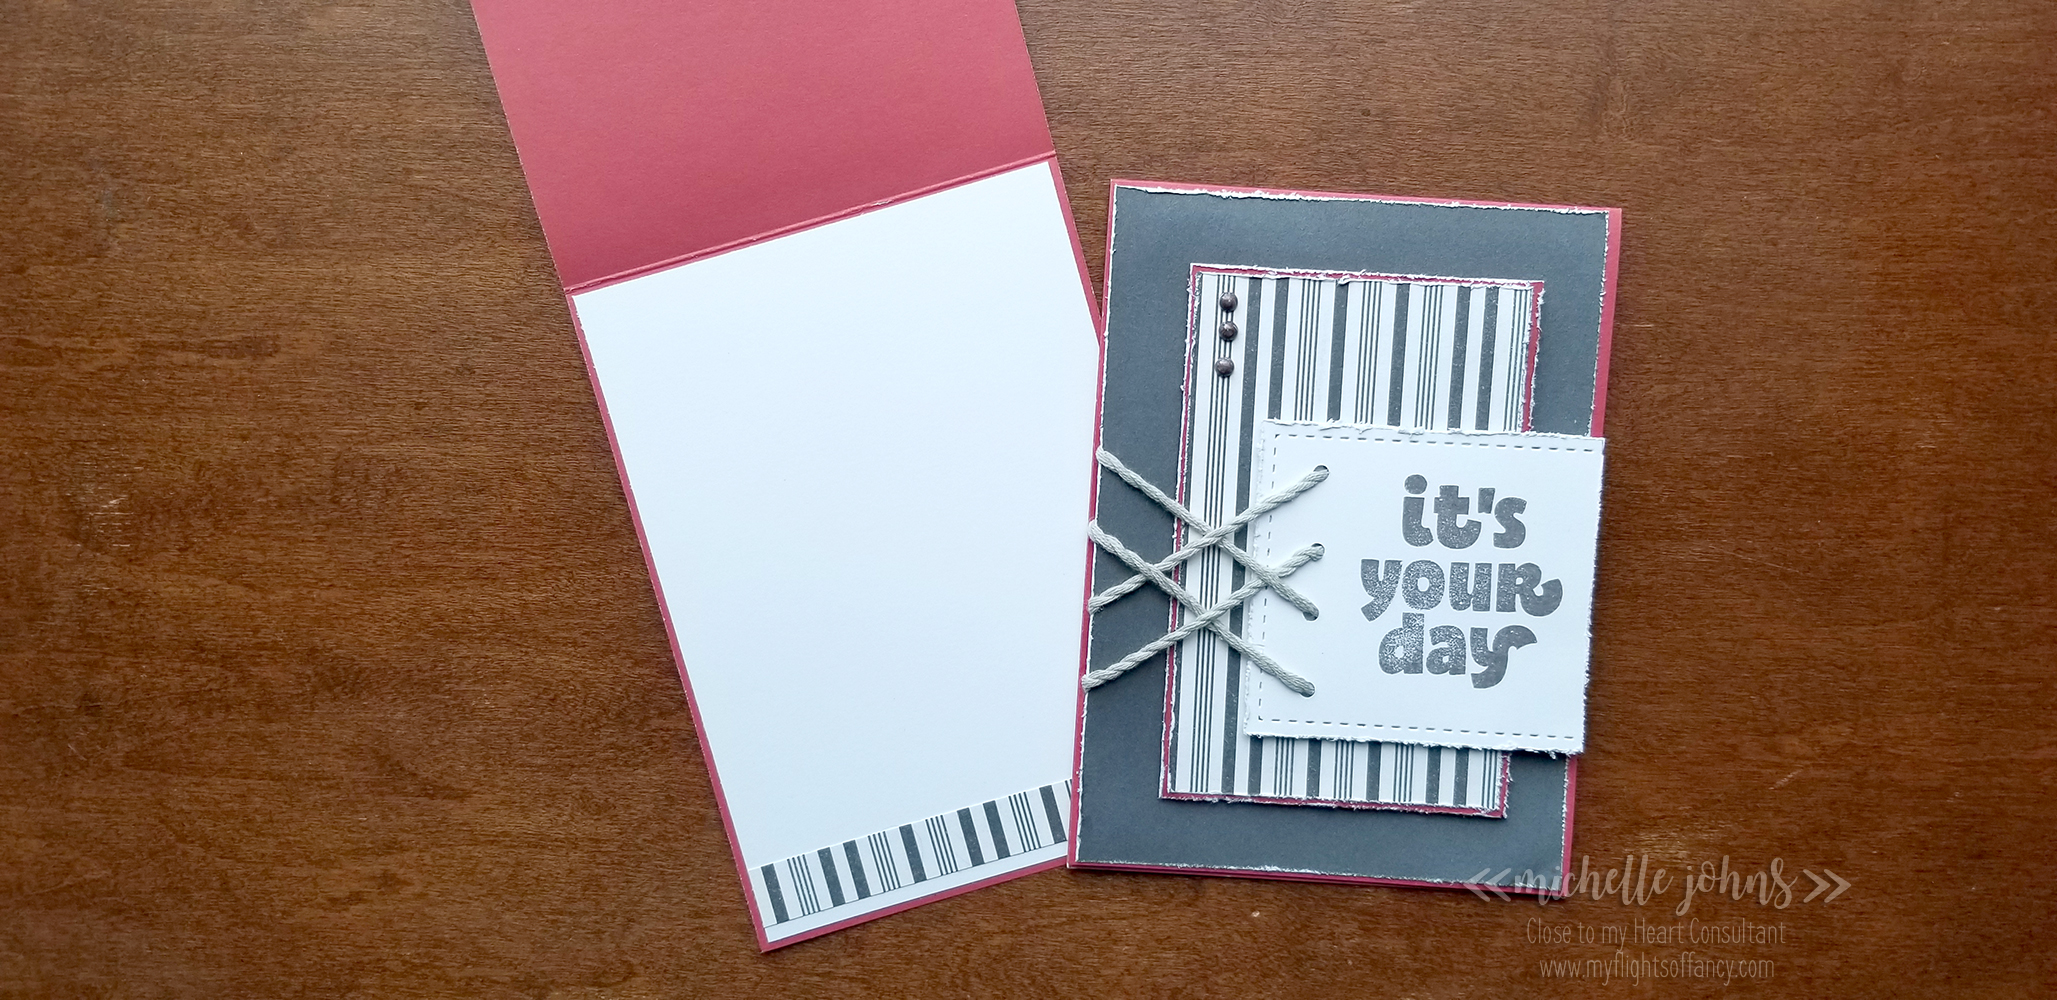
I used the shaker thin cuts for both the circle and the frame, the shaker window foam and acetate for the shaker part, and I filled it with bits and pieces from the gold sequin mix, and a few of the smaller pearls. I used the happy birthday sentiment from the Hippo-Partymus stamp set stamped in Archival Black ink.

I hope you like my little card! It went together very quickly! Plus, I have found a few fun challenge blogs to play along with! I would love it if you left a little note to let me know what you think!

Thanks for stopping by!

All products used are CTMH unless otherwise noted:
Craft On Paper Packet
Window Shaker Thin Cuts
Window foam and acetate
Gold Sequin Mix
Pearls
Micro Glue Dots
White Daisy Cardstock
Archival Black Ink
Thin Foam Tape
Liquid Glass
Fiskars Aluminum Rail Paper Trimmer

Making Waves with H2H!

This week’s challenge over at Heart 2 Heart is all about making waves! There are so many things that we could go with on this one, but I went more crafty, than photographic!

I decided to create my own B&T paper with the wave stamp from the Escape to Paradise set. I used sapphire ink on sapphire paper, and a little bit of masking to make the fun paper!

I used the Make it from your Heart, Volume 1 book, pattern 22 for this card. The stars paper is from the Into the Wild paper pack. I stamped the ship and tree with Intense black ink, and the sentiment and envelope with the archival ink. I colored the ship with the Carmine Touch Twin marker, and the tree on the inside used the Vivid Green and Clay markers. I did use the matching thin cuts to cut both the ship and the tree out. Both the front and the inside are layered with some sapphire cardstock.

I really had fun coming up with this card! I hope you enjoy it as well! Let me know what you think!

Supplies used are all CTMH unless otherwise noted:

Escape to Paradise Bundle Z4085
Into the Wild Paper Pack
White Daisy Cardstock
Sapphire Cardstock
Intense Black Ink
Archival Black Ink
Sapphire Ink *photo shows old style pad
Carmine Touch Twin Marker
Vivid Green Touch Twin Marker
Clay Touch Twin Marker
White Cards & Envelopes Value Pack
2 x 3 1/2 Clear Acrylix Block
1 x 3 1/2 Clear Acrylix Block
Fiskars Paper Trimmer

Candy Apple Color Challenge at H2H

This week’s challenge at Heart 2 Heart is all about Candy Apple Red! I don’t know about you, but I LOVE how red this color is! Valentine hearts, 1950’s Chevy Truck, and Candied Apples all come in this fantastic red color! This week’s challenge is to show you different ways to use it! You have a whole month to play along with us, so I do hope that you join us!

Today I drew inspiration from the Make it from your Heart volume 1. These books give you sketches with the cutting sizes, they also give you a finished piece of artwork to help you with ideas. Today I went from the idea, more than the actual sketch! We are using pattern 20 from the book today, so go and look it up! If you don’t have these books, I promise you, they will help you so much in your crafting!

Today my colors are Candy Apple (of course), White Daisy, and Black. I used a piece of Black cardstock cut at 4 1/4 x 11, scored at 5 1/2 for my card base. I then used two pieces of white daisy cardstock, both cut to 4 x 5 1/4. One for the outside and one for the inside, as it is easier to write on white cardstock than it is to write on black (well, it is if you want it to be able to seen!)

I random stamped the large heart from Stacy Julien’s Story by Stacy, Colorful Texture stamp set in candy apple ink on one piece of the white daisy, and just one single heart in the bottom right corner of the second piece. While I had the stamp out, I random stamped the back flap of the envelope and put one single heart on the bottom left of the front of the envelope.

Now I did some die cutting! I used the largest heart from the Basic Shapes – Hearts thin cuts on some candy apple cardstock, the 2nd largest stitched circle from the Stitched Circles thin cuts on some white daisy cardstock, and the torn notebook edge from the decorative borders thin cuts in black cardstock.

I grabbed the words from the Colorful Texture set to create the sentiment on the card, also stamped in Candy Apple Red ink. I created the colon using the round end of my embossing tool. I used the i from ‘this’ in the stamp set, upside down, for the exclamation point after the word ‘you’. I used the journaling pen to create a stitched line on the outsides of the Candy Apple Heart.

Next, I cut off about 9 inches of the Candy Apple Striped ribbon, and used some glue dots to create the wave in the piece. I then used a few more glue dots to secure the black piece cut from the torn edge thin cut to the back of the ribbon.

Now it is time to put the whole thing together! I adhered both white daisy layers to the front and inside of the card using liquid glass. Then I glued the ribbon/paper cluster to the card just below 1/3 of the way from the bottom of the card. I used foam tape to pop up the heart from the card, and again to pop up the white circle from the heart. To finish off the card, I added some black enamel dots!

I really like how the card turned out! If you compare it to the artwork in the book, you can see that it very closely resembles it! (the stamps and such used in the book are now retired, so I used currently available items.

I hope that you like the card that I came up with! I would love to know what you think! Please leave a comment below and let me know!

Thanks so much for stopping by!

~ Michelle

I So Totally Love You!

Today marks another challenge over at the Heart 2 Heart challenge blog, and I know you want to play along! This week’s theme is Happy Times. This would be a GREAT scrapbook page, as it could be so very many different things!

Today I decided to go with a card with a sentiment that speaks volumes for many a happy time!

This card uses many different dies, and I LOVE how it turned out! So, let me walk you through my process, shall I?

I started with the Make it From Your Heart, Volume 4, and found pattern 3 (so, yeah, didn’t get too far into the book! LOL) that I loved how the stitching looked on the card. I’m all thumbs with a sewing machine, so I thought, “Hey! I have the stitching dies in the Decorative Borders Thin Cuts set!” So, I grabbed that out, started with a white daisy piece of cardstock that was 4″ x 5 1/2″, and marked at every inch, lightly with pencil. Then I ran the cardstock and die through the die cut machine 15 times! (this is definitely not a card you want to make a LOT of!)

Then I cut a piece of charcoal cardstock to be slightly larger than what the pattern called for, because I decided I wanted to use the scallop from the same set. (I ended up cutting that piece in half, to get the scallops where I wanted them) I glued that to the back side of a piece of B&T from the Feels Like Home paper pack. Then I attached the stripe pieces from the Something Fierce paper pack to the back side of the scallops. Then I attached that little cluster to the piece that I had done the stitching to.

Next up, I cut the largest circle from the Basic Circles Thin Cuts from charcoal cardstock, and the largest circle from the Stitched Circles set from white daisy cardstock. I stamped the stitched circle with one of the sentiments from the April Stamp of the Month, Love So Sweet in Archival Black ink.

I wrapped a piece of the White & Gold Ribbon around the flower B&T, and attached on the back with a piece of foam tape, on both sides. Then I added Foam tape behind the rest of the white cardstock piece. I glued the white daisy and charcoal circles together and popped them up on some foam tape as well. Then I tied a bow in the white and gold ribbon, and attached it to the card at the meeting of the circle and ribbon with some micro glue dots.

To finish off the card, I added some Gold Glitter gems, after I placed the whole stitched piece onto a card base from the value card and envelope package.

I decided that I wanted to up the envelope a bit, so it would match the card a bit more, and to make it a bit more fun to receive. So, I glued a piece of the striped paper from the Something Fierce paper pack, the same piece that was used on the card, and trimmed with my microtip scissors.

I hope that you really like my card, and would LOVE it if you decided that you needed to make one just like it! It would be great if you would leave a comment and let me know what you think of this fun little card!

These paper packs and the stamp of the month will both only be available until the end of April, so you will want to make sure to hop on over and get them before they are gone!

Man Card Monday ~ We’re Related?

Today’s card is super fun and a little spunky! Plus it’s super easy to do!

There are just a few pieces for this card, so it goes together SUPER fast! And when you use the cutting guide below, it makes it even faster!

Make sure to watch the video to see how fast it comes together!

The paper sizes are as follows:
Yellow Stripes: 4 x 5 1/4 & 1/2 x 5 1/4
Pewter: ~ 4 x 3
Canary: ~ 4 x 3

The items used for this card are:

Card Base & Envelope
Mix In Paper Pack
Pewter Cardstock
Canary Cardstock
Archival Black Ink
Liquid Glass
Shaker Window Foam & Acetate
Cricut Cartridge: You Are Here
Black & White Dots

You can find the cut file here. You will need the You Are Here Cricut cartridge to be able to cut it, so if you don’t have that, let me know, and I can hook you up!

Man Card Monday – Celebrate!

Welcome to another Man Card Monday! Today our card has NO STAMPING! What?! Yup, a card with no stamping! Check this out!

This card was fairly simple to use, but does have a fun technique!

We have a bit of shine on our card, and I think that it turned out beautifully!

Add a bit of embellishing thread, and it’s great to go!

Check out the video here:

As stated in the video, here is the Cricut Design Space File for you. You will need to have the Artistry cartridge to be able to cut this file as shown!

I hope that you enjoyed this card, and all of the cards in the series! I’ve listed below all of the supplies that I used to complete this card.

CTMH Supplies Used:

Mix In Paper Pack
Value Pack White Daisy Card Base & Envelope
Liquid Glass
Artistry Cartridge Bundle
White Daisy Cardstock
Silver Embossing Powder
Versamark Ink
Silver Embellishing Thread
Microtip Scissors
Micro Glue Dots
Large Glue Dots
Foam Tape
Piercing Tool
Heat Embossing Tool

Man Card Monday ~ Happy Wishes

Welcome to another Man Card Monday! Today’s card is a simple one, but can be used for so many different things! It would be super easy to swap out the papers for another card!

Here are the measurements for today’s card:

Black (2): 4 1/8 x 5 3/8
Heather: 4 x 5 1/4
White Daisy: 4 x 5 1/4
Striped paper: 3 1/8 x 3 7/8
Plaid paper: 2 x 3 7/8
Heather strip: 1/2 x 4
Black strip: 1/8 x 4 1/8
Scraps: White Daisy & Heather

This is a beautiful yet simple card that works for so many things!

Make sure to watch the video to see it come together!

Supplies used:

Seasons Mix In
Heather Cardstock
Black Cardstock
White Daisy Cardstock
Card Base
Flower Market Cricut Bundle
Stitched Ovals Thin Cuts
Fiskars Paper Trimmer
Micro Tip Non Stick scissors
Liquid Glass
Tombow Glue
Black Archival Ink

Man Card Monday ~ It’s Your Day!

Welcome back to another Man Card Monday! I don’t know about you, but I am loving this fun series! I do hope you are enjoying them too!

Today I have this fun card for you. I have used Ruby and Charcoal cardstock paired with a striped paper from the Feels Like Home paper pack.

Here are the dimensions for today’s card:
Ruby: 4 x 11 & 2 3/4 x 4 1/4
Charcoal: 5 3/8 x 3 7/8
Stripes: 2 5/8 x 4 1/8 & 1/2 x 4
White Daisy: 5 3/8 x 3 7/8 & 3 1/4 x 4 1/2

I got the idea from this card that I found on Pinterest. She doesn’t give her dimensions, and I hadn’t looked for them before I made the card, so I came up with some of my own.

Make sure to watch the video to find out all of the how to’s on making this card!

Thanks so much for stopping by! I look forward to seeing you again next week!

~ Michelle

If you like what you see in this post, why not;

  • Subscribe to my Youtube channel
  • Subscribe to my blog.
  • Ask me how to earn a free pre-cut kit each month, with a qualifying purchase
  • Join my CTMH Team!
  • Here is the supply list for the cards, today. They are linked directly to my shop, so if you feel the need to have some come live with you, by all means, click away!

    Feels Like Home Paper Pack
    White Daisy Cardstock
    Ruby Cardstock
    Charcoal Cardstock
    Whisper Thick Twine
    ShinHan Touch Twin Marker, Warm Grey 7
    Years of Sweetness Stamp Set
    Liquid Glass
    Tombow Tape Runner
    Black and White Dots
    Micro Tip Scissors
    Piercing Tool
    3-D Foam Tape
    Fiskars Paper Trimmer
    Needle Threader

    Thanks again for stopping by! Have a great day!

    Free Birthday Hugs!

    Hey everyone! It’s another week, which means it’s another challenge over at Heart 2 Heart Challenges! This week is “By The Numbers”.

    Today I went very VERY subtle with the challenge. I saw this card on Pinterest, and thought that it would be super fun to make, of course, adding my own twist to it!

    So, I used the I Heart Us papers, because they are so fun! The striped ‘rainbow’ paper is one of my favorite in the pack! (Plus, with using it, this card will qualify to play along with The Paper Players Color Challenge PP432)

    Here you can see that I stamped the numbers as the background behind the sequins in the shaker window. I used the numbers from the March Stamp of the Month, This Happened. I lined them up on one block and stamped them with linen ink, so that it would be a super subtle background. Then I used the Simply Said alphabet to stamp the word BIRTHDAY in archival black ink, mostly centered, but not quite. (on accident, I wanted it centered, but I think it still looks ok! LOL) Then I used the “free hugs” sentiment from the Sticky Notes stamp set, to stamp above and below the BIRTHDAY in lagoon ink.

    I used the shaker window foam & acetate to create the shaker bits on this card. I know, it’s square, and you are wondering how the heck I did that, right? Well, I used the squares from the center of the foam circles to create the outline on the shaker bits, and then added the loose sequins. I attached a few of them with the micro glue dots, so that when it sits up, they don’t all fall to the bottom. I put the acetate on top, making sure that all of the corners were covered, and then just trimmed off the extra acetate, to make it be a square!

    The white ribbon adds just the right amount of texture to the card to finish it off!

    I hope that you enjoyed my card! I hope you go over and play along with the Heart 2 Heart challenge! There are some great examples over there, so it should give you a few ideas of things that you can do to add some numbers to your projects!

    Thanks for stopping by! I would love it if you leave a comment for me about my project!

    Until next time,

    Michelle

    If you like what you see in this post, why not;

  • Subscribe to my Youtube channel
  • Subscribe to my blog.
  • Ask me how to earn a free pre-cut kit each month, with a qualifying purchase
  • Join my CTMH Team!
  • Man Card Monday ~ Thanks for Sticking by me!

    Today marks the fist in a new series for me! This Man Card Monday is for those of us that love making cards, but have a hard time with the cards for the guys. Guys are hard! We want to put bling and pretty bits on the cards that we take the time to make, but the guys . . . well, they don’t generally wants the glitz and bling!

    So, each Monday, watch for a video from me that will walk you through making the cards, maybe with a little too much talking, sometimes . . . but that’s me! Some cards will be easier than others. Today’s card is a bit of a futzy one, but I LOVE how it turned out!

    Today’s card uses papers from both I Heart Us and So Much Happy. Using the Make it From Your Heart, Volume 4 book made it REALLY easy to do!

    The white dots from the Black and White Dots helps give it some ‘bling’, but still makes it ok for the guys!

    Adding the water coloring on the cacti is what took the most amount of time, well, maybe fussing cutting them took a bit more time? Anyway, those cacti took the most amount of time of the whole card, but I think they are totally worth it!


    (Don’t see this video? Click here to watch it on YouTube!)

    I hope you like the cards, and that you join me each week for Man Card Monday! I look forward to seeing you next week!

    ~Michelle

    If you like what you see in this post, why not;

  • Subscribe to my Youtube channel
  • Subscribe to my blog.
  • Ask me how to earn a free pre-cut kit each month, with a qualifying purchase
  • Join my CTMH Team!
  • Here is the supply list for the cards, today. They are linked directly to my shop, so if you feel the need to have some come live with you, by all means, click away!

    So Much Happy Paper
    I Heart Us Paper
    White Daisy Cardstock
    Pewter Cardstock
    Value Pack Card Base & Envelope
    C1751 Sticky Notes Stamp Set
    Archival Black Ink
    Black and White Dots
    Make it From Your Heart, Volume 4
    Water color Pencils
    Small Round Water Brush
    Micro Tip Scissors
    Piercing Tool
    3-D Foam Tape
    3-D Thin Foam Dots
    Fiskars Paper Trimmer

    Thanks again for stopping by! Have a great day!