Category Archives: CTMH Cards

Cards made with CTMH Products

CTMH Technique Blog Hop – Purposeful Patterns

Welcome to this months Technique Blog Hop! This month we are working with the Make if From Your Heart volumes 3 and 4. You should get plenty of great ideas from this blog hop, and I am certain that you will want one or both of these books by the time you are done! You should have arrived from Danielle’s blog. If you didn’t, and you started here, that’s ok, it’s a big round circle, and you will get back to her blog!

Today I am working with Volume 4, which is all about cards! I had a hard time choosing which pattern to use, but decided to go with pattern #4.

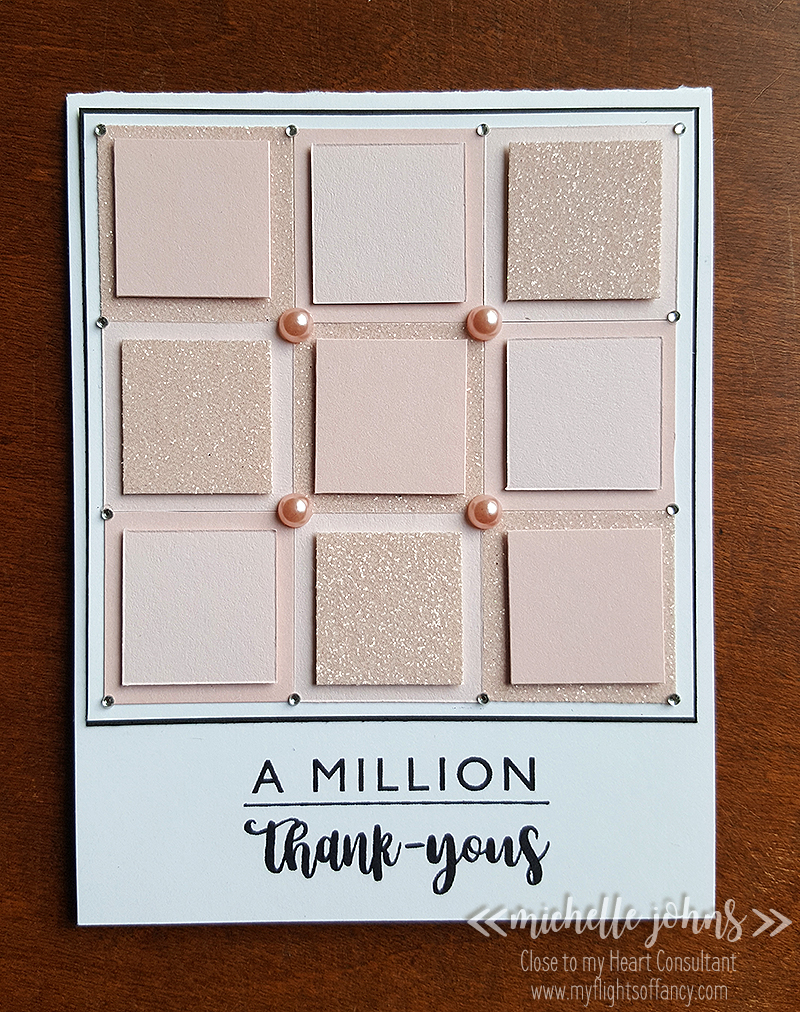
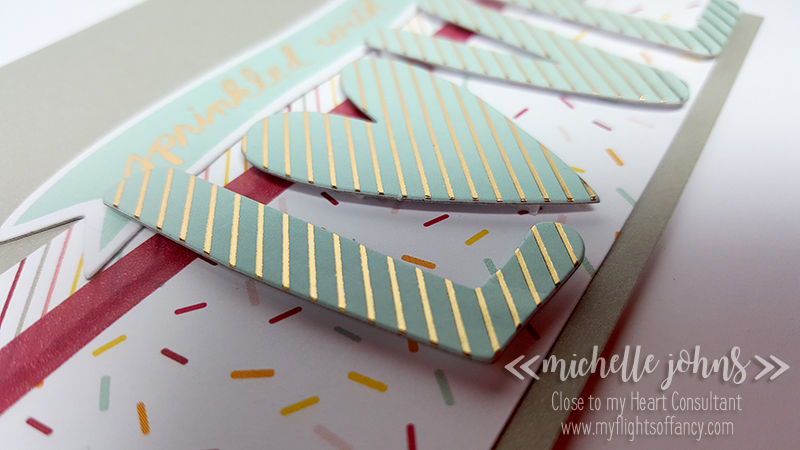
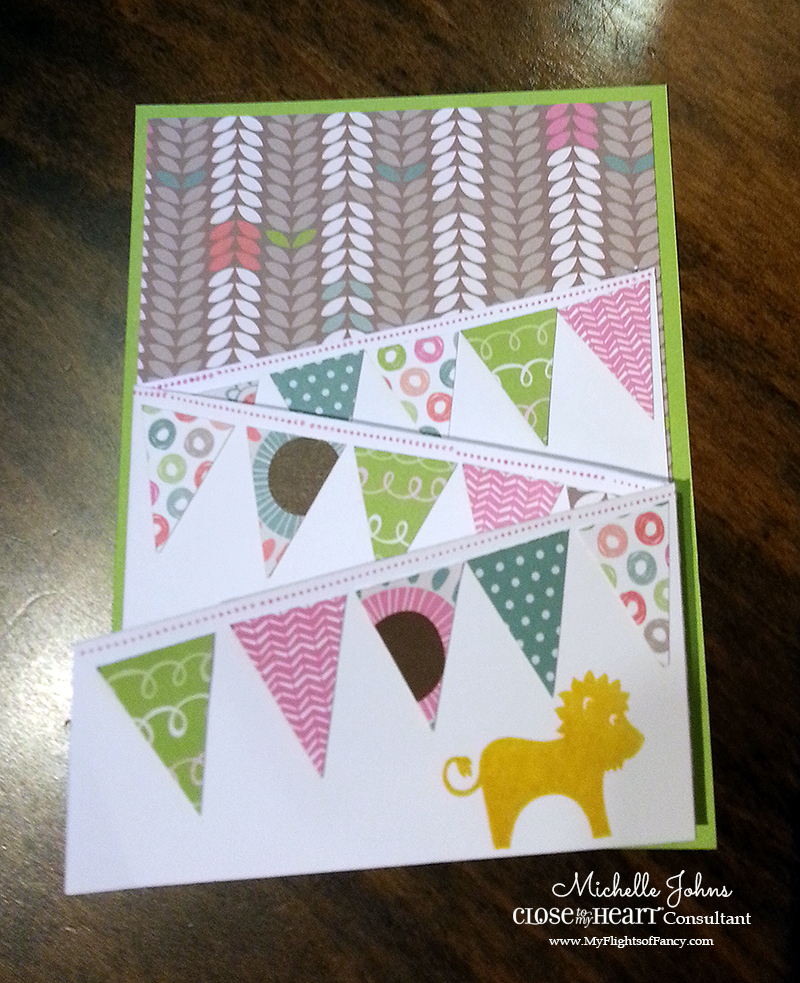
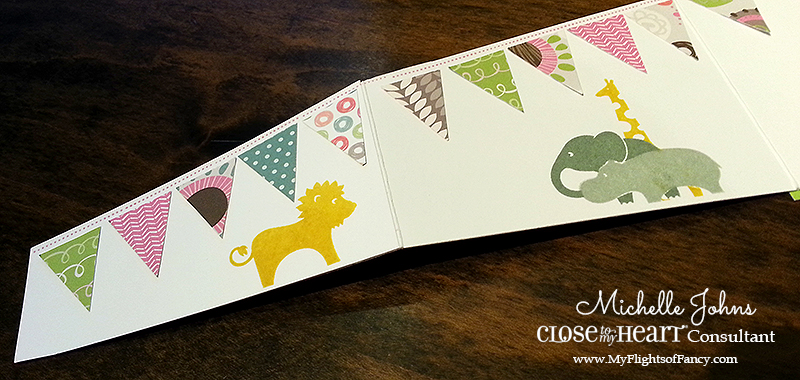
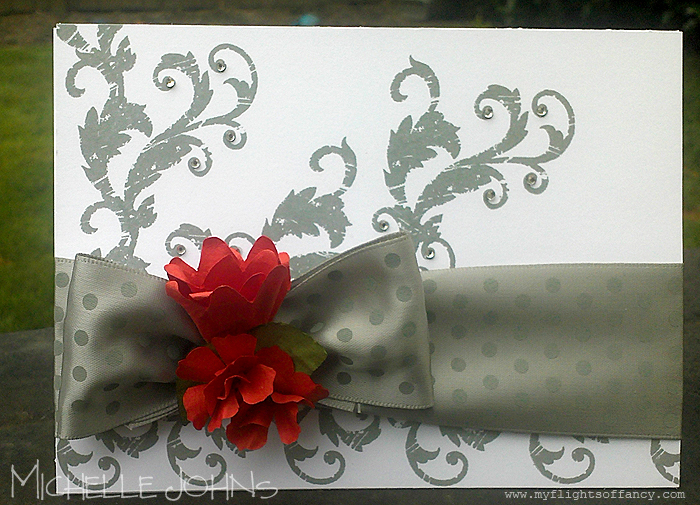
This is the first card that I made. Now, I did make some adjustments for this card. I left off the piece on the left, and I added another banner piece, plus the sentiment piece as well.

I loved the flowers and the butterflies on this PML card from the Chelsea Gardens paper pack. So, I trimmed it to 4 x 5.5, trimmed the card base down to the same size, and started layering things! This whole card (minus the base) is used from scraps from my projects that I have made already! That lacey banner piece, that was part of a 3×4 PML card. The mat under the sentiment? It’s the same PML card! I used charcoal ink to stamp the sentiment with and the Many Congratulations stamp set. I used just a bit of the White Shimmer Trim to give a bit more sparkle. Topped it off with some bitty sparkles, and you have a beautiful card!

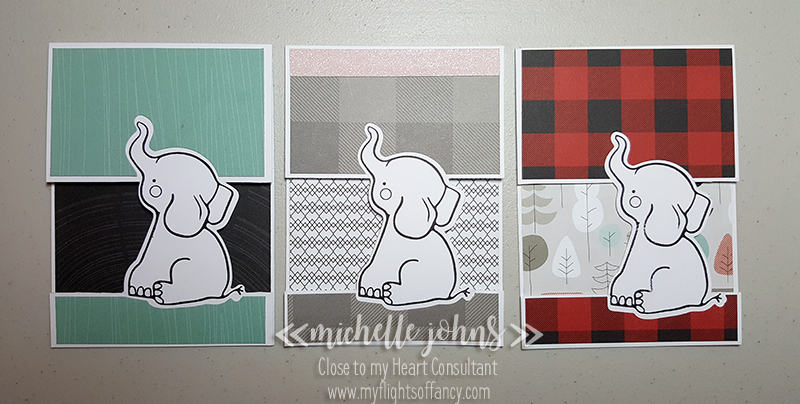
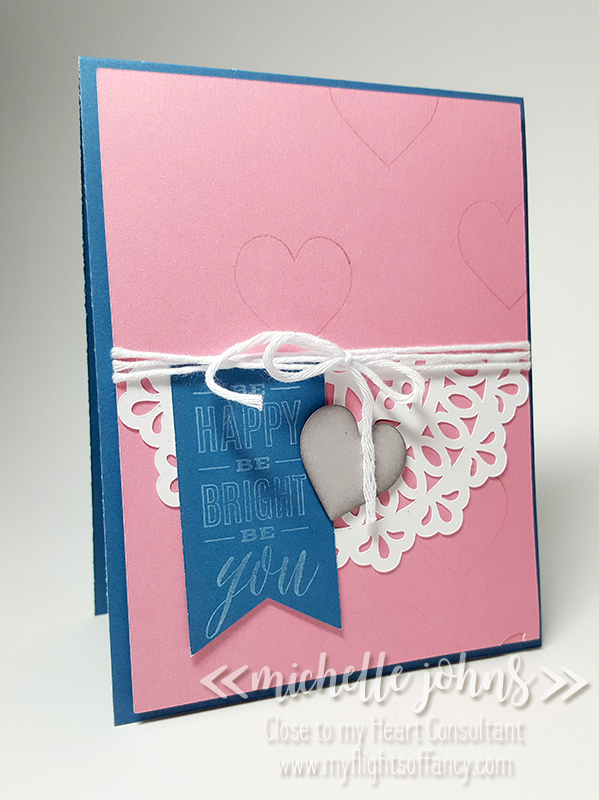
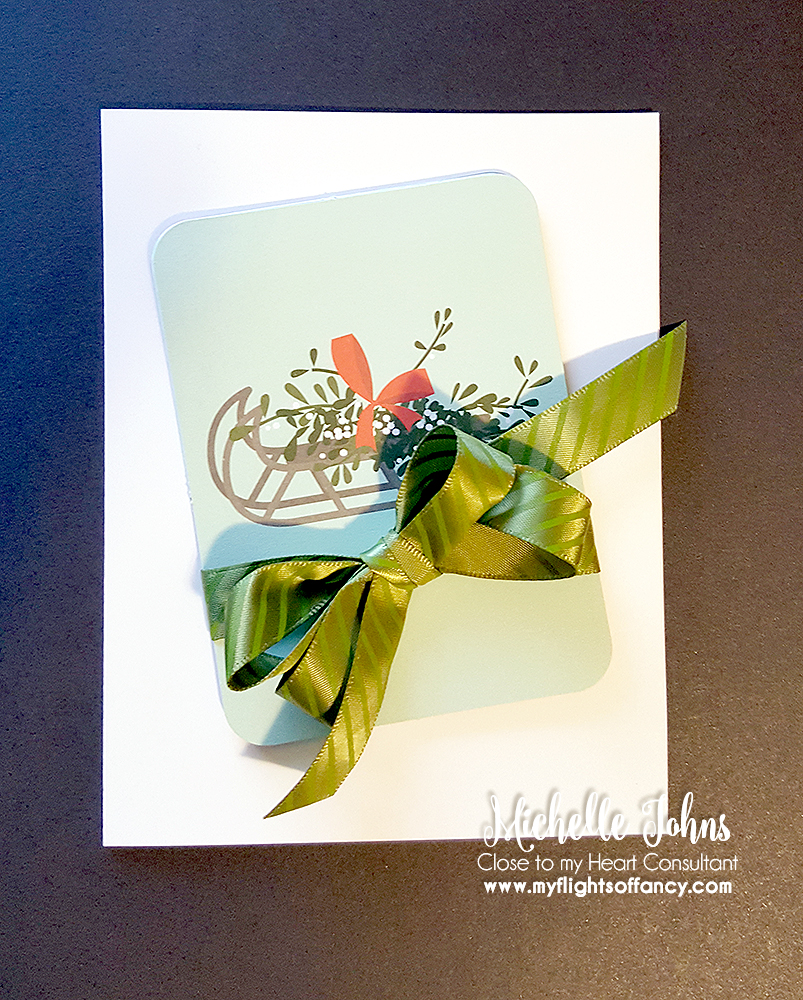
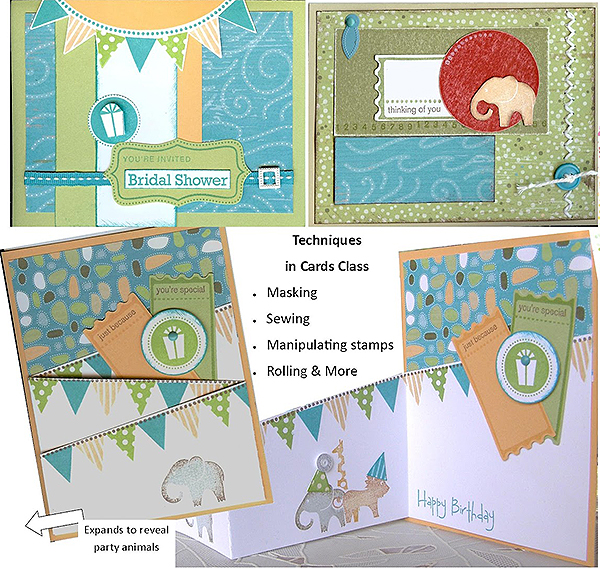
The next card, believe it or not, is from the same Chelsea Gardens paper pack! I wanted to show that there is great versatility in this paper pack! I even used the same card pattern! The only difference is the size of the sentiment banner!

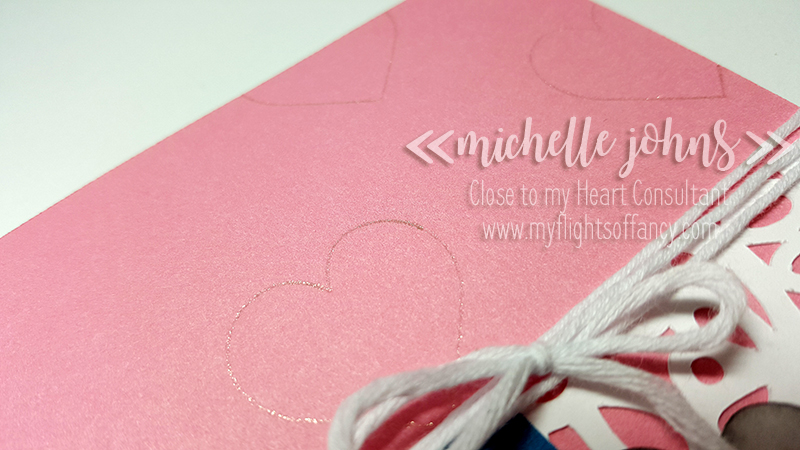
This is a MUCH more boy-ish card! It is very monochromatic! I am loving this card too! The dark banner piece is one of the zip strips from this paper line. That see through piece? That is our vellum that I colored with the Warm Grey 7 marker! I used that same marker to color the mat piece for the banner! The sentiment is from March’s Stamp of the Month. Like the first card, I stamped with Charcoal ink. I couldn’t leave it plain, so added a few of the white dots to finish it off, and it looks great!

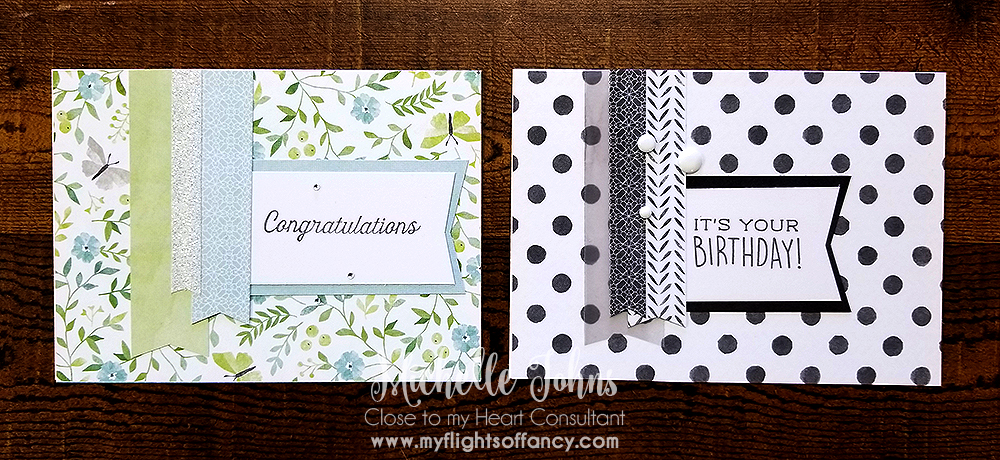
I love that these cards look the same, but so different at the same time! It just goes to show that these card patterns can be used so very many different ways!

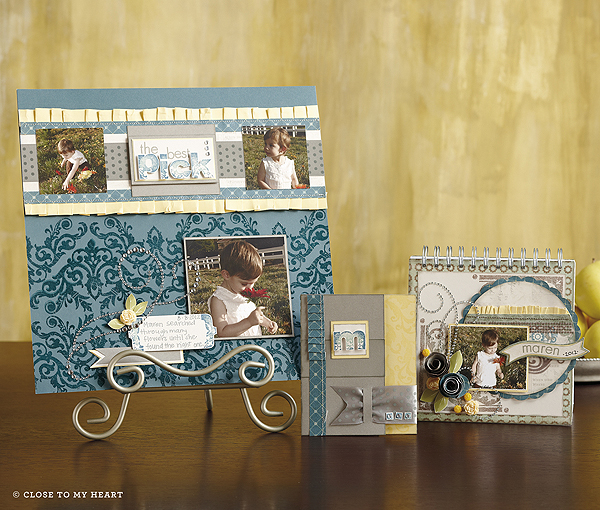
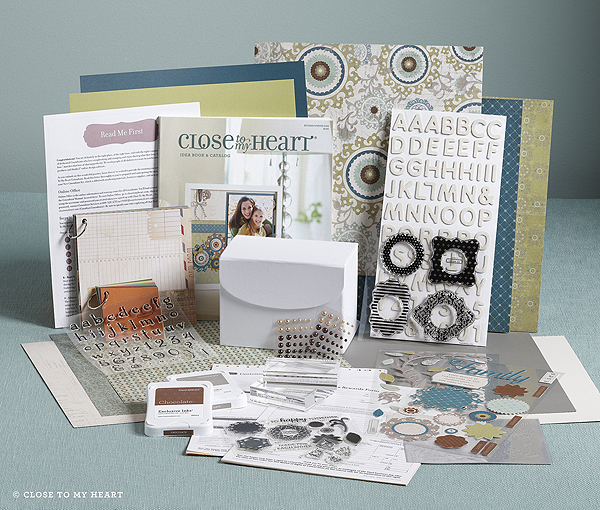
The books show you the sketch of the pattern, the dimensions (which I’ve covered in the photo), and two samples of the cards as well. These volumes come hole punched and ready for you to put in an album. You can use any of the mini albums available right now!

Thanks for stopping by! Let me know which card is your favorite! Now you are on to Tammy’s blog.

Fancy Elephants

My oldest loves elephants. She hasn’t seen this one just yet, but I know she would love it too!

I’ve seen similar cards in the past, so knew that I wanted to try it! When I saw this stamp set in the new Annual Inspiration book, I KNEW that I had to try it!

Look how cute it is when it’s standing! Believe it or not, the card base and the elephant are all just one piece!

This is one of the cards that I will be teaching at my fancy folds class that will be coming up soon! It uses the Sweet Baby stamp and thin cuts bundle.

All three of these cards are made with the Jack Paper Pack that will be retiring at the end of this month! So, if you want to re-create these cards, you will definitely need to get some ordered before then!! See that pink sparkly strip at the top? It is a small bit of the Bashful Glitter Paper, isn’t it adorable? I think I need to grab my small water brush and my bashful ink pad and color in his little cheeks!

I love how they are all the same, but that paper gives them each a totally new look!!

I hope you like them! Do you have this fun Elephant stamp yet? What about those Jack papers? Share what you have made with them!

Until next time!

~Michelle

CTMH Technique Blog Hop – Crazy About Cardstock

Welcome to the CTMH Technique Blog Hop! Today you should have arrived here from Michelle’s blog. If not, that’s ok, it’s a big circle, and you can make it back around to her!

This month we are focusing on cardstock! If you haven’t heard yet, CTMH changed up the cardstock a bit with the new Annual Inspirations! And, let me tell you, this is a FANTASTIC change!! One side will have the ‘true’ CTMH color, the other side will be 10% lighter! This means we have now effectively doubled our cardstock colors! How awesome is that??

So, We are showing you many different things that you can do with your cardstock, whether it be to show the two colors, or other fun projects!

My little project for you, is this fun card made with the new Color of the Year, Bashful! I was inspired by this card that I found on Pinterest. I used the Bashful Cardstock and the Bashful Glitter Paper.

This was a super fun and EASY card to do! (and perfect for scraps!!)

Look at all that bashful bliss!! Here you can see a little closer the difference between the cardstock. This cardstock is all from one sheet! (not counting the glitter, of course!)

I decided to mimic some of the elements on the front, to the inside of the card. So there is the black cardstock, white daisy cardstock, and the leftover strips from the bashful cardstock, just to give some interest to the inside of the card!

Want to make this card for yourself? Check out below for the sizes and all of the products that I used!

Thanks for stopping by, I hope you liked my little card! Next up is Sarah, so hop on over to her blog and see what fun things she has come up with!

Card Details:
Card base, White Daisy: 4 1/4 x 11, scored at 5 1/2
Black cardstock pieces: 4 1/16 x 4 1/16 & 4 1/16 x 5 5/16
White Daisy pieces: 4 x 4 & 4 x 5 1/4
Bashful cardstock: 1 1/4 x 1 1/4 (qty 6) & 1 x 1 (qty 6) & 1 1/4 x 4 & 1 x 4
Bashful Glitter Paper: 1 1/4 x 1 1/4 (qty 3) & 1 x 1 (qty 3)
Thin Foam Dots
Liquid Glass
Archival Black Ink
Thanks a Million Stamp Set
Bitty Sparkles
Bashful Pearls
“Pokey Tool”

Cut all your pieces to the sizes listed above.

Using your black archival ink, in the white core edges on the black cardstock.
Using some washi, tape the 1 1/4 x 1 1/4 squares together on the back side, making sure they line up properly.
Using liquid glass, glue the squares that are washi’d together onto the white daisy square base. (this gives you some wiggle room that tape runners don’t give!)
Again using the liquid glass, glue the white daisy square to the black square. (again, that wiggle room is important with the tiny edge that we have here)
Laying the square on the front of the card, figure out where your sentiment is going to be. Stamp this with the archival black ink on the card front.
Layer the bashful strips on the white cardstock for the inside of the card. Mine is approximately 1/4″ up from the bottom of the white daisy cardstock.
Then layer the white daisy card onto the black cardstock. Using liquid glass will help you get this aligned properly.
Once all layers are layered for the inside of the card, attach to the inside of the card.
Once the inside is complete, add the square to the front of the card.

Once it was all glued together, I added the bashful pearls and the bitty sparkles with the “pokey tool”. The more I look at it, I think I would go with one or the other, maybe not both. (so I might switch that up before I give it to anyone!)

Viola! Your card is now complete! Try this with other colors of cardstock, and share your creations! I would love to see them! Share on Facebook or Instagram! I would LOVE to see them!

Until next time!
~Michelle

Sprinkled with Love

Who doesn’t like sprinkles, right?? Today I am back with another card! I’ve used more of the Sugar Rush papers for this card, and the coordinating Complements pack. There is NO stamping on this card, and it was quick and easy!!

I was inspired by Global Design Project’s Sketch.

This fun chipboard has gold foil stripes on it! It makes it sparkle very nicely!

Here I created the shadow so that you could see that the gold foil really does stand out! The sentiment is foil as well. The Whisper cardstock and the Pomegranate washi add just enough of a pop of color to really stand out!

I hope you have enjoyed this little card today!


You only have a short time left to get the Welcome Home Wreath and the January Stamp of the Month! You definitely don’t want to miss out!

Something else you won’t want to miss out on is the Spring Retreat at the Beach! I have spots still available! You can find the specifics here.

Be Happy

Happy Monday! This week is a bit off for me, being that it is a short week. I am sure that others feel the same!! The bonus is, I got to craft more! Always a good thing, right?

Today I am sharing a card that is missing patterned cardstock. I wanted to remind everyone, that you don’t have to have patterned papers to make beautiful things! I used the Artistry Cartridge and bundled stamps for this card. I was greatly inspired by this card I found on Pinterest.

Today I used Pacifica, Pixie, and White Daisy cardstocks.

When I am ready to send it, I will create an inside liner, write my message, and then glue it in. (that way, if I mess up, I can just make a new liner, and not have to make a new card!)

The cricut explore cut this doily image just beautifully! And would you believe, the doily and the heart are both white daisy cardstock?

I knew when I was cutting the images, that I was going to color the heart with one of my Touch twin Shinhan markers. Now, the key to getting not blotchy color, is to completely saturate the cardstock. So, I cut a few, colored a few, a few different colors, and then decided at the end of the card making which I wanted. Well, this one was just a happy little accident! The side you see is actually the BACK side of the heart that I colored. When I went to put the thin foam tape on the back, I decided that I liked it MUCH better than the front! It is just so much softer looking, and I thought it complimented the card well.

Now, if you come to my crops, you know that you can use anything there, and I encourage it! Very few people have limited themselves to just one company’s products. Generally, when I show things on my blog, I try to use only CTMH products, however, this time, I just HAD to use this pen. It is a pen that I was introduced to at my friend Erin’s house. It is a glittery gelly roll pen, and it is fantastic! Today I used it in my cricut explore to draw these little hearts, to give the background just a little something. I think it worked quite nicely, don’t you?

So, that’s my card for today! I will have another next Monday! Join me tomorrow when I show you a little something to give away chocolate. (WHAT?!?!?! Give AWAY chocolate? . . . well, yeah, it helps our friends feel good too!) You will want to come back and see!

Before you go, though, have you seen this fantastic wreath?

It’s available in January, thanks to National Papercrafting month! Every January, we celebrate National Papercrafting Month as a way of acknowledging the pure joy of playing with paper! We scrapbook with it, we make cards with it, we decorate with it—in short, we craft with it! This January, we’ll be celebrating the joys of papercrafted home décor with the beautiful Welcome Home wreath kit. This kit comes with precut pieces you can simply pop out and attach to the sturdy chipboard wreath base, making a welcoming décor piece for your home. The wreath kit can be yours for just $18.95, or you can get it FREE with a qualifying $60 USD purchase. In addition, hostesses with qualifying Gathering totals and new Consultants who sign up in January can also receive a free Welcome Home wreath kit. Celebrate your love of papercrafting with the exclusive, easy-to-assemble Welcome Home wreath kit.

This kit comes with almost everything you need to put it together, including the gold stickers to spell welcome or your name, all you need to add is glue! All of the pieces are pre-cut (just like my workshops!) I know you will enjoy putting it together! Just remember, this fun wreath is ONLY available in January!

Until tomorrow, stay crafty, my friend!

~ Michelle

CTMH Technique Blog Hop – Ravishing Ribbon

Welcome to the CTMH Technique blog hop. This month we are featuring the fabulous CTMH ribbons! These ribbons are fun and beautiful! Today you should have gotten here from Haley’s blog, however, it is a circle, so if you started here, you will be able to get around to everyone’s blog.

Let’s take a look and see what I have for you!

ribbon-01

Now, my lighting isn’t the greatest for this card . . . I didn’t get a chance to take the picture until last evening, and there’s a lack of light in my house, well, at least enough for great photos!

I used one of the PML, Happy Happy Christmas cards for this card. Makes it a nice, easy, fast card to do!

ribbon-02

This shows the ribbon a bit better, color wise, and you can see how satin-y it is! This ribbon is from the Enchantment Ribbon Pack, which gives you 4 fun ribbons and a baker’s twine in the Enchantment family of colors.

I hope that you have enjoyed my card today! Let me know what you think! After that, hop on over to Janna’s blog to see her fantastic work!

Have a fantastically crafty day!

~ Michelle

Fall Cards Class

Hey everyone! Have you seen the new shop here on the site? I’ve added kits ready to be mailed, Retreat options, and my classes will be there too! Trying to make things be a one stop shop for you!

The next class coming up is the Fall Cards Class. This is a great class for those fall card needs. You will make a total of 6 cards, one of each design, and walk away with the envelope for them too. Your cards will be done completely, and will be ready for you to give to someone immediately!

fall-card-class

The times for the class are:

Fall Card Class | Oct. 25 @ 9am
Fall Card Class | Oct. 25 @ 6pm

Classes are limited to 10 people per class, so make sure that you get your spot! I hope to see you there!

~Michelle

Zoology 101

Today’s focus is on the Zoology stamp set from Close to my Heart. It’s a great little set! I had so much fun making this little card with it and the Lollydoodle papers!!

I was completely inspired by Kimberly’s card below. She used a stamp set that is now retired, for her banners, so I just recreated them with the Lollydoodle papers!

It’s a bit different than most of the cards that you will see, in that it opens like this:

And then there is a party inside!

I used masks to be able to stamp the group of animals without overlapping them.

Isn’t this a fun card?? It would be great for so very many things!! Because this set is a Cricut Compatible set, it means that it will always be available! I tell ya, it’s a steal at just $9.95!

Take a look at some cards that some other fabulous ladies have made with this set!


by Sheila Bennett


by Joelle H.


by Sheila Bennett


by Kimberly Thomas


by Aaron Booth

I hope you have enjoyed all of the cards made with the Zoology stamp set today!

I hope you are able to enjoy some crafty time today!

~Michelle

Everything used is CTMH:
Paper Pack: Lollydoodle
Cardstock: White Daisy, Pear
Stamps: Zoology
Inks: Honey, Whisper, Slate, Cotton Candy
Glue: Tombow
Tools: Paper Trimmer, Micro-Tip Scissors,Clear Blocks

August Stamp of the Month

Welcome to the August Stamp of the Month Blog Hop! There are nearly 60 consultants in this hop, showing off some wonderful creations! You should be coming from Judy’s blog, if so, you are on the right track! If not, that’s ok too, it’s a big round circle! If you would like, you can see the whole list of hoppers here.

This stamp set is fun! It’s already pre-distressed for you, and gives some fantastic texture to your images! Here you can see the artwork that the Art Department at Corporate came up with. Super fun stuff!

You can see on the lagoon cardstock, they used lagoon ink, so it would stand out some, but not as much as black would, and they made their own B&T paper with it. On the Card, they used a yellow (or possibly versamark) on the yellow to have just a bit of design, so it isn’t completely blank. Then, on the Display Album, they used the corners on just 2 of the corners of the white panel. Those corner stamps just add to the clusters that they have created.

I was looking through one of the many magazines that I have, and found a card that had a fun flourish with ribbon and flowers and I really liked it! So, I decided to recreate it with this stamp set!

Everything on this card is brand new product! (with the exception of the White Daisy Cardstock). You have the New Slate Ink, New Slate dotted ribbon, New paper flowers, and New Black & Grey sparkles!

I used just one stamp of this stamp set on this card, but managed to make it look so different! This will be a fun stamp to use!

Your next stop in the blog hop is at Maria’s Blog. Make sure to go and check out her blog, and everyone else’s too!

Have you thought about becoming a consultant in the past? Well, now would be the PERFECT time to do that! With this new book, Close to my Heart has created a new consultant kit, and LOWERED the price! You can now become a new consultant for just $49! Take a look at what you get for that $49!

I am loving that Avonlea paper! (my first workshops will be using that paper!) AND! That isn’t all! We got these fabulous bags at Convention, with our new Idea Book and some other yummy stuffs! Close to my Heart has decided that they are going to give them away FREE! Consultants that sign up in August will receive one of these bags with their New Consultant Kit! (while supplies last, of course!)

This bag is water proof, has a shoulder strap, two straps to be able to carry it like a back pack, a large inside pocket that holds LOTS of papers! (more than 90 layouts! . . . ask me how I know that one!), two side pockets, and a front pocket as well. This bag has a retail value of $45 all by itself! And, since you weren’t at convention, the only way you can get it is to sign up to be a new consultant! Let me know if you are interested! I would love to have you join my team!

Happy Crafting!
~Michelle

May Stamp of the Month Blog Hop

Welcome to the May Stamp of the Month blog hop! There are more than 60 ladies participating in this blog hop, so make sure to make your rounds! You should have arrived here from Heather’s blog. If you ever get lost along the way, you can find the complete list of bloggers here.

Today I have 2 cards to share with you! And, believe it or not, both of these cards were made entirely from scraps! (well, minus the ribbon, that was straight off the spool!)

First I have this fun black/white/red version for you. Such a simple card, but I think it makes quite the little statement, don’t you?

I just stamped the largest image off the corner to give it a bit of a graphic look, added the red scraps, and attached to the card. The size of the card is 4 1/4 square.

The second card I again used the off the edge stamping to make these fun borders. I then added the ribbon, and cut out the flower. Then I added the ink for the flower (yeah, I know, that’s backwards), and added a fun popped center!

What do you think?

Next you are off to Karen’s blog! Have fun hopping along!