Author Archives: Michelle

CTMH Technique Blog Hop – Crazy About Cardstock

Welcome to the CTMH Technique Blog Hop! Today you should have arrived here from Michelle’s blog. If not, that’s ok, it’s a big circle, and you can make it back around to her!

This month we are focusing on cardstock! If you haven’t heard yet, CTMH changed up the cardstock a bit with the new Annual Inspirations! And, let me tell you, this is a FANTASTIC change!! One side will have the ‘true’ CTMH color, the other side will be 10% lighter! This means we have now effectively doubled our cardstock colors! How awesome is that??

So, We are showing you many different things that you can do with your cardstock, whether it be to show the two colors, or other fun projects!

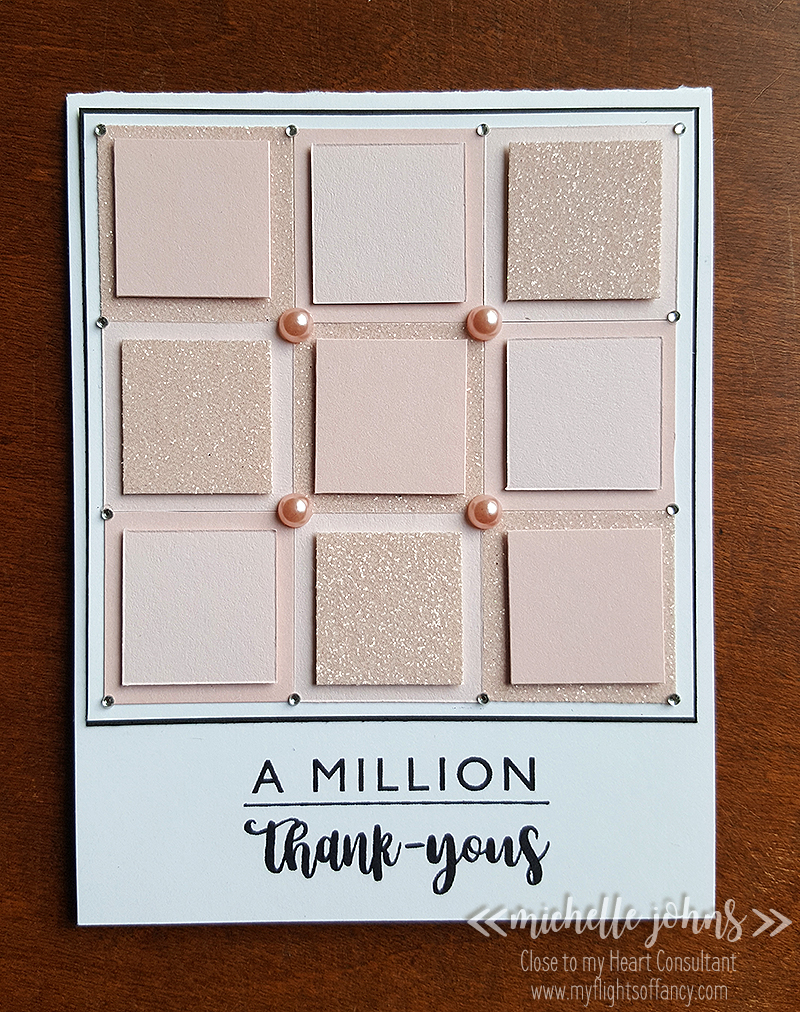
My little project for you, is this fun card made with the new Color of the Year, Bashful! I was inspired by this card that I found on Pinterest. I used the Bashful Cardstock and the Bashful Glitter Paper.

This was a super fun and EASY card to do! (and perfect for scraps!!)

Look at all that bashful bliss!! Here you can see a little closer the difference between the cardstock. This cardstock is all from one sheet! (not counting the glitter, of course!)

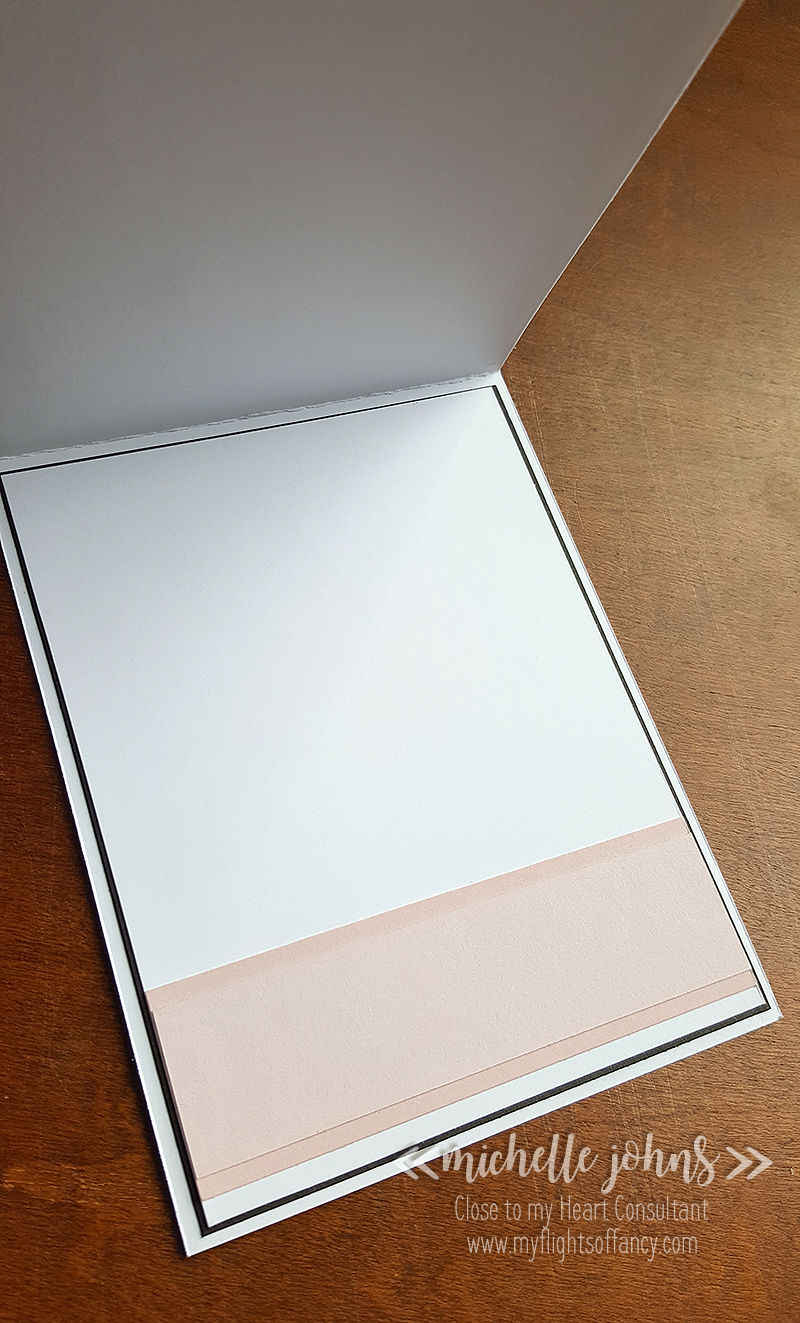
I decided to mimic some of the elements on the front, to the inside of the card. So there is the black cardstock, white daisy cardstock, and the leftover strips from the bashful cardstock, just to give some interest to the inside of the card!

Want to make this card for yourself? Check out below for the sizes and all of the products that I used!

Thanks for stopping by, I hope you liked my little card! Next up is Sarah, so hop on over to her blog and see what fun things she has come up with!

Card Details:
Card base, White Daisy: 4 1/4 x 11, scored at 5 1/2
Black cardstock pieces: 4 1/16 x 4 1/16 & 4 1/16 x 5 5/16
White Daisy pieces: 4 x 4 & 4 x 5 1/4
Bashful cardstock: 1 1/4 x 1 1/4 (qty 6) & 1 x 1 (qty 6) & 1 1/4 x 4 & 1 x 4
Bashful Glitter Paper: 1 1/4 x 1 1/4 (qty 3) & 1 x 1 (qty 3)
Thin Foam Dots
Liquid Glass
Archival Black Ink
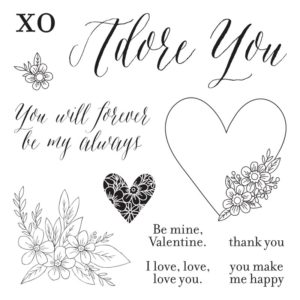
Thanks a Million Stamp Set
Bitty Sparkles
Bashful Pearls
“Pokey Tool”

Cut all your pieces to the sizes listed above.

Using your black archival ink, in the white core edges on the black cardstock.
Using some washi, tape the 1 1/4 x 1 1/4 squares together on the back side, making sure they line up properly.
Using liquid glass, glue the squares that are washi’d together onto the white daisy square base. (this gives you some wiggle room that tape runners don’t give!)
Again using the liquid glass, glue the white daisy square to the black square. (again, that wiggle room is important with the tiny edge that we have here)
Laying the square on the front of the card, figure out where your sentiment is going to be. Stamp this with the archival black ink on the card front.
Layer the bashful strips on the white cardstock for the inside of the card. Mine is approximately 1/4″ up from the bottom of the white daisy cardstock.
Then layer the white daisy card onto the black cardstock. Using liquid glass will help you get this aligned properly.
Once all layers are layered for the inside of the card, attach to the inside of the card.
Once the inside is complete, add the square to the front of the card.

Once it was all glued together, I added the bashful pearls and the bitty sparkles with the “pokey tool”. The more I look at it, I think I would go with one or the other, maybe not both. (so I might switch that up before I give it to anyone!)

Viola! Your card is now complete! Try this with other colors of cardstock, and share your creations! I would love to see them! Share on Facebook or Instagram! I would LOVE to see them!

Until next time!
~Michelle

JCB Blog Dreamin Big

Welcome to the Just Crazy Blessed monthly mini blog hop! This month we are focusing on the Dreamin Big paper pack! I am LOVING this kit!

This kit works for spring or summer pages, for boys or girls! If you don’t like the bugs, flip the paper over and you have flowers!

In just a couple of weeks, my WYW ladies will be doing the Dreamin Big WYW, and I will be adding two 2 page layouts to the kit. These pages can be used for additional pages that match the other pages, or stand alone pages for another event.

When I designed the WYW extra pages, I manged to use EVERY SINGLE one of the compliments stickers!! I don’t know that I have ever done that before! Here you can see all of the embellishments that are left (before making the cards that also go with the kit!)

My ladies have seen the pages (and the cards) and are in love with them! Let me know what you think!

Now, you are off to Danielle’s blog to check out her stuff!

Until next time!

~Michelle

Tuesday Treats: Gem Box

Hey everyone! It’s time for some more treats!!

This is a super fun box that I saw a tutorial for, using the Envelope Punch board. Well, I have many, many tools, but that isn’t one of them. Well, I KNOW that I can make that without the punch board, so I did!

I used one of the sheets from a past paper pack, some embellishments from the Sugar Rush Compliments, a bit of white shimmer trim, some of the heart washi, and some twine that I had laying around. (We have had some severe weather (for us) so I’m trying to drive as little as possible) I had a few hearts from the Raspberry cardstock left from another product, so I added those too, and finished off with some Sugar Rush Dots.

As you can see, this fits 4 Lindor truffles, these are pink (fit the box colors!) and are milk and white chocolate.

This fun little box isn’t going to just sit here, this is going to go to Robyn! I had to cancel my last crop because of weather, and challenged the ladies that were going to come to do something crafty, and share a picture of what they created. For doing so, they would get an extra little something at the next crop. Well, Robyn was the only one that shared her projects, so she gets this fantastic little box!

Now, one of the tools that I suggest that you have in your crafter’s tool kit . . . a needle threader!! While, yes you can use it for sewing . . . you can also use it to get your bakers twine or thin ribbons into small holes!

So, the next time you are at the store, grab a package! They are usually less than $2!

I hope you like my little box!

I’ll be back tomorrow with a scrapbook page! Hopefully you will join me!

~Michelle

Sprinkled with Love

Who doesn’t like sprinkles, right?? Today I am back with another card! I’ve used more of the Sugar Rush papers for this card, and the coordinating Complements pack. There is NO stamping on this card, and it was quick and easy!!

I was inspired by Global Design Project’s Sketch.

This fun chipboard has gold foil stripes on it! It makes it sparkle very nicely!

Here I created the shadow so that you could see that the gold foil really does stand out! The sentiment is foil as well. The Whisper cardstock and the Pomegranate washi add just enough of a pop of color to really stand out!

I hope you have enjoyed this little card today!


You only have a short time left to get the Welcome Home Wreath and the January Stamp of the Month! You definitely don’t want to miss out!

Something else you won’t want to miss out on is the Spring Retreat at the Beach! I have spots still available! You can find the specifics here.

Thursday Tutorial : CTMH How-To Books

If you’ve been around my blog or attended any of my classes or crops, you have probably heard me talk about the CTMH books. Now, I’m not talking about the Idea Books (those are FANTASTIC, but still) . . . I’m talking about the How To books. In the current “big book”, they are on page 110, or you can find them online, here.

Now, why are these books so great? Well, because they give you everything you need, at the tip of your fingers! You have artwork made with the sketch provided (sometimes exactly the same, and sometimes with something a bit different!), you have cutting guides, telling you how many and what styles of paper you need, and how to best cut them to save time and money.

Last week, I shared a layout with you that used a pattern from Cherish. I wanted to share another example with you. Now, this is from a PDF (that I will also share with you), so it doesn’t include the artwork that is in the book, but it is very helpful!

This image shows you the sketch, the sizes of each of the pieces, and how to cut them, like I mentioned above. You can download the PDF here.

There are books for just Layouts, books for just Cards, and books that include both! One of the things that I will do if I have a creative block, is flip through the books looking at the artwork. Maybe I have an idea of the paper I want to use, or even the purpose for the card. I can flip through the book and find something that I like, and be able to make it! (the card books have 2 totally different designs of each card, spread throughout the book. While you may not like the design in one paper, you may find that you really like it in a different paper!)

Next time you are at one of the crops or classes, feel free to flip through them! They are always there to use during the crops!

Until tomorrow, stay crafty my friend!

~ Michelle

Sweet! Yum! Treat Bag!

Welcome back to Bags & Tags Tuesday! Today I have this sweet little bag of chocolate for you! It would be paired perfectly with a coffee, mocha, hot cocoa, or even tea!

As you can see, this sweet little bag will hold 3 Ghirardelli chocolates perfectly!

I used Pixie Cardstock for the bag and the straps. The little dot is the middle of the donut hole from yesterday’s card! (there are 2 more on the back side, since I mis-cut one of the donuts yesterday!) The dots and cup are from the Sugar Rush paper packet, as well as the “hello” sentiment (it’s from the same zip strip as yesterday’s card).

I used two of the three washi tapes that come in the Sugar Rush Washi Pack. They add just a bit to the whole bag, making it not too bland!

I hope you enjoyed this little bag! I’ll include the dimensions and such below!

Until tomorrow!!

~ Michelle

Bag dimensions and info:

3 x 4 15/16
scored at 2″ from each 3″ side. (so the long part across the top)

(2) 2 1/2 x 1 7/8
scored at 1/2″ on 3 sides (2 long and one short)
slightly miter the squares on the 2 corners

(2) 1/4 x 10 (handles)

Use your bone folder to crease the score lines.
Attach handles 1/2″ in from the sides, lining them up just along the score line.
Decorate the front of your bag before you put it together, as it will be easier to do at this point.
Attach center piece of the bag sides first (do both sides).
Then attach the sides to the front of the bag, and repeat on the back.

Life is Sweet

Welcome back to the blog! Monday’s are card days! (I’d go with Make a Card Monday, but it’s already been taken by a number of people, but one of my idols, Kristina Werner was the first! (at least that I know of!)) So, until I come up with another catchy title, I’ll just go with something generic! hahaha!

I had so much fun making this card! It was directly inspired by this card! I loved the whipped cream on top of the coffee! Can you guess what image I used off of one of the CTMH cartridges that I used to make it?

I’ve gotten a lot of use out of this latte cup from the Artistry cartridge! I just used the slice feature on my cricut to not cut the lid of the cup. The sentiment on the card comes from one of the zip strips from the Sugar Rush papers (which is what I used for this entire card). This new paper pack is SOOOOOO fun!!

I used one of the Touch Twin markers to color the straw. I did have it white, but it didn’t stand out from the whipped cream, so I needed to do something different. So, here you can see my test scratch paper, and then the little strips that I was using to test the colors.

I hope you like the card today! Tell me, who would YOU send it to, and why?

Until tomorrow!

~ Michelle

Weekly Mini Album | Week 2

Hi All!!

Remember last Sunday when I showed you the title page for my mini album? Well, I have the next week’s spread for you!

My thought process is, I will put all of my photos that I have taken over the week into the book. However, that isn’t always going to happen . . . I took a few extra pics this week! LOL!! You can see that I added a 3×4 flip flap to one of the photo spots!

I captioned the photos in Photoshop using the Umbrella font.

On the 2nd page, I wanted to use a 4×6 photo of the Gorge that I took, and had another picture of the “snowstorm” that we got, and needed journaling too, so those all went on the same page.

I had fun this week, and my family had fun this week, so that means it was a good week!

I hope your week has been great, and that next week is just as good or better!

Until tomorrow!

~ Michelle

Scrap Your Stash : Christmas Morning

So, Saturdays are going to be Scrap Your Stash. Those fun things that you have had in your stash for more than 6 months . . . they may not be new and exciting . . . but you bought them for a reason! So, I invite you to join me, and use your stash up!!

So, I found this sketch on pinterest, and tracked it down to the exact location, and they even have a PDF download!!

I made sure to snap a photo of everyone that was opening presents on Christmas morning, and some of them are blurry and not so great, but, that’s ok!!

Now, the two different 4×6 spots aren’t glued down because I am going to be putting them into flip flaps when I put them in the page protector. I will be adding journaling to the page under those flip flaps.

This was fairly simple to put together, once I figured out what paper combinations that I wanted! I used both Yuletide Carol and Snowhaven paper packs. I used Watermelon and Umbrella fonts for my title, and used Photoshop to create the ‘shadow’ for it. Audrey helped me pick the papers for the words, and she is excited about this layout!

So, a couple of notes for you. . . . Kids LOVE to see photos of themselves. (at what point does that change, do you know? I remember being excited when I was young, to see pictures of me!) So, get the photos in front of them! Be it scrapbook pages, photo books, or even the digital photo frames!!

Now, the second note . . . you know that pretty paper that you got because it was just awesome! You know where it’s stashed, right? In the third box from the bottom of the cupboard, with some other papers that you loved when you bought them too, right? When was the last time you laid eyes on that paper? Not any time recently, huh? So, how about this for a mind blowing thought . . . if you put that paper onto a project, then you can share that paper with A. Yourself, B. Your family, and C. Your friends!! That means that EVERYONE can enjoy that paper that you loved when you bought it! (and let’s go Velveteen Rabbit here . . . all the paper wants to be loved!) So, I challenge you, in the next week, to pull out at least ONE of your “I can’t use this paper because it’s too pretty” paper, and create something with it. Scrapbook page, card, home decor item, a box, anything that brings you joy!!

Thanks for stopping by today!! I hope you enjoyed my page! I can’t wait to see what you have done with your stash!!

Until Tomorrow!

~ Michelle

Be Happy Layout

So, today is Scraplift day! This day will include layouts and cards and basically anything that inspires me! I have many different pinterest boards for this, and boy, is my scrapbook one full!! Today, I was inspired by this layout. Seeings as I usually do 2 page layouts, I decided to create a second page to go with it. It ended up being an “inspired by” more than scraplifted, but I think it’s all good!

So, I started with Cricut Design Space, and created the following layout:

This page uses the Artbooking, Artistry, and Flower Market Cartridges. You can find the Design Space file here.

So, once I got this designed, I had to choose some photos. So, I went looking through my folders, and found some from my retreat in October, AND, it’s my friend Vickie’s birthday today, and had these GREAT photos of her and Jenn, and just KNEW that I had to use them!! (Sorry Mary, for you getting cut off in the photo! Definitely going to have to reprint them all so that everyone is on there, and they are better quality!)

I knew what paper I wanted to use too, because she just LOVES this paper! So, away I started cutting! Now, if you compare my hexagons to the design space file, you will see that a few are in different spots. As with any creative project, sometimes, things just have to change a little. (you’ll note that the banners didn’t end up on the layout either!)

Now, this paper pack (now retired) is a very summery paper pack, by design, especially with the complements. However, I just made it do what I wanted it to do!!

I created a little cluster with the stickers and vellum pieces, it’s so fun to put all the bits and pieces together! You can sorta see, in the photo above, the pink and yellow banner tails, those were long dove tailed on both ends banners (one pink and one yellow) . . . well, I wanted to make these little flags sticking out, so I cut it in half, and used them how *I* wanted to use them!

We did indeed have good times at the retreat! I am so glad to know all of the ladies that come to my crops, workshops, and retreats!

Thanks for stopping by to visit! I hope you are enjoying all of the artwork!! Now, remember, there are some January only things, you won’t want to miss out on them!

Welcome Home Wreath
January Stamp of the Month : Adore You

Thank you again for stopping by! I hope you have a great day! If you are in the local area, (or anywhere being hit by storms) stay home, stay safe, stay warm! Maybe do some crafting! I have a challenge up on my crop event, since it’s been cancelled, if you click that you are going, and post something that you craft on Saturday, I will have a fun little something for you! So, go and check it out!

Until tomorrow!

~ Michelle