Monthly Archives: June 2018

Mini is Marvelous – CTMH Technique Blog Hop

Welcome to the Mini is Marvelous blog hop! Today you are going to get to see some fun mini albums that CTMH offers! Today you should have arrived from Darlys’ blog, if not, that is ok, it’s a circle, and you will get back to her!

Today I am going to show you the Kitchen Traditions album. This is a fun little album, and it is TOTALLY ready for your photos and your recipes!

Now, you can get all of these things separately, but you can get them in a bundle too! The bundle includes the Kitchen Traditions Recipe Kit (60 – 4 x 6 cards, 6 – 6 x 8 divider pages, 2 sticker sheets), Everyday Life Album in Bashful, and the My Acrylix Kitchen Traditions stamp set. You get all of this for just $59.95!

This is a close up of the divider pages and some additional cards that can be used for more details or photos.

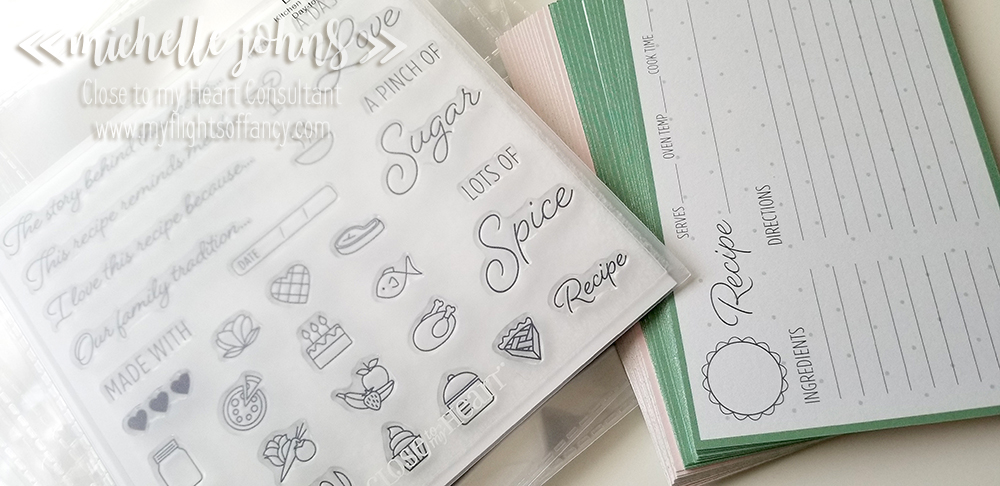
This is the stamp set and the actual recipe cards.

These are the stickers. Aren’t they cute? Some fun decorating stickers and some tabs for dividers!

This photo is showing the back side of the divider page, a recipe card, and a fun/detail card.

Here you can see the back side of the recipe and fun cards, and the front side of the divider.

Now, you don’t see any photos or recipes in mine, I’m actually thinking about taking it to the family reunion this summer, and asking people for their favorite recipe of Grandma Olive’s, and then make the book into one of the raffle items! I know the family would LOVE that! Especially if I could get some photos to go with them!

Thanks so much for stopping by! If you like this kit, it is only available through the summer, so you will want to move quickly, as they are only while supplies last!

Now you are off to Wendy’s blog!

Have a great crafty day!

Rad Dad – Masculine Themed Optional Hop

Another hop! You betcha! This month we have a special called Dad is Rad, and it’s only available until the end of June! I know you will want to get this set, and we are here to show you some ideas other than what you get with the kit itself! They will all be masculine themed, so they are perfect for the Dads (or guys) in your life! Today you should have arrived from Darlys’ blog. If not, that’s ok, it’s a circle, so you will get back there. So, let’s get started, shall we??

First, let’s start with what you get in the Dad is Rad kit. Check this out!

This kit contents:
1 – My Acrylix® Rad Dad Stamp Set (D1811)
11 – cardstock sheets (1 Almond, 1 Crystal Blue, 1 Juniper, 1 Sapphire, 2 Toffee, 4 White Daisy, 1 gold glitter)
1 – White Burlap Ribbon (Z3323)
1 – Gold Bows (Z3380)
4 – white cards & envelopes

You will also have access (even without purchase) to a pdf guide on how to create a two page layout and 5 cards with the supplies in this kit. It really is a great deal!

Now, shall I show you what I came up with? I must tell you, I totally CASEd this card I found on Pinterest. I changed the colors so that it would use what came in the kit, and I LOVE love love how it turned out!

I stamped the solid argyle image in Almond Ink and the dotted argyle in Sapphire Ink. The “Thank you” was cut with my explore, I used the font Lobster Two. I cut it four times and layered them together with liquid glass, and attached them to the card with it as well.

I used the Almond cardstock for the background and the Sapphire cardstock to tie in the ink and sentiment.

I even brought the design into the inside of the card. I just couldn’t stop stamping it!

I am LOVING how this card looks! Super classy and very masculine! Tell me what you think!! What color combos would you use??

Now, after you comment, hop on over to Alayne’s blog and see what she has for you!

Thanks so much for stopping by!

June SOTM – A Bushel & a Peck

Welcome to this month’s blog hop! This set is super cute! If you are doing the 30 days of coloring, this is the perfect set for you!!

Today you should have arrived from Darlys’ blog. If not, that’s ok, as it’s a big circle, so you will get back to her!

I don’t know about you, but I’ve had a superbusy time recently with all the grad stuff and end of the school year stuff, so I didn’t have much time to create this card! But it turned out cute!!

The coloring took more time to do than deciding on the pattern from the Make it from your heart, volume 4 book, cutting, and even adhering the papers to the card base, combined!!

I used archival black ink to stamp with, and heated it with the craft heater, so that the shinhan markers didnt pick up the ink when I was coloring. I used the 3 brown markers; bronze marker, Mahogany marker, Clay marker, the Sap green marker, cherry pink, carmine, warm grey, and black markers.

See that fun shape that the sentiment is stamped on? It is one of the shapes from the Fresh Air Cardmaking thin cuts! Isn’t it adorable?

I used my non stick micro-tip scissors to fussy cut the image out. I then used them to do stamp surgery on the sentiment stamp, so that it would look the way I wanted it to!

I used the Adventure fundamentals paper pack for the heart paper and the green water colored paper, added a bit of kraft to help the green pop a bit more against the heart paper. I wrapped some white twine around the green and kraft grouping, and then popped it with some thin foam dots. I used more thin foam dots to pop the sentiment piece.

I hope you like my card! I would love to hear what you think! Leave me a comment, I read everyone of them!

Next you are on to Gina’s blog!

Thanks so much for stopping by!!