Category Archives: CTMH

15 years of Close to my Heart goodness!

Just Crazy Blessed Team Blog Hop – Adventure Fundamentals

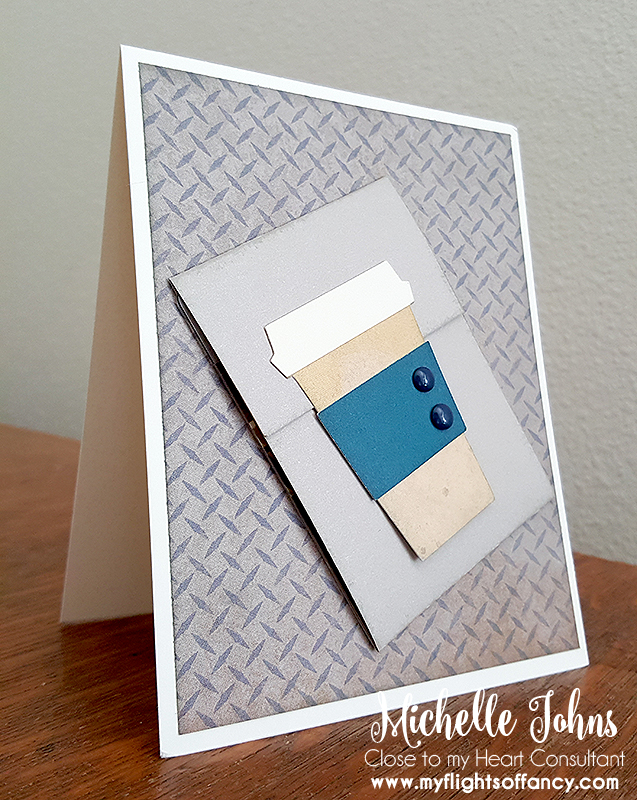
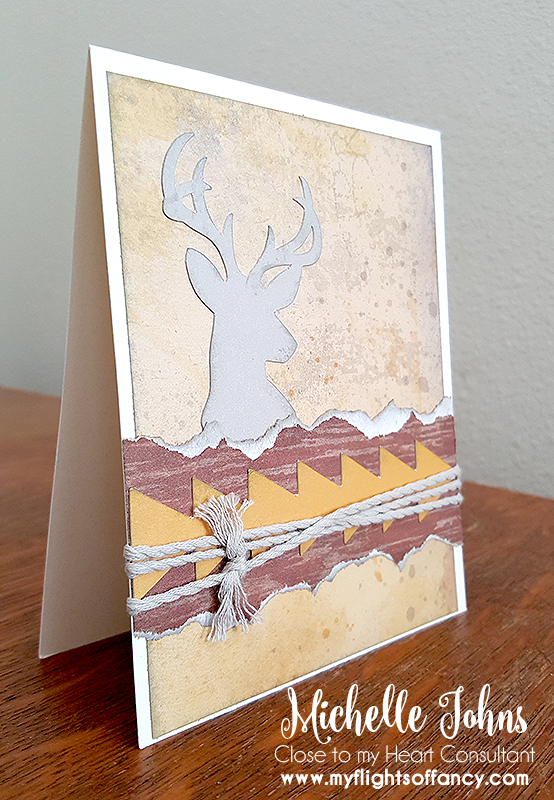
Each week for all of August and September we will be showing you some of the fantastic new products in the CTMH Annual Inspirations book! This book is chalk full of FANTASTIC products! I know you will be as excited about it as I am!! This week we are showing you the Adventure Fundamentals and ALL THE NEW COLORS!! Yes, we have new colors! They are so bright and fun and vibrant! I KNOW you will love them!

Today I am going to start off with a little mini card that I made for a friend. This was a somewhat odd sized card, but it was so so so cute!!

OS-01

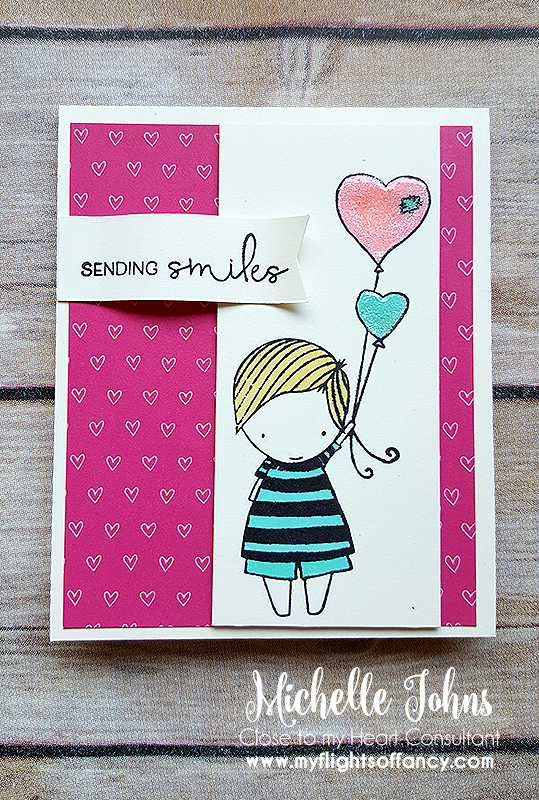
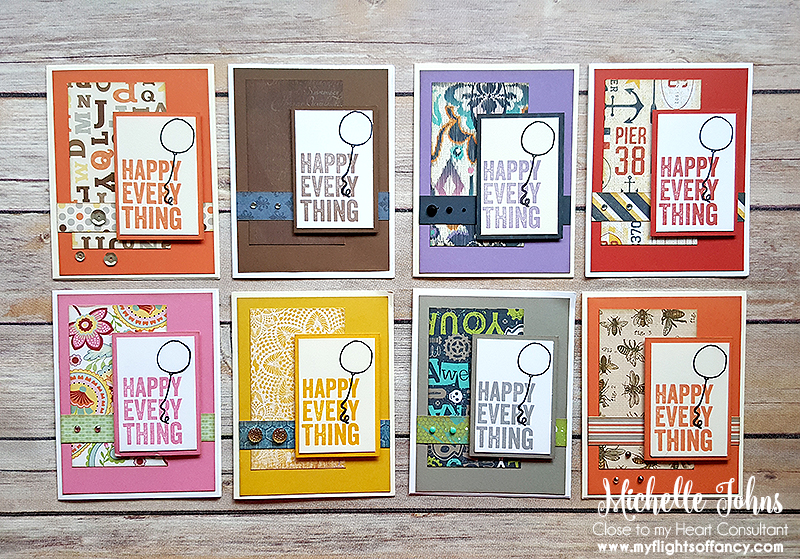
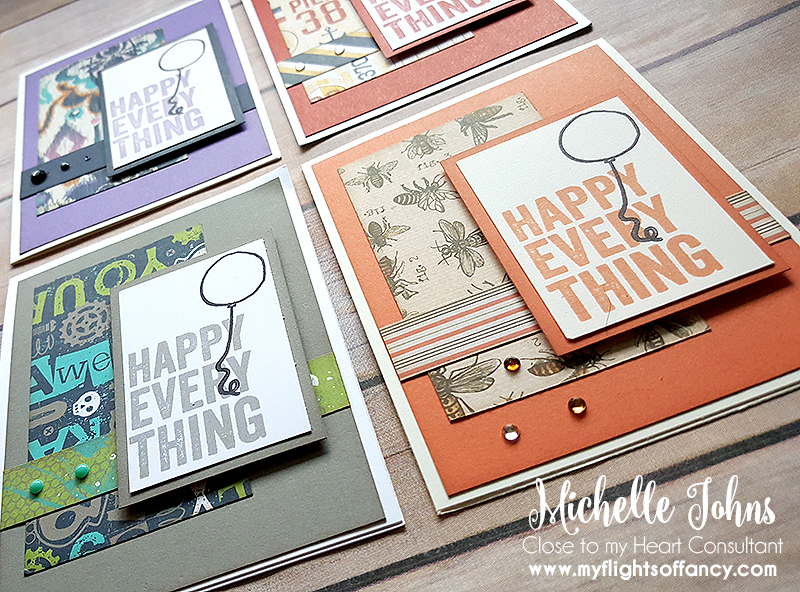
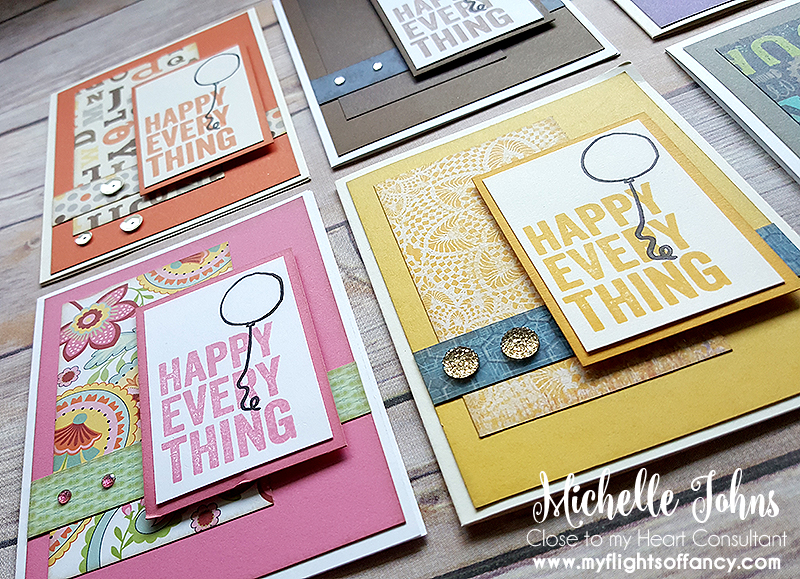
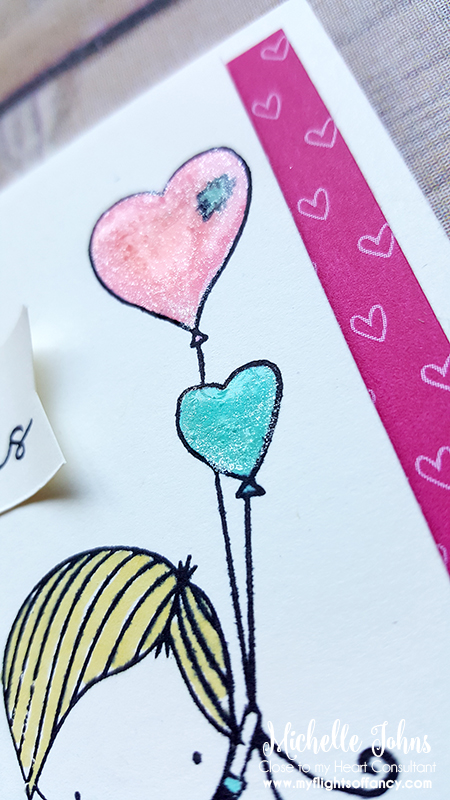
This uses the new Raspberry color, it’s just one of the sheets in the new Adventure Fundamentals line! This adorable little guy is from the Brand Spankin’ New Operation Smile set! I am LOVING it!! $7 of every OS stamp set goes to help kids with cleft lip and cleft palette receive life saving surgery!

OS-02

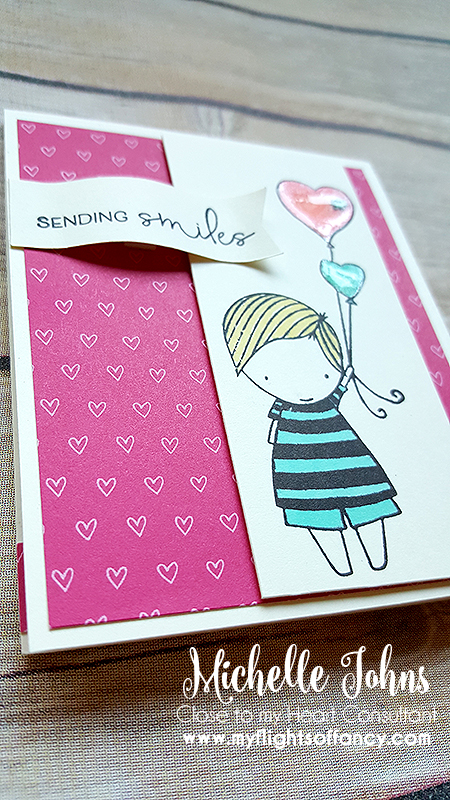
After I colored the balloon, I used the new glitter brush to make it glittery! Then I did a light coat of liquid glass to make it shiny!

OS-03

The sentiment for the outside of this little card is from the new Cricut bundle, Flower Market. You will see plenty of stuff from me with that, because it is fantastic! (like the other cartridges that CTMH offers!) The sentiment on the inside is from the same OS stamp set, and is the PERFECT little sentiment for a card!

OS-04

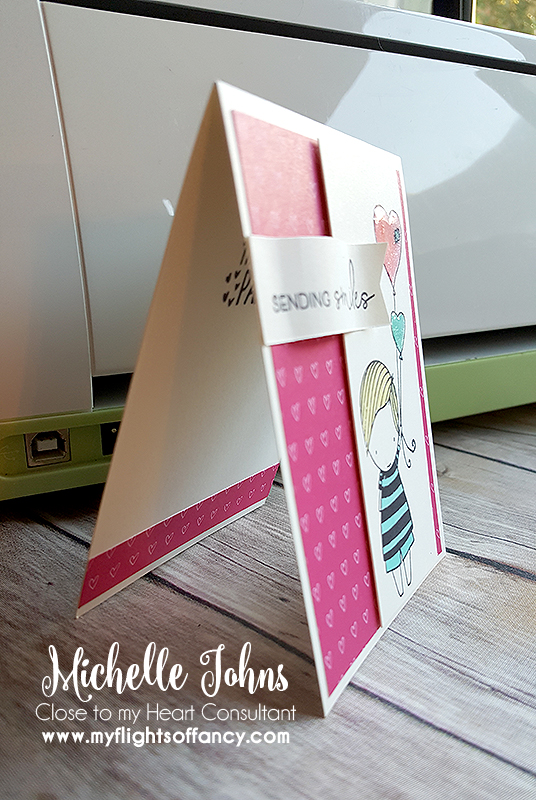
I put a tiny little strip along the inside of the card too, just to dress it up a smidge.

The next card that I have for you uses the Flower Market Cartridge as well! I am a bit hooked on this cartridge, I tell ya! I am CERTAIN that you will be seeing a lot of it!

smiles-01

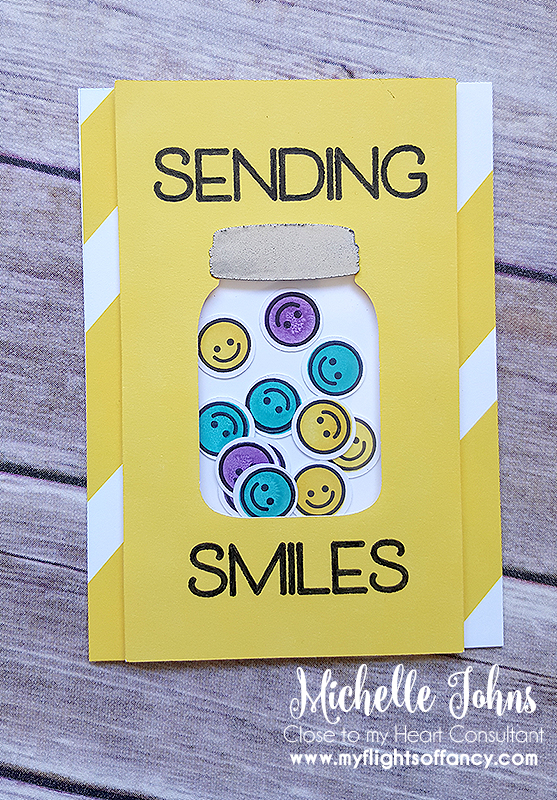
Now, this card is super fun! I used a small piece of sheet protector to create the “clear” part of the jar. I sliced off the top of the jar to create a lid, and then embossed that with Silver Embossing powder.

smiles-03

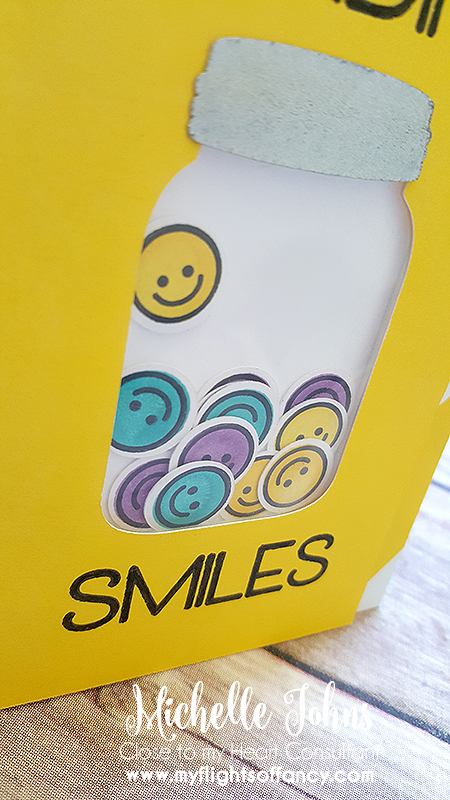
Then I cut circles with my cricut for all of the bitty emoji smiles! I stamped each with the solid color stamp, and then went back with the smiles! I needed a LOT of smiles for this fun little shaker card!

smiles-02

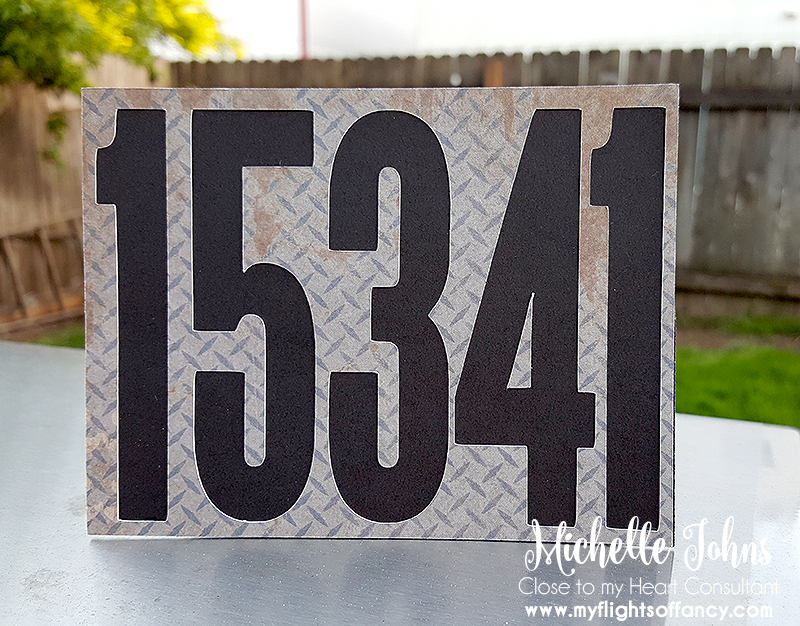
The fun font that you see on this card? It’s on the new Flower Market cartridge too! I used my journaling pen in my explore machine to create the outlines, and then I ever so carefully colored in the lines to give me a solid image.

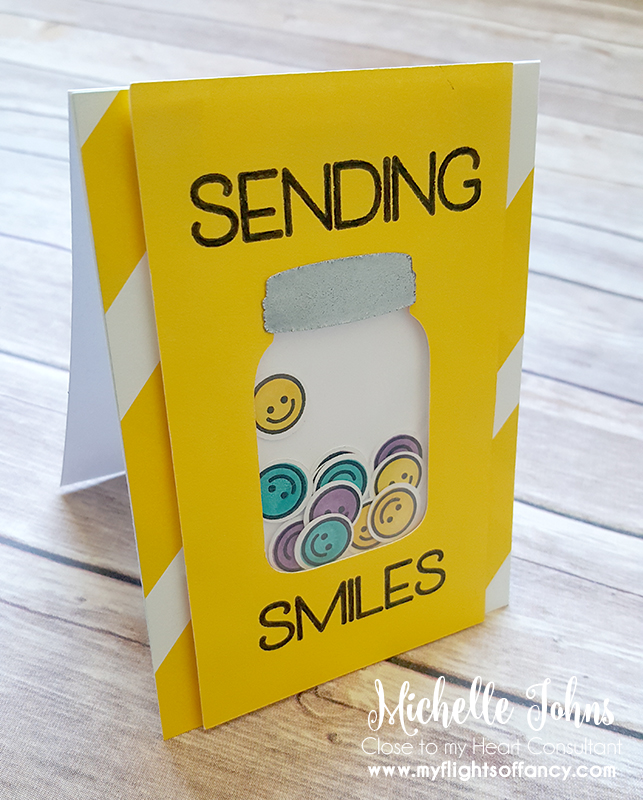
Isn’t it a great little card? I had so much fun making it! (in fact, it’s my second version! My first version used the Enchantment Fundamentals paper, and you will see it again, soon!)

Thanks for joining us today! Please use the buttons below to hop through the Just Crazy Blessed Team Blog Hop!

previousnext

Magical Flip Flap Layout

magical-web

Have you seen this fantastic Magical Layout yet? I am IN LOVE with this layout!! {and, not to mention a tad impressed with it!}

Magical-01

This layout has spaces for 37 photos, as shown in these photos! THIRTY SEVEN!!

Magical-02

It is like a mini album mixed with a traditional album!

Magical-03

There is so much interactivity with this layout!

Magical-04

There are flips and flaps EVERYWHERE!!

Magical-05

I even did a quick video for you to see it in action!!


{If you are reading this in email, click through to see this video, if it doesn’t show up!}

How would YOU like to have one of these layouts for your own book? It can easily be yours!! I am taking orders for this kit! Orders will be accepted until July 15th and will be shipped out on August 1st. Make sure you get your order in! Both the paper and the flip flaps retire at the end of July, so you want to make sure you don’t miss out!!


Magical Flip Flap Layout


Magical Flip Flap Layout, Instructions Only

With this option, you will receive a PDF file from me with the cutting guides and photos on how to put the layout together. You will NOT receive any product from me other than the PDF.


Mr. and Mrs. White

It’s time for another Weekend Challenge on one of the FB groups!

WC3-01

So, I used two of the shapes that were in the challenge, but I used a lot of them!

WC3-02

I used CTMH White Daisy cardstock and Thin 3-D foam tape. (I LOVE that stuff!) I’m able to give dimension, but be able to get MANY layers without it being too bulky!

WC3-04

What you can’t see very well in the pictures is that the Mr. & Mrs. is shiny as well as the corner pieces. I used Liquid Glass on them to give them a bit of pop, without having yet another popped up layer.

I was going in a direction similar to this originally, but wasn’t terribly happy with it, when someone posted in another group a card somewhat similar to this one, and I knew exactly what I was going to do! If my order had gotten here, I would have done one of the circles and the corner pieces in silver embossing powder, but it won’t be here until Tuesday!

I hope you enjoyed my little card!

Until tomorrow!

~Michelle

15,341

Huh? What? 15,341?

Yesterday was my hubby’s birthday, and that is the number of days that he’s been around!

15341-1

I used a sheet of B&T from the Urban paper pack for the front. Originally I was going to make a shaker card with some beer caps inside, but I couldn’t get it to work how I wanted it to!

15341-2

So, instead I made it an easel card, on some black cardstock. I used the cricut gold pens to write the sentiment on the inside.

15341-4

I used the gold Triangle Durables(on clearance right now) to have a spot for the front of the card to ‘lean on’ to help it to stay standing up.

I had fun making the card! And he caught on pretty quick as to what the numbers were!

Until tomorrow!

~Michelle

Happy Everything

I have created a small card kit that is available to purchase, I only have a few left. I have used some of the retired CTMH papers to make up these kits. They are all pre-stamped and pre-cut and ready for you to put together!

happy-01

There are 8 cards in the set, and some papers that work for girls and some for guys!

happy-03

The embellishments are also included, as are the envelopes and a fun bag like the one I used for the Georgie gift card holder the other day.

happy-02

All you need to add is the distressing ink (if you want) . . . I used Desert Sand and a sponge, some glue, and some foam tape. SUPER simple!

The card kits are just $15 plus shipping (if you aren’t local). You can use the paypal button below!


I hope that you like the cards! I have other kits that I will be sharing within the next couple of days!

Until tomorrow!
~Michelle

Happy Birthday Grandpa!

My Father in Law works out of state, and isn’t home often. He came home just the other day and we had a birthday celebration for him this evening. My youngest, Audrey, decided that she wanted to make him a birthday cake! (She’s recently gotten into baking, and makes a killer banana bread!)

gpabday-02

So, she made a devils food chocolate cake with chocolate frosting and mini reese’s on top.

gpabday-01

To make it more fun, and not have to have a million candles on top, we went with a cake topper. One of the great things about my cricut explore, is that I can use any of my fonts that I have. And Photoshop makes the other two layers possible!

gpabday-03

I used Black, Chocolate, and Autumn Terracotta (retired) cardstocks from Close to my Heart to make this fun topper! I cut two of the brown so that I could hide the toothpicks between the two layers to make the back look good too!

gpabday-04

I glued the letters and layers together with Liquid Glass, and then used foam tape between the two brown layers.

The whole thing came together in about 10 minutes! It was nice and fast, and added just a little extra to the cake!

What do you think? What topper would you like to see?

Until tomorrow!

~Michelle

Charlotte Cards

The Charlotte paper pack and Workshop Your Way (WYW) will be retiring at the end of April. It is such a pretty combination of colors, pinks and browns and black, that it works for so many things! Today I am sharing with you the cards that are part of the WYW kit. (You have to add the card bases, but the rest of the paper is left over after you complete the three pages in the WYW kit!)

charolette

You get to make 3 each of three designs. As you can see with my cards, I changed them just just a bit, some I just flipped the paper over, some I changed the orientation of the card itself. I also swapped the stamped sentiments out, so that there were a variety of cards with the different sentiments!

It was so easy to make these cards with the instructions in the WYW kit! And the pages that they make are great too!! I haven’t snapped any photos of my pages, but take a look at the artwork that CTMH provided for us!

1601-se-charlotte-wyw-lovely-day-layout

1601-se-charlotte-wyw-celebrate-love-layout

1601-se-charlotte-wyw-home-is-layout

It is a beautiful paper packet, and the pages are beautiful as well! I would love to show you how to put them together, or just have some crafty time together!

Until tomorrow!

~Michelle

Regatta Display Frame

At the Spring Retreat at the Beach, we did three different classes, just like every year. One of the classes this year was the Regatta Hinged Display Tray. This tray is so fun to do, I’ve done a number of them (like here and here)! They are fun to make, fun to look at, and fun to give, too!

regdisp01

For this tray, we used the Regatta paper pack, Beach Days Stamp set, The My Anchor Thin Cuts, Archival Black ink, Cranberry Ink, White Daisy ink, Clear embossing powder, the Shin Han Carmine marker, and some White Daisy cardstock.

regdisp02

Instead of pulling out some red cardstock, we cut the hearts out of the white daisy cardstock, and colored them with the Carmine ShinHan marker. They turned out GREAT! Stamped the sentiment directly on the B&T paper, and cut the anchor with the thin cut. We stamped them first and then cut them, however, they can be cut first and then stamped. That is the great thing about the clear stamps!!

regdisp03

Now, on my sample, here, I used white daisy ink and clear embossing powder. However, when I had the ladies do theirs, they used white daisy ink and white embossing powder. It made it pop that much more! This stamp was also done directly on the B&T paper.

regdisp04

This last square was so much fun! As you can see with the shadows, there are a few different levels of the layers! The lighthouse was popped on some foam tape, my boat was put on a scrap of cardstock to hold it up just behind the waves. The waves were die cut and then folded, so that they would wrap into the box and sit on the outside edge of the little box they are in. There is also a small piece of sapphire cardstock on the bottom of the box, to keep with the blue for the waves.

I love how this little box turned out, and heard raves from each of the ladies, as well! Would you be interested in a box like this? Contact me and I will show you how!

Until Tomorrow!

~Michelle

Guys like cards too!

Ever need a card for a guy? You know, one without lace, and glitter, and bling? Yup, they really do make things without those things! They really do, I promise!!

Well, we have a paper pack called Urban, and it is TOTALLY made for guys!!

UGC-whole

I made this fantastic card kit with the Urban pack! The workshop is available via mail, or at my in person workshop on May 20th.

I think every card is pretty fantastic! There is only stamping on one style of card (so 2 cards, since you get two of each card design). First up is perfect for a coffee shop gift card! The cup lifts to reveal a spot for you to put the gift card into.

UGC-01

The next card, I just love the grungy background on! The little bits of splashed color, mixed with the wood grain and the enamel dots, so fun! We all have a guy that we need to thank at some point, right?

UGC-03

This next card is the only one with stamping on it, and it’s just a bit. The sentiment could easily be changed to something else, like thanks or a sympathy card. Like the coffee card, it uses that stamped metal paper.

UGC-04

This next card is SUPER fun! I used that same wood paper that you saw briefly in the Thank you card, but I cut it into smaller pieces, and inked the edges of each piece, so it looks like a wood floor. The sentiment is great for graduations, new jobs, new home, or many other things!

UGC-02

This next card could be used for pretty much anything, since there isn’t a sentiment on it . . . but I loved the deer silhouette that is on the Artistry cartridge, and was inspired by a card on Pinterest, and this is what I came up with.

UGC-05

The only horizontal card of the bunch is this birthday card! Every guy has a birthday! This paper has kind of a blueprint look to it, and is just so grungy! I really do like it and the whole paper pack!

Would you be interested in attending the class? The ladies that did it the first time I held it had a GREAT time! They loved the cards and I hope that the people they send them to love them too! There is the option to have the class mailed to you, as well! If you choose that option, I will send you a list of the things that you will need to complete the cards as I have them shown. (inks and stamps wise) Just select the option that you would like from below, and I will get you hooked up with this great card class!


Urban Guy’s Card Class


I look forward to sharing more creations with you tomorrow!

~Michelle

Pink Foxes

I’m in the middle of making bags and cupcake toppers for a friend’s baby shower. In the process of killing time while my cricut was cutting, I looked to see that one of my Hostess Club ladies has a birthday today!

foxcupcake

So, I snagged a bit of Blush Cardstock (retired), White Daisy, and Black and cut this quick, cute, pink fox. While the cut isn’t on one of CTMH’s cartridges, it has quickly become one of my favorite cartridges!

foxcupcake2

Tomorrow the baby shower will be happening, and I can’t wait to get a picture of all of the cupcakes with the fun toppers in them! I won’t be able to be there, as it is the day of my Monthly Crop, however, I am certain that the mom will LOVE them!

Until tomorrow!

~Michelle