Author Archives: Michelle

Thursday Tutorial: Shimmer Brush

If you haven’t played with CTMH’s shimmer brushes yet, you are missing out! These things work like a DREAM!!

That being said, sometimes it’s a bit hard to figure out how to work them. So, I created a quick video on how to put it together so that you can start using them on your projects.


{If you are reading this in email, click through to the web page to view the video}

In the video I show you the Clear Shimmer Brush, and you can also now get the Gold Shimmer Brush.

Hopefully this was a bit helpful to you!

Until tomorrow, have a crafty day!

~ Michelle

Dinner with the Family

The other morning, one of my girls called and wanted to go out to dinner, as a whole family. Seeing as I don’t get to see them very often, now that they have moved out, I agreed!

While I didn’t get many photos, they were fun, and the evening was great!

I started with the Vistual Texture pattern from the Cherish book. These books are so fun! Can you see what I did with the pattern to get to my finished page?

cherish-visual-texture   <–Click here to download a PDF of this pattern!

I used the Adventure Fundamentals paper pack. The raspberry and willow are so pretty together, don’t you think? I have the tabbed journaling cards there to add some journaling to (which I WILL do, after I get the photos printed and added to the page)

Like the other day, I used my explore to cut the title. This time I used the Umbrella Regular font on CTMH’s Black Cardstock. I even have a little hint to share with you about it.

All of CTMH’s cardstocks have a white core. This is done so that the color on the cardstock is consistant. This also means that when you cut it, you can see the white on the inside. Sometimes, that is not really what you want, and you ink the edges to remove some of the white (or hide it a bit). However, with this title, I didn’t want to have to edge all the little bits here and there. So, let me show you my fun and easy trick!

This is the title cut, (mirrored) while still on my cricut mat. You can see that the word “the” is repeated, this was my “test” sample to show you. As you can see, the white shows already, before I take it off the mat.

So, after I take them off the mat, and put them onto the remainder of the black cardstock (yeah, it doesn’t look like it, because of the light), you can see the differences. (the arrows help some). On the left, is a fairly straight above photo. You can see on the lower word, there are many more white spots vs. the upper one.

On the right photo, the angle is slightly moved to a lower position, and you can see even more of the white showing.

Here is a comparison of the words on the same background paper, with better lighting. While very similar, you can still see more white on the one on the right. So, my little trick to share with you is to mirror your white cored paper to minimize the amount of white that shows!

I will be having the photos printed soon, and will show an updated photo on another post, so keep watch for it!

Now, I’ve shown you the wreath that is a special for January, but have you seen the Stamp of the Month? It is a GREAT stamp to add to your collection if you love making valentines, or plan on doing pages for valentines (Kids? Grandkids? that special someone?). It’s just $5 with a $50 purchase, or you can get it by itself for just $17.95.

I hope your week is flying by! I know it has been for me! Saturday I have a crop coming up for the local ladies. Are you nearby? I have a few spots open still! Just let me know if you are interested!

Until tomorrow!

~Michelle

Chocolate holder, take 1!

So, Tuesdays are going to be Tags, Bags, and Treat Holders! Yesterday I told you I was going to have something for you to be able to gift to friends . . . we all like little gifts! Especially when they are made pretty first!

So, I used another paper from the Rustic Home Fundamentals paper pack. This pack is so fun!

Here you can see it is a matchbook style treat holder. Inside is just one little Ghirardelli square, perfect for a little “I’m thinking about you” treat.

This is such a fun little treat holder!! You could easily make up many of them for valentines or treats for birthdays, or even just because!!

Remember those hearts that I told you I colored yesterday? Well, they came in perfectly today for the front of this little treat holder! They are all cut from White Daisy cardstock, and then colored with the ShinHan Touch Twin markers.

I hope you liked the little holder today! Who would YOU give one to? Join me tomorrow for another fun crafting bit!

Until then, have a fabulously crafty day!

~ Michelle

Be Happy

Happy Monday! This week is a bit off for me, being that it is a short week. I am sure that others feel the same!! The bonus is, I got to craft more! Always a good thing, right?

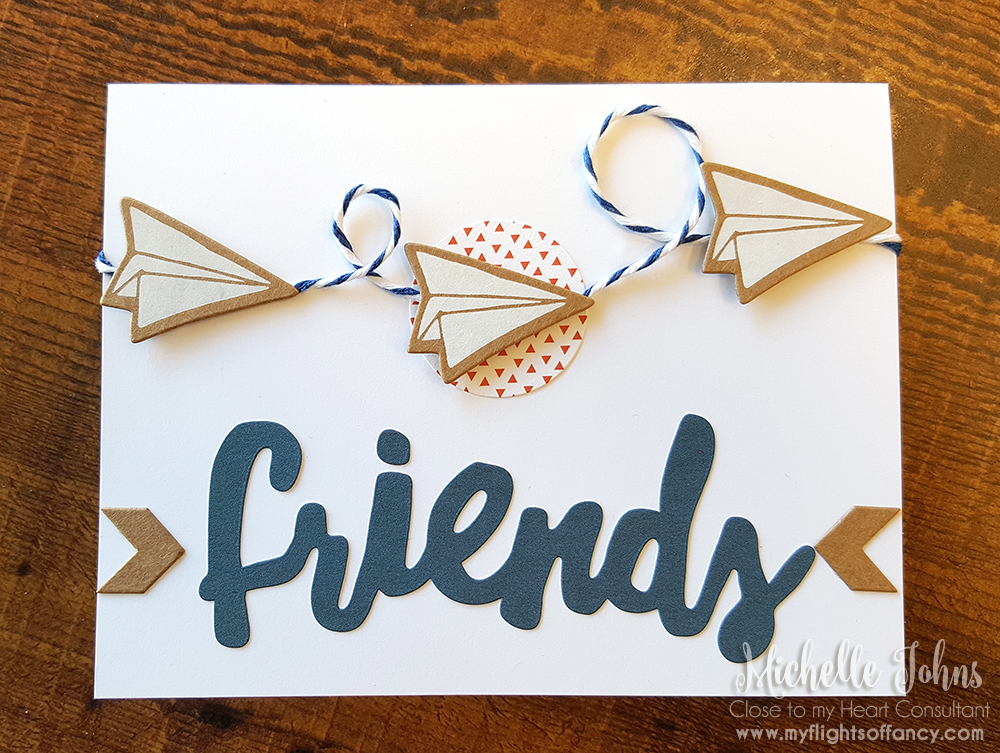
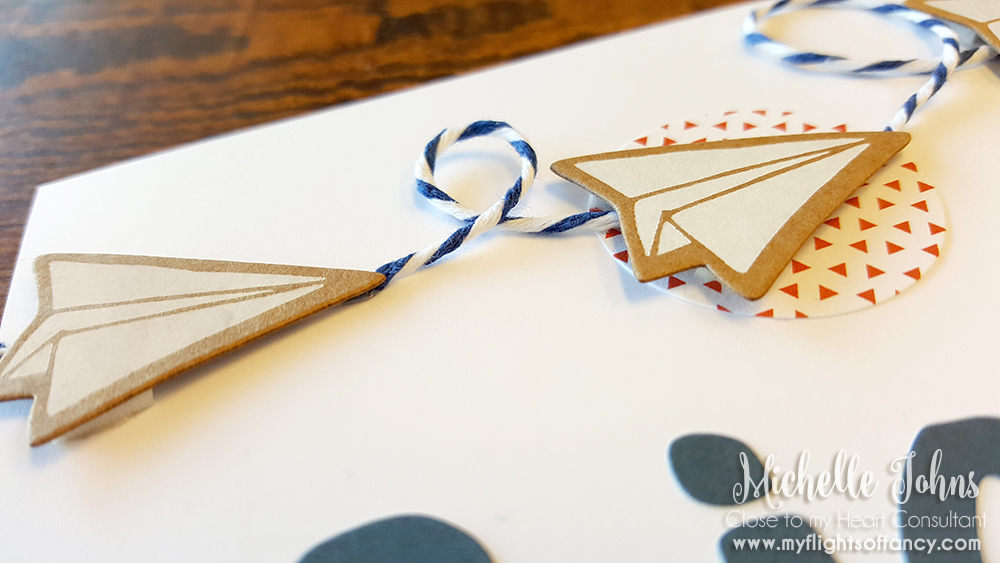
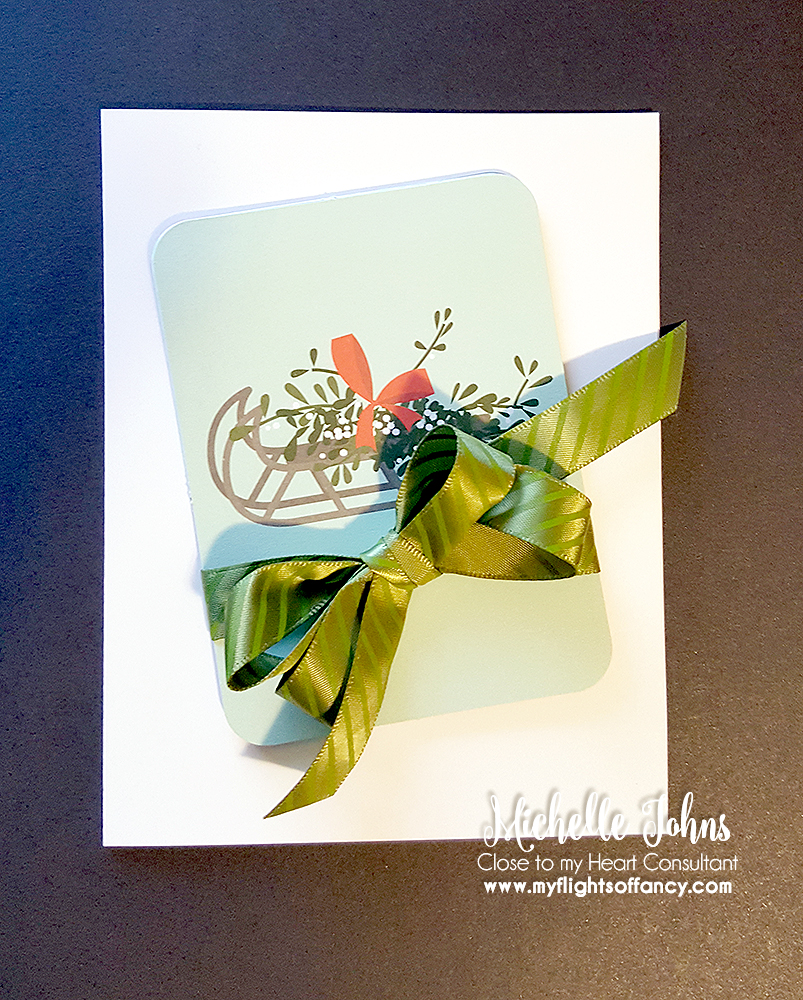
Today I am sharing a card that is missing patterned cardstock. I wanted to remind everyone, that you don’t have to have patterned papers to make beautiful things! I used the Artistry Cartridge and bundled stamps for this card. I was greatly inspired by this card I found on Pinterest.

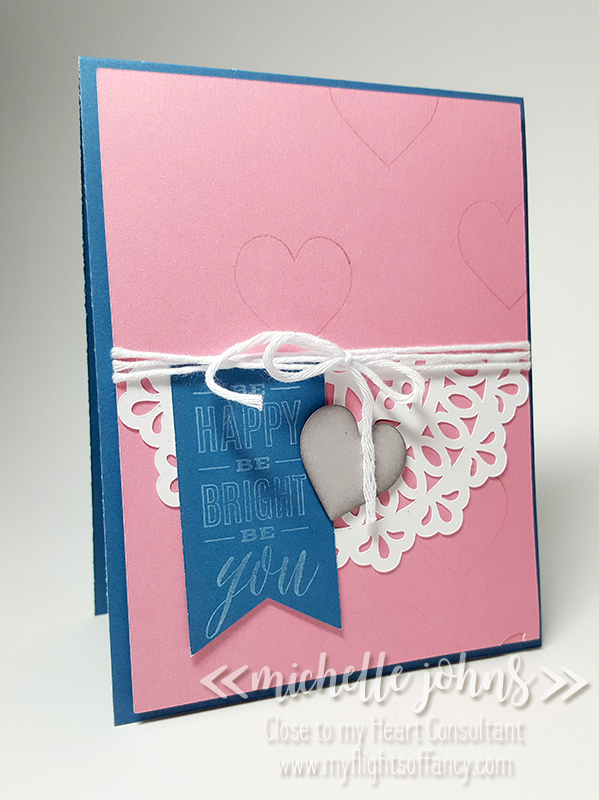
Today I used Pacifica, Pixie, and White Daisy cardstocks.

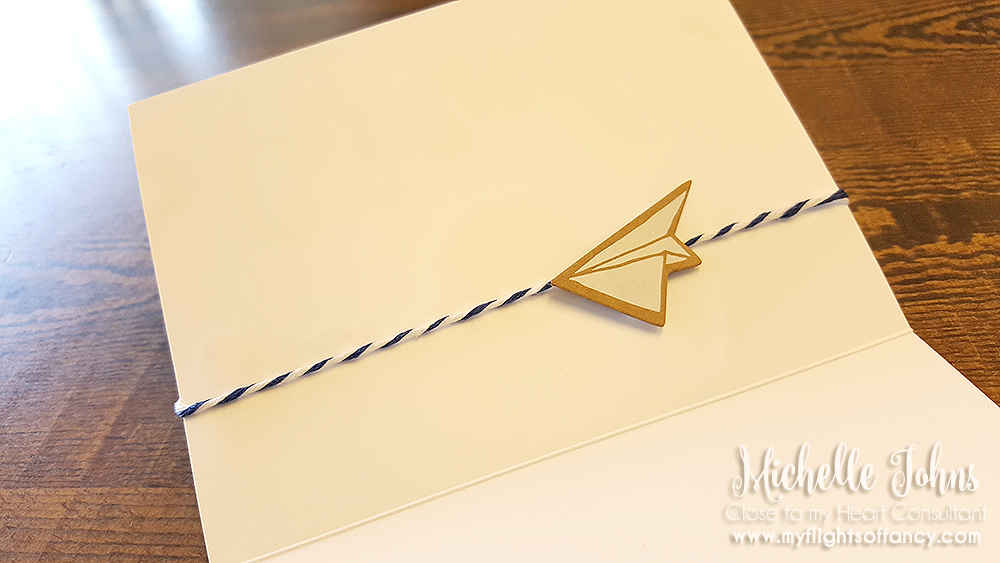
When I am ready to send it, I will create an inside liner, write my message, and then glue it in. (that way, if I mess up, I can just make a new liner, and not have to make a new card!)

The cricut explore cut this doily image just beautifully! And would you believe, the doily and the heart are both white daisy cardstock?

I knew when I was cutting the images, that I was going to color the heart with one of my Touch twin Shinhan markers. Now, the key to getting not blotchy color, is to completely saturate the cardstock. So, I cut a few, colored a few, a few different colors, and then decided at the end of the card making which I wanted. Well, this one was just a happy little accident! The side you see is actually the BACK side of the heart that I colored. When I went to put the thin foam tape on the back, I decided that I liked it MUCH better than the front! It is just so much softer looking, and I thought it complimented the card well.

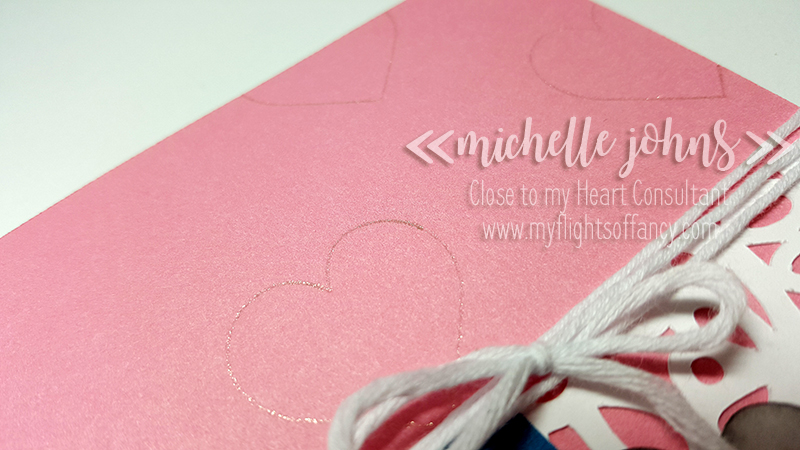
Now, if you come to my crops, you know that you can use anything there, and I encourage it! Very few people have limited themselves to just one company’s products. Generally, when I show things on my blog, I try to use only CTMH products, however, this time, I just HAD to use this pen. It is a pen that I was introduced to at my friend Erin’s house. It is a glittery gelly roll pen, and it is fantastic! Today I used it in my cricut explore to draw these little hearts, to give the background just a little something. I think it worked quite nicely, don’t you?

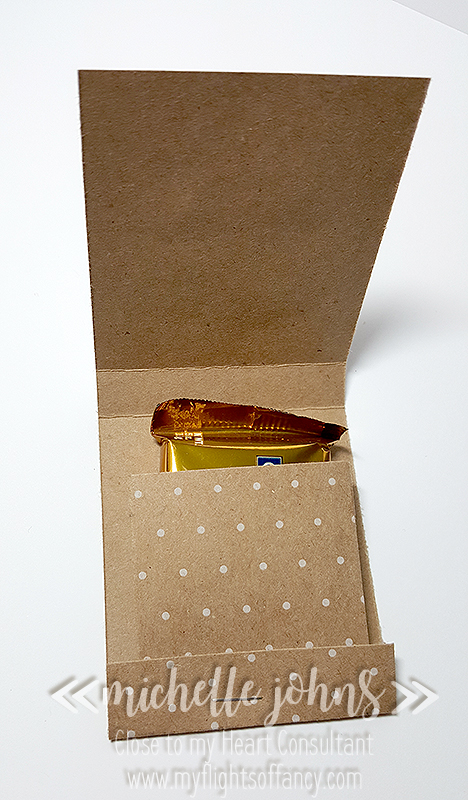
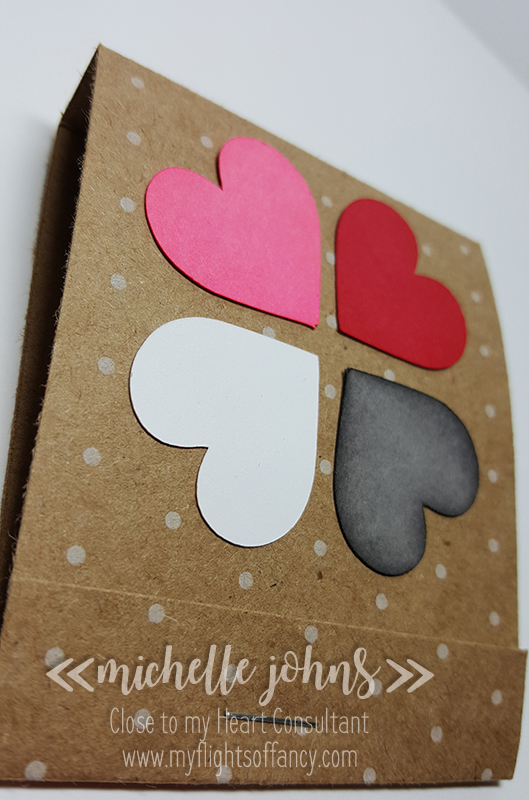
So, that’s my card for today! I will have another next Monday! Join me tomorrow when I show you a little something to give away chocolate. (WHAT?!?!?! Give AWAY chocolate? . . . well, yeah, it helps our friends feel good too!) You will want to come back and see!

Before you go, though, have you seen this fantastic wreath?

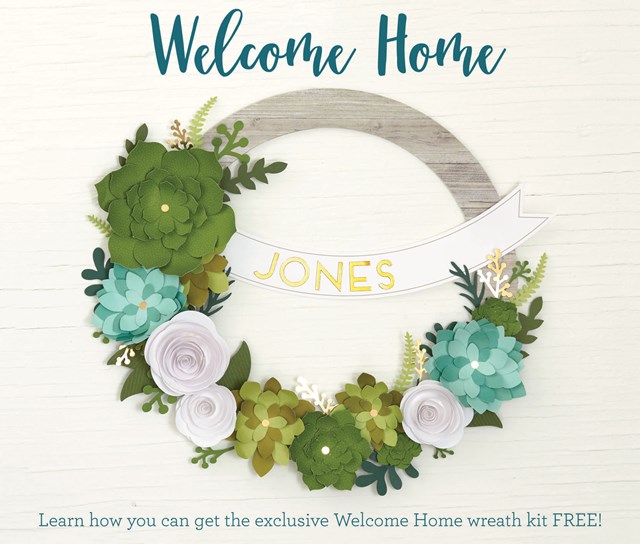
It’s available in January, thanks to National Papercrafting month! Every January, we celebrate National Papercrafting Month as a way of acknowledging the pure joy of playing with paper! We scrapbook with it, we make cards with it, we decorate with it—in short, we craft with it! This January, we’ll be celebrating the joys of papercrafted home décor with the beautiful Welcome Home wreath kit. This kit comes with precut pieces you can simply pop out and attach to the sturdy chipboard wreath base, making a welcoming décor piece for your home. The wreath kit can be yours for just $18.95, or you can get it FREE with a qualifying $60 USD purchase. In addition, hostesses with qualifying Gathering totals and new Consultants who sign up in January can also receive a free Welcome Home wreath kit. Celebrate your love of papercrafting with the exclusive, easy-to-assemble Welcome Home wreath kit.

This kit comes with almost everything you need to put it together, including the gold stickers to spell welcome or your name, all you need to add is glue! All of the pieces are pre-cut (just like my workshops!) I know you will enjoy putting it together! Just remember, this fun wreath is ONLY available in January!

Until tomorrow, stay crafty, my friend!

~ Michelle

New Year, New Album!

Happy New Year! I hope you all celebrated safely last night! I stayed in and watched movies while hubby was out Uber driving. He called me between rides to share stories about the passengers that he had. And it was good that they all took Uber, as they definitely should NOT have been driving.

Sundays will be focused on a mini scrapbook series. I will show you different layouts that I have done for my black and white striped mini album, that cover what has happened during the week. It won’t have every photo that I take, but will have a few, for sure! Each week will have some journaling, at least to outline the things that happened during the week. There will be just plain ol’ average weeks, where we may not have anything exciting happen, but that is part of life too, right? Just the everyday stuff between the “special events”. But, those days are important too. They seem to go fast, because as we age, we don’t have the “firsts” like we did when we were young. (this was a discussion that hubby and I and a few peeps were talking about just a few days ago) So, we need to celebrate the every day, too!

Now, it’s the first, so there aren’t a whole lot of things that happened this week (of 2017), so today I am just showing a few pics of how I decided to do the title page. It was a combination of ideas that I have seen on Pinterest.

Here are the pieces before I put them in the page protector (to help avoid glare). I used one of the woodgrain papers from the Rustic Home Fundamentals paired with Black cardstock, and some retired gold glitter paper. (yes, we still have gold, but this was one of the other colors in the old 3 color packs)

I used my cricut explore to cut the numbers and words. I love being able to use the fonts that I have on my laptop! (especially since I seem to hoard them!)

This is what it looks like when it’s in the page protector. The page is 6×8, and has four slots that are 3×4. I think that it turned out great!

And here you can see it is in my mini album! I will have the next section for you next Sunday!

So, the new year brings many new things, like the Seasonal Expressions book, which goes live today! LOTS of fun new things in there! I’m going to share the papers below, but you can go to the site and check out all the new stuff in the shop!


Sugar Rush Paper Pack


Hello Lovely Paper Pack


Dreamin’ Big Paper Pack


Some Kinda Wonderful Paper Pack

Do you do a weekly scrapbook? Is it a mini? Full sized? Other? Let me know what you are doing this year for your scrapbooking!

Join me tomorrow for a fun card!

Until then!

~ Michelle

JCB Blog Hop Oh Deer!

Welcome to the Just Crazy Blessed team mini blog hop! This month we are showing off the Oh Deer! Papers! These are such fun, beautiful papers!! Today you should have arrived from Yvonne’s blog, however, if you are starting here, it’s a circle, so you can start here and end here!

I’m sharing the mini album that I made with the Oh Deer papers and compliments. It’s such a fun little album!!

This album was a blast to make! Some fantastic papers makes it really easy to do!

Many of the compliments in the pack have gold and silver foil on them!

Want to see the whole thing in action? Check out this video that I made!


{If you are seeing this in your email, you might need to click here to see the video}

Need one for yourself? You can find them in my shop!

Want to see more fun creations with this paper pack? Check out Janna’s blog for her project!

Atlantic Heart Sketches #189

Earlier this year I made a number of pages that used the Enchantment paper pack, and used just a portion of the compliments that went with it. So, I thought I would play along with the Atlantic Hearts Sketches this week with some of those left over parts!

01

While I don’t have the rectangles like in the sketches, I went with a numbers thing, in that I used my 3 airplanes for those spots.

02

Used little dots of liquid glass to tag down the twine, under the airplanes, and ended up with a fun loop de loop!

03

The stickers on sheets are thick, like cardstock, and they are fantastic! You can see that this one has a denim type print on it.

04

I even decided to pull the design into the inside of the card! I tied the twine inside, and hid the knot with another of the airplanes!

{Isn’t that a fun little video thing? I just found out that my phone does them! I’m lovin’ it!}

14407528_790154481125395_1477083511_n

Check out Atlantic Hearts Sketches and play along with some great sketches!

Until next time, have some great fun crafting!

~Michelle

CTMH Technique Blog Hop – Ravishing Ribbon

Welcome to the CTMH Technique blog hop. This month we are featuring the fabulous CTMH ribbons! These ribbons are fun and beautiful! Today you should have gotten here from Haley’s blog, however, it is a circle, so if you started here, you will be able to get around to everyone’s blog.

Let’s take a look and see what I have for you!

ribbon-01

Now, my lighting isn’t the greatest for this card . . . I didn’t get a chance to take the picture until last evening, and there’s a lack of light in my house, well, at least enough for great photos!

I used one of the PML, Happy Happy Christmas cards for this card. Makes it a nice, easy, fast card to do!

ribbon-02

This shows the ribbon a bit better, color wise, and you can see how satin-y it is! This ribbon is from the Enchantment Ribbon Pack, which gives you 4 fun ribbons and a baker’s twine in the Enchantment family of colors.

I hope that you have enjoyed my card today! Let me know what you think! After that, hop on over to Janna’s blog to see her fantastic work!

Have a fantastically crafty day!

~ Michelle

More Thin Cuts!

I don’t know about you, but I am LOVING the thin cuts dies that CTMH has started carrying! They just announced at the Australiasia Convention that they are releasing FOUR MORE thin cuts sets! This means less fussy cutting for some of those GREAT stamped images! (That means that this little girl could have been popped up even a bit more!)

1610-cc-new-thin-cuts

These thin cuts will last until the end of the Annual Inspirations book, or until supplies run out! So, that means that you don’t want to wait until July to get yours, they may not be there anymore!! I’ve listed the stamps and the matching Thin Cuts below for you. They are NOT being offered as a bundle at this point in time, as many people already have the stamp set in their stash already.

Swirly Seashells (C1664) matches Swirly Seashells Thin Cuts (CC1155)
Sweet Birthday (B1532) matches Sweet Birthday Thin Cuts (CC1156)
Wreath (A1193) matches Wreath Thin Cuts (CC1157)
School Kids (D1706) matches School Kids Thin Cuts (CC1158)

If you haven’t used the Thin Cuts dies yet, you will love them, I’m sure of it! You will need a cuddlebug or big shot (or another machine similar) to be able to use them. This is one of the tools that I always have available at my crops for people to use!

Let me know if you have any questions about these new dies! I can’t wait to get mine!

Until next time, stay crafty, my friend!

~Michelle

Are you a Planner Person?

Well, last year, CTMH came out with a great planner, complete with mini album/binder and all sorts of accessories. This year is no different! Well, a bit different, in that you can get it NOW!

1610-cc-planners-gonna-plan

The planner pages have a week spread over two pages, the dividers are coloring pages, so you can put your pens and pencils to work, each month overview that spreads over two pages, three gold paper clips, and even a pencil pouch to keep your tools handy!

planner

You can get your planner three ways right now. . . . just the planner insert (shown above) for just $16.95, the Sea Glass Album & insert bundle, for just $31.90, or the Stripes Album & insert bundle, also just $31.90. You can see the stripes album on one of my previous posts about pocket pages.

So, if you are a planner, or know a planner, this is a great time to get these! They are while supplies last, and I know last year they went quickly!

I hope you have a fabulous day! Until next time!

~Michelle