Category Archives: CTMH

15 years of Close to my Heart goodness!

Balloon Talk Blog Hop!

Are you ready to jump right back into things? I know I am! Today we have a hop of about 50 consultants showing you some super fun things to do with this stamp set! I can’t wait to see everyone’s stuff!! Today you should have arrived from Michelle Jones’ blog. If you happen to get lost along the way, you can find the full list on Melinda’s blog, HERE.

This set gives you so many great options to use it! I found a super fun page made with some die cuts and sponging, and thought that it would be perfect to make something similar with this fun set!

I used one of the photos I snapped of my guys on a trip south. They were both singing along to one of their favorite songs!

I used Whisper, Slate, Sweet Leaf, and Twilight inks for this layout, and used both the front and the backs of the stamps! (one of the best things about the clear unmounted stamps!!)

I hadn’t grabbed any colored cardstock, since I wasn’t sure which color I wanted to use, so I just used my ink to color my mat for my photo! I love that it is so easy to do, and guarantees that it matches the inks on my page!

To add a bit of dimension to my page, I added some washi tape and some triangle durables. I think it flows quite nicely!

I do hope you have enjoyed my project! I know I did! This fabulous stamp set is available for just $5 with a qualifying order, so make sure to get yours!!

Now you can hop over to Gina’s Blog to see what she has come up with!

Until next time, have a crafty day!

~Michelle

Matryoshka Erin?

My friend Erin collects these matryoshka dolls, and so I went to her for a suggestion for a card.

She suggested that I do a gate fold that opens up, so that it could act like the dolls do, in that the heads come up, and in chatting with her, I thought about this swing top card that I had done long ago with the Hooligan’s paper pack.

So, this one swings up, and you can see another, smaller doll inside! Fun, right??

But, one thing I bet she didn’t expect, is to be the face on the doll! Wouldn’t this be so fun to use as a party invite?? (and it WAS just Erin’s 21st birthday, again)

I thought this was just so fun to do! I used the sketch from My Favorite Things for this card.

I hope you enjoyed this card! I am off to the beach tomorrow morning for my Retreat! I will have more stuff for you over the weekend!

Have a crafty day!

~ Michelle

Just fluttering by

Today I am using the “A Tree” stamp set with my Ariana papers! Such a fun combo!

I stamped the leaves on the green paper in black archivl ink, and cut them out. Then I stamped in chocolate onto some Colonial White cardstock.

Added a few layers, and viola! The original inspiration card had the tree cut off on the left side, to match the white cardstock, but I liked how it looked hanging over, so I kept it!

This card was super fun, and simple, and easy to make! Took very little time to do. At only $6.95, this is a GREAT set to have handy!

Check out some great cards made by some other fabulous ladies!


by Aaron Brown


by Karen Day


by Miriam Prantner


by Vicki Wizniuk

Aren’t these great cards? Need some more inspiration? Check out my A Tree board on Pinterest.

I hope you have a crafty day!

~ Michelle

Ariana Pop Up Card

Have you seen those cute little pop up cards? Not the ones that I showed you the other day, but this other one.

This cute little card fits into an envelope, so you can mail it to whoever you need to send a card off to!

It stands up all by itself! (well, after you pull it up, of course!)

When you take it out of the envelope, this is what it looks like. Fairly simple, but it contains the wow inside!

I used a bit of Baker’s Twine to add some extra cuteness to it!

Are you ready to learn how to do this step by step?


{If you are reading in email, you may need to click through to see the video}

Here are the paper sizes for you.
(2) 7/8 x 4 1/8
(1) 3 3/8 x 4 1/8
(1) 1 5/8 x 4 1/8
(1) 2 1/2 x 5

(If you want the white on all sides, instead of doing 4 1/8, just do 4″)

I hope you have enjoyed the tutorial! I would love to see the cards that you create with it!

~ Michelle

Ariana is here!

This week we will be focusing on the Ariana paper pack, and since it is Monday, that means that it is the day for a Layout!

Isn’t this just a gorgeous page? I have had THIS page pinned to my board for more than a year. I just loved it so much, but it sooooo isn’t my style. In fact, I almost didn’t make this layout . . but, I decided to challenge myself and just do it!

I have used a number of different products on this page. In this cluster, you can see I have used some cardstock, a few pieces that are cut from the B&T paper, some textiles, some Trinkets wooden shapes, and some retired pearls.

This flower was FUN to make!! I cut a strip from the textile, and because I can’t cut fabric straight (this is why I’m not a quilter), it was a bit lopsided. I ran a stitch through one side with a needle and thread. Then I went to fray the end a little bit, because I wanted a bit of a shabby looking flower, and found that I REALLY liked how it looked with the long strings hanging off of it. Then I tightened the fabric on the thread, and wound it in a bit of a spiral shape, so that it overlapped. {part of this is because I used black thread, and didn’t want you to see it!!} I added one of the wooden flower shapes to the middle (to hide the ‘hole’), and added a pearl on top.

I cut out a tiny rose to add a bit more detail, and added a butterfly from the trinket embellishment pack.

You can see in some of the close up shots, that the paper is torn and curled. I tore the shapes with the help of Kiwi Lanes Designs Cascade Trails Border kit. They made it REALLY easy!! After I had my shapes torn, I then wet a washcloth with some water, and dabbed the torn edges with the washcloth, and rolled them. I wasn’t particularly careful in the process, as I wanted it to look a bit worn (otherwise I would have cut the edges, right?). I kept the curls a bit tight. After they dried, they became pretty hard! (much harder than one might think they would be, anyway . . . . well, at least more than I thought!)

In the upper corner of the photo spot, I have another little flower ‘cluster’. It isn’t really a cluster, but because of the multiple layers, it gives more heft to the eye than if it were just one single flower. I cut out two flowers from one of the B&T sheets, and layered the smaller on top of the larger with some foam tape, then added a pearl to the middle. Both layers are just slightly tucked under one of the curled layers, to help with depth as well!

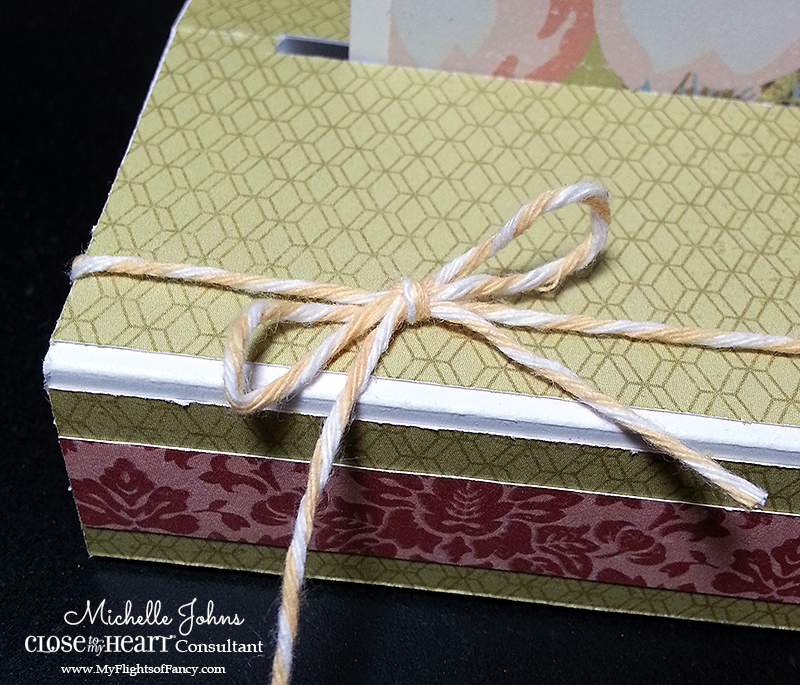
On the edges of the top and bottom piece, I wanted to give a bit more dimension, so I distressed them. There are many ways to do this, the two most common are straight to paper (i.e. ink pad directly touches the paper) and with a sponge. I usually use the sponge method, because I want light coloring on the edges of my papers. This time, however, I did straight to paper. It’s still really soft though, because I didn’t use the regular ink, but the pigment ink pads. They are a great size to be able to do this, and because of their sponginess, they keep the soft look that the sponge distressing does.

I do hope you have enjoyed my layout today! I know I had fun making it!!

I hope you have a crafty day!!

~ Michelle

Items used to create this fun layout:
Paper Pack: Ariana
Cardstock: Cashmere, Sky, White Daisy
Ink: Cashmere Pigment Ink
Embellishments: Chantilly Textiles {retired}, Trinkets Wooden Shapes, Pearls {retired}
Glue: Tombow, Liquid Glass, 3-D Foam Tape
Tools: Paper Trimmer, Cascade Trails {Kiwi Lane}, Micro-Tip Scissors, Art Philsophy Cricut Cartridge

Jubilee WOTG

This paper pack has been fun to use this week! As I’ve said, it would be perfect for summer happenings, picnics, family reunions, BBQ, fairs, and so many other things! Check out the layouts that you get to make with the WOTG.


{Click here to see a larger version}


{Click here to see a larger version}

Don’t they look fun? You can get the Jubilee WOTG through July, but why not get it sooner, and have your pages all ready to add photos to!

I hope you had a Crafty Day!

~ Michelle

Birthday Presents & so much more!

I know you have seen me post about the new base and bling necklaces that we have, and I am sharing them again.

This time, however, it wasn’t me that created this fun necklace!

My youngest, Audrey, made this entire necklace. I gave her instructions every step of the way, but she did it ALL!

She’s only 11! So, I know that if she can do this, YOU can too! It really wasn’t hard at all!!

She had a birthday party to go to, that was a last minute invite. So, having made some already, I knew that this would be a perfect present! Here are the steps that she went through, to make the necklace

1. Decide if she wanted a sticker from the craft sheet, or a paper from my stash (she chose paper)
2. Pick paper in the color that she wanted (this was an old CTMH paper that was blue stripes)
3. Pick which stamps to use (she went with the E for Emily, and used one of the many retired alphabets that I have)
4. Stamp in Black Archival Ink and allow time to dry
5. Color over the blue (not the black, we found that was too hard to see at the end) with a Spica glitter pen {I wish we carried these!!}
6. Trace around the E with the gold metallic marker (to help it stand out)
7. Use a square from the sticker sheet to cut out the E in the right size
8. Glue the paper to the base of the necklace with liquid glass. Allow time to dry
9. Add liquid glass to the top of the paper (making sure to NOT drag the tip of the bottle over the paper, as that makes the marker smear)
10. Put the glass cover in the necklace and hold for a few moments.
11. (this is the only step I helped with) Use a baby wipe or wet washcloth to wipe the excess liquid glass that comes out from between the glass and the base.
12. Pick which charm to use
13. String pendant and charm onto necklace.
14. Wear! (or in this case, package to give as a gift)

See, it really is THAT simple!! Even more simple if you use one of the stickers from the 4 different sticker sheets that we carry!

Here is the present all packaged and ready to be put into the tissue paper and into the bag. (which is the same bag that she had gotten at her last birthday, from this same friend!)

Adorable, right??

Here is the pendant that I shared on Facebook on Friday. I doodled on one of the stickers, then used the same spica pen for some glitter, and put it all together. Super fast and simple! (I did the whole thing before I had to go to work that morning, so I was done in less than 30 minutes!!)

Want to get a group of girlfriends together to put together some necklaces? Contact me, and we will get it all figured out!

Have a crafty weekend!!

~ Michelle

What I love the most, a SOTM Blog Hop!

This month there are more than 50 consultants participating in the blog hop, that means that you should have PLENTY of ideas on how to use this cute stamp set! Happy Place is a set with three ‘babushka’ dolls, three sentiments, and a cute heart. Today you should have arrived from Judy’s blog. If you get lost along the way, you can find a complete list on Melinda’s blog.

For my card, I stamped the largest doll image 4 different times, cut and pieced together. I left a little overlap on most every piece, so that they are pieced together as one piece (as a doll), and then attached the doll to the car.

Her hair is colored with a chocolate watercolor pencil.

The scallops at the bottom are around one of the sentiments, and I created a mask with a scrap piece of paper, so that I could have just the scallops. Then I cut the top line off of one of the sentiments, and added three dots with our journaling pen.

Thank you for stopping by! Your next stop is Teresa’s blog.

So, Thursday, I didn’t get a chance to post my card. My day went much differently than I had expected, and I ran out of time. I did get a chance to hang out with some GREAT consultants, and learn more about some of our fantastic products. I also got to create some fantastic things, and I will be sharing those with you soon!! Below is my card featuring the February SOTM, Wild About Love.

I used the tiny heart from the set and stamped it in honey pigment ink on squares that are 1 1/4″ square. Then I rounded 2 of the corners. I inked a scrap piece of paper with the honey pigment ink, and then used the scallop edge punch to give just a bit more pop at the top of the B&T.

The squares are popped up with some 3-D foam tape, just to give it a bit more interest. I hope you have enjoyed them!

Have a crafty day!!

~ Michelle

Sweet as a cupcake!

Hot dog eating contests, livestock shows, rodeo, and of course baking contests! You will find all of these things at your local fair (I bet!). Today, we are going to be joining in on the baking contest, and I submit this card, and claim it’s as sweet as a cupcake!

Isn’t she just the most sweetest of girls? She is from the Paper Doll stamp set! Just like the paper dolls of past, she has different outfits and add ons!

Here, you can see that I have colored her in. What you can’t see, is that the cardstocks are 2 different colors! I stamped first, her upper body onto a colonial white piece of cardstock, and then her outfit {complete with cupcakes} onto a piece of white daisy cardstock. I used my Cashmere, Honey, Indian Corn Blue, Cotton Candy, and Champagne inks to color her in. I used a blending pen on most of those colors, but did use a water brush to do her skin tones. I then used the silver metallic marker to color in the tray!

I cut out her dress, and glued it directly to the colonial white cardstock, and then popped the colonial white piece. {normally it would be popped under the mat piece, but I liked this contrast just a bit better} I LOVE that her little tray is a bit longer than both of the background pieces!

I added 4 little bitty sparkles to the middle of the flowers on the blue strip, just to give it a smidge of bling.

Today I used the sketch from Clean and Simple Stamping as the start of my card.

I hope you have enjoyed this cute little card! Add the Paper Doll stamp set to your cart today!

~ Michelle

Everything used is CTMH:
Paper Pack:Jubilee
Cardstock: White Daisy, Colonial White
Stamps: Paper Doll
Inks: Cashmere, Cotton Candy, Champagne, Honey, Indian Corn Blue
Embellishments: Bitty Sparkles, Silver Metallic Marker
Glue: Tombow, 3-D Foam Tape
Tools: Paper Trimmer, Micro-Tip Scissors,  Clear Blocks

Party Dress Tutorial

It’s Tuesday! Monday is over, and we are well into the week! My retreat is less than 2 weeks away, I will be having a GREAT time with some wonderful ladies! I have a few spots still open, I would love to have you come join us!

Today I am going to show you how to fold this cute little party dress! Practical Scrappers post today is all about Gold!

Aren’t the gold dots just adorable?? They are washi!

The card itself is pretty simple, because I wanted the dress to absolutely be the focus!

This dress pops up from the card just a bit, but is still completely mail-able!

Let’s check out the tutorial, shall we?

Printer Paper size: 4 x 4 inches
B&T Paper size: 4 x 4 inches
Card base: 4 x 8 inches, scored at 4 inches

Today’s card uses all CTMH items:
Jubilee Paper Pack
Cardstock:  White Daisy
Embellishments: Gold dot Washi Tape
Glue: Tombow, Foam Tape
Tools: Paper Trimmer, Bone Folder