Welcome to the October SOTM blog hop! Today you should have arrived from Katy’s blog. If you happen to get lost along the way, you can find the entire list of hoppers on Melinda’s blog. I hope you find some great ideas!
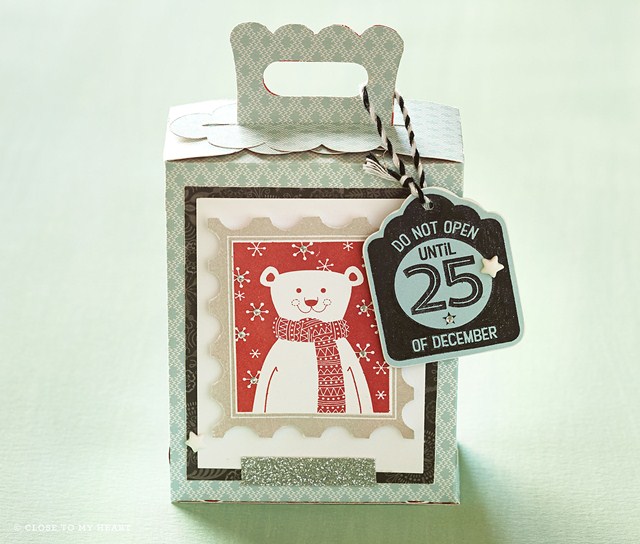
This set is super adorable, and I can easily see myself making a LOT of tags for presents with this set! Unfortunately, I wasn’t able to get to a project before this hop went live, you will will have to forgive me for not having my own artwork up here.
Both of these boxes are super cute, and go together so fast! Your gift would be ready in no time!
This set has 7 fun stamps on it, ready for the gift giving season! These stamps are only available during the month of October! You can purchase it for $17.95 or you can get it for just $5 with a $50 purchase! Make sure to get yours before they are no longer available!
Thanks for stopping by today! Next up on the hop is Maureen!
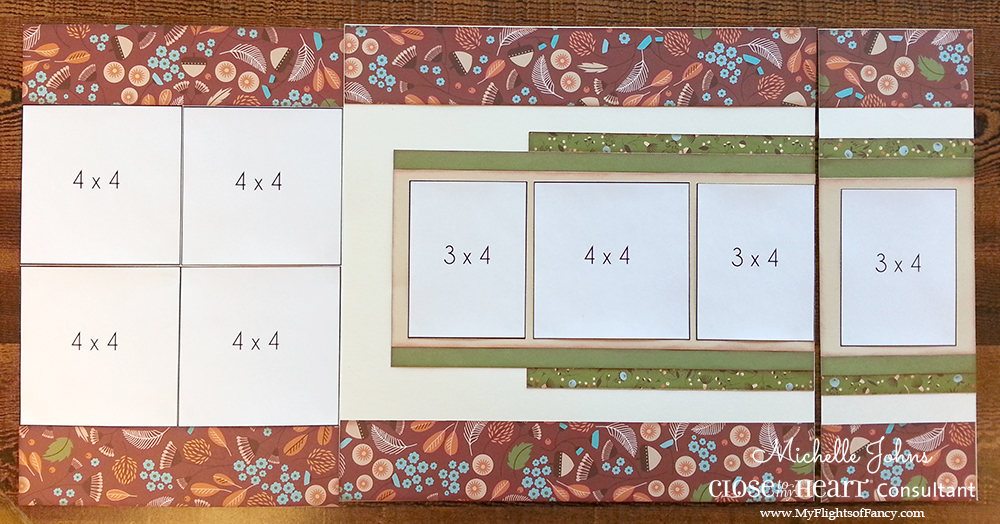
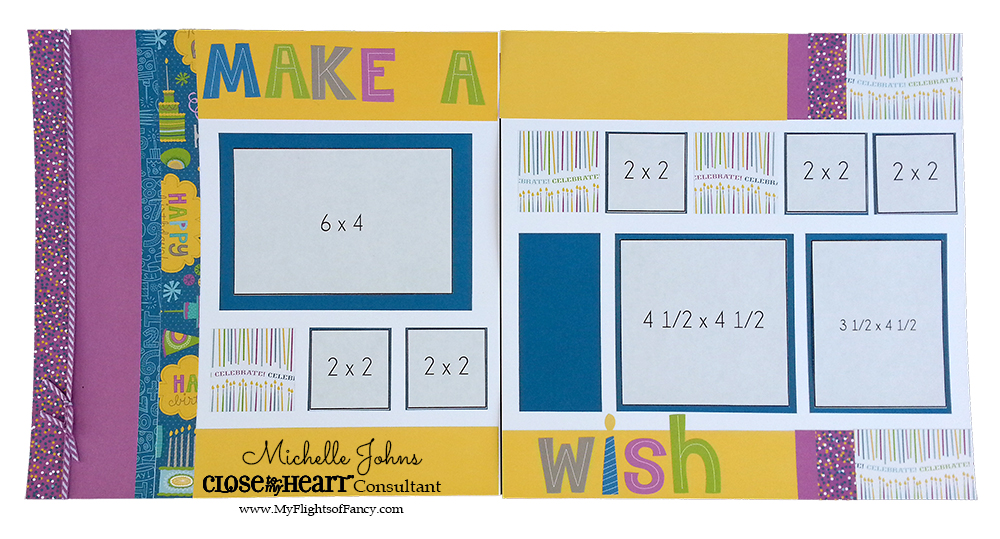
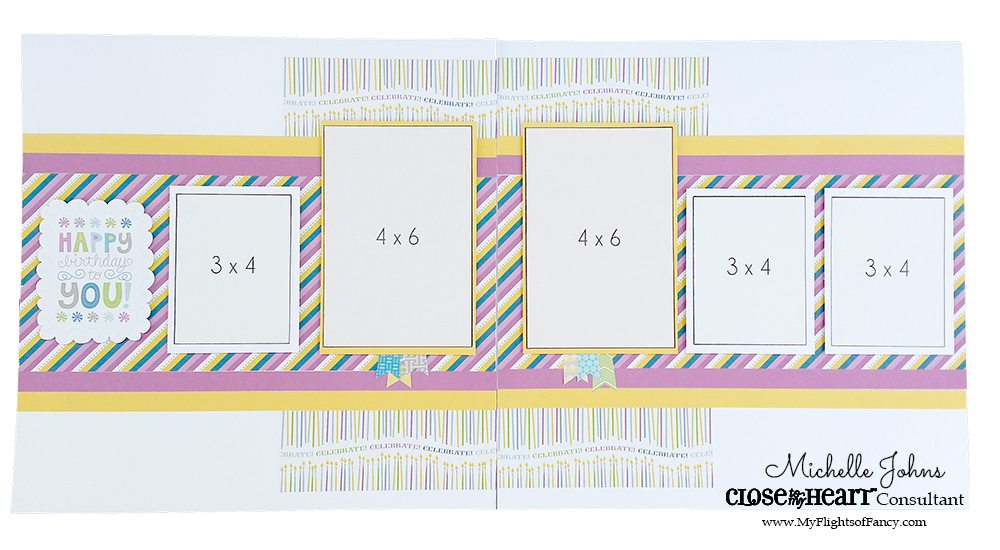
I’ve been busy, working up a storm! Today, I am sharing with you the Pathfinding workshop! It is a 5 page workshop with 45 photo spots, that you could EASILY add more to! (I’ll show you how at the end!)
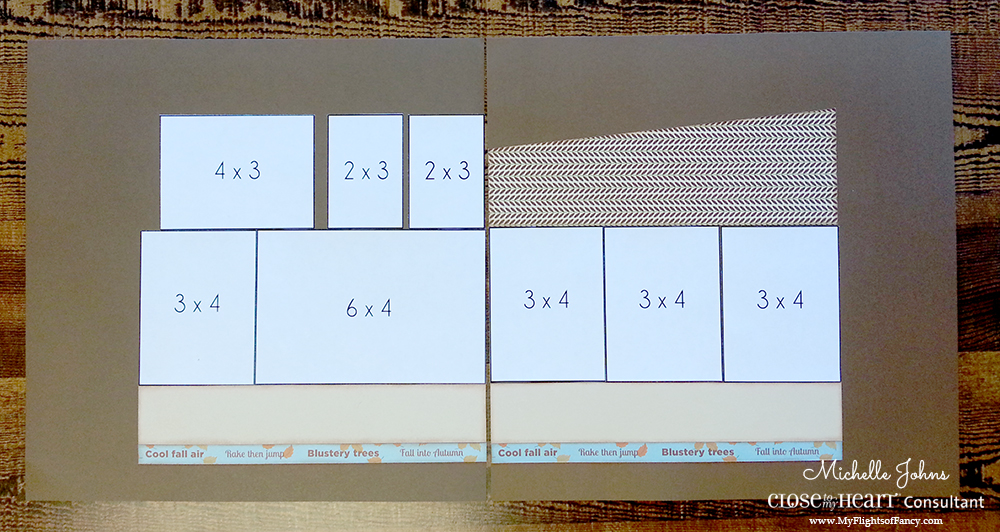
The first pages you see use our 12″ flip flaps (not shown in the photo, due to glare). It uses the 8″, 4″, and 2 of the 6″ flip flaps (1/2 of a package).
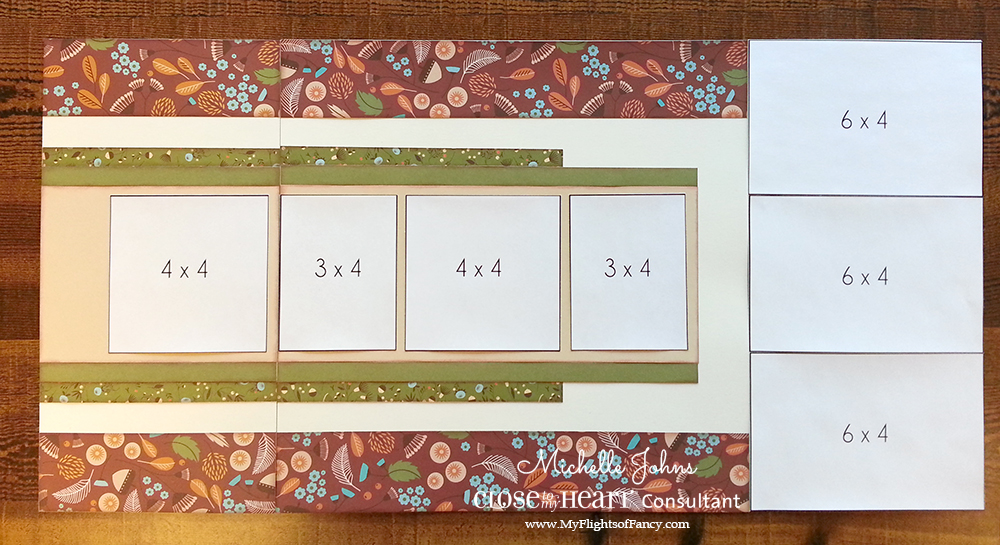
This is the left page, opened up (with the right page removed, to make more sense when photographing).
This is the right page, opened up, again, with the left page removed to make more sense when photographing.
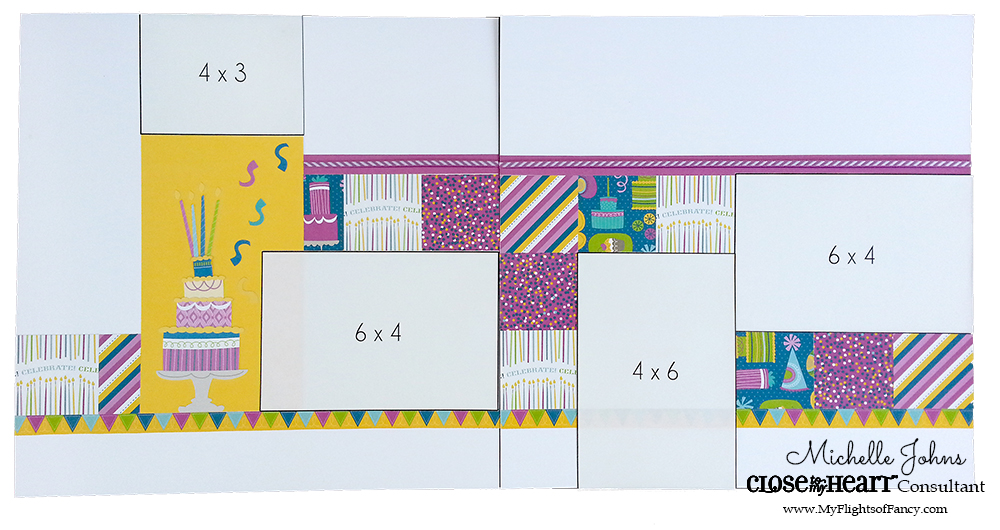
This is the inside of page one, with all flaps removed for ease of photographing.
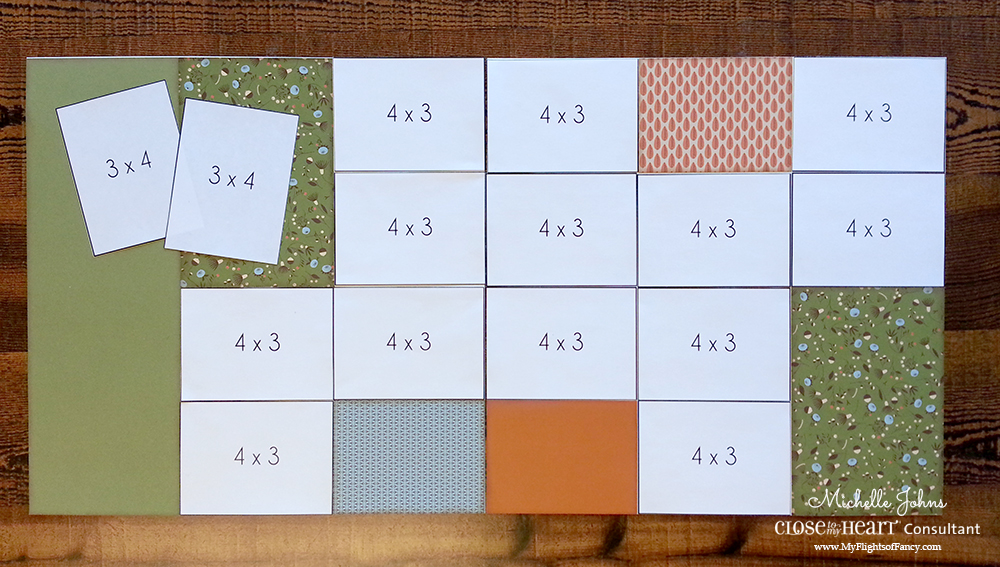
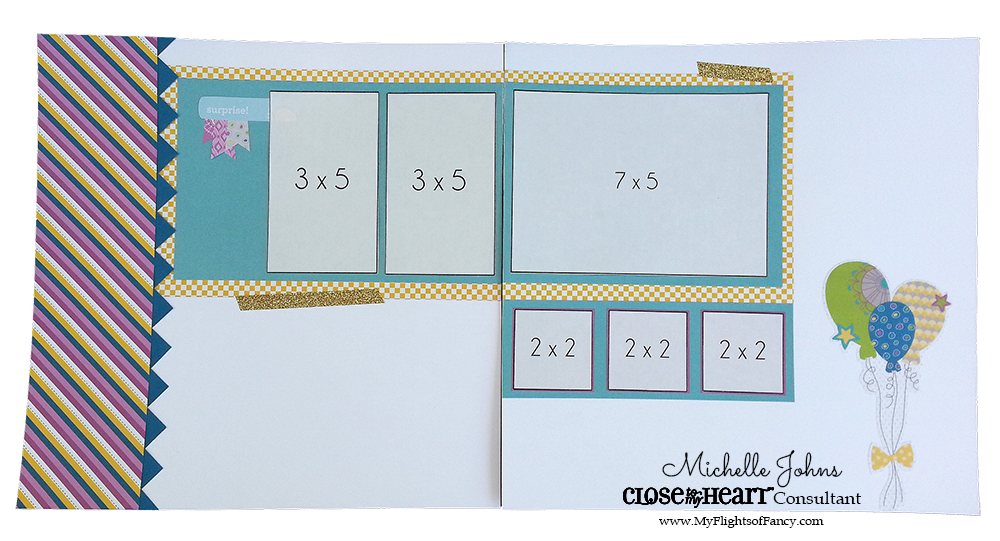
Page 2 allows for sooooo many photos! The best part? You could easily add a package of the new 3 x 4 flip flaps to this page, and you will have up to 30 more photos on these pages!!
Page 3 is a fun page! You can add the 4 x 6 flip flaps to this page, as well as the 3 x 4, and have more photos here as well!
Flip flaps are such a handy tool to always have available when you are scrapbooking! They allow you to have many more photos on your pages, that might only have a few, otherwise.
Check out this quick video that I made to show you these layouts in their flip flaps, and how they work.
Now, how do you go about getting this workshop?
There are two options for you to get these files. You can place a $25 order on my site, and I will email them right over! Or, you can purchase just the files for $15. This option is great if you are outside of the US and not able to order from my website.
Are you a consultant that would like to offer this class to your customers? Email me after you place your order, and I will also send the consultant release and information on how to best work this for your workshop!
This workshop is fast and easy to put together, and allows you to showcase so many of your photos! I don’t know about you, but when my kiddos were younger, there were many, MANY photos of them playing in the leaves, soccer games, pumpkin patch, hay rides, and Thanksgiving too.
These are the things that you will need to be able to complete your workshop:
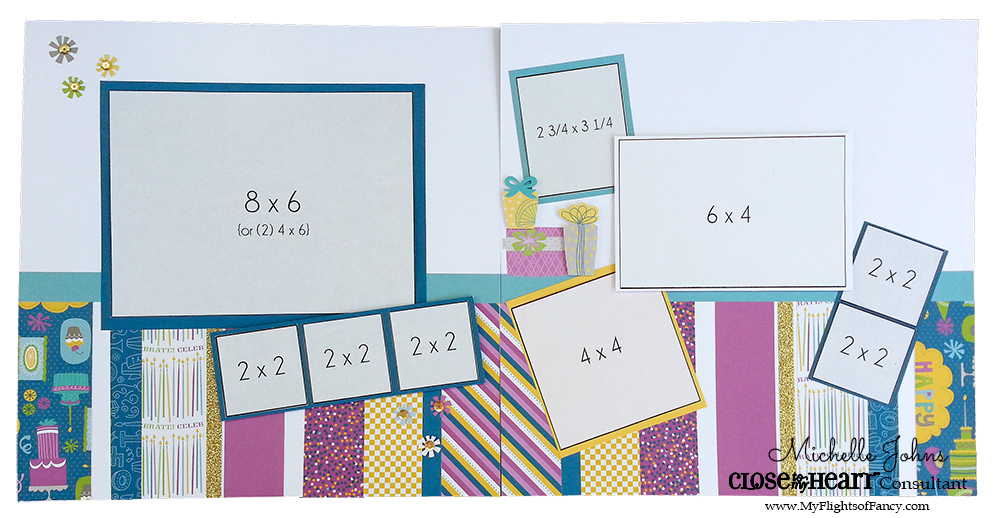
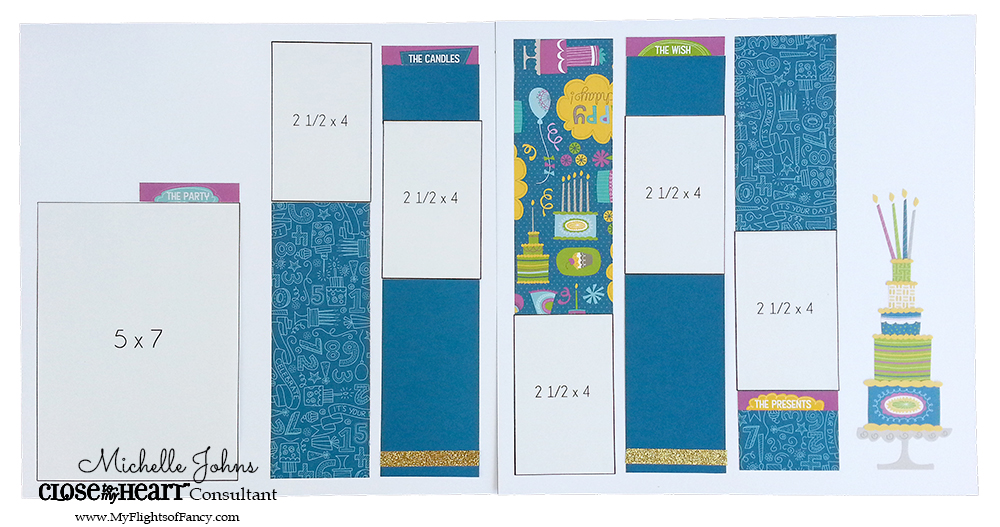
Do you have lots of birthday pictures that you need to get scrapped? Maybe you have multiple kids that you are behind with? Well, then this workshop is for you!! With this workshop, you will have 16 pages completed, ready for photos, with minimal paper used, keeping your cost down!
When you purchase the full list of items, you will have some leftovers (but not much) that you can use on other projects. The cost breakdown for each 12 x 12 page (averaged, of course) is just $3.07! You won’t be able to beat that price anywhere! And, if you break it down to what you have left, well, then the price gets even better! {but, honestly, I didn’t do that math.}
This workshop includes a welcome letter, which includes the photo sizes you will need for the workshop (including which orientation you will need them in), a piece labeling sheet, cutting guides that include first and second cuts (to help minimize mistakes), photos of the individual layouts with some close up shots, and helpful tips on how to put the pages together. It also includes tips on how to make some of the pages less ‘birthday’! There is also a list in the workshop of things that you might want to add, to put a little more oomph into the pages, including flip flaps, more embellishments, and the ever needed page protectors!
I know that this will be a great workshop for so many people! There is NO stamping and no cricut cuts needed for this workshop, as I know that there are people that would LOVE to have pages that they didn’t have to stamp on, and there are people that do not have a cricut, or maybe don’t have our cartridges. This workshop requires just the basic supplies to put it together.
Ready to get some more information? Head over to the Workshops page, and it will explain how to get this fantastic kit! You can get it if you are in the US or even if you aren’t!
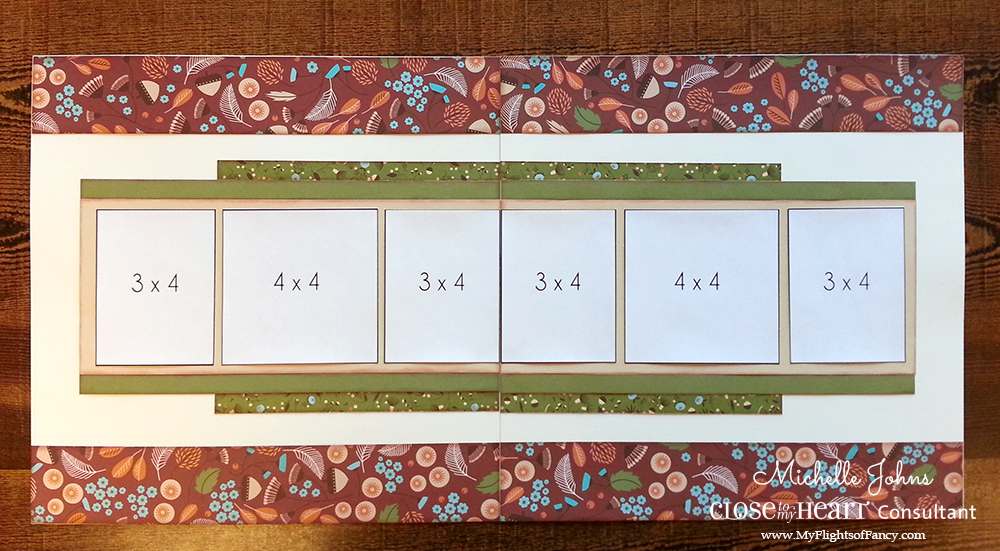
Before you leave, though, here are some closer shots of each of the pages that you will create with this workshop!
Thanks for stopping by! I hope you have enjoyed my workshop!
September is just a few hours away, that means fall is right around the corner! I am looking forward to cooler days, sweatshirts, hot cocoa, and watching my son play football as a Freshman at Skyview!
This month we have more than 80 consultants showing you some fabulous ways to use this fun stamp set! I’ve seen some GREAT ideas already, and I can’t wait to get through the hop myself! Today you should have arrived from Alyson’s blog. When you are done, you will visit Maria’s blog. If you happen to get lost along the way, Melinda has the full list on her blog, and you can find that here.
Let’s take a look at some stuff now, what do you say?
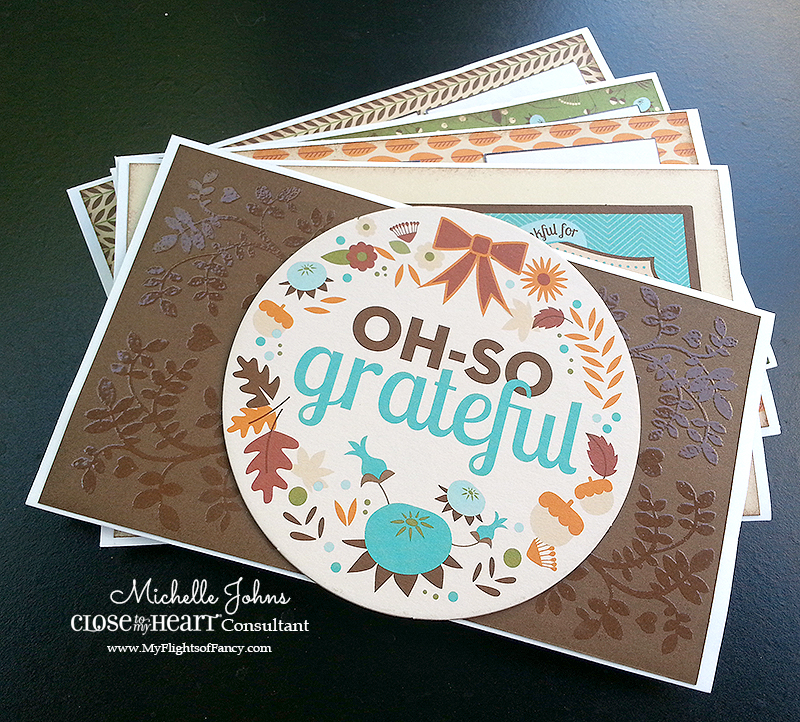
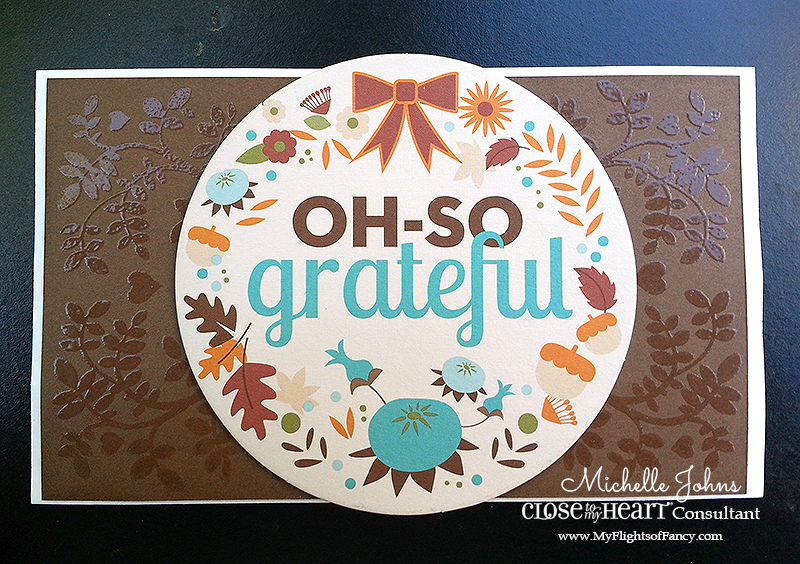
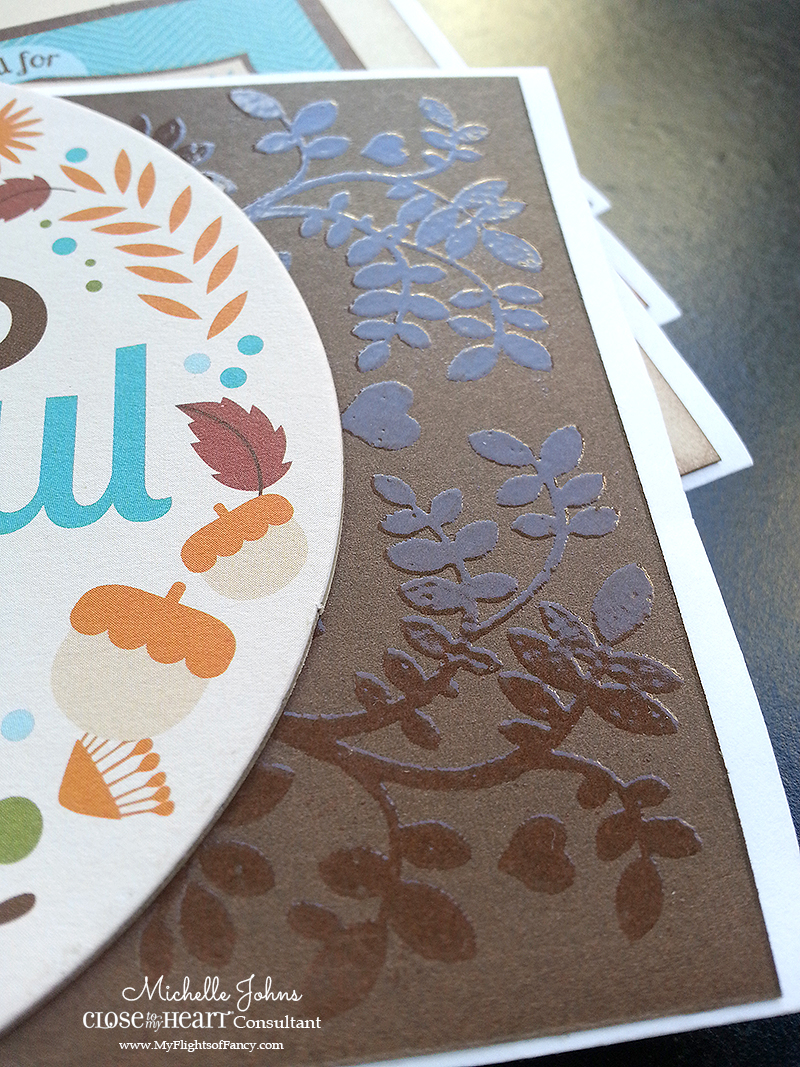
I had seen someone use a different stamp set behind their focal image, and it was similar in style, and I thought that was a super cute idea! When I pulled out my Pathfinding paper and Pathfinding complements, I saw this GREAT circle sentiment, and thought that it would be perfect! I decided to go with a mini album!
I stamped the top of the tree in versamark on my chocolate cardstock, and then embossed it with some clear detail embossing powder. Then I did the other side. (truth be told, I ended up doing it three times, because I didn’t leave enough space for my circle to have the embossed leaves hang out around it, so you can’t see the 2nd stamping, but I can admit my mistakes!)
Now, I know that it doesn’t look like a mini, yet. . . In the process of organizing my supplies, and school starting (this coming week) I cannot find a single pair of my 500 billion hole punches, nor my torture tool (what my kids call my crop o dile!). *sigh*
So, for more detailed photos, come back later this week! In the mean time, hop on through the list to see more fabulous artwork with this great stamp set! As a quick reminder, you will visit Maria’s blog next!
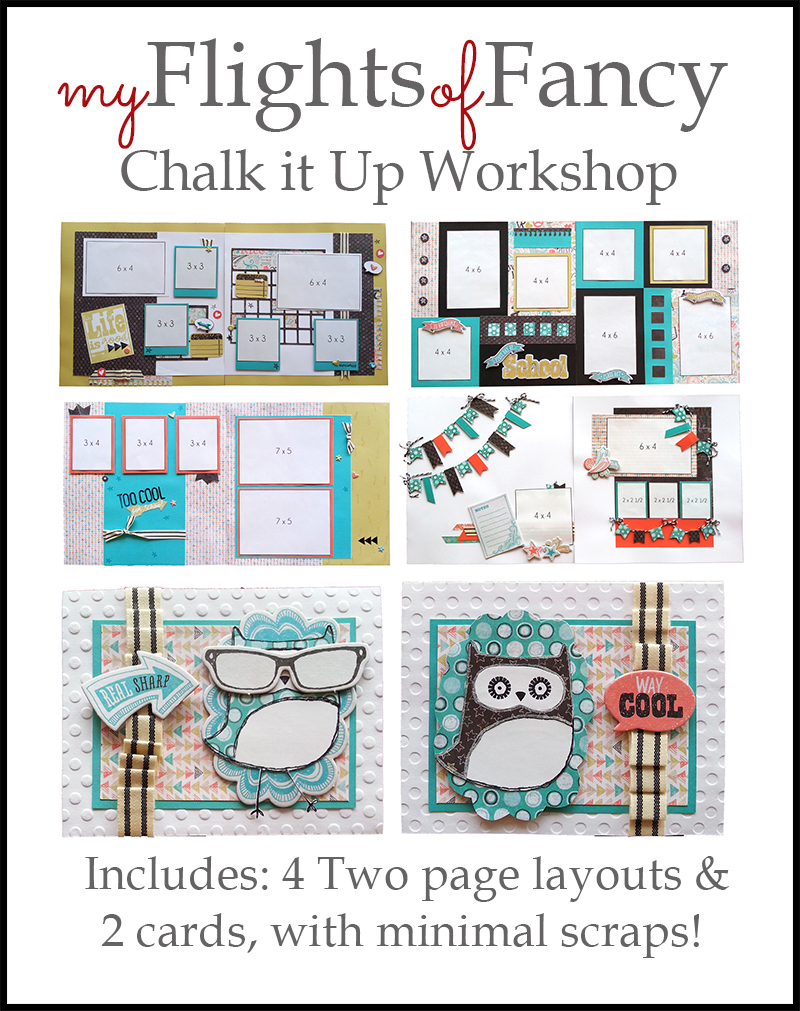
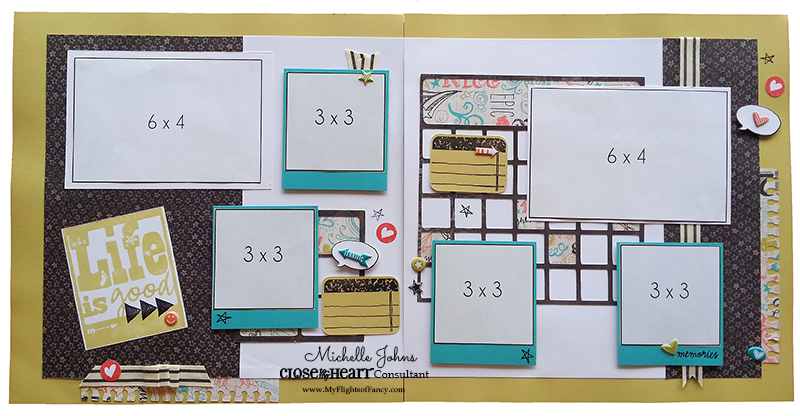
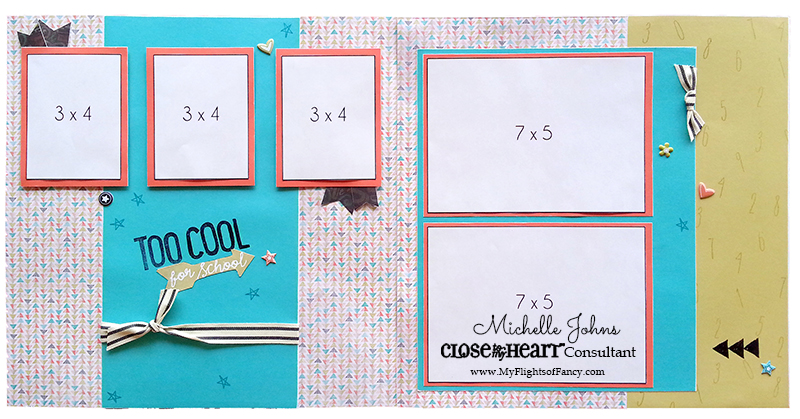
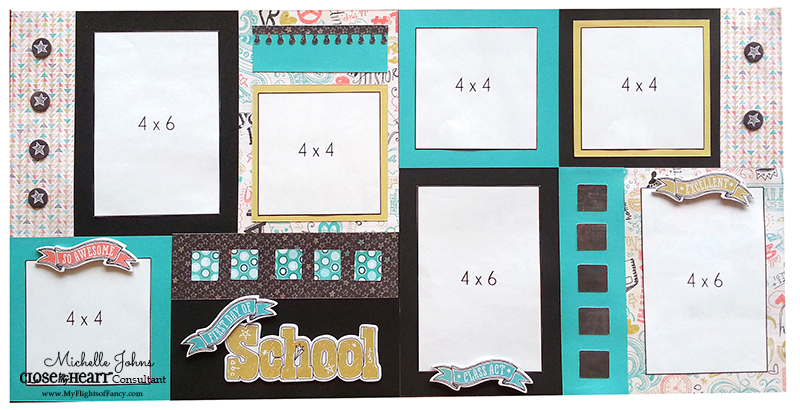
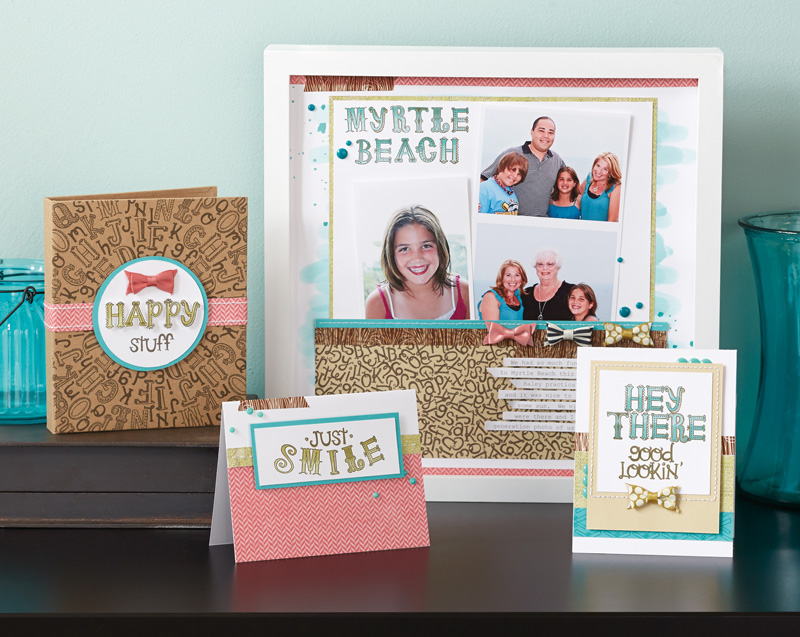
Chalk it Up is one of the new paper packs available in the Brand New Annual Inspirations book! It is a super fun paper pack, perfect for back to school photos!
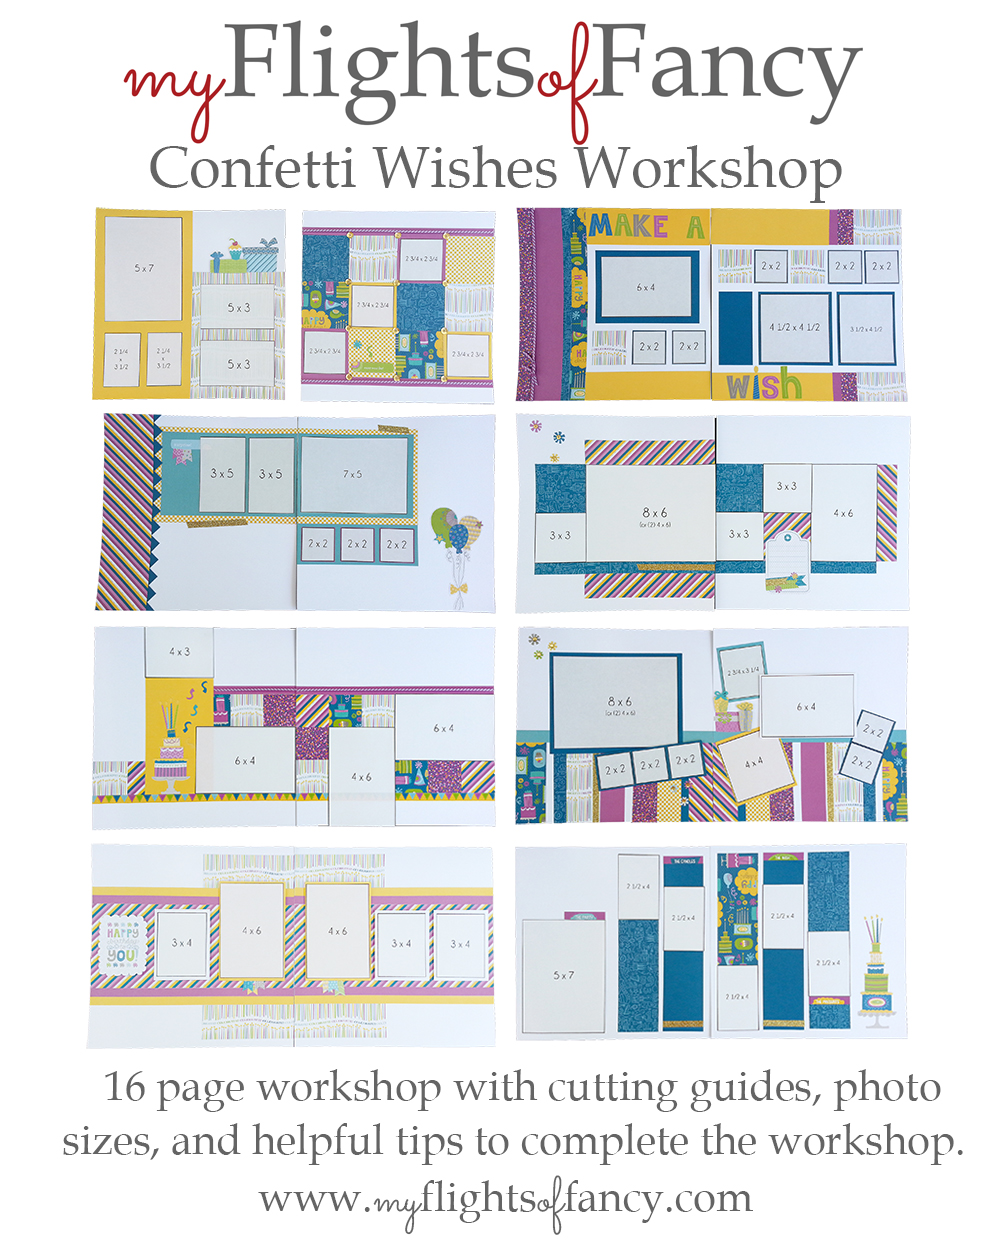
I’ve created a new kit that is available, complete with photos, cutting guides, and instructions on how to put together the pages!
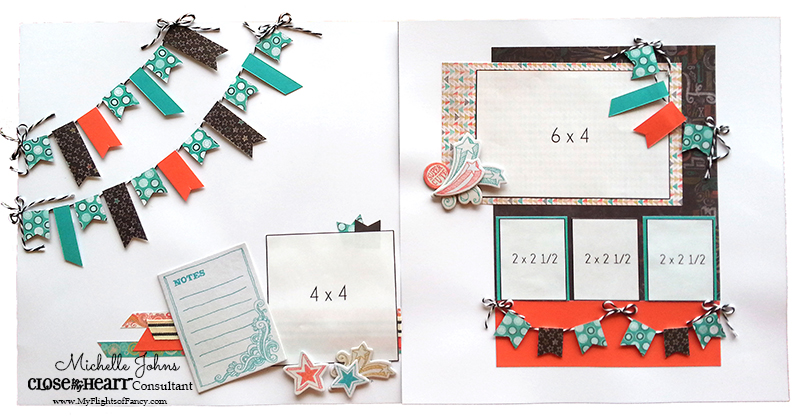
The first two pages are using the WOTG kit, with some slight adjustments, and then you get another 2 layouts and two cards! You will even have some scraps left over! (but not much!!)
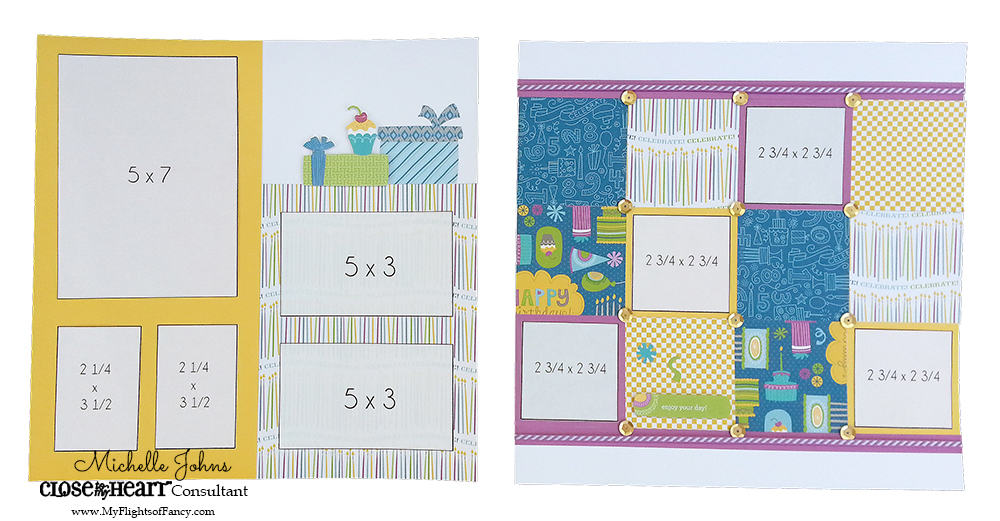
Check out these pages!
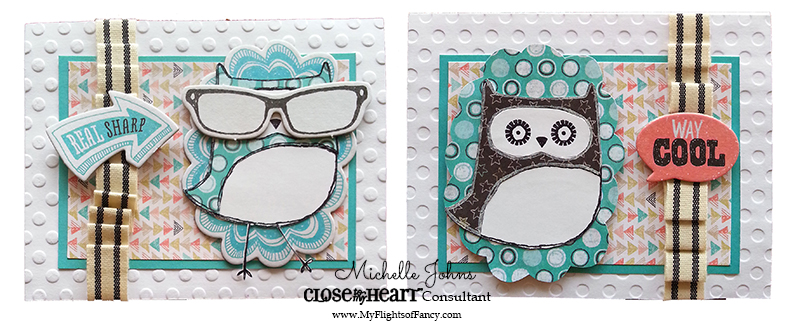
These are the fun cards that I made with the pack and the August Stamp of the Month! (it’s only available in August, so make sure you get yours before it is too late!)
I’m sure you are wanting to know how to get your kit, right?
There are two ways to get this workshop file. Place an order on my website, of $20 and I will send you the files free! Or, purchase the cutting guides with the Paypal button below, for just $10. This is a great option if you are outside of the US and not able to order from my website.
Here are the items that you will need to complete your workshop:
Once I receive the confirmation email from Close to my Heart, that states you have ordered, I will email the file to you!
If you are a consultant, and would like to teach this class to your customers, please contact me after you order, and I will also include the consultant release.
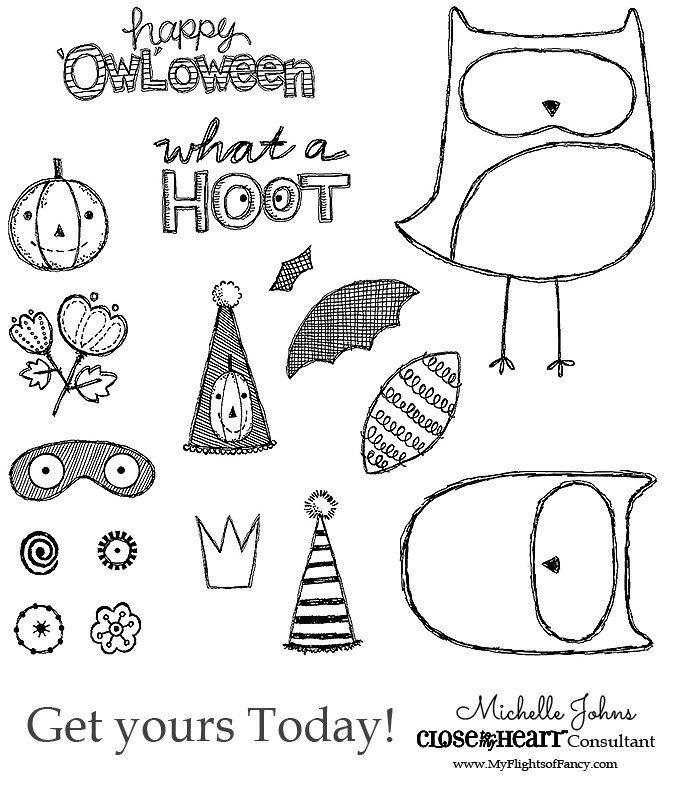
Welcome to the August SOTM blog hop! We have more than 60 consultants participating this month, and there will be a TON of ‘owl’dorable artwork!
Today you should have arrived here from Sarita’s blog. If you happen to get lost along the way, Melinda has the entire hop listed on her blog, and you can find that {here}. Let’s get onto some fun artwork, now, shall we?
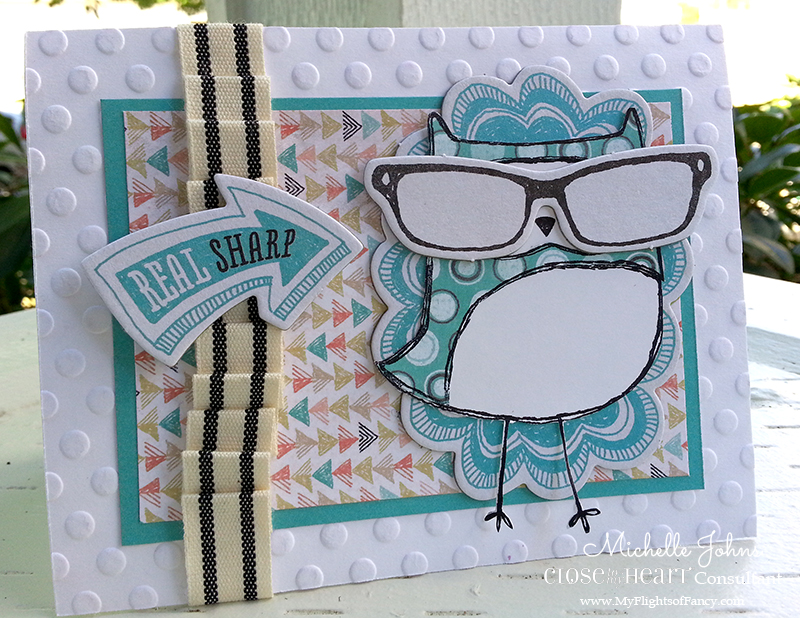
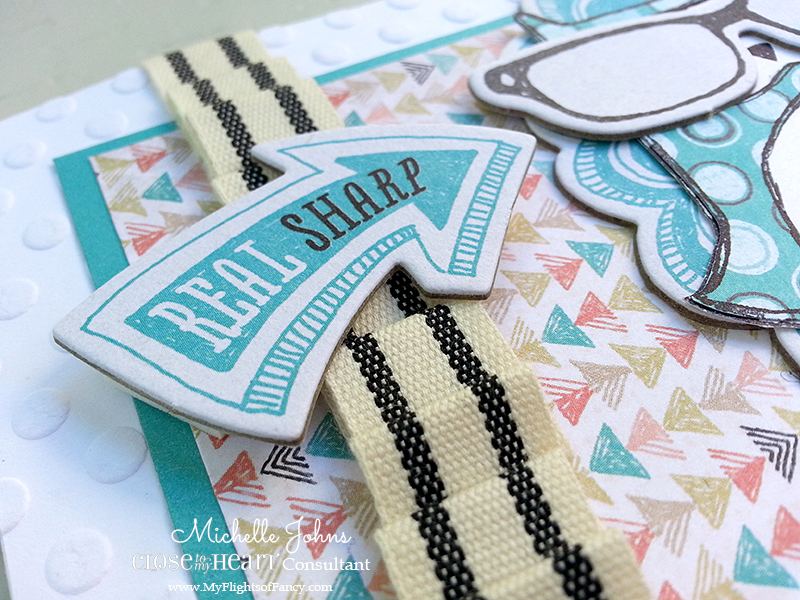
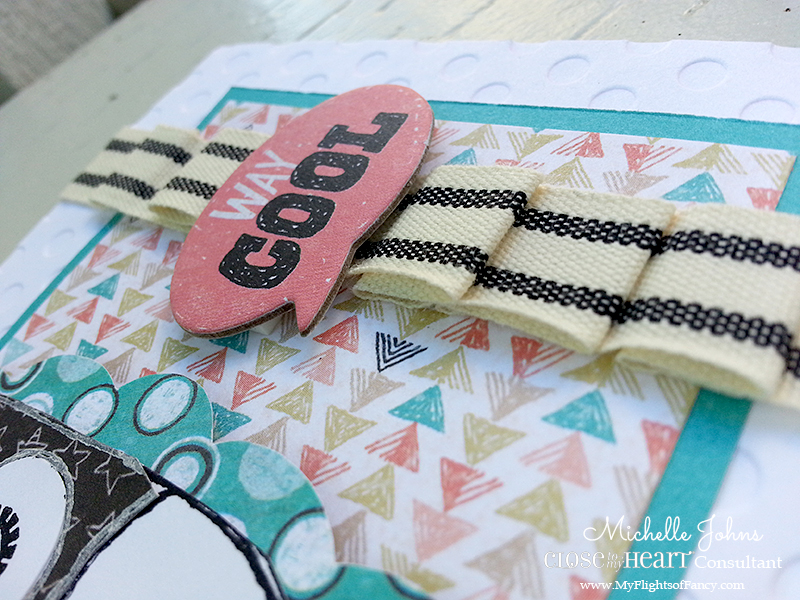
Now, I know you are thinking . . . whaaaat? That doesn’t have the super cute owl on it! And you are right! But, this is how my card looked half way through. I wanted to show you, that it was super cute just like it is . . . before I finished it!
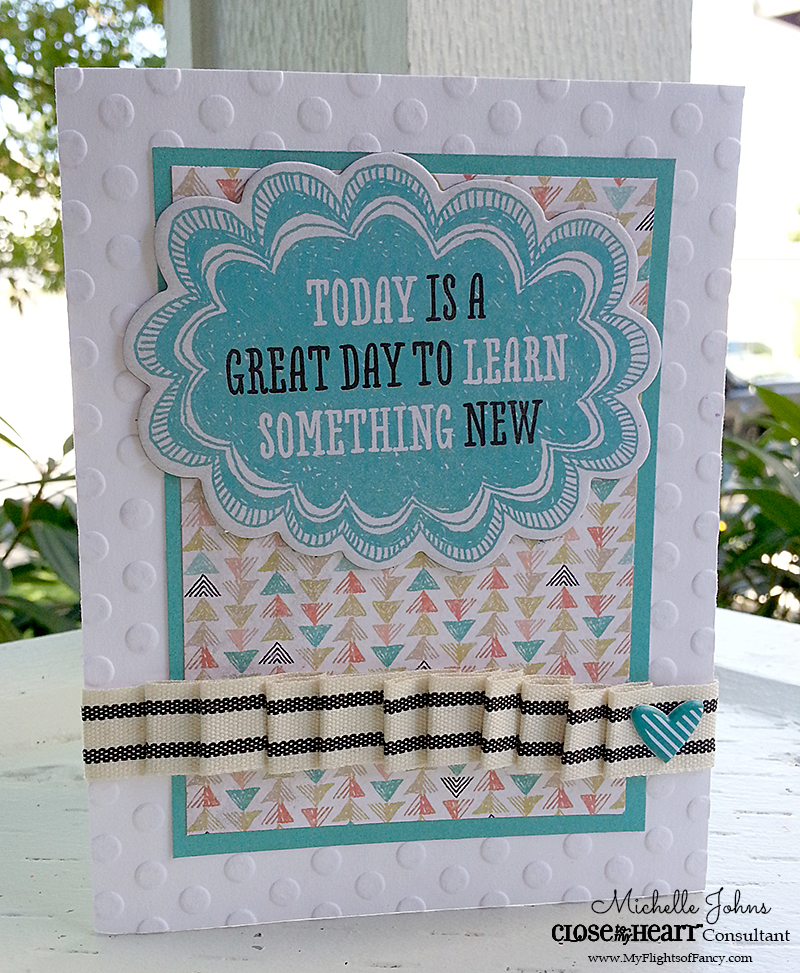
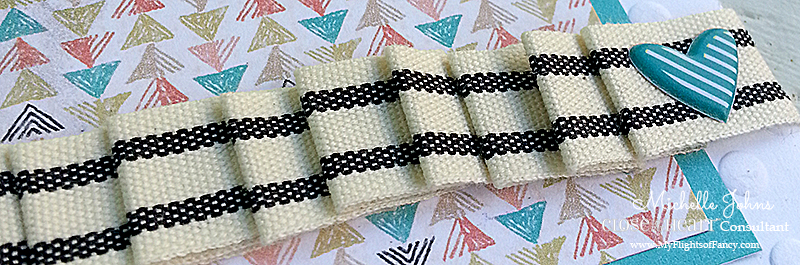
I am using a new paper pack called Chalk it Up . . it’s super fun! The scalloped bubble is one of the dimensional elements that go with that paper pack. The ribbon and the tiny lagoon heart come in the WOTG pack!
Isn’t that great? You will also see that I have used one of the CTMH embossing folders! They are FANTASTIC! And at 5×7, they are perfect for lining up the pieces and not having to worry about missing any parts on a card front!
So, THIS is what the card turned into! I rotated it, well, un-rotated it, as this is how it started! Added the owl that I hand cut, and another 2 dimensional elements from that same pack! He is very hipster nerdy, and it totally fits with the area that I live in!
Pleating the ribbon is SUPER easy with glue dots! Comes together in no time at all!
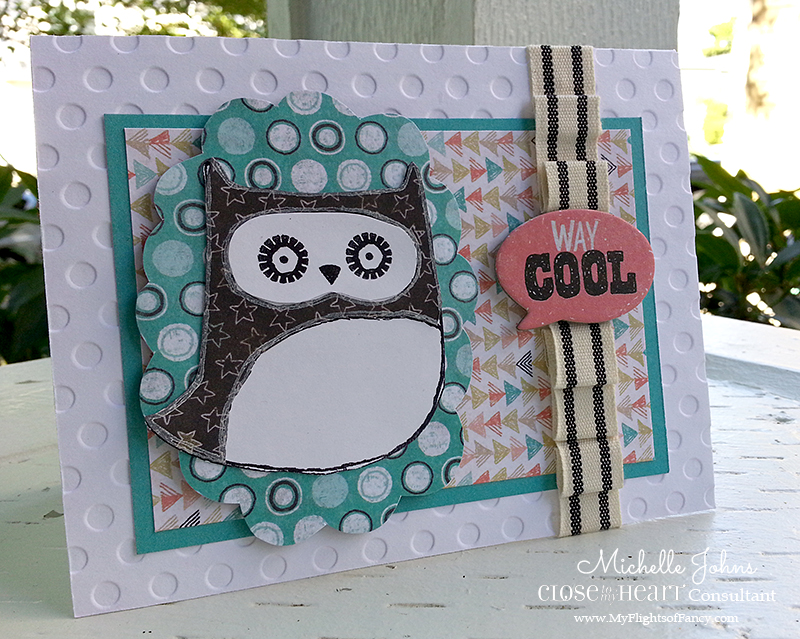
And, since I was going to make 2 cards, I wanted to show you that you could do a very similar card, even though there is only one of the scalloped oval in the dimensional elements!
For this guy, I traced the scalloped oval before I glued it to the other card, and cut it out. Added some foam tape to give it some dimension, and it looks great!
I pleated the ribbon a bit differently on this one, to give some room in the middle for the little word bubble!
While the What a Hoot SOTM was designed for a Halloween type use, you can TOTALLY use it for other things! I can see TMNT . . . errr TMNO? . . . party owls for birthday cards, retirements, or just because! So many different options . . don’t limit yourself to JUST Halloween! I hope I have shown that you can easily use this set for so many things! I hope you enjoy it!
As always, the SOTM is just $5 with any qualifying purchase, or you can purchase it for $17.95. They are totally ‘owl’dorable! I bet you want one to come live at your house too, don’t you?!
I hope you have enjoyed my cards! I would LOVE it if you left a comment before you hop off to Teresa’s blog!
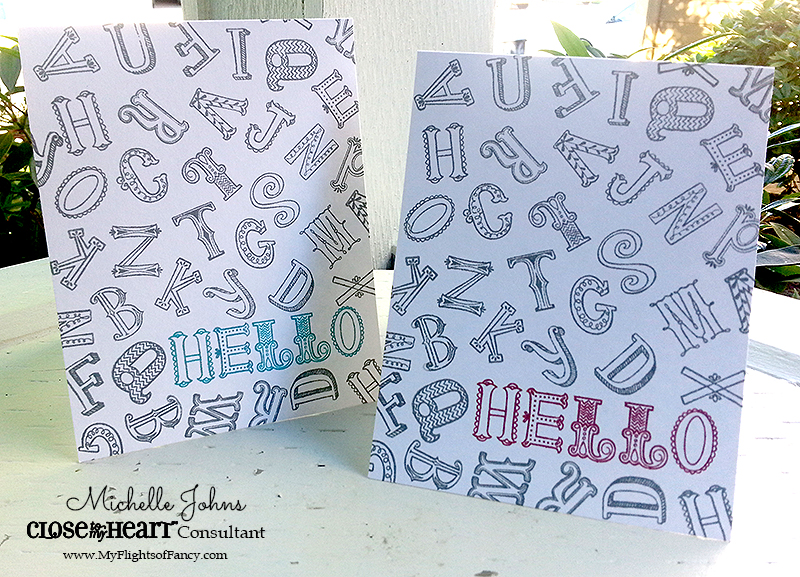
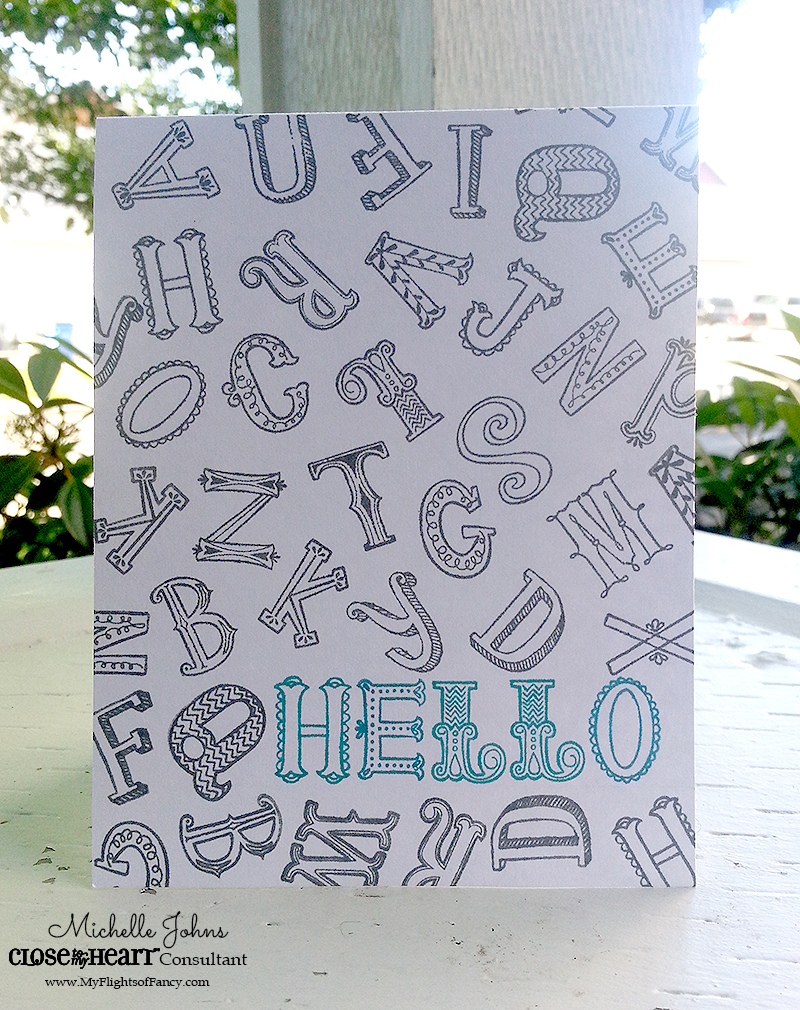
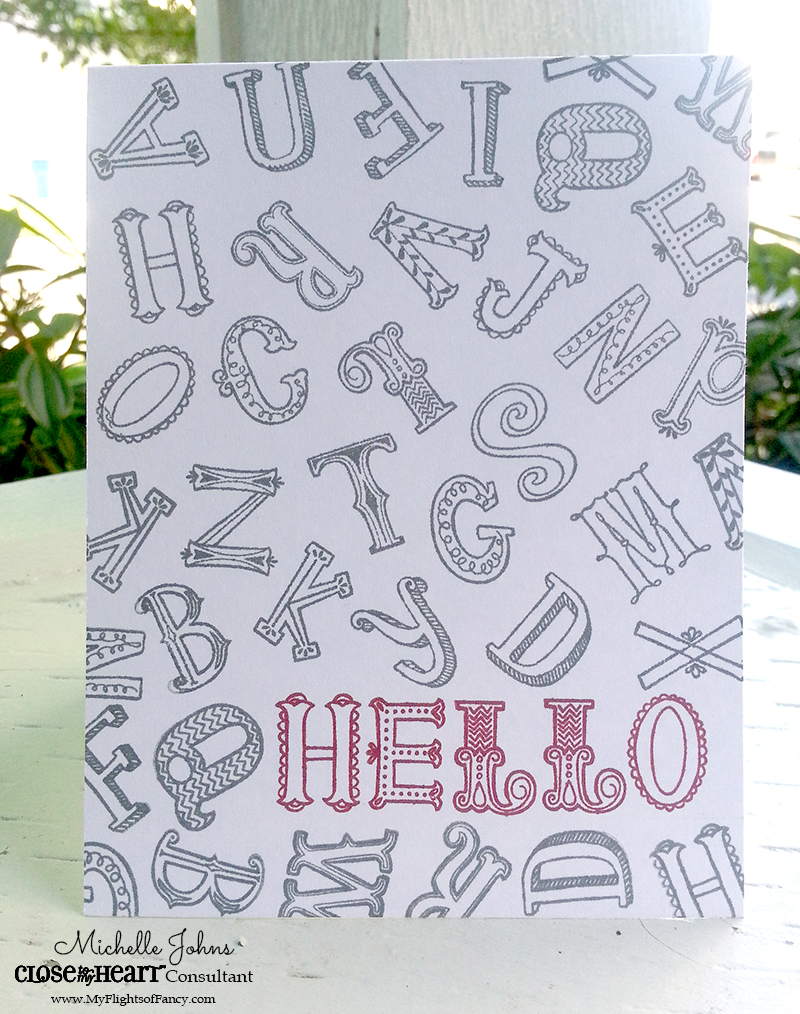
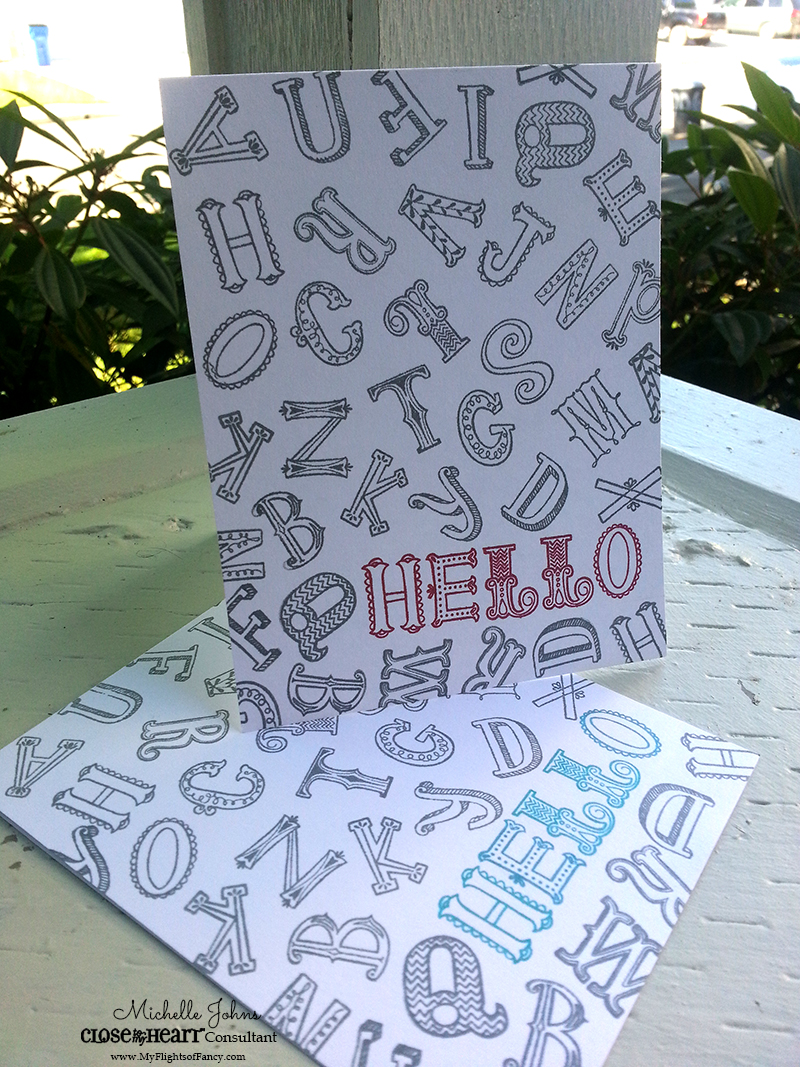
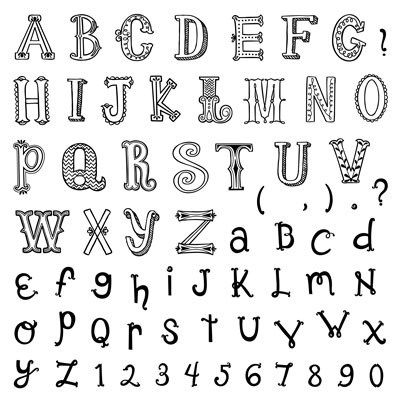
Well, at least the circus alphabet, This month’s Stamp of the Month!! It has two styles of every letter in the alphabet, plus numbers and punctuation! There are so very many different things that you can do with this set!! Today you will see many consultant’s ideas of what to do with this fun set! Today you should have arrived from Krista’s Blog. If you get lost along the way, Melinda has the full list, HERE.
I do so love CTMH’s artwork that they have in the Idea Book for this stamp set!! Check it out!
Isn’t that adorable? I love the background stamping! So, I ran with that idea, and this idea that I found, and this is what I came up with!
This card was so easy, that I decided I needed to make two! This would be a simple card to be able to do multiples of!
This one uses Slate and Lagoon Inks.
This one uses Slate and Ruby Inks.
Pretty awesome, right?? This is super easy to do, and the set is so worth it! It can be yours for just $5 when you place a qualifying order of $50. Contact me today to get your order in!
Thanks for stopping by!! The next stop in the hop is over at Jean’s Blog! Have a super fantastic day!
Happy June! Are you ready for some fun? This month, the Stamp of the Month blog hop has more than 50 participants! I know you will get some great ideas, and be inspired to have a party! This stamp set is perfect to get ready for the 1st (if you are in the North) or the 4th of July! Today, you should have arrived from Krista’s blog. If you happen to get lost along the way, Melinda has the whole hop listed on her blog, here.
Let’s get hopping, shall we?
Kami’s graduation is coming up, and she wanted some homemade announcements and party invites. So, this is a combo of a few that I found on pinterest, matched with this month’s SOTM!
The front cover doesn’t fully reach the far right side, to give the small panel that you see the 2014 on.
I got out my trusty Art Philsophy cartridge, and cut out the numbers, the white circle, the spikey circle, and the scalloped piece on the side. The banner itself was fussy cut by hand with some micro tip scissors.
The circle and the banner are both popped up with a bit of foam tape, to give it some dimension. The ‘waves’ of the banner are actually glued to the silver spikey circle, to help give it a curved appearance.
The spikey circle and the scallop trim on the edge were both colored with our silver metallic pen!
So, if you are family or friends, you very well may receive something that looks just like this, or very similar, in your mail boxes soon!!
This set has so many different options on it! I am certain that you will find LOTS of inspiration along the hop!
Thanks for stopping by! I hope you enjoyed it! Your next stop in the hop, is Nancy’s blog.
It’s been a whirlwind week! On Wednesday I agreed to be the vendor for CTMH at the Puyallup Heirloom Stamp Show, THIS weekend! Yup, that means that I had 2 days (and a smidge) to get ready!! I’ve been a busy lady, with some help from great friends!
Saturday, the show went great! Many fabulous ladies commented on my Party Dress Cards, so I thought I would make it easier to find for everyone!
So, welcome to all the fabulous ladies from the Heirloom Stamp Show, and the guys too!! I would love it if you subscribed to my blog!
Remember this card?
Or even this one?
They aren’t terribly hard to make, and I made a video tutorial for you, so you can make some too! Just hop on over to the post that has the info!
Welome to the SOTM blog hop! You will find more than 50 consultants participating this month! You should have arrived from Kathleen’s blog. If you get lost along the way, Melinda has a full list of blogs on her blog.
This month’s stamp set has 5 different stamps, that have so many possibilities! I found a fun little packet type giftable, and wanted to make it more!!
Isn’t this fun? I think it would be a perfect little gift for teachers! (and will probably use it for JUST that! The student teacher in Audrey’s classroom will be leaving at the end of the week, and I think this might just fit the bill for an appreciation gift!)
As you can see, it hold a via packet, but this is one of the big packets, not the little ones!
I used scraps from my Jubilee cards that I made back in March for the front pocket, just needed to cut them into banner shapes!
I stamped the image from the stamp set two times, colored with one of the blue watercolor pencils, and then cut them up! Then I layered them with some 3-D foam tape.
Remember how I said I wanted this to be ‘more’? Well, the one that I got the idea from, was just the packet. But I wanted to be able to have a card with it too, but wanted it to be all one! So, that’s just exactly what I did!
This card folds into thirds! This is the inside shot, and as you can see, the card is standing up! This is a great way to be able to display the front, and still have plenty of room on the inside for the kids to write on! I added a few more scraps from the paper on the inside, so it wasn’t just plain.
Here are two different shots of the back. The first is with the card completely closed (and leaning against something). The twine helps to keep the card closed. The right is with the card open, and you seeing a side view. No, you aren’t seeing crooked, the card really is tilted, just a bit! I cut off just the smallest wedge of a triangle from the bottom of both of the sides, so that it would sit nicely when open.
Isn’t this a fun little detail/cluster? It’s cut directly from one of the papers in the Jubilee pack! I thought it worked well, and gave just a bit more dimension to the card/packet!
I would love to hear what you think about this fun little giftable! Leave me a comment, and let me know what you think!
Next up in the blog hop is Michelle (two in a row!), and I am certain that she has something fabulous to show you! So, hop on over to her blog next!