Author Archives: Michelle

Twisted Thank you cards!

So, it’s that time of year, when the teachers need a big thank you for putting up with . . . eeeerrrr . . . teaching your kids so well over the school year! I know my kids loved their teachers, even if they were pushed hard! (Which I think is wonderful!) And, we must not forget the bus drivers! They are pretty awesome too, for dealing with all of the kids and getting them safely to and from school.

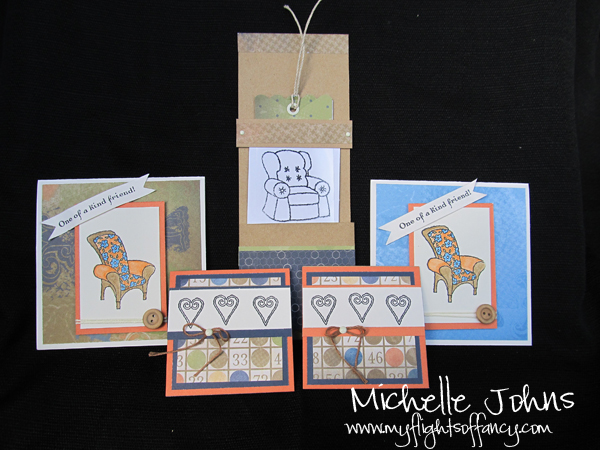
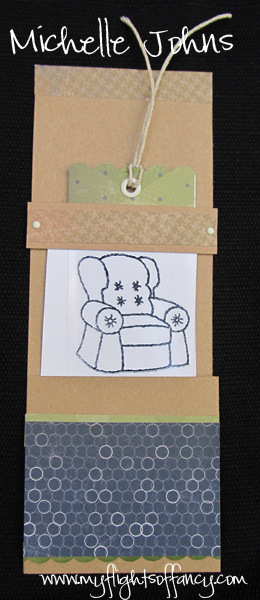
So, I started with the bus driver thank you (and they were all going to be about the same). The elementary kiddos have a male bus driver, Scott. and Scott has been great with the kids. And, like most card makers, guy cards are not the easiest for me. Luckily, I had the Fanfare kit handy, so I used papers from it!


It’s an envelope card, and these are great, because they have built in little pockets for gift cards and/or notes!


I put a little band around it, so that it would stay closed.

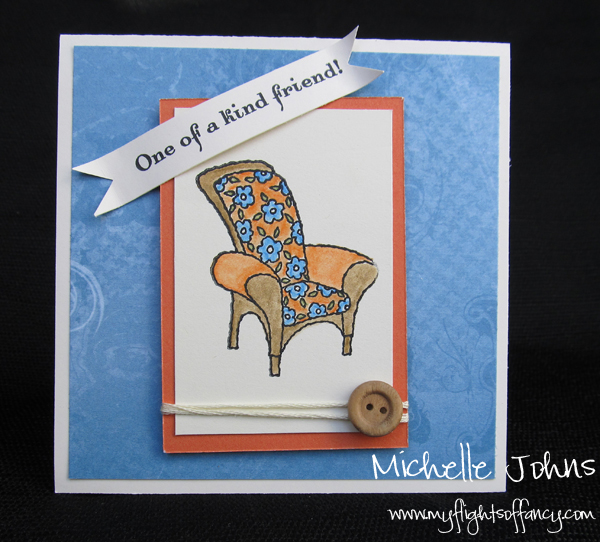
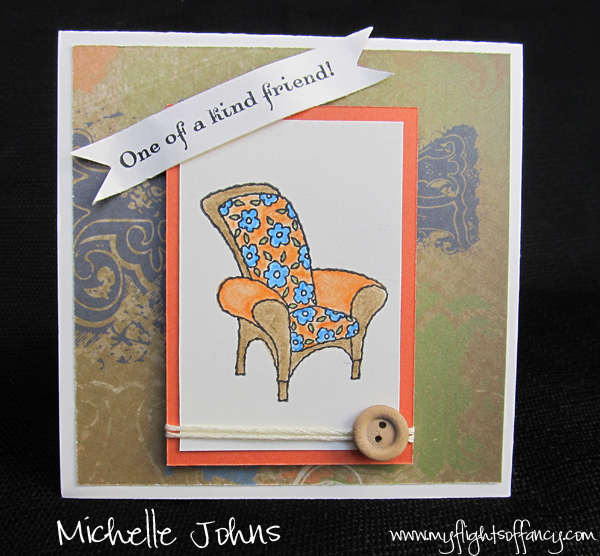
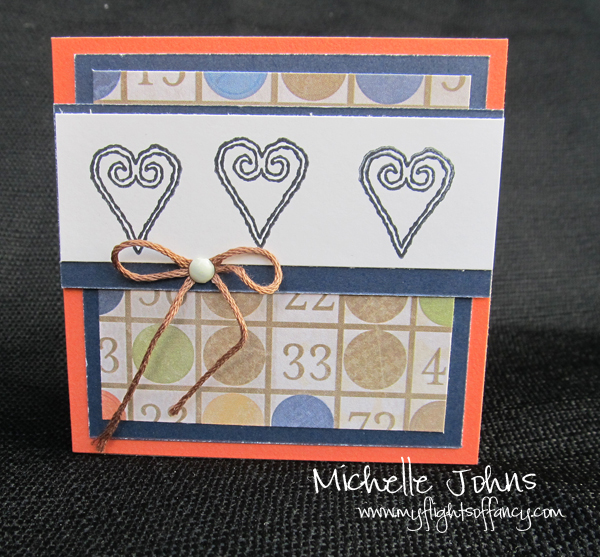
Next up was the teachers. They both had awesome teachers, one likes scrapbooking, and got a basket to go with, and the other I didn’t get to know so very well, so she got a starbucks cup, with some Fanfare paper inside to decorate it!

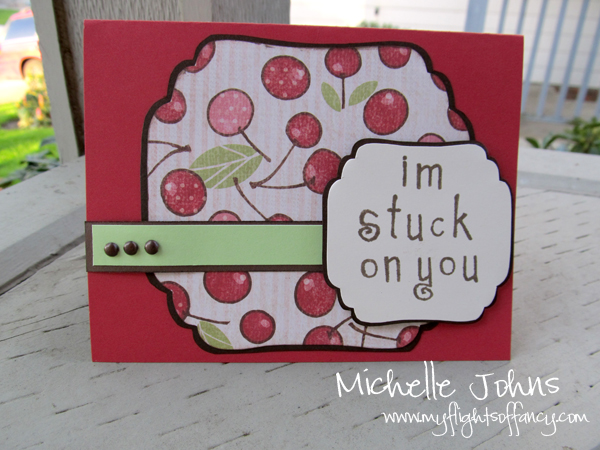
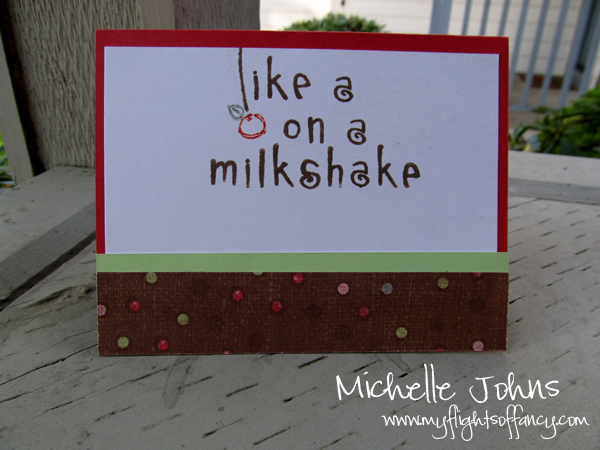
I used the Twisted Sketch for this week, and the twist was fabric!


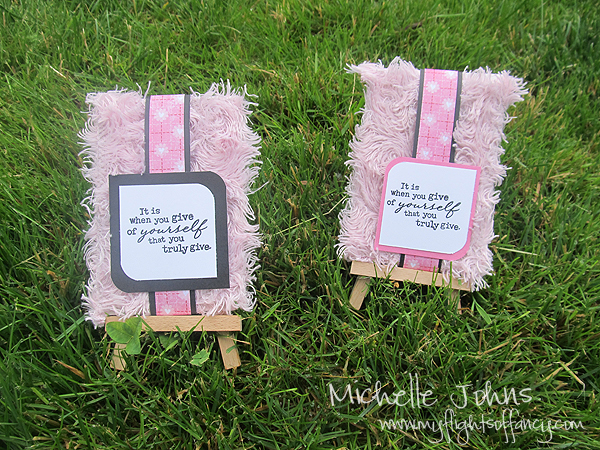
I had the perfect material!! I had a fun shirt that one of my girls had out grown, and I had kept it knowing that I wanted to do something crafty with it! 🙂 Isn’t it fun???


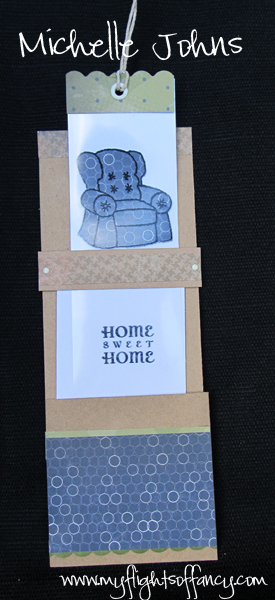
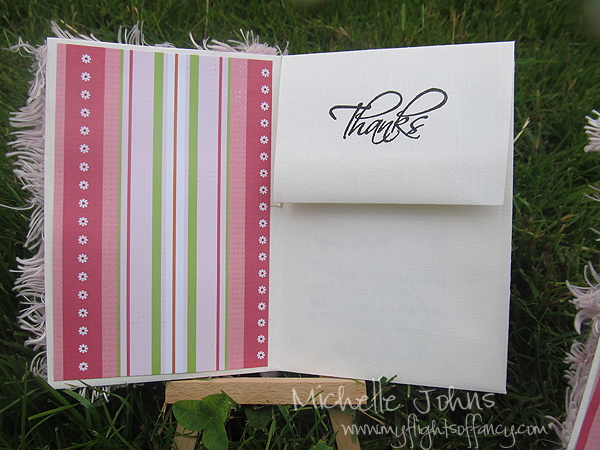
Here you can the inside of both of the cards. They were the same, for the most part. (I probably should have been a bit more creative, but I was just going with the flow!)


Here you can see a bit more, the fluffiness from the front of the card!

Come back every day this month (& next), I will have all sorts of fun projects in store for you!!

~Michelle

All materials used are CTMH, unless otherwise noted:
Fanfare WOTG for Scott’s card
For Every Occasion Stamp Set
Treasures Stamp Set
Sweetheart papers & cardstock
Tombow adhesive
Black Archival ink
Non CTMH: pink material on teacher cards

Twisted Sketches!

So, if you haven’t heard yet, I was accepted to the design team over at the Twisted Sketches blog! Anam is great! She gives you a sketch each week (both cards and layouts) and then you get a twist! Sketches are easy, but when you bring in that twist, it (can) make things harder! But so much more fun, and makes you think outside the box! {sometimes}

So, without further ado, I present for you, my card for the Twisted Sketch #63! {They go live EVERY Saturday! Come play along!}


So, I am sure you are wondering what the twist was this week, right? Well, it’s Metal! And, now I am sure you are wondering how I factored that in, since I don’t have any visable metal on my card, right? Well, when I was making the card, I went and grabbed some tin foil, and crumpled it into a loose ball, and then just stamped it into my ink pad, much like you would a stamp. Then I just random stamped all over the white cardstocks! It makes such a fun design!!

Ingredients for this card:
{all CTMH unless noted}
Cardstock: White Daisy & Kraft & Kraft Borders
Inks: Sunset & Outdoor Denim & Bamboo & Chocolate
Stamp set: C1362 You’re a Hoot
Adhesives: Tombow & Scorpal
Non CTMH: Letter Game pieces

It’s the last day!

Today is the last day to be able to get the gorgeous You & Me kit! Wonderful, thick papers, a stamp set, ribbon, pearls, and a how to guide!! Just $34.99 by itself, or just $15 with an order of $50! Special sale, place a $100 order, and I will give you the kit, free!

Stuck


So, Twistes sketches had a Design Team call, and I decided to enter this card!

Originally, I was going to use a cool hot glue technique that I found, however, when I heated up my glue gun, it’s broken! The glue is coming out from the wrong spot! LOL So, I had to do something different! I was then going to stamp ‘glue’ instead of ‘you’, and then cross out the glue and hand write you . . . but since the card is going to be going to my hubby, I didn’t think he would get it quite as much as another crafter would. . . LOL!!

Here are a couple more shots of the card!


This is the sketch that they wanted us to use! Oh, and being that it is Twisted Sketches, their twist was “Glue” (hence the twisted in their name!)

I know I had fun making this card, so hopefully you enjoy the card too!

~Michelle

Lucky Chairs to you!


So, I made some FUN cards with the Lucky paper pack and the May Stamp of the Month, Chairs!

Aren’t they cute? I have a few favorites!


These two cards are 4.25 x 4.25. I am loving the little banners that I have been seeing around, so I wanted to add it to this card! And, I must honestly say, the difference was an accident! These papers are the same, just front and back! LOL When I was adding the glue, I didn’t flip one over, so had to put it down like that! LOL!! (there are good accidents! I swear it!) The chairs are colored with CTMH’s watercolor pencils and blended with a blending pen.

This is a little 3×3 card, and they are perfect for gifts, like I have said in the past, or just to hand a little note to a friend.

And, the following is one of my new favorites! It does a magic trick! Follow the photos down, and you will see!


Isn’t that great?? I saw another card that does a very similar thing online, somewhere (forgot to save the address! grrr!). So, I had to figure out how to re-create it! LOL

I hope you enjoyed my cards!

~Michelle

It’s my Birthday sale!


So, because it’s my birthday, I have a great present for you!! I think this is a fantabulous plan, don’t you?? So, look at this!
Today you will be able to take advantage of the presents!

Here’s how it works: Call or email me between 10:00 a.m. and 9:00 p.m. and get in on these specials:

The 1st order will get a FREE Marker (your choice of color) with your order of $25 or more!
The 2nd order will get FREE Stardust Glitz Glitter with your order of $25 or more!
The 3rd order will get a FREE package of Mini Medleys with your order of $25 or more!
The 4th order will get a FREE ink pad with your order of $25 or more!
The 5th order will get aFREE Petite Perks stamp set with your order of $25 or more!
The 6th order will get a FREE marker with your order of $25 or more!
The 7th order will get a FREE ink pad with your order of $25 or more!
The 8th order will get FREE Hemp package with your order of $25 or more!
The 9th order will get a FREE Dimensional Element Monogram with your order of $25 or more!
The 10th order will get a FREE package of sparkles with your order of $25 or more!
The 11th order will get FREE Waxy Flax with your order of $25 or more!
The 12th order will get a FREE marker with your order of $25 or more!
The 13th order will get a FREE Level 1 My Reflections kit with your order of $25 or more!
The 14th order will get FREE Create a Shade Pearl Paint with your order of $25 or more!
The 15th order will get a FREE sampling of buttons with your order of $25 or more!
Then I’ll start all over with e-mailer/caller #16!

As a super special, the 21st person will get FREE SHIPPING on their order! If I get 36 orders, I will select one person to receive a D sized stamp set, of your choice, absolutely FREE! IF (I should say WHEN, though, huh?) I reach 100 orders total, I will add another drawing, for any stamp set in the idea book, that the winner will be able to choose. So, not only do you win with every order (and you can order more than one time, you have 2 chances to win more!

If you want to order online through my website for your order, make sure to click the link that will be available on the front page of my site.

If your order freebie is one that has a color option, I will contact you to find out which color you would like. As orders can come in until 9pm, there is the possibility that I will not contact you until the following day for your choice of color.

Also, you DO NOT have to live close to take part in this special! You can live anywhere, and the items will ship to you!

Want to add some more extra special-ness to my birthday month? Sign up to be a consultant with me! I LOVE what I do! I am able to create beautiful cards for people, help moms and grandmas create gorgeous scrapbook pages to log their memories. So, not only do I get to do what I am loving, I get paid to do it, AND I get to find new friends in the process! You have the option to build your own kit now (would have been nice and fun when I started!), with more add ons available too! You will get personal training from me, help from consultants world wide, ideas for artwork available from the wonderful books that we have available, as well as ideas that I can help with, and the other ‘sister consultants’ around you.

If you want to be a consultant with me, just let me know! May 1-31 CTMH is having a special that is AWESOME!! (I haven’t seen it happen in the 3 years I’ve been a consultant) For the month of May, all new consultant kits are half price!! I think that is fabulous!! Perfect reason for you to sign up with me!!

Have a wonderful day! I look forward to hearing from EACH of you today!!

~Michelle

15 day Count Down: Day 1

Well, Tomorrow is my birthday! You did hear about my special that I am having, right? Where every $25 order gets something free? It is so much fun! I put the information in my newsletter! If you didn’t get it, make sure to check out my blog tomorrow, as I will make sure to put it up there too!! You want to make sure to place your order tomorrow!!

Today’s feature is going to be . . . . . Studio J!

As many of you know, I do my digital scrapbooking in Photoshop. But not everyone has or even wants to have let alone use, photoshop! CTMH has come out with a wonderful online way to create! You can even try it without creating a username and password (but you will want to when you get done using it!

To use Studio J, go here: Michelle’s Studio J Spot

Once you enter the site (by either creating a username, logging in, or just trying it without those things), you have the option to go to your projects, start a new, or purchase projects. If you are just trying it, you won’t have any projects stored yet, nor will you have anything to purchase. So, click on Create a new project, and name it. The names must be 3 or more letters, just FYI.

Next, you can upload photos, or even skip that part to see what you can do with papers and such, and make photo decisions later. Once uploaded, you will click continue in the bottom right corner of the page.

Next you will get to pick which kit you want to use. One of the great things about Studio J? Is the retired paper packs are still available to use with Studio J! So, if you started a page with Moondoggie, and you don’t have any more of that paper left, you can use Studio J to finish your scrapbook! When you are a Studio J member, you have papers that are available to ONLY members! (they aren’t even printed papers!)

Once you have chosen your kit, you can double click it, or click it once and then click continue. Then you will get to pick your layout design. Every design you find on Studio J, is in one of Jeannette’s books (that I mentioned earlier in the countdown). And like with the papers, there are layouts that are only available to members. Once you have your layout chosen, Studio J will give paper options to you (as to how you want the papers laid out on the pages). You will have some great options to choose from! Sometimes, though, they are not exactly what you want. Just pick what is closest, because you will be able to change the papers, here in a minute.

Now that you have the layout shown to you, with paper and cardstock shown, you can finish your layout. Change papers if you want, by selecting them, then on the left clicking papers, and choosing the paper that you want. Add ribbon and buttons and stickease too! The options are endless!

The great thing about Studio J is that you can save up multiple layouts, and then have them all printed at one time! Another bonus of membership is that you get free shipping on your layouts!

It is definitely something worth checking into! I know you will love it!

~Michelle

15 day count down: Day 2

Water color pencils! They are fantastic!!


{click image to shop}

I used these water color pencils for these cards:


and these cards too!


The brightness of the color depends on a number of things. You can color just the outside, with a fairly heavy line, or you can color the whole thing, lighter, for a more soft/pastel color. You can use 2 different pens to soften the coloring. Both the Aqua pen and the blending pen work perfectly! (I used the blending pen on all of the cards you see above)


{click image to shop}


{click image to shop}

I know that you will love getting these pencils!! Let me know if you want to try them out first!

~Michelle

15 day Count down: Day 3

The versamat is a wonderous thing!


{click image to shop}

I put off getting this until semi recently. And I must say, that I should have gotten it MUCH sooner!! This is wonderful because one side is made for cutting things, and the other side is made to be able to stamp on! (that way you don’t have to wonder where your little foam piece is that comes with the stamp set!)

Although, don’t be like me and the first time you use it, not think, and cut on the stamp side! LOL!!!

~Michelle

15 Day Count Down: Day 4

My stamp organizer has been sooooo handy! (and I need to get a few more!) They hold 15 stamp sets perfectly! They have a handle on them, so that they are travel-able! I have also seen a number of consultant make them into card caddies! How great is that! Now you would be sure to not have bent corners on your cards!


{click image to shop}

If you want to make sure to have just enough tools for what you need to do while traveling, this would be perfect to carry them in! You can fit a number of stamps, plus the ink and blocks, as well as scissors, glue, and even embellishments! (I’ve done this often!!)

Definitely a must have!
~Michelle