Author Archives: Michelle

Charlotte Cards

The Charlotte paper pack and Workshop Your Way (WYW) will be retiring at the end of April. It is such a pretty combination of colors, pinks and browns and black, that it works for so many things! Today I am sharing with you the cards that are part of the WYW kit. (You have to add the card bases, but the rest of the paper is left over after you complete the three pages in the WYW kit!)

charolette

You get to make 3 each of three designs. As you can see with my cards, I changed them just just a bit, some I just flipped the paper over, some I changed the orientation of the card itself. I also swapped the stamped sentiments out, so that there were a variety of cards with the different sentiments!

It was so easy to make these cards with the instructions in the WYW kit! And the pages that they make are great too!! I haven’t snapped any photos of my pages, but take a look at the artwork that CTMH provided for us!

1601-se-charlotte-wyw-lovely-day-layout

1601-se-charlotte-wyw-celebrate-love-layout

1601-se-charlotte-wyw-home-is-layout

It is a beautiful paper packet, and the pages are beautiful as well! I would love to show you how to put them together, or just have some crafty time together!

Until tomorrow!

~Michelle

Regatta Display Frame

At the Spring Retreat at the Beach, we did three different classes, just like every year. One of the classes this year was the Regatta Hinged Display Tray. This tray is so fun to do, I’ve done a number of them (like here and here)! They are fun to make, fun to look at, and fun to give, too!

regdisp01

For this tray, we used the Regatta paper pack, Beach Days Stamp set, The My Anchor Thin Cuts, Archival Black ink, Cranberry Ink, White Daisy ink, Clear embossing powder, the Shin Han Carmine marker, and some White Daisy cardstock.

regdisp02

Instead of pulling out some red cardstock, we cut the hearts out of the white daisy cardstock, and colored them with the Carmine ShinHan marker. They turned out GREAT! Stamped the sentiment directly on the B&T paper, and cut the anchor with the thin cut. We stamped them first and then cut them, however, they can be cut first and then stamped. That is the great thing about the clear stamps!!

regdisp03

Now, on my sample, here, I used white daisy ink and clear embossing powder. However, when I had the ladies do theirs, they used white daisy ink and white embossing powder. It made it pop that much more! This stamp was also done directly on the B&T paper.

regdisp04

This last square was so much fun! As you can see with the shadows, there are a few different levels of the layers! The lighthouse was popped on some foam tape, my boat was put on a scrap of cardstock to hold it up just behind the waves. The waves were die cut and then folded, so that they would wrap into the box and sit on the outside edge of the little box they are in. There is also a small piece of sapphire cardstock on the bottom of the box, to keep with the blue for the waves.

I love how this little box turned out, and heard raves from each of the ladies, as well! Would you be interested in a box like this? Contact me and I will show you how!

Until Tomorrow!

~Michelle

Guys like cards too!

Ever need a card for a guy? You know, one without lace, and glitter, and bling? Yup, they really do make things without those things! They really do, I promise!!

Well, we have a paper pack called Urban, and it is TOTALLY made for guys!!

UGC-whole

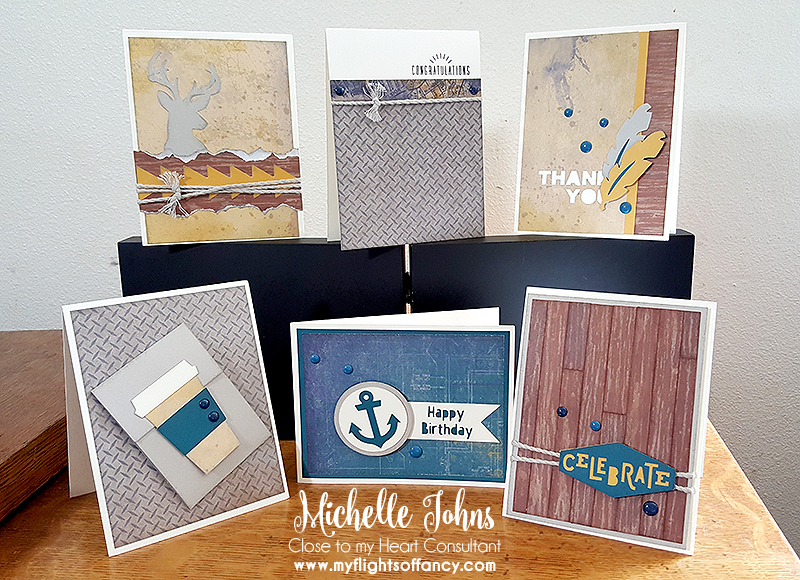
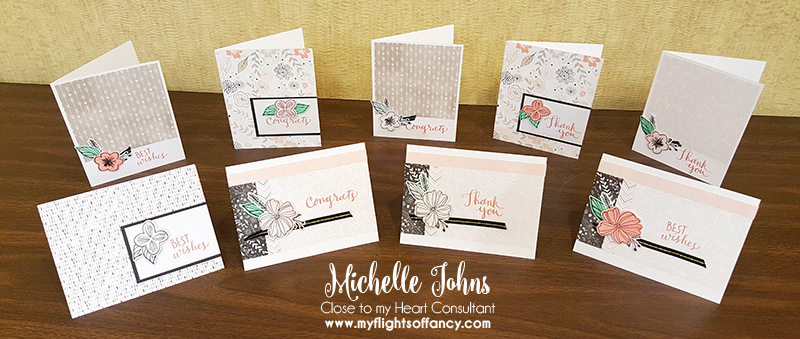
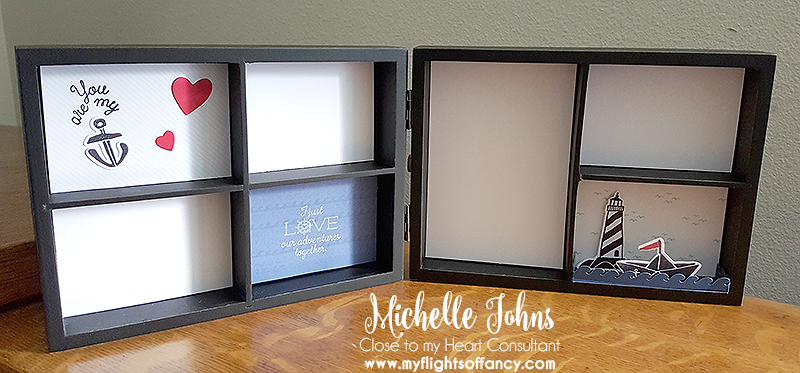
I made this fantastic card kit with the Urban pack! The workshop is available via mail, or at my in person workshop on May 20th.

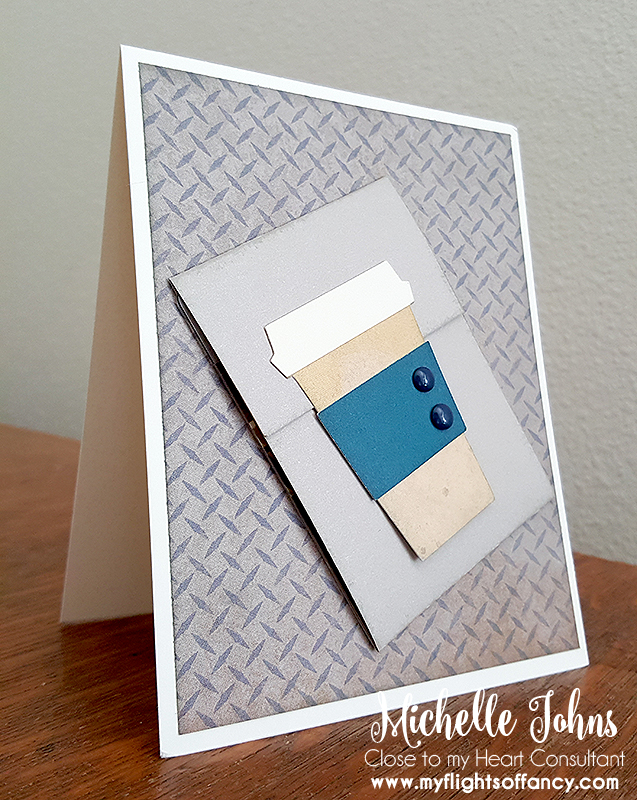
I think every card is pretty fantastic! There is only stamping on one style of card (so 2 cards, since you get two of each card design). First up is perfect for a coffee shop gift card! The cup lifts to reveal a spot for you to put the gift card into.

UGC-01

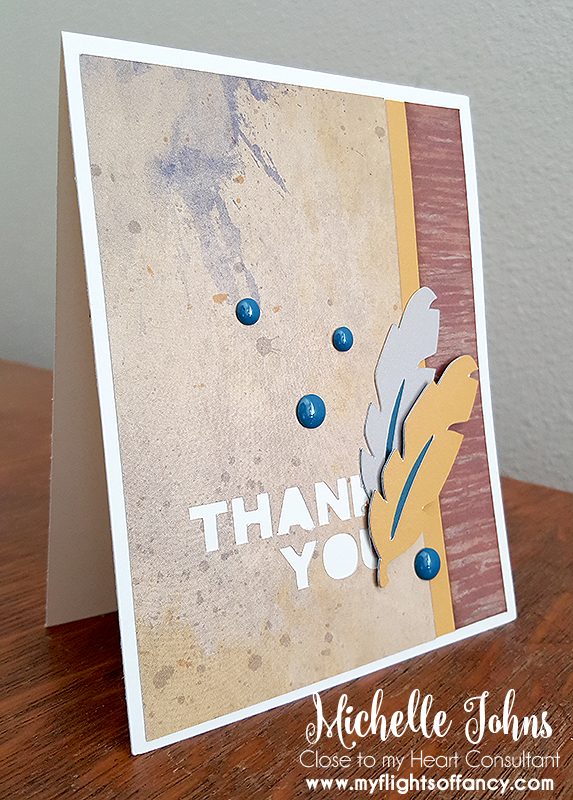
The next card, I just love the grungy background on! The little bits of splashed color, mixed with the wood grain and the enamel dots, so fun! We all have a guy that we need to thank at some point, right?

UGC-03

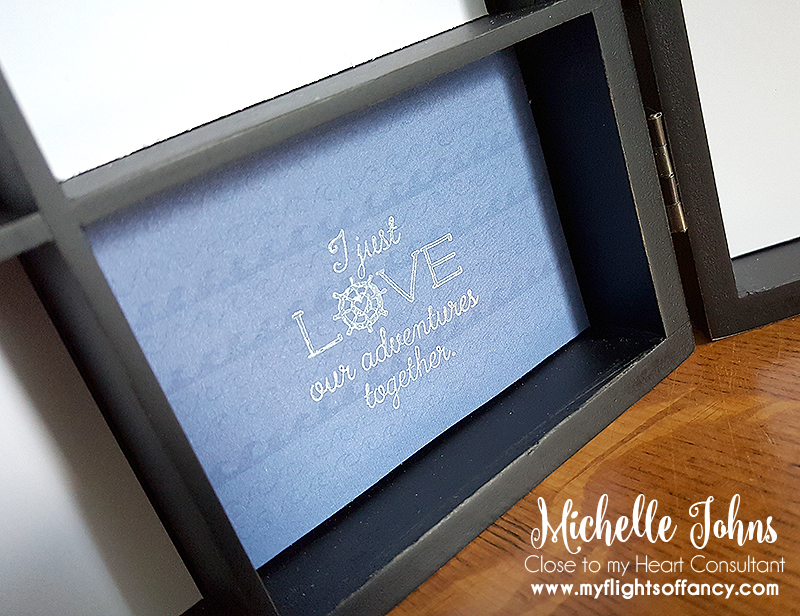
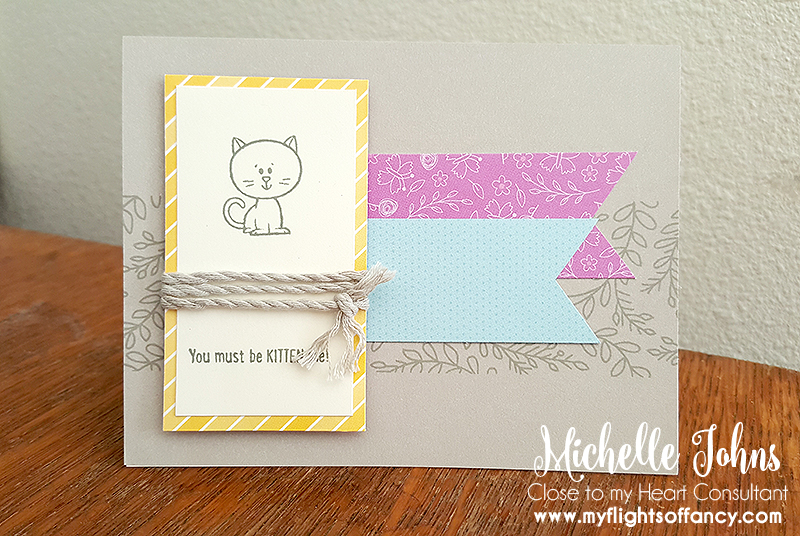
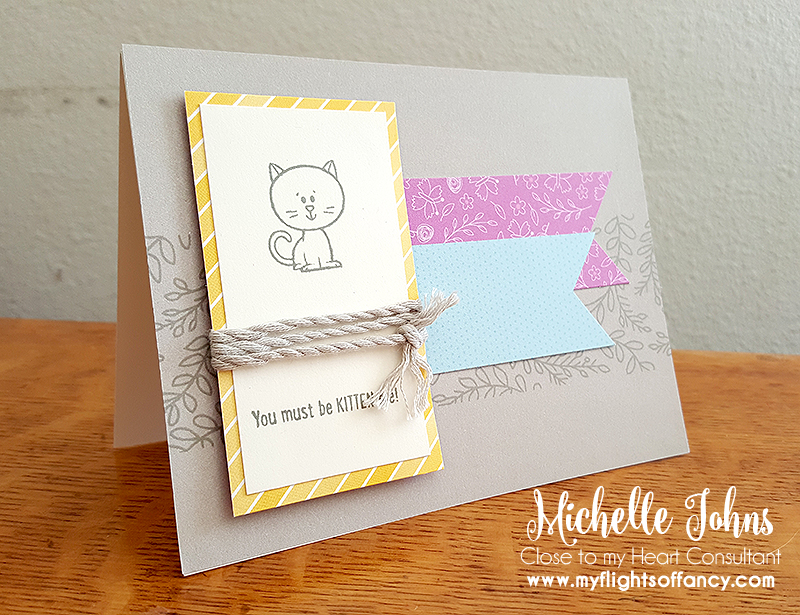
This next card is the only one with stamping on it, and it’s just a bit. The sentiment could easily be changed to something else, like thanks or a sympathy card. Like the coffee card, it uses that stamped metal paper.

UGC-04

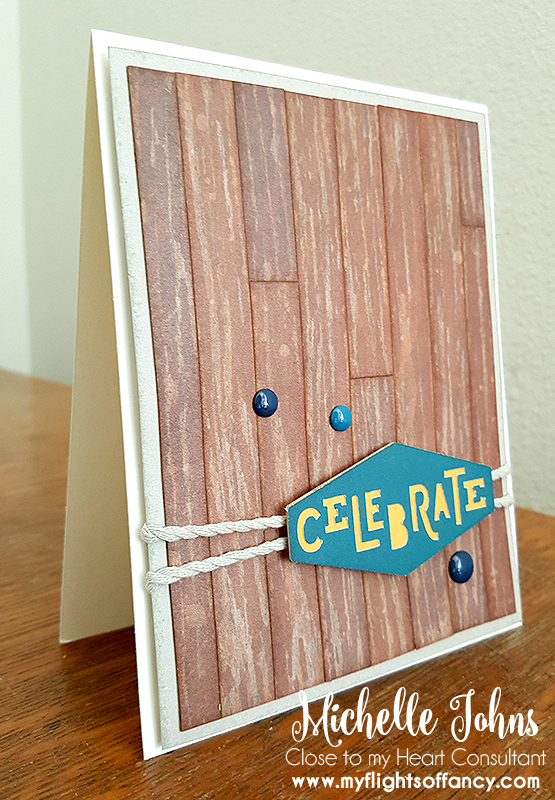
This next card is SUPER fun! I used that same wood paper that you saw briefly in the Thank you card, but I cut it into smaller pieces, and inked the edges of each piece, so it looks like a wood floor. The sentiment is great for graduations, new jobs, new home, or many other things!

UGC-02

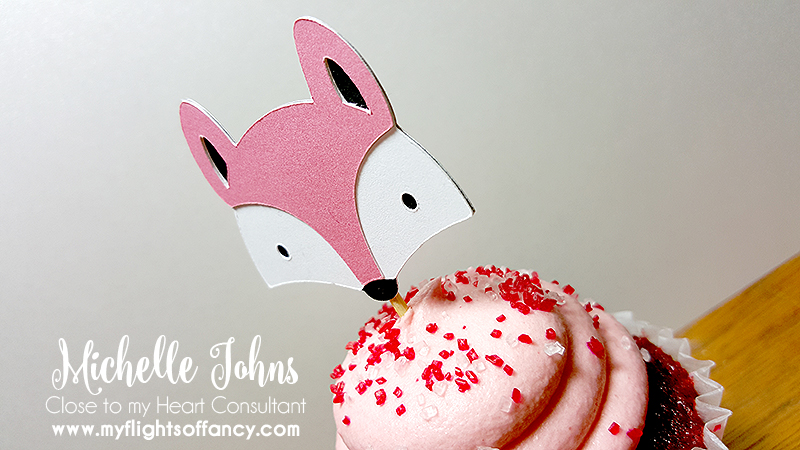
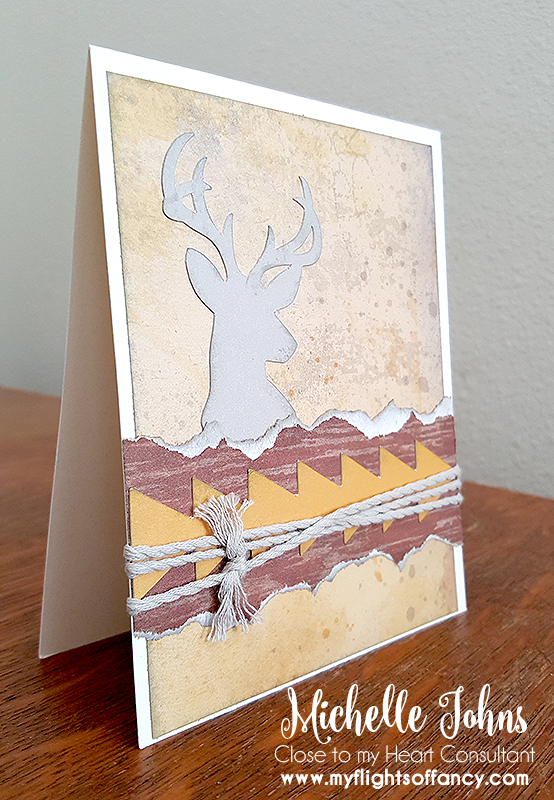
This next card could be used for pretty much anything, since there isn’t a sentiment on it . . . but I loved the deer silhouette that is on the Artistry cartridge, and was inspired by a card on Pinterest, and this is what I came up with.

UGC-05

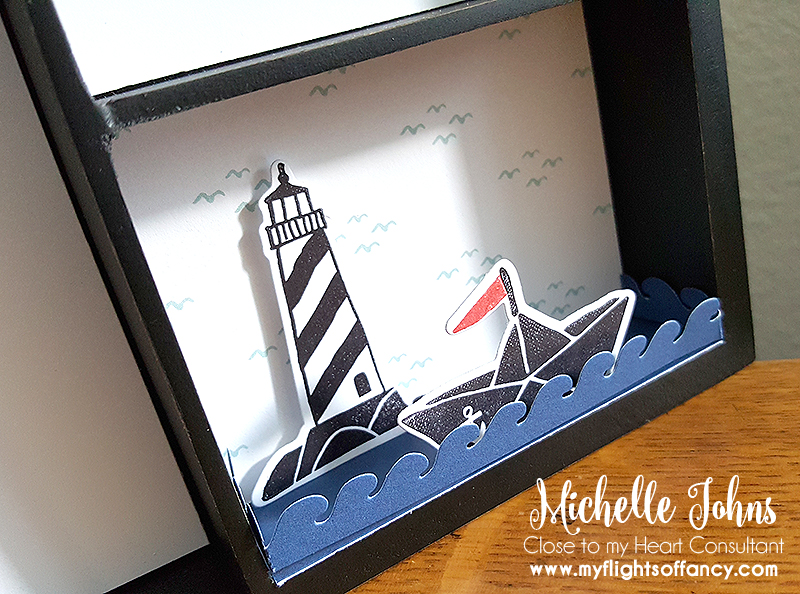
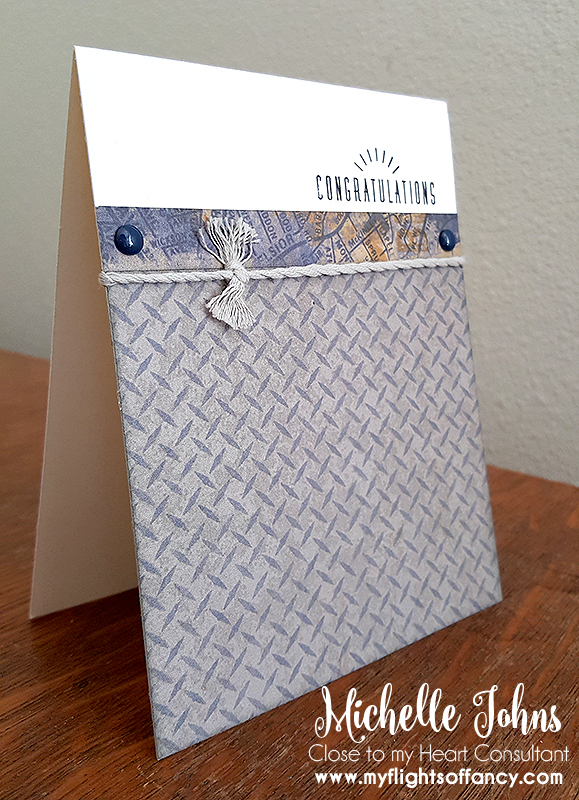
The only horizontal card of the bunch is this birthday card! Every guy has a birthday! This paper has kind of a blueprint look to it, and is just so grungy! I really do like it and the whole paper pack!

Would you be interested in attending the class? The ladies that did it the first time I held it had a GREAT time! They loved the cards and I hope that the people they send them to love them too! There is the option to have the class mailed to you, as well! If you choose that option, I will send you a list of the things that you will need to complete the cards as I have them shown. (inks and stamps wise) Just select the option that you would like from below, and I will get you hooked up with this great card class!


Urban Guy’s Card Class


I look forward to sharing more creations with you tomorrow!

~Michelle

Pink Foxes

I’m in the middle of making bags and cupcake toppers for a friend’s baby shower. In the process of killing time while my cricut was cutting, I looked to see that one of my Hostess Club ladies has a birthday today!

foxcupcake

So, I snagged a bit of Blush Cardstock (retired), White Daisy, and Black and cut this quick, cute, pink fox. While the cut isn’t on one of CTMH’s cartridges, it has quickly become one of my favorite cartridges!

foxcupcake2

Tomorrow the baby shower will be happening, and I can’t wait to get a picture of all of the cupcakes with the fun toppers in them! I won’t be able to be there, as it is the day of my Monthly Crop, however, I am certain that the mom will LOVE them!

Until tomorrow!

~Michelle

Georgie’s Special Delivery!

The Georgie paper pack has been around since last summer, however, I haven’t really played with it until just now. I think this paper is just ADORABLE! This paper pack doesn’t have to be used for ‘baby’, but it is SO easy to use it for that!

georgie01

For the base, or container for my little creation, I used one of the Designer Creations Slate paper bags (the chevron one). I folded it, not quite in half, wrapped a piece of paper all the way around the belly of the bag. Then figured out which of the compliments that I wanted to use for this little bag. I used the Cardstock stickers, the chipboard piece, and even some of the clear stickers from the Compliments pack.

georgie03

I added some Whisper Thick Twine and three little white gems from the Grey Enamel Gems pack.

georgie04

This little bag holds a card to hold a gift card, and another card spot for your personal message! I put one of the clear stickers on the white of the bigger card, to help tie it in with the rest of the bag/card. (Heck, I don’t even know what to call this thing!)

georgie02

All of the pieces come in the Georgie paper pack & Georgie Compliments with the addition of the Whisper twine and Grey Enamel Gems (and the Bags, of course!). I did add one small piece of white for a note to be written on, for the bigger card.

I hope you like my little card bag thing! Originally I wasn’t going to make the whole set of grey bags into gift card holders with the Georgie papers, but I think I will, just to see how many different little bags I can get with it!

When I get them done, I will share them, for sure! (and then, I bet there will be a workshop coming up with them, too!)

Until tomorrow!

~Michelle

Salt in the Air

I fell in love with the Regatta paper pack the minute I saw it. I LOVE love LOVE the beach! And, while I don’t go sailing, this paper pack is SO fun! I know I will miss it when it retires at the end of the month! You will want to make sure that you get yours before it’s gone!

reg01

I used my handy Cricut Explore machine to cut out some various sized circles of each of the papers in the pack, and then arranged them in the shape of a heart. I was inspired by this layout done by Jennifer de Castro. The stamp from Beach Days was the PERFECT title for my little page, and went along wonderfully with the photo from my Retreat that was almost a month ago now!

reg02

I popped each of the little circles on a layer of foam tape, and my photo and ‘title’ are popped up on two layers of foam tape! I used Archival Black Ink for the stamping (looks like I need a new pad, this one is drying up a bit!). I added the journaling with a pen and tucked it under the photo a smidge.

reg03

To give it a bit more bling, I used a few of the dots from the Enamel & Glitter Duos Blue Dots collection. I think it gives it just a bit more pop! What do you think?

Would you like to make one for yourself? I am hosting a layout night on Friday at 6:30! I would love to have you join me! It’s just $7! RSVP and let me know that you would like to come! I have spots for 10 ladies!

I hope to see you there!

Until tomorrow!

~Michelle

Easy Bling!

I know I have posted about the CTMH Base & Bling line in the past, like here & here, however, I wanted to show you a few more.

BnB01

Here you can see a few different things. There is a mix of old and new. The older style of the Base n Bling has an antiqued look. The newer styles are shiny. There are still both Gold and Silver, and the shapes available are square, round, rectangle, and oval.

BnB02

There are still MANY different charm styles to choose from, including a few in the clearance section, at the time that I am sharing this with you!

As you can see, I have a couple of necklaces, a keychain, and a book ring. It is a GREAT way to give something fun, that is easy to do, doesn’t take up a lot of room, and can be done by a 10 year old! (That means that YOU can do it too!!)

The pendants and glass covers come in packages of 3, as do the charms! That means that if you add just one chain, you could EASILY have 3 necklaces, relatively inexpensively! The fastest way to create these fun pendants (or key chains) is to use the sticker sheets that CTMH has already designed for you! Just stick the sticker into the pendant, add a dot of liquid glass, put the glass cover on top, and VIOLA! You are DONE! The hardest part is going to be which sticker to choose!

BnB03

Want to find out how easy it is in person? Host a necklace buffet! You can pick and choose between some of the different stickers and shapes and have a great evening with your girlfriends! Let me know if this is something that might interest you!

Until Tomorrow!

~Michelle

You must be Kitten Me!

You must be kitten me, that you can get this stamp set and help kids at the same time??

No way, dude!

kitten01

But, seriously! The kitten and saying on this set come from the Animal Greetings set that benefits Operation Smile. I’m sure you’ve seen me talk about them in the past . . . they help children in other countries with cleft plate and cleft lip receive the surgeries they need to be able to survive, and thrive. Each surgery is only $260! When you purchase this stamp set, $7 of every set goes directly to them! That is such a great deal!!

kitten02

For this card, I used one of the Colonial White card bases, Whisper cardstock for the front, the vine stamp from Botanical backgrounds, whisper ink, three pieces of the Penelope paper pack, Whisper thick twine, and Foam tape.

It was such a simple card to put together! A set of these would go together in no time at all!! And you could do 15 different cards in total! Check out some of the other stamps on this set!

b525ae56-6b1b-4bc8-b64d-e716d742a88c

It is a great punny stamp! They could easily be colored in with pens, pencils, crayons, or any other medium that you might like! In fact, I am going to do a special! For every person that purchases the Animal Greetings stamp set from me in April, I will send out one of these card kits! I will send them out each weekend until the end of the month! So, let all your friends know too! I would LOVE to help Operation Smile in any way that I can! (and remember, when you are checking out, you have the ability to round up your order! So you could spend just a few cents more, to make it a nice, even round number for you, and give more help to Operation Smile!)

I look forward to showing you something new tomorrow! Make sure to check back!

~Michelle

Penelope Mini Album

Back a few weekends ago, I got to go to a Spring Launch event, hosted by CTMH to show off the upcoming Seasional Expressions 2 book (you will LOOOOOVE it!!). Prior to the event, one of my uplines hosted a meeting, and we got to make a fun little mini album! It uses the PML cards in the Penelope paper pack that will retire at the end of April (so you will want to get it before it’s gone!)

pen01

It also uses the Colorful Me Instalife cards, Silver Foil Tape, and the MyCreations Mini Folio, and besides glue and photos (and a few tools) that is all that you need!

pen02

When I put mine together, I added a few more pockets, because who wouldn’t want to be able to add a few more things to the mini album??

pen03

Those two little cards that you see (blue stars and yellow/orange arrows) at an angle behind the purple paper are tucked into the pocket. There’s another on the other side of the page. There is also a pocket in the middle with a fun little insert.

pen04

On the 2nd and 4th pages shown here, is where your photos would go. The first photo spot, the photo would tuck behind the birds. The second would slide in from the top, behind the frame.

pen05

Here, the first spot is more of a journal spot than a photo spot. The heart is where your other photo would go. The last two ‘pages’ that you see in this photo are the front and back covers of the mini album.

I don’t know about you, but I am LOVING this adorable little mini album! It is a great way to use up the PML cards that you may not have used if you are a traditional scrapbooker. If you need to order any of the supplies, they are linked above! I would be happy to answer any questions that you may have about it!

Remember, in April, the great SOTM is just $5 with a qualifying order, and it’s just adorbs!! I have seen some GREAT things done with this set! I will show off some examples within the next few days!

s1604

Until tomorrow, stay crafty my friends~!

~Michelle

Weekend Challenge

So, I am a part of a Facebook group that has various challenges and Cricut cut swaps. There is a challenge this weekend to use some specific files, in any way that we would like. So, I grabbed a scrap piece of Kaleidoscope paper that I had left over from Convention this last summer, and cut out the fun box that was included in the files.

frog01

There was also this adorable frog in the files. So, I grabbed the new Fern cardstock and a few scraps of black, white, and cranberry, and cut this fun guy out! Because the little nose bits were tiny, I managed to lose one of them! LOL So, I just grabbed my journal pen and drew his little nose on there. (trying to be about the same size/shape as what was originally cut). I used my Topiary ink to edge the frog, the cranberry ink to do his tongue, and the archival black around all the black bits.

frog2

The box is just slightly angled, with the bottom being slightly smaller than the top edge, so I didn’t want to just glue him onto the box face. So, I grabbed an adhesive spring from Close to my Heart. and now he can move a smidge!

frog3

The top closure of the box looks like 3 little hearts when it’s closed. I think it’s really adorable!

frog4

I hope that you like my little creation! I know I had fun making it!

I look forward to showing you something new tomorrow!

~Michelle