Monthly Archives: June 2013

July Stamp of the Month: Sweet Life

Welcome to the July Stamp of the Month Blog Hop!

I don’t know what’s going on weather wise for anyone reading this, but it is HOT here!! Convention just got over in Walt Disney World, and I think a number of consultants brought that heat and mugginess with them back from Florida! It’s H O T!!

This month’s stamp set is perfect for all sorts of things! It would be great for gift giving with some jam and bread, or fresh picked fruits, or even so many different treats!! So, hop along with me, and let’s check out some of the great goodness that we have for you! Today you should have come from Michelle Jones’ blog (She’s such a great gal! I met her last year at a dinky little airport on the way home from convention!). If you happen to get lost along the way, Helen will have a whole list of everyone available for you to check out.

Did I mention that it’s hot? Well, I have no AC at my house and it was 96 degrees when I was working on this card! Sooooo, I took a small basket of supplies and headed down to my favorite Starbucks. When I got there, I realized that I could have brought a few more supplies, but I decided to make due with what I brought! And, I think that it turned out pretty good! (there will be another card that I created at the same time, in another blog post!)

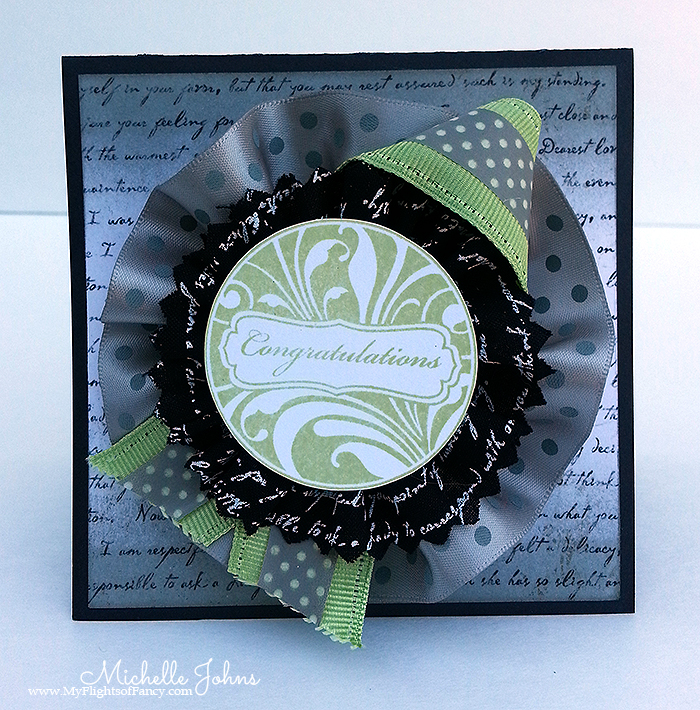
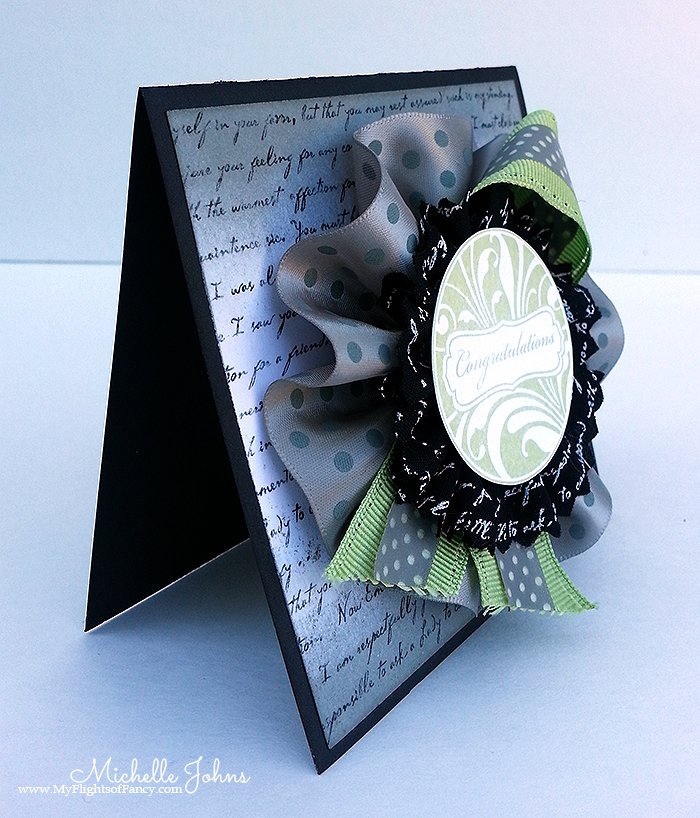
Isn’t this adorable? I used a piece of kraft that I punched. I stamped the cherries on a scrap of paper (since I forgot my baggie of pre cut circles that would have been perfect for this .. ) and colored it with my watercolor pencils. These things are FABULOUS!! I love them so much! I used just 4 colors; Chocolate, Clover Meadow, Holiday Red, and Cranberry.

I added a bit of cranberry on those shaded spots, and it made them look so much better! Once I was all done coloring, I decided on which card style I wanted to do (from an idea list that was about 6 cards long). I realized I would need to make my cherries a circle . . . soooo, I grabbed my roll of washi tape, and drew a circle around my cherries! I just quickly cut them out with my micro tip scissors. Then, I though, well, I will need a pop of color behind it. However, I didn’t bring any red cardstock with me. Sooooo, I flipped my cherries over, and drew a circle on some more scratch paper (which, was actually another card base, because I didn’t have any white cardstock with me! Ack!). I used the holiday red pencil and scribbled a wreath type shape around the circle that I drew. Then used my blending pen to make it a pretty color without lines. Added some glue and plopped the cherries on top of the red wreath. Then I just fussy cut around the cirle, and viola! I have a matted image!

I used some retired red ribbon assortment, because I thought the gingham fit perfectly with the stamp, and put the card together with some foam tape! I think it turned out fabulously, don’t you?

Thank you so much for visiting my little spot on the interwebs! I do hope you will come back throughout the month to see different ideas on what to do with this stamp set! Until then, you can hop along to Traci Godbee’s blog!

Happy Hopping!

~Michelle

Independance Day Blog hop

Yup, I know it’s not Independance day just yet . . . but this great group of ladies and I are doing a hop so that you can see some great ideas to use to decorate or scrap your Independance day (whether you are in the US or Canada!).

What ?!?!? Hope you weren’t expecting to see Will Smith fighting the aliens here! We are actually featuring crafty creations showcasing “Independence Day” … the holiday!

Not only are all of our creations going to be about Independence Day … the holiday … but they will also be using the Artiste and/or Art Philosophy Cricut cartridges available exclusively through a Close to My Heart consultant. If you don’t already have a Consultant that you are currently working with, please contact one of the Consultants in our hop with any questions you have!

In this hop, you will see projects featuring this versatile cartridges from many talented crafty ladies! Enjoy our blog hop!

If you have just hopped onto my blog, please start at the beginning at Lucy’s blog – Love 2 Create. If you came from Theo’s blog, Celebrate Crafts,then you are in the right place!

Today, I went with a fun wreath! I got the idea from my friend, Linda (you can see her version with Christmas papers on her blog) and thought that it would look really good in Red, White, and Blue!

I used a piece of cardboard that came with some bulk papers to cut the back/base of the wreath out of. Then I scored, cut, folded, and glued all of the fun medallions. I cut the stars out with the Art Philosophy cartridge, making it super easy to add all those stars! ( I would have done the medallions on the Artiste cartridge, but lost my book, and then ran out of time!)

I scored each of the stars so that they would pop a little bit more, as well! Add a bit of foam tape, and they pop quite nicely!

I hope you enjoyed my little project! If you would like to make one of your very own, let me know, and we can get you everything you need to make it!

Your next stop on our Independence Day hop is Jennifer at 4 Hearts Scrapbooking.

Just in case you get lost along the way, here is the list of the ladies that are participating in the blog hop this month!

Lucy ~ Love 2 Create
Theodora ~ Celebrate Crafts
Michelle ~ My Flights of Fancy <-----You are Here----- Jennifer ~ 4 Hearts Scrapbooking
Traci ~ Paper Crafting 101
Penny ~ It Makes Total Cents

I’m a Practical Scrapper!

There is this great blog, Practical Scrappers, that has some great challenges, inspiration, and more! I’ve been invited to their design team! I think it’s fabulous!!

Today there is a great sketch up for you to play with! So many ways to go with this sketch!

Using the sketch as a base starting point, and a card from Card Inspirations 10, I came up with this card. I like the soft lines that I came up with.

I used For Always papers with the black cardstock base. I then used some Slate Dotted Ribbon and a bit of For Always textiles for the rosettes. I put some of the slate washi tape on top of the sweet leaf ribbon to get the layered effect.

I used sweet leaf ink to stamp the Congratulations stamp from the Salutation Seals Set onto a circle that I cut out with the cricut.

I had fun with this card! I hope you are inspired by it and the fabulous stuff over at Practical Scrappers!

Be Crafty!

~Michelle