Hi Everyone!
Jessica, over at My World Handmade is having a fun month on her blog, every day in July she has been having a project, with how to’s, posted on her blog! And every project will involve red, white, and blue! Lots of guest posters (like me!) are helping her! I got to close out the month with my little tutorial, so I hope you enjoy it!
So, for my project, I thought I would share a fun little card box! It’s a box, that folds flat, even with your stuff inside! (well, depending on what you put inside!)
While I would love to claim that I made this up, I didn’t, and you can find other tutorials all over! LOL!! I’ve adjusted mine just a bit so that it will fit into a regular envelope (the ones that fit a 5 1/2 x 4 1/4 card). That way, you can send your little box in the mail, if you wanted!
You will see photos from 2 box cards that I made. I forgot to take some pictures, so had to do other photos! The blue box card does not fit into that envelope mentioned before. However, if you trim 1/2 an inch off each flap, and adjust the cardstock and paper, like on the white box, then it will easily fit into the envelope!
This is what you will end up with, when you are done!
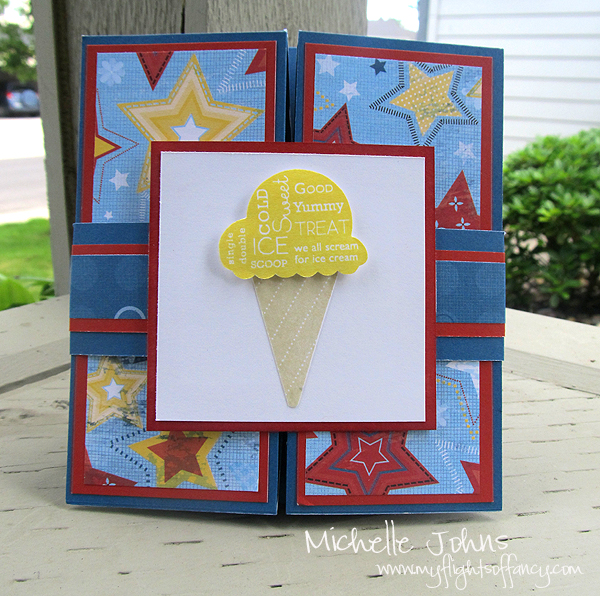
I used Close To My Heart’s Fanfare Workshop on the Go, which contains the cardstock, Background & Texture, and stamp set.
So, you will need the following things to make this box:
Cardstocks:
8 1/2 x 11 (main)
2 1/4 x 5 1/4 (contrast)
1 1/2 x 12 (main band)
3/4 x 12 (2nd band)
Sentiment Mat
Sentiment Cardstock
Background & Texture:
2 x 5 (two of these)
1/2 x 12
Stamps & Inks dependent on your papers and stamp image!
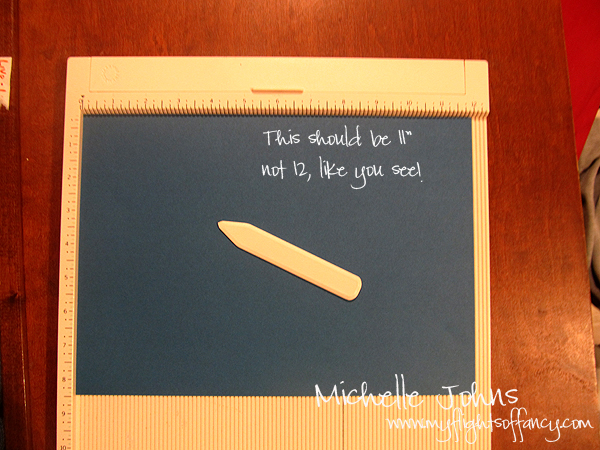
So, first you are going to score your cardstock along the longest side: 2 1/2″, 4″, 7″, 8 1/2″
Next you are going to turn your cardstock, and score it at 1 1/2″, then flip the paper and score it at 1 1/2″ on the other side.
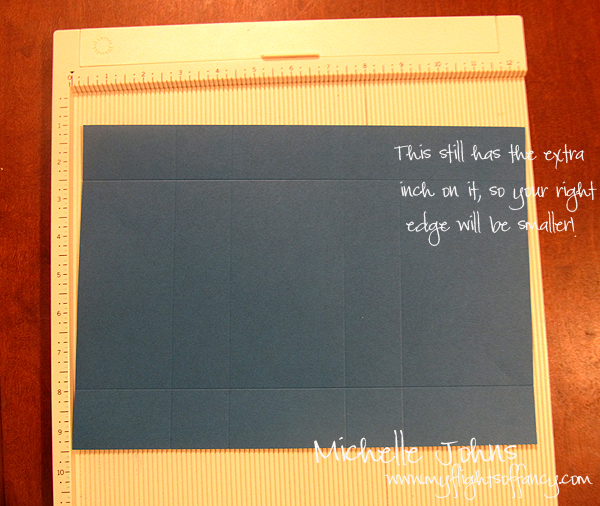
{If you want your card to fit into the envelope, now would be the time to trim off 1/2 inch from each end (so, from the 2 1/2 & 8 1/2 spots), or, at least, the easiest spot to do so!}
Now, you are NOT going to fold all of your score lines just yet!
You want to mark your middle point of the biggest box (in the middle). Just a little mark with pencil, or I did mine with my bone folder. You want to mark on both sides of your paper (this is along the long side).
Once you have your middles marked, then you are going to score, BUT ONLY on the long sides. (that 1 1/2″ score mark that you did) And here’s why. You need to make a couple more score lines, but you need to have the middles marked, and be able to fold to see the corners.
Here on my handy dandy MS scoring board, you can see that I have marked one line with a pencil. I did this the entire length of the score board. I do this because it makes it SUPER easy to line up my lines in the right spot. What you are going to do, is make a diagonal line from the inside corner of the biggest box to your middle mark. (all within that 1 1/2″ score mark) First, line up your corner with the line, by getting it as close as you can. Fold your edge in, and make sure that your corner is on the line.
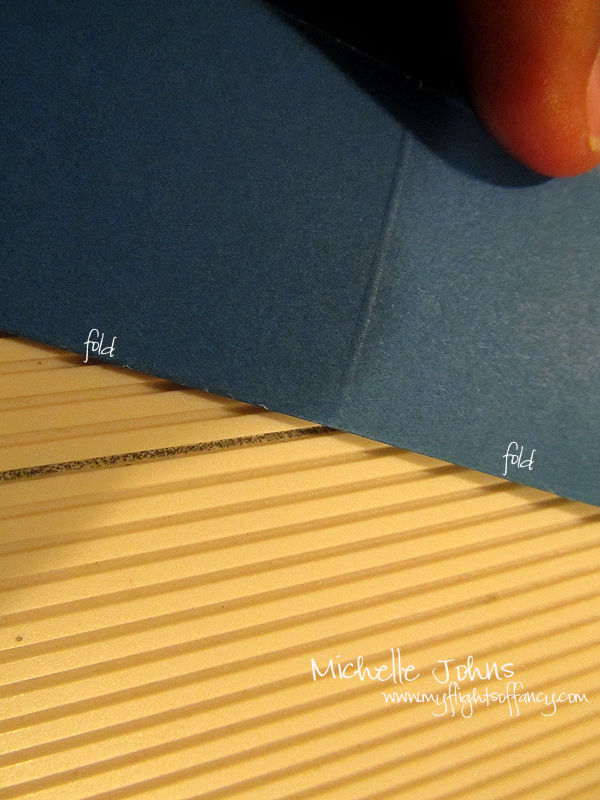
Then you are going to unfold the edge, and get the middle lined up on the same line.
Double check to make sure your corner is still on that line, and then score.
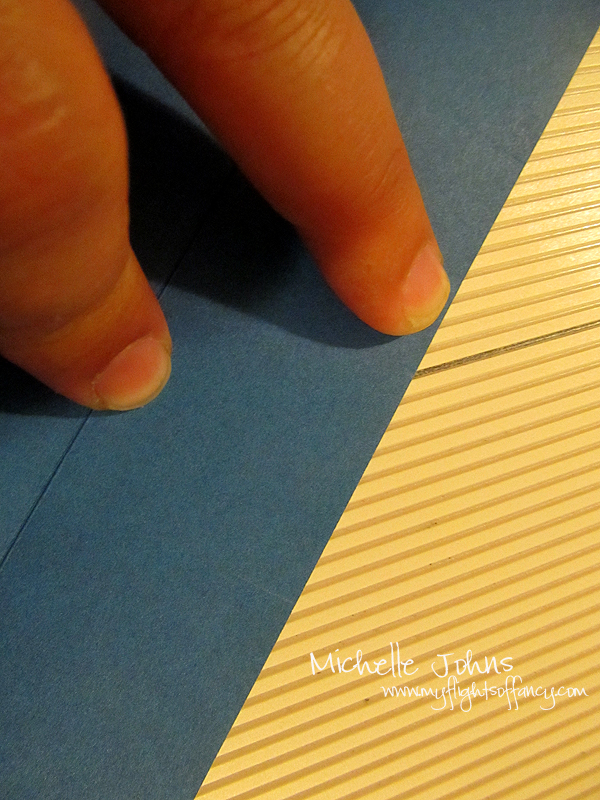
Repeat with the other side of the same box, and then the other side of the page.
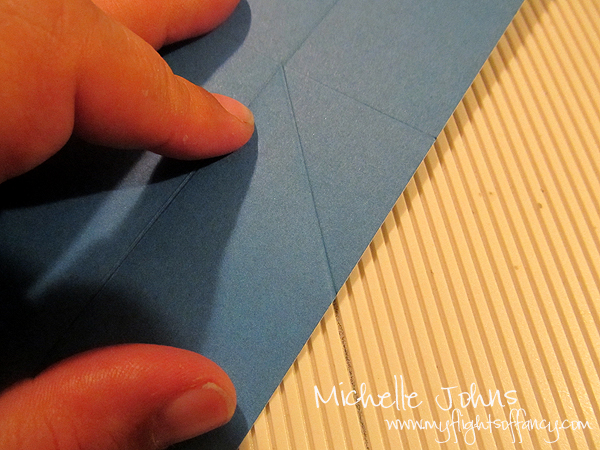
So, now that you have that done, fold along all of the score lines.
Next you are going to cut your score lines so they look like this:
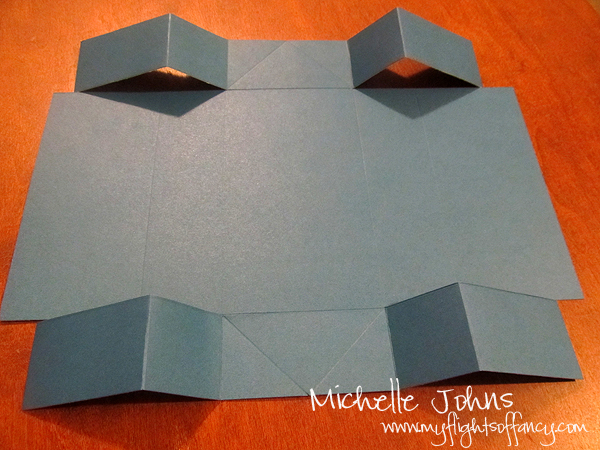
Then you will cut off the end corners, so it will now look like this:
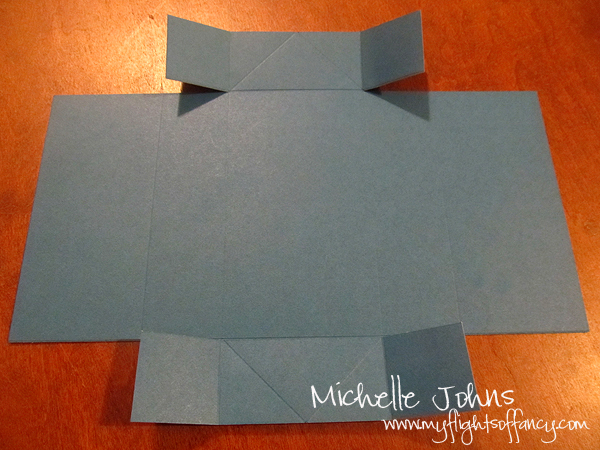
Now that they are all scored and cut, your box will look like this:
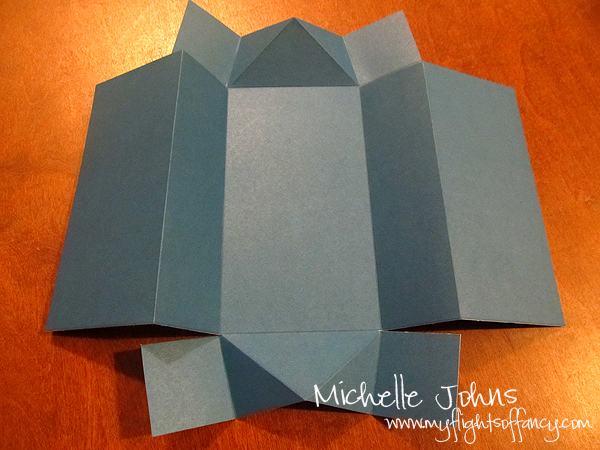
If you want to insert a back / greeting on the card, now would be the time to do it. You can see that I just added a white piece of cardstock.
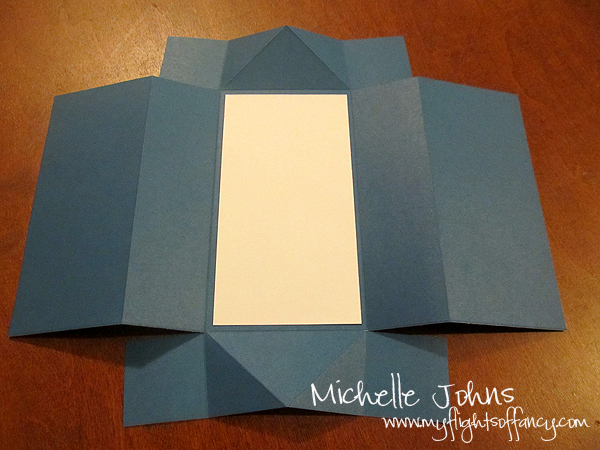
Add glue to the top and bottom corners of the cut pieces. (You should be able to see the glue in my photo) How much glue you use, will depend on the stickiness of your glue. ATG or scor pal or red tape would be the best here.
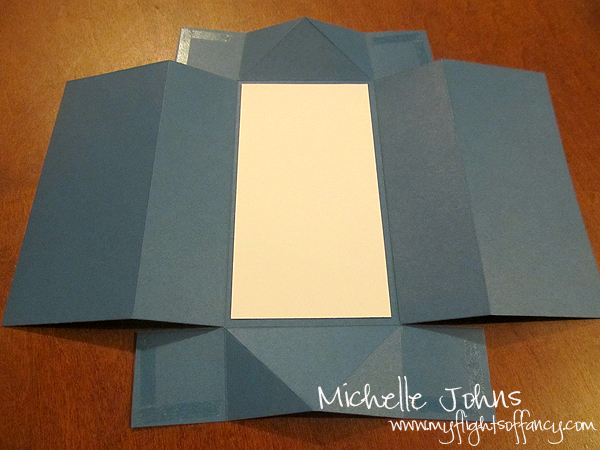
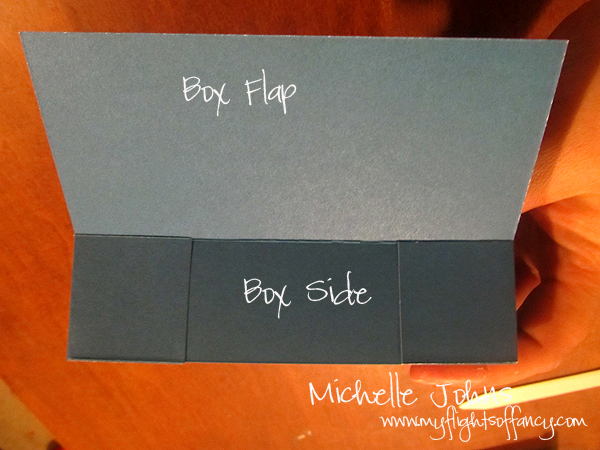
It’s really hard to get a good picture holding this together, but I tried! You are going to fold up the middle ‘flap’ and glue the flaps with glue at a right angle.
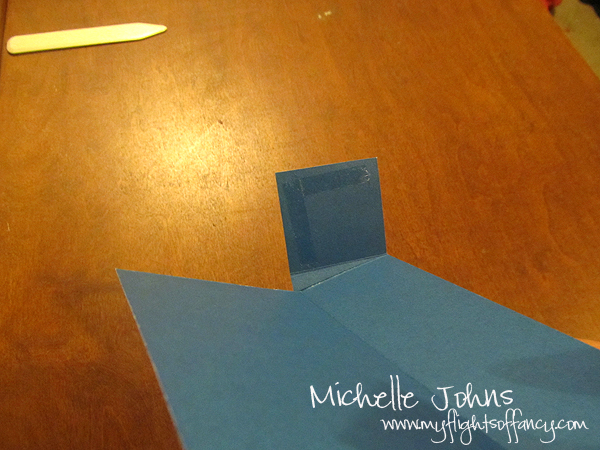
Here is a shot with both ends on one side glued.
Here is what the box will look like, at this stage when you get both ends done, and have it sitting on your desk / table!
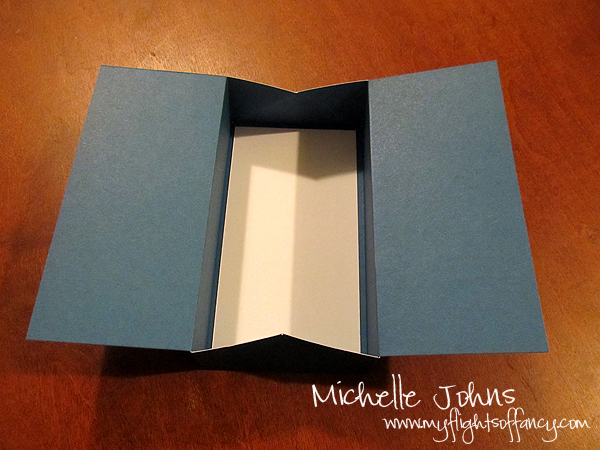
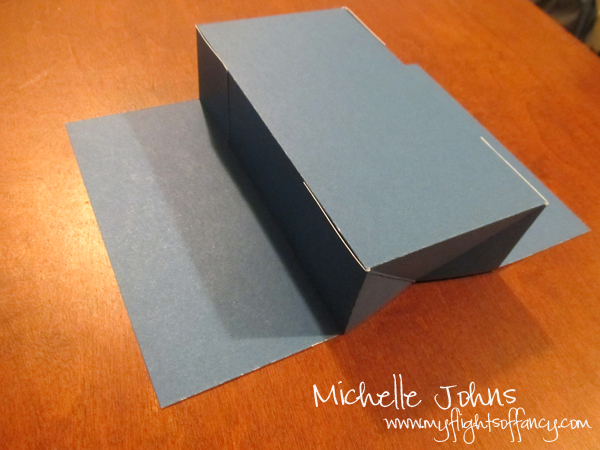
And what it looks like sitting upside down on the desk / table
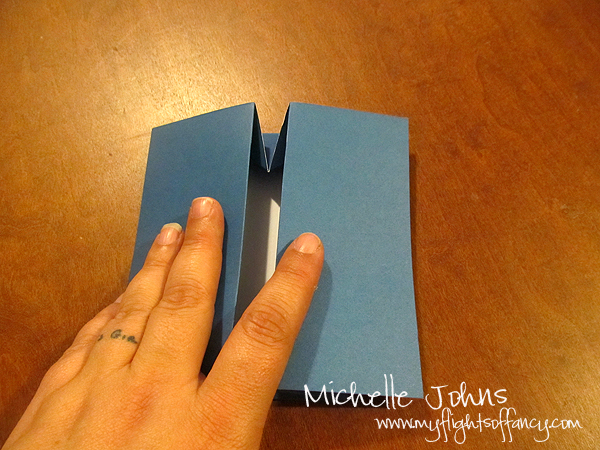
Now for the technical terms . . . . you are going to ‘smoosh’ the flaps in, to teach them that they need to lie flat! (those score marks that we made will help!)
Now your box is all done, and it’s time to decorate!! You can do this any way you see fit, but this is how I did it! I have used cardstock and paper on mine, but you could use just a piece of cardstock and stamp it and put a pretty border on it.
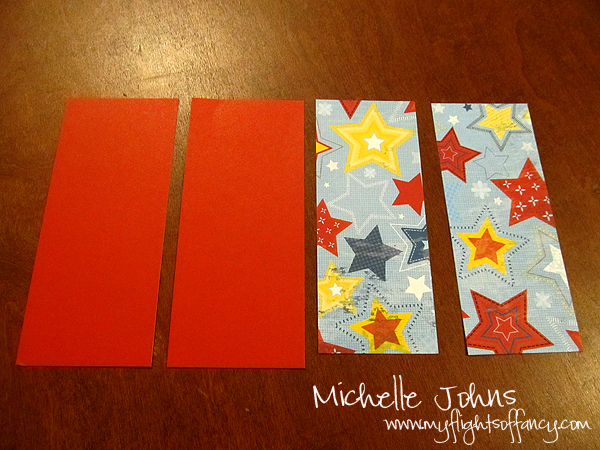
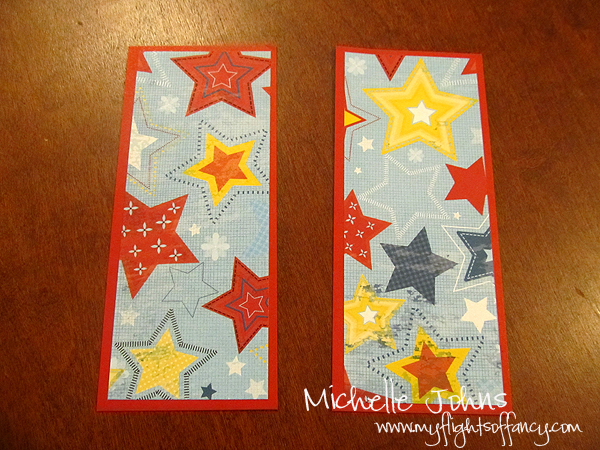

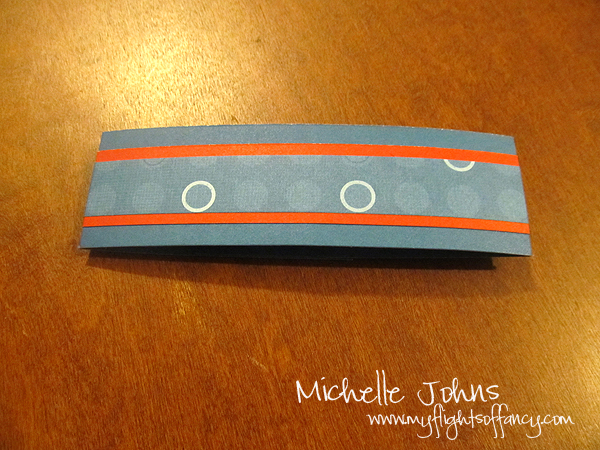
Now it’s time for the band!
Now, theory would be, you glue all pieces, and then fold them. However!!! Let me tell you from experience, that this won’t work!! Your paper will buckle, and not be pretty! LOL the easiest way to do this, is to glue the middle of the paper, on all levels. (I have 3 levels, you might do only 2) Next, you are going to hold it across the front of the card. Then you are going to bend the cardstock that is closest to the card. You do not want this to fit super snugly, you need to have space. Make sure they overlap, and you can cut off the excess once you get all the folds figured out. Once all the papers are folded, you will want to attach the ends with a strong tape (again, ATG, scor pal, red tape).
So, what you are going to do next, I don’t have photos of. (sorry!!) You are going to stamp your sentiment, and then mat it with your cardstock. You will then use Scor pal or red tap to attach this to your band.
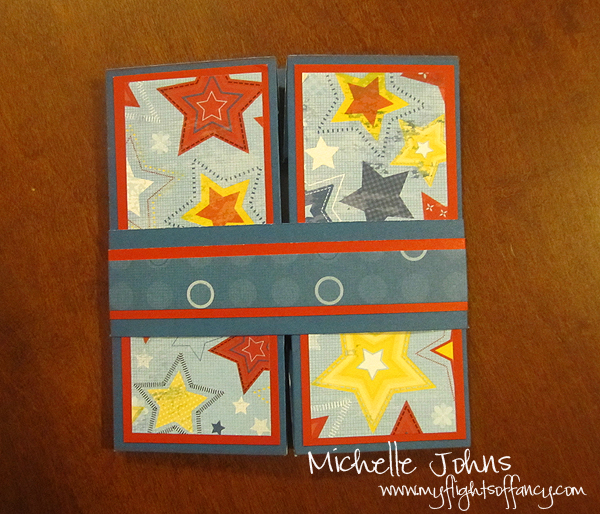
The secret to making your project look more finished and professional, is to attach your sentiment where the band meets! That way you hide that meeting of the ends of the band and it looks all nice and neat!
Here are the few pics of the cards as they are done! You can see on the white card, I put the sentiment sideways, and on the blue card, it’s up and down. How you do this is completely up to you (and your sentiment!)

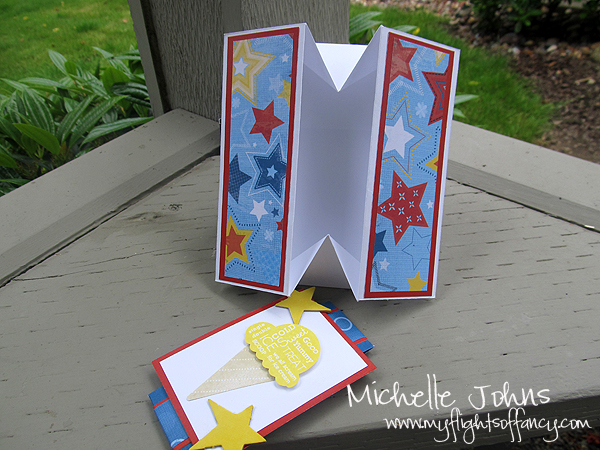

You can put all sorts of things inside! I’ve put in little thank you tags, cupcake toppers, and even to/from tags! The possibilities are endless! You could even put a gift card inside, make a little pocket so that it doesn’t slip around.
I hope you had fun viewing my how to make a box card! I am having a give away, so I hope that you enter!
~Michelle


